ESP32 C3 Super Mini - Control Fan
Learn how to control a DC cooling fan with your ESP32 C3 Super Mini using a relay module. This beginner-friendly project shows you how to turn a fan on and off automatically with simple Arduino code.
In this tutorial, you'll learn:
- What a DC fan is and how to control it with ESP32 C3 Super Mini
- How to wire a relay, fan, and power supply to ESP32 C3 Super Mini
- How to write code to turn the fan on/off
- How to build automatic cooling projects with temperature sensors
Hardware Preparation
Or you can buy the following kits:
| 1 | × | DIYables Sensor Kit (18 sensors/displays) |
Additionally, some of these links are for products from our own brand, DIYables .
Overview of DC Fan
A DC fan is an electric cooling device that runs on direct current power and moves air for ventilation or cooling.
Key features of DC fans:
- Run on DC voltage (common: 5V, 12V, or 24V)
- Two-wire connection: positive (red) and negative (black)
- Constant speed when powered with steady voltage
- Variable speed when powered with PWM signal
- Low power consumption and quiet operation
- Ideal for cooling electronics projects, computers, and small spaces
Why DC fans are great for beginners:
- Simple two-wire hookup
- Work with common power supplies
- Easy to control with relays or transistors
- Affordable and widely available
Pinout
A DC fan has two connection wires for power:
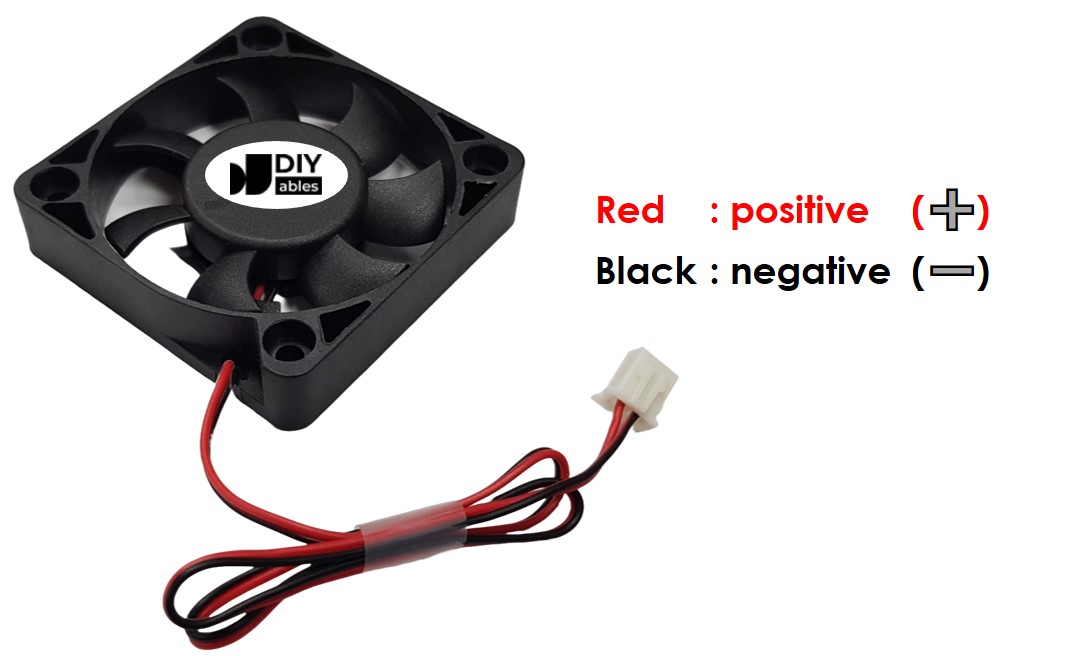
- Negative (-) pin (black wire): Connect to the negative/ground of your DC power supply
- Positive (+) pin (red wire): Connect to the positive of your DC power supply
Important voltage note:
- Always match the power supply voltage to your fan's rating (5V, 12V, or 24V)
- Using wrong voltage can damage the fan or cause poor performance
- Check the label on your fan for voltage specifications
How to Control Fan
Basic control methods:
- Full speed operation: Connect fan directly to its rated voltage (5V or 12V DC) - fan runs at maximum speed
- Speed control: Use PWM (Pulse Width Modulation) signal to vary fan speed from 0-100%
- On/Off control: Use a relay to switch fan power on and off (covered in this tutorial)
About this tutorial:
- This guide teaches on/off control using ESP32 C3 Super Mini and a relay module
- Speed control with PWM will be covered in a separate tutorial
- A relay is required because fans use higher voltage than ESP32 can handle directly
- Learn more about relays in our ESP32 C3 Super Mini - Relay tutorial
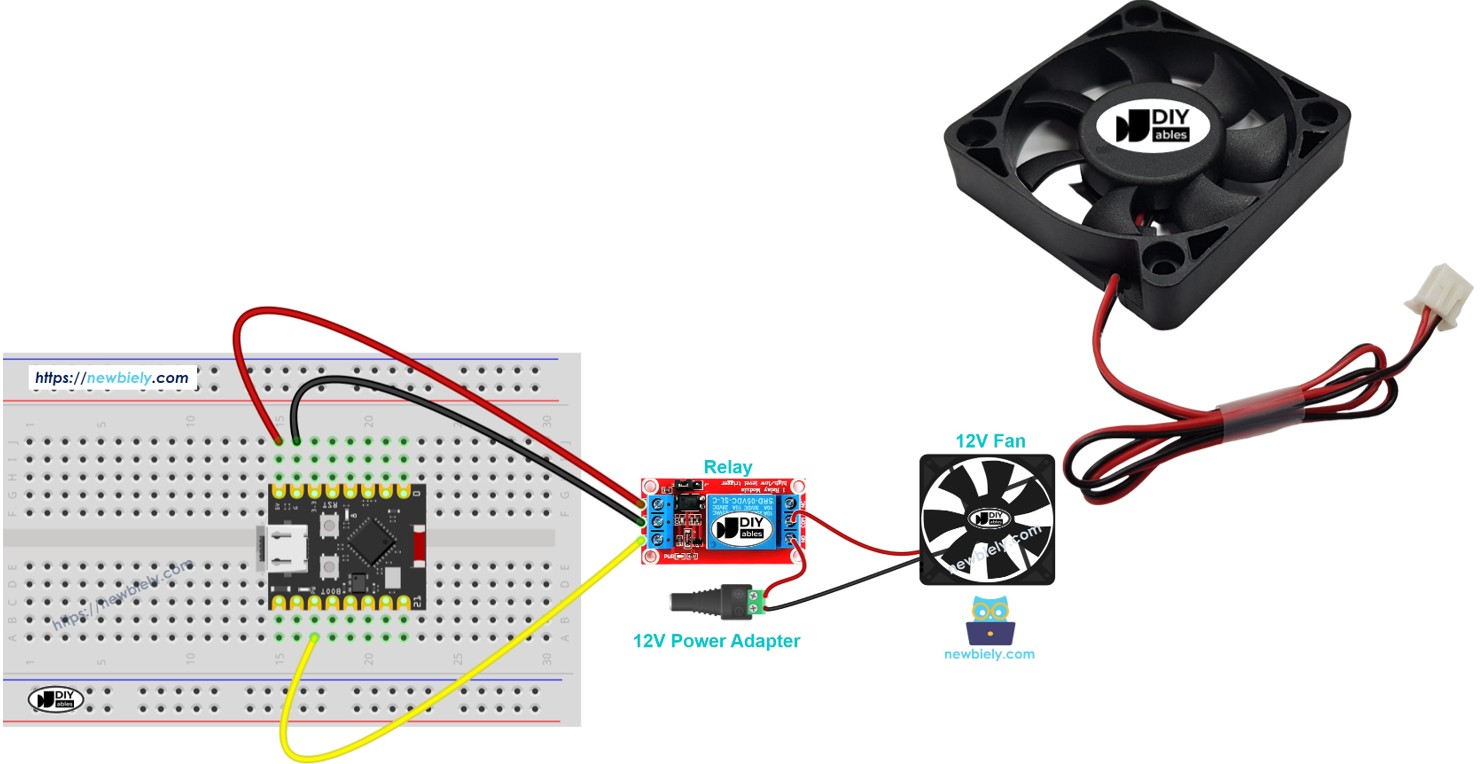
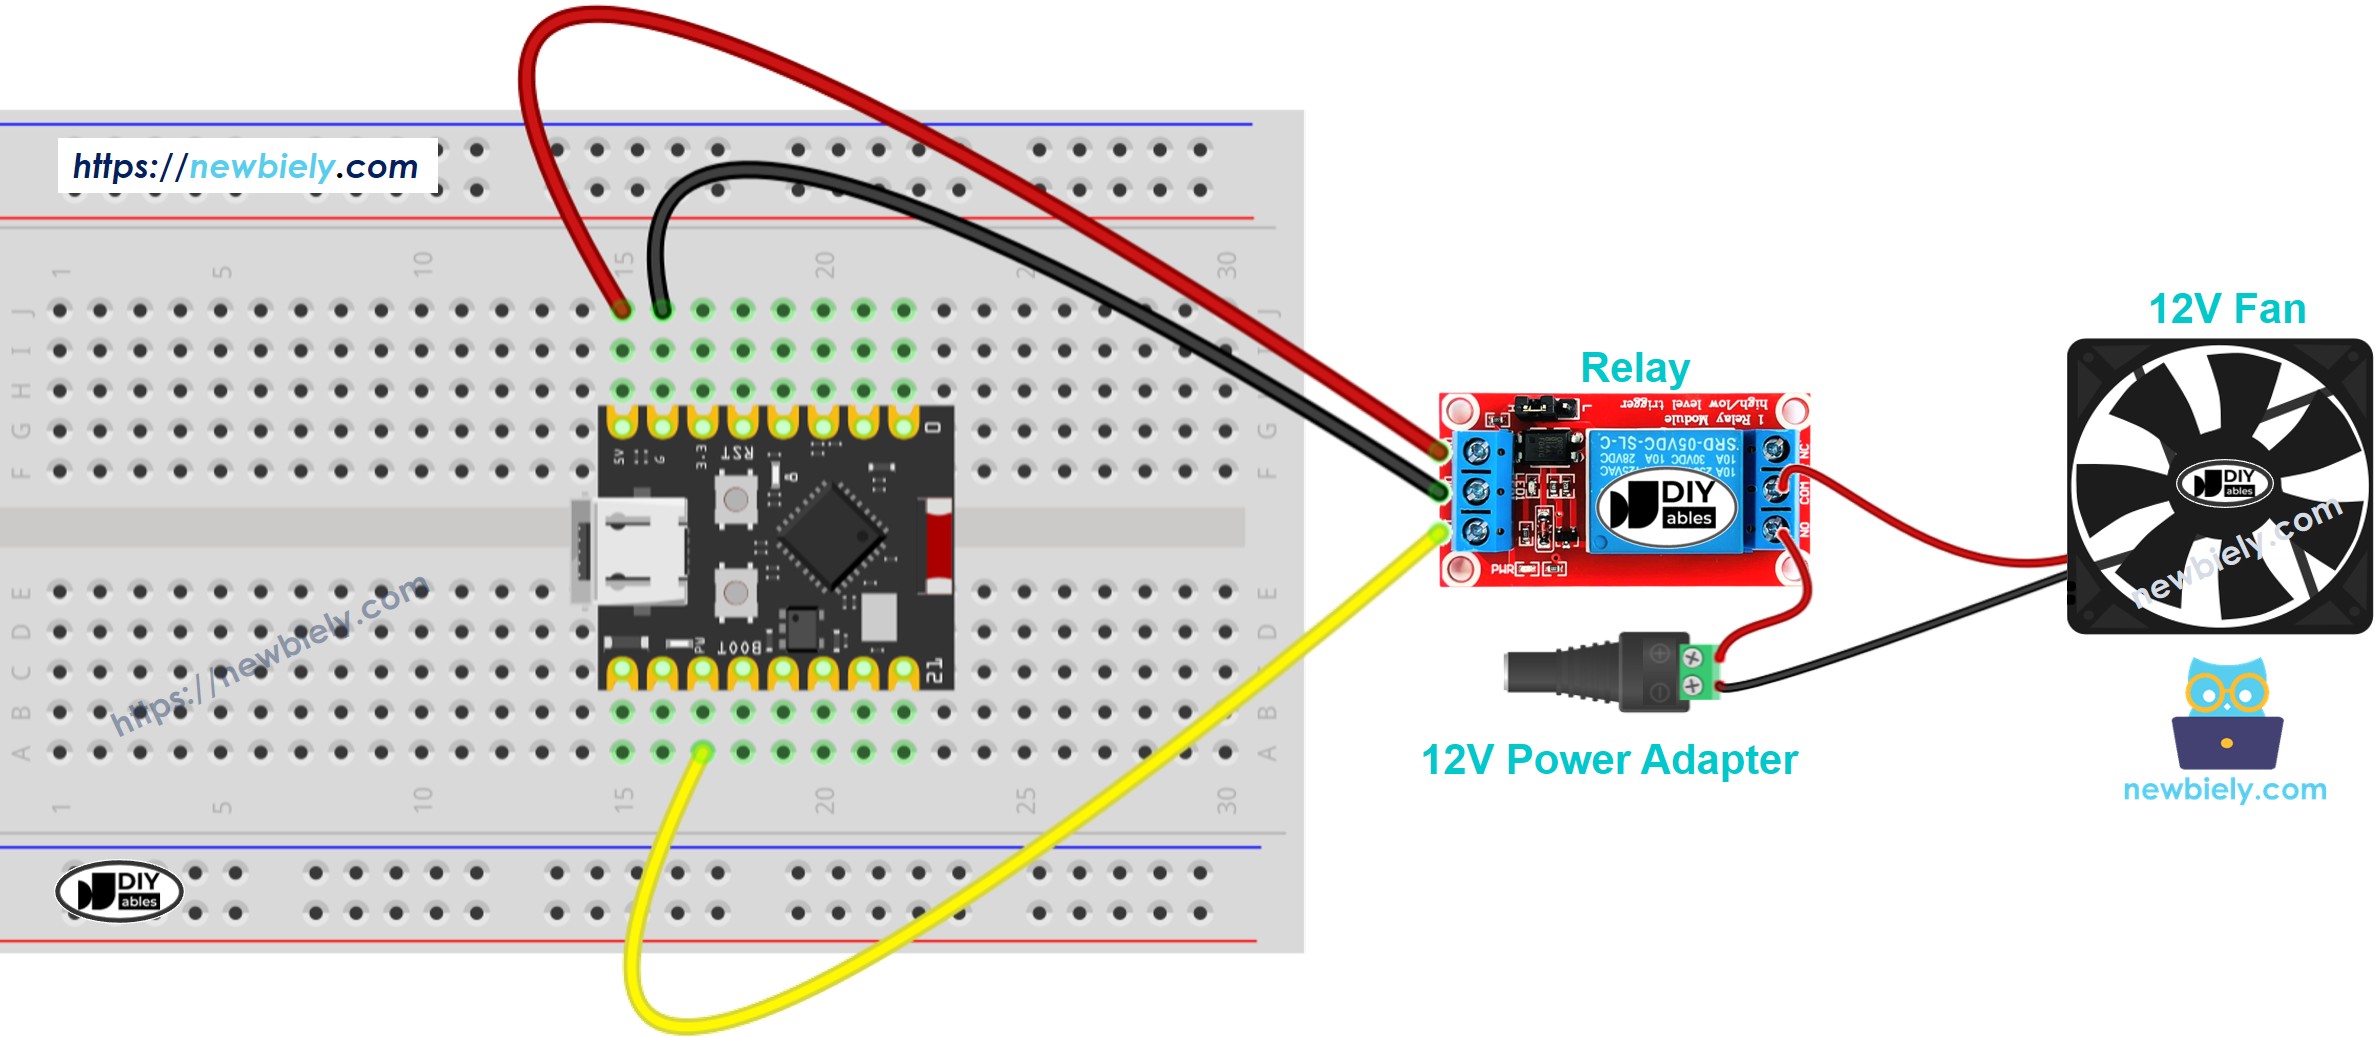
Wiring Diagram
Connect your ESP32 C3 Super Mini, relay, fan, and power supply as shown below:
This image is created using Fritzing. Click to enlarge image
Important wiring notes:
- Power matching: If using a 5V fan, use a 5V power adapter; for 12V fan, use 12V adapter
- Safety warning: Never connect the fan's high voltage directly to ESP32 pins
- Relay protection: The relay isolates the ESP32 from the fan's power supply
| Component Pin | ESP32 C3 Super Mini Pin |
|---|---|
| Relay Signal (IN) | D7 |
| Relay VCC | 5V |
| Relay GND | GND |
| Fan Positive (+) | Relay COM (Common) |
| Fan Negative (-) | Power Supply Negative (-) |
| Relay NO (Normally Open) | Power Supply Positive (+) |
ESP32 C3 Super Mini Code
This code demonstrates how to control a fan with ESP32 C3 Super Mini by automatically turning it on and off.
What this code does:
- Turns the fan ON for 10 seconds
- Turns the fan OFF for 10 seconds
- Repeats this cycle continuously
- Uses a relay connected to GPIO pin D7 to control fan power
- Includes serial monitor output to track fan status
Detailed Instructions
- New to ESP32 C3 Mini? Complete our Getting Started with ESP32 C3 Mini tutorial first to set up your development environment.
- Setup your IDE: If you're new to ESP32 C3 Super Mini, follow our environment setup guide for ESP32 C3 Super Mini in Arduino IDE
- Wire the components: Connect the relay, fan, and power supply to ESP32 C3 Super Mini following the wiring diagram above
- Connect ESP32: Plug the ESP32 C3 Super Mini into your computer using the USB Type-C cable
- Open Arduino IDE: Launch the Arduino IDE application on your computer
- Select your board: Choose ESP32 C3 Super Mini and its COM port from the Arduino IDE
- Copy the code: Paste the provided code into a new Arduino IDE sketch
- Upload the code: Click the Upload button to compile and flash the code to your ESP32 C3 Super Mini
- Test the fan: Watch the fan turn on and off automatically in 10-second intervals
- Open Serial Monitor: View fan status messages in the Serial Monitor (set to 115200 baud)
- Pro Tip: Add an LED to the relay circuit to visually confirm relay switching without needing the fan connected
Line-by-line Code Explanation
The above ESP32 C3 Super Mini code contains line-by-line explanation. Please read the comments in the code!
Serial Monitor Output
Open the Serial Monitor in Arduino IDE to see the fan control status:
Applications and Project Ideas
Use fan control with ESP32 C3 Super Mini to build practical cooling and automation projects:
- Temperature-controlled cooling system: Automatically turn fan on when temperature exceeds a threshold
- Humidity ventilation system: Activate fan when humidity is too high in a room
- Computer case cooling: Build a smart cooling system that adjusts to component temperatures
- Greenhouse climate control: Regulate air circulation for optimal plant growth
- Bathroom exhaust timer: Automatically run fan for set duration after detecting humidity
- IoT smart ventilation: Control fan remotely via WiFi using ESP32's built-in connectivity
Video Tutorial
Watch the video below for a visual walkthrough of this project.
Challenge Yourself
Try these modifications to expand your ESP32 C3 Super Mini fan control skills:
- Easy: Change the on/off timing to 5 seconds instead of 10 seconds
- Easy: Add a button to manually turn the fan on/off instead of automatic timing
- Medium: Add a DHT11 temperature sensor and turn the fan on only when temperature exceeds 25°C
- Medium: Control two fans independently with different relays and GPIO pins
- Advanced: Implement PWM speed control for variable fan speed (0-100%)
- Advanced: Create a web interface to control fan speed and monitor temperature remotely