ESP32 C3 Super Mini - MQ3 Alcohol Sensor
TITLE: ESP32 C3 Super Mini - MQ3 Alcohol Sensor
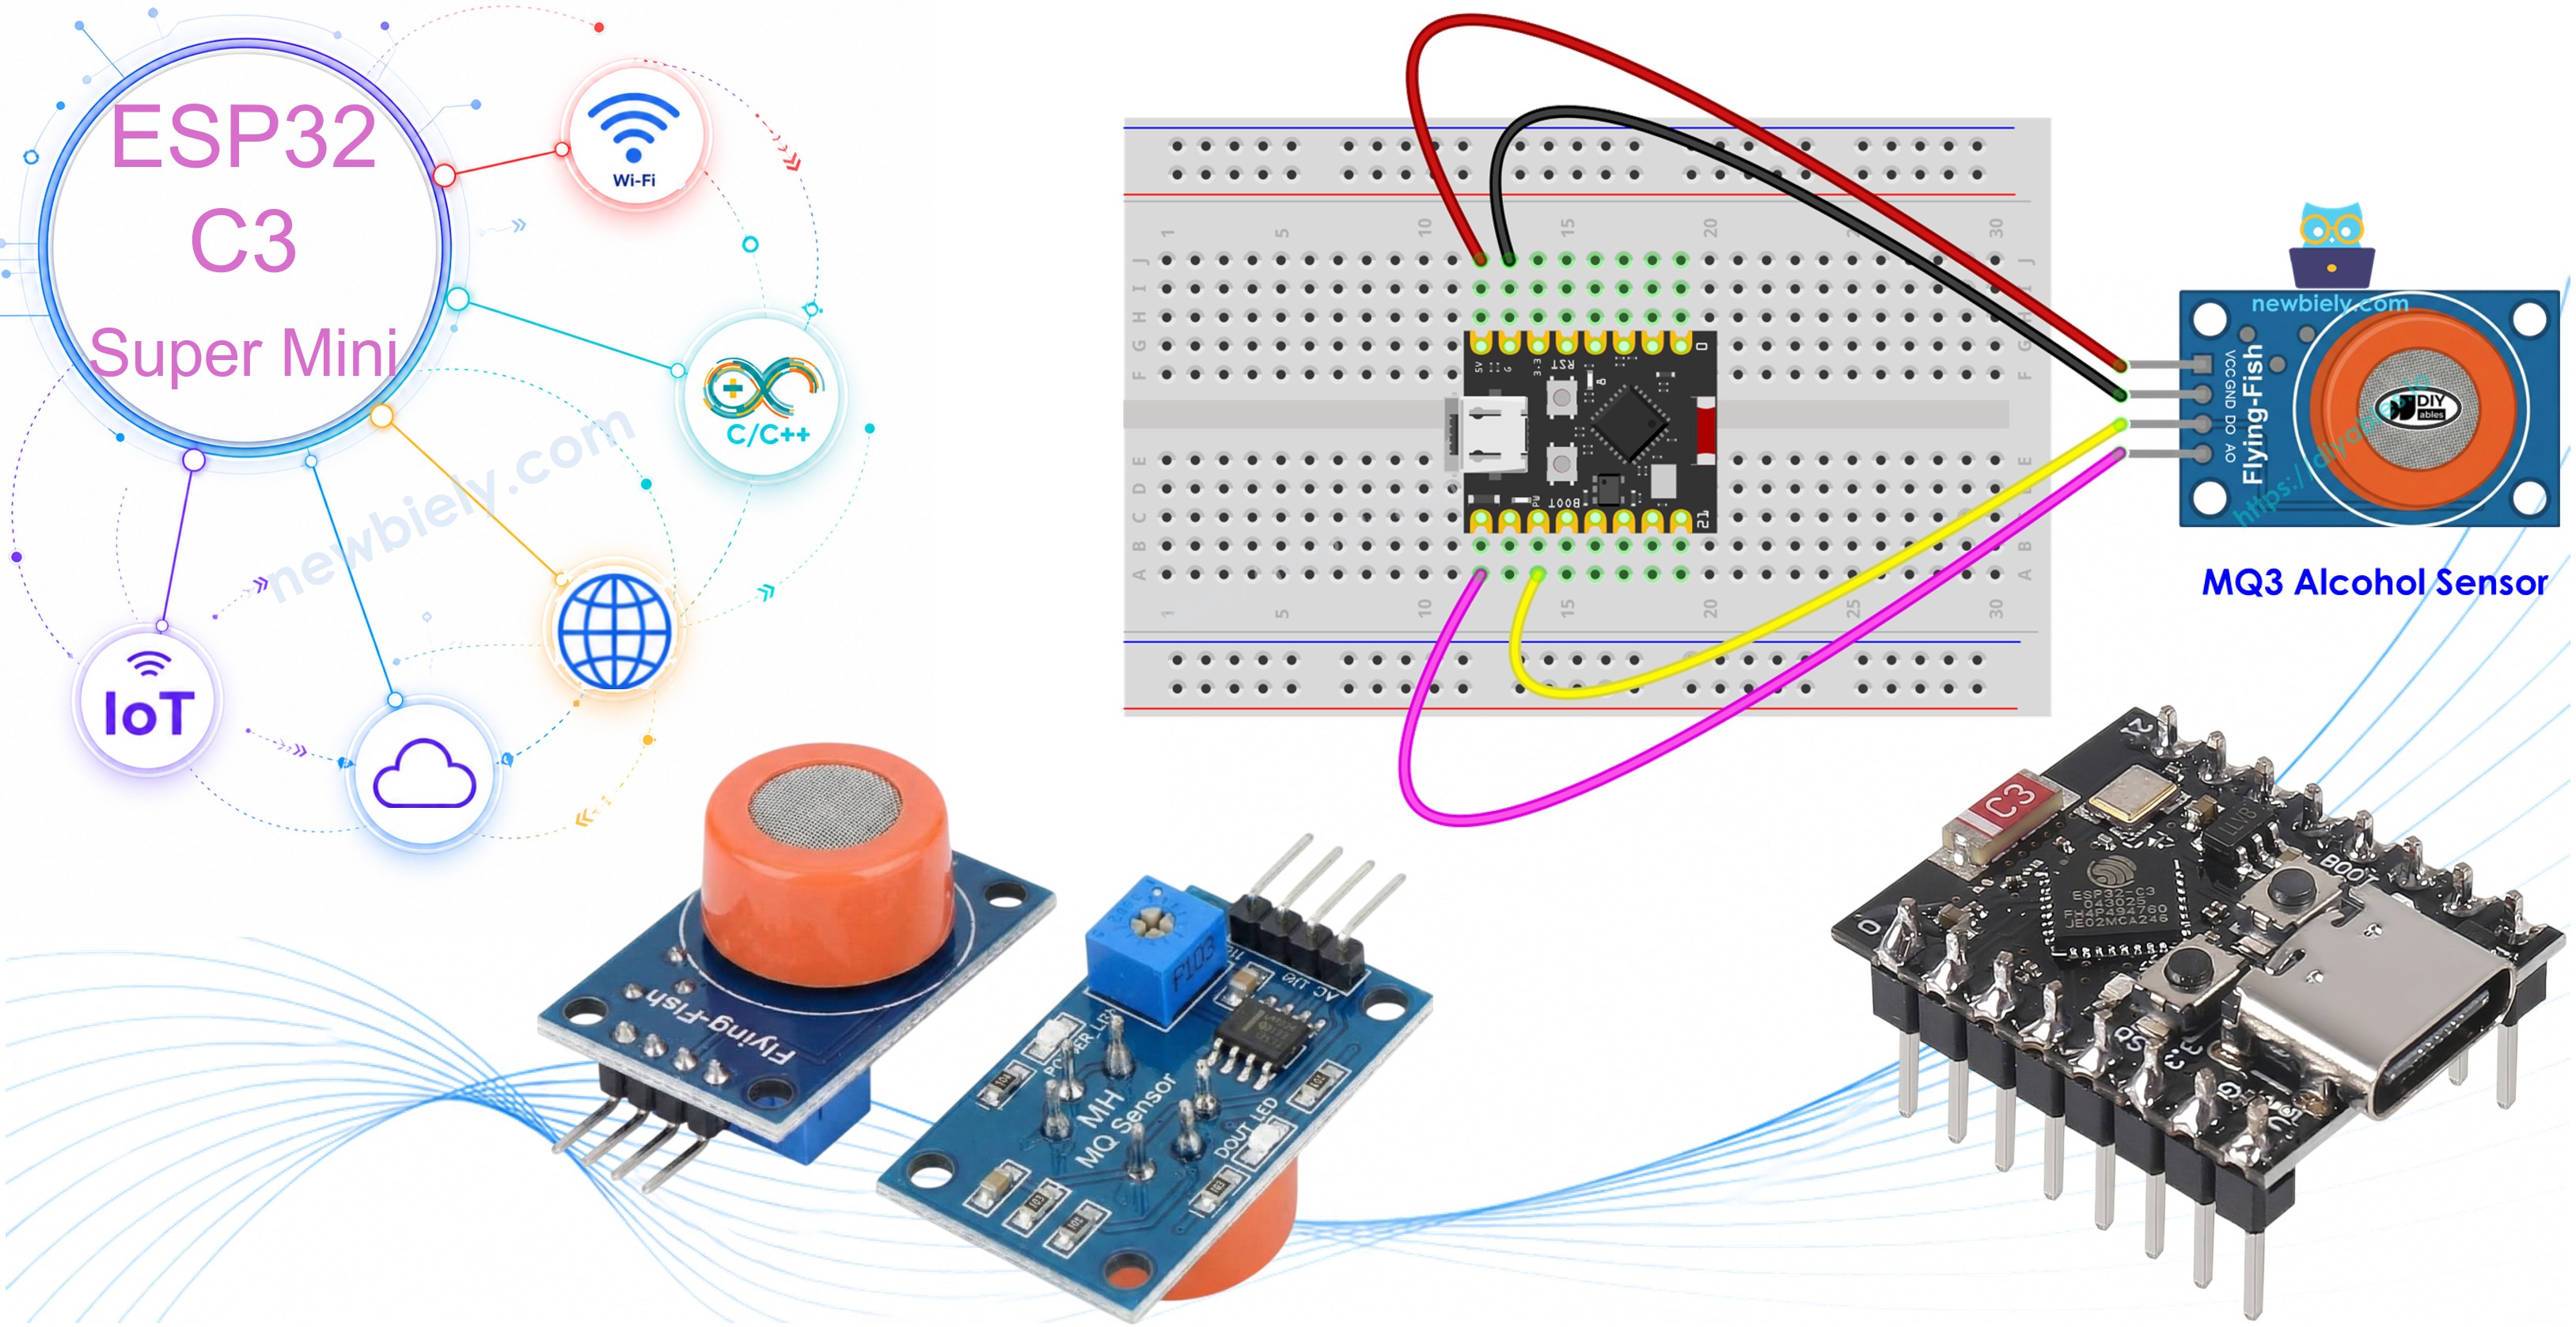
This tutorial shows you how to use the ESP32 C3 Super Mini with an MQ3 alcohol sensor to detect ethanol and alcohol vapor in the air. Perfect for building DIY breathalyzer projects and alcohol detection systems!
In this tutorial, you will learn:
- What the MQ3 alcohol sensor is and how it detects alcohol vapor
- How to wire the MQ3 sensor module to ESP32 C3 Super Mini
- How to program ESP32 C3 Super Mini to read alcohol concentration data
- How to calibrate the sensor for accurate breathalyzer readings
- How to build threshold-based alcohol detection systems
Hardware Preparation
| 1 | × | ESP32 C3 Super Mini | |
| 1 | × | USB Cable Type-A to Type-C (for USB-A PC) | |
| 1 | × | USB Cable Type-C to Type-C (for USB-C PC) | |
| 1 | × | MQ3 Alcohol Sensor | |
| 1 | × | Breadboard | |
| 1 | × | Jumper Wires |
Or you can buy the following kits:
| 1 | × | DIYables Sensor Kit (18 sensors/displays) |
Additionally, some of these links are for products from our own brand, DIYables .
Overview of MQ3 Alcohol Sensor
The MQ3 is a gas sensor that detects alcohol vapor and ethanol by measuring resistance changes in its sensing element.
- Operating Voltage: 5V DC
- Detection Range: 25-500 ppm (parts per million)
- Load Resistance: 200 KΩ
- Heater Resistance: 33Ω ± 5%
- Heating Consumption: < 800mW
- Sensing Resistance: 1 MΩ – 8 MΩ
- Preheat Time: 24-48 hours for first use, 5-10 minutes for subsequent uses
- Output Types: Both digital (DO) and analog (AO) outputs
- Sensor Type: Metal Oxide Semiconductor (MOS) chemiresistor
- Sensing Material: Tin Dioxide (SnO2) on ceramic substrate
- Perfect for: DIY breathalyzers, alcohol vapor alarms, air quality monitors, drunk driving detectors
The MQ3 alcohol sensor module uses a heated metal oxide semiconductor to detect alcohol molecules in the air. When alcohol vapor contacts the sensor surface, it changes the electrical resistance, which the ESP32 C3 Super Mini can measure.
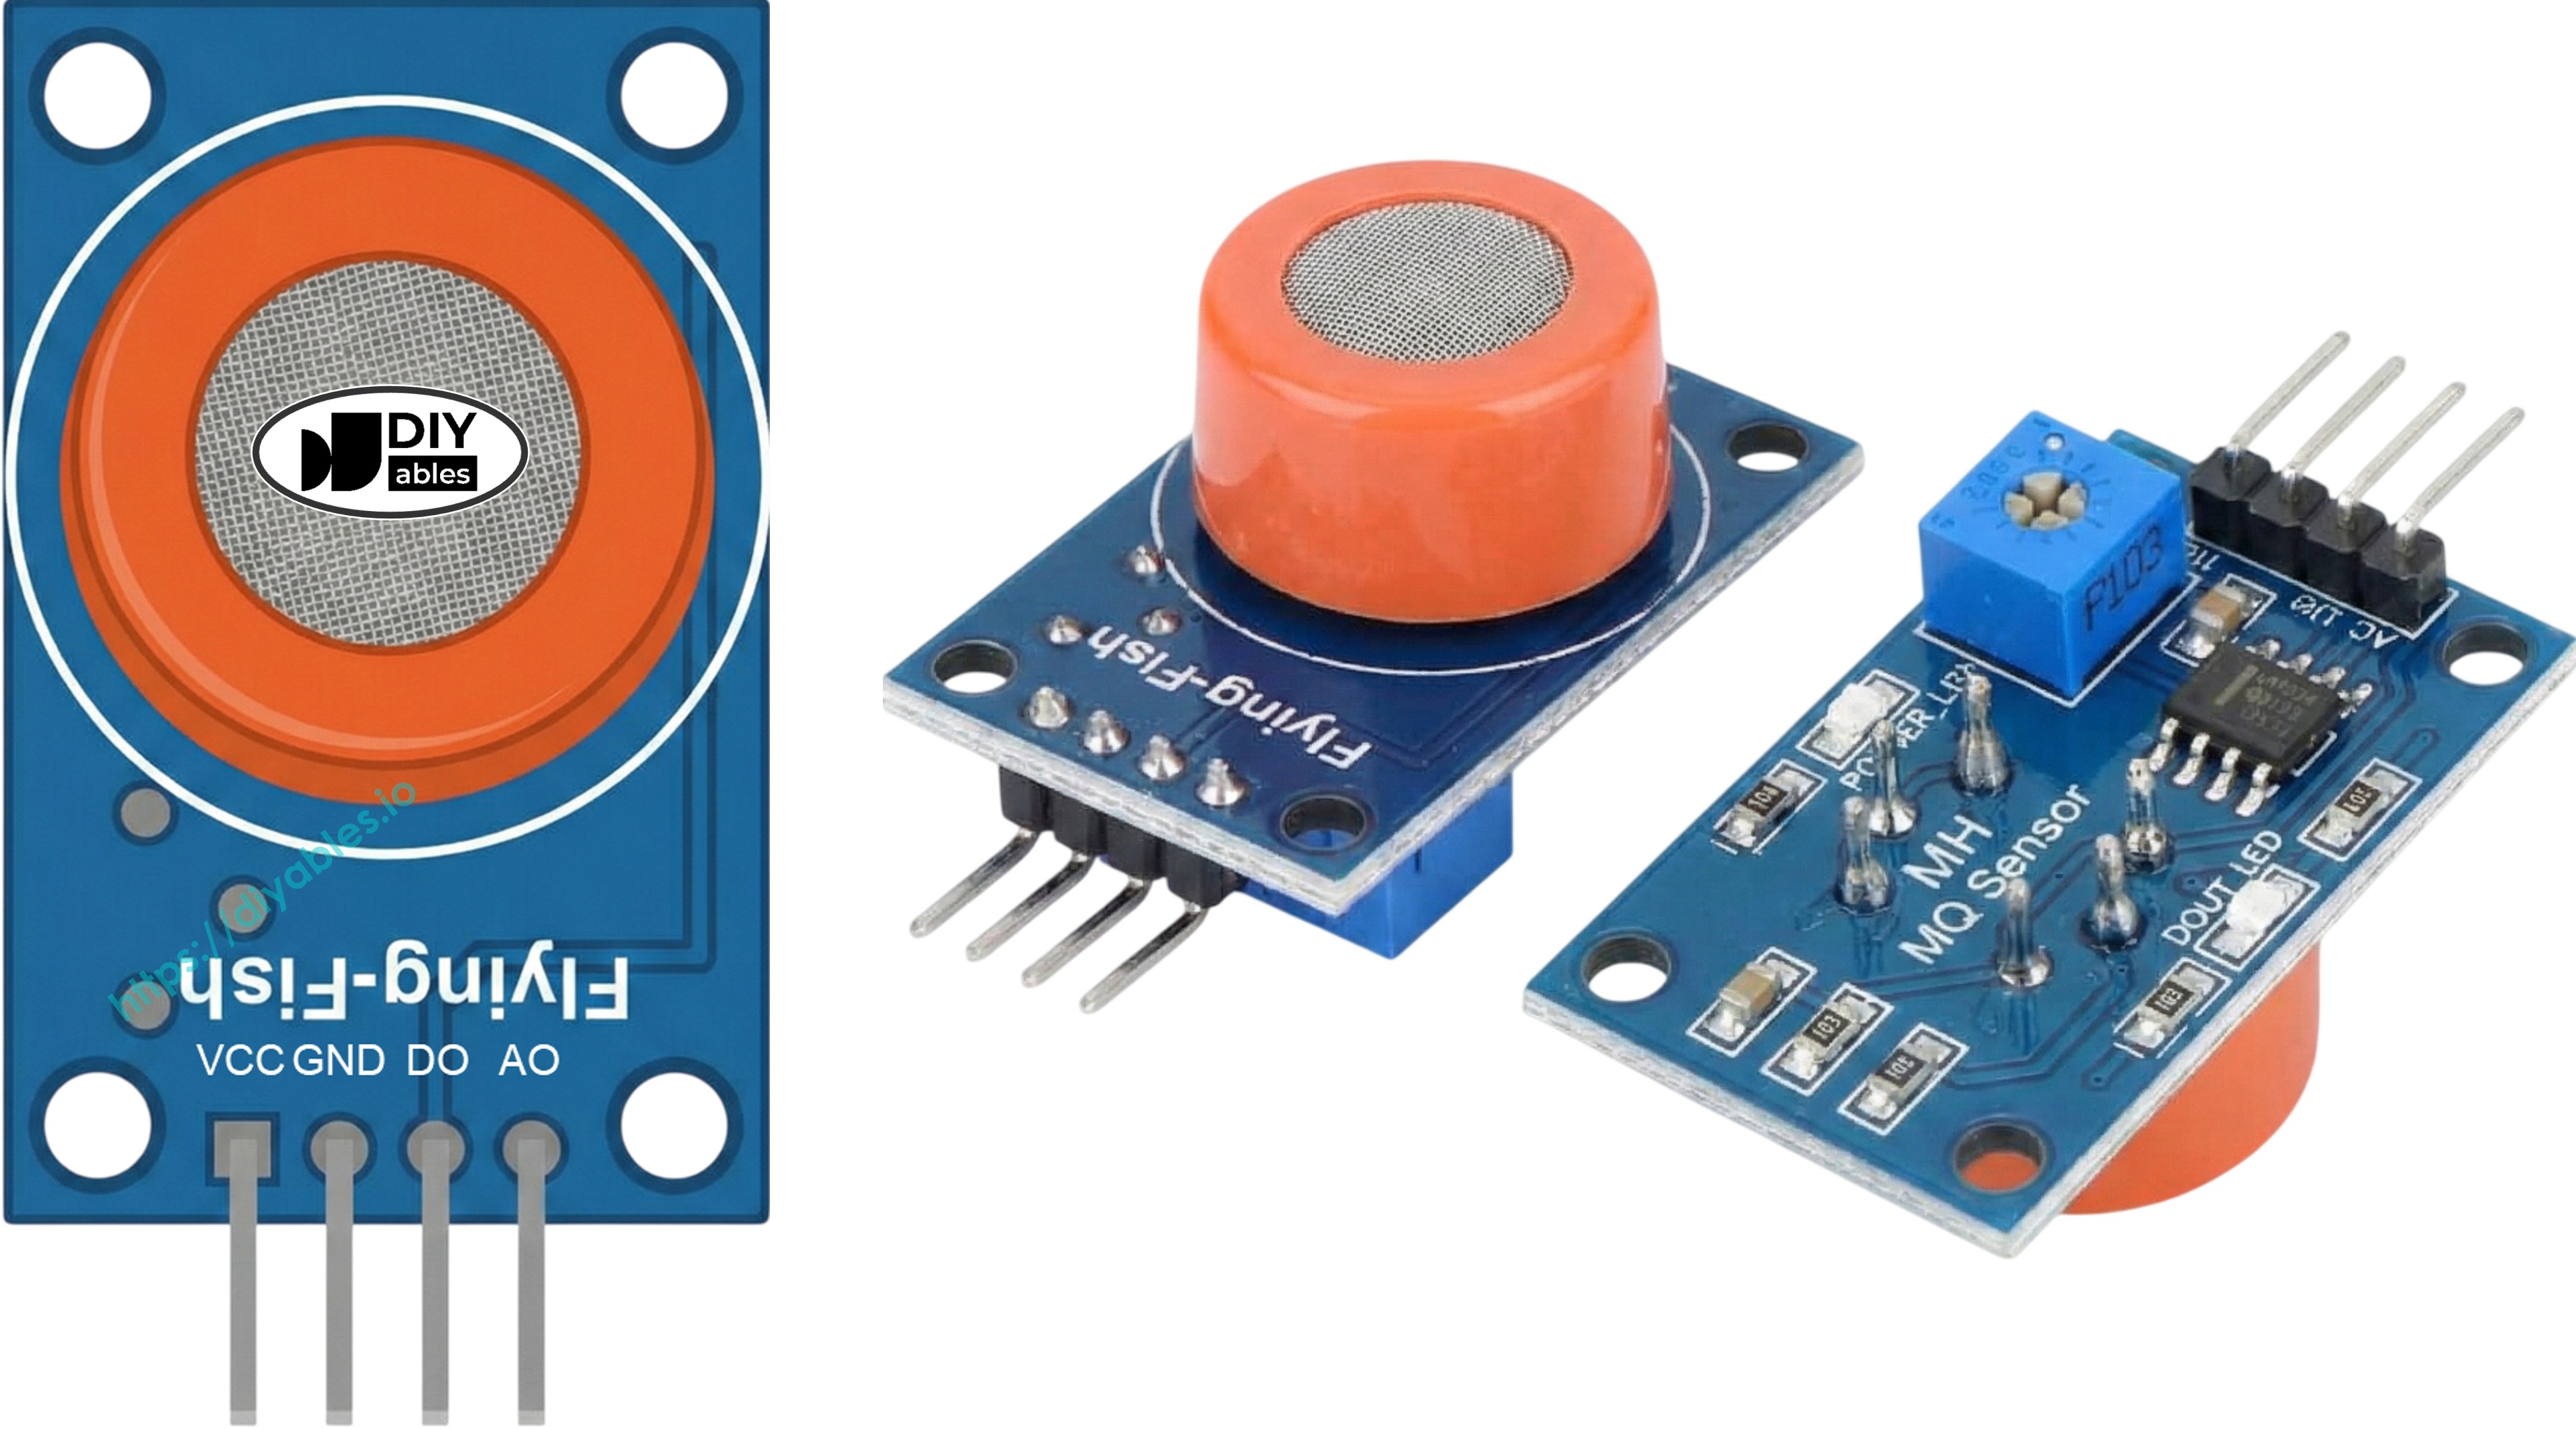
Pinout
The MQ3 alcohol sensor module has four pins for easy connection to your ESP32 C3 Super Mini:
- VCC pin: Power supply pin - connect to 5V
- GND pin: Ground pin - connect to GND (0V)
- DO pin: Digital output pin - outputs HIGH or LOW based on threshold setting
- AO pin: Analog output pin - outputs voltage proportional to alcohol concentration
The module also includes two LED indicators:
- PWR-LED: Power indicator - lights up when module is powered
- DO-LED: Detection indicator - lights up when alcohol is detected above threshold
How It Works
The MQ3 sensor detects alcohol through resistance changes in its Tin Dioxide (SnO2) semiconductor material:
Clean air operation:
- Oxygen molecules stick to the SnO2 surface when heated
- Trapped electrons create high electrical resistance
- Sensor outputs low voltage on analog pin
Alcohol vapor detection:
- Alcohol molecules react with surface oxygen
- Releases trapped electrons back into the material
- Electrical resistance drops significantly
- Sensor outputs higher voltage on analog pin
- More alcohol = lower resistance = higher voltage output
Digital Output (DO pin):
- Use the onboard potentiometer to set detection threshold
- DO pin goes LOW when alcohol exceeds threshold (LED turns ON)
- DO pin stays HIGH when alcohol is below threshold (LED stays OFF)
- Perfect for simple yes/no alcohol detection
Analog Output (AO pin):
- Provides continuous voltage reading from 0-4095 (ESP32 ADC range)
- Higher voltage = more alcohol vapor detected
- Lower voltage = less alcohol vapor
- Ideal for measuring actual concentration levels
- Not affected by the potentiometer setting
Warm-up and Calibration
Pre-heating Requirements
The MQ3 alcohol sensor requires proper heating before accurate measurements:
- First time use or after 30+ days storage: Heat continuously for 24-48 hours to stabilize sensor readings
- Regular use: Warm up for 5-10 minutes before taking measurements
- During warm-up: Initial readings may be higher than normal but will stabilize quickly
- How to warm up: Simply connect VCC to 5V and GND to ground via USB power or external supply
Finding Your Threshold Values
Every MQ3 sensor is slightly different, so calibration is essential for breathalyzer projects:
- Clean air baseline test:
- Run sensor in fresh air without any alcohol present
- Record the analog value (typically 100-150)
- This is your "sober" baseline reading
- Alcohol vapor test:
- Hold isopropyl alcohol or hand sanitizer near (not touching) the sensor
- Let vapor reach the sensor element
- Record the higher readings (typically 400-900 depending on vapor concentration)
- This establishes your "detection" range
- Set detection zones:
- Sober range: Below baseline + 20 (example: readings < 120)
- Moderate range: Mid-level readings (example: 120-400)
- High range: Above moderate threshold (example: > 400)
- Important notes: Individual sensors vary, environmental conditions affect readings, always calibrate your specific sensor before real use
Setting the Digital Threshold
Adjust the onboard potentiometer to set when the DO pin triggers:
- Expose sensor to alcohol vapor (use hand sanitizer or rubbing alcohol)
- Turn potentiometer clockwise until DO-LED lights up
- Slowly turn counterclockwise until LED just turns off
- Digital threshold is now calibrated for your desired sensitivity level
- Test by exposing to alcohol vapor again - LED should light reliably
Wiring Diagram
The MQ3 sensor module connects easily to the ESP32 C3 Super Mini using both digital and analog outputs.
- Note: The MQ3 sensor requires 5V power for proper heating. Connect VCC to the 5V pin, not 3.3V.
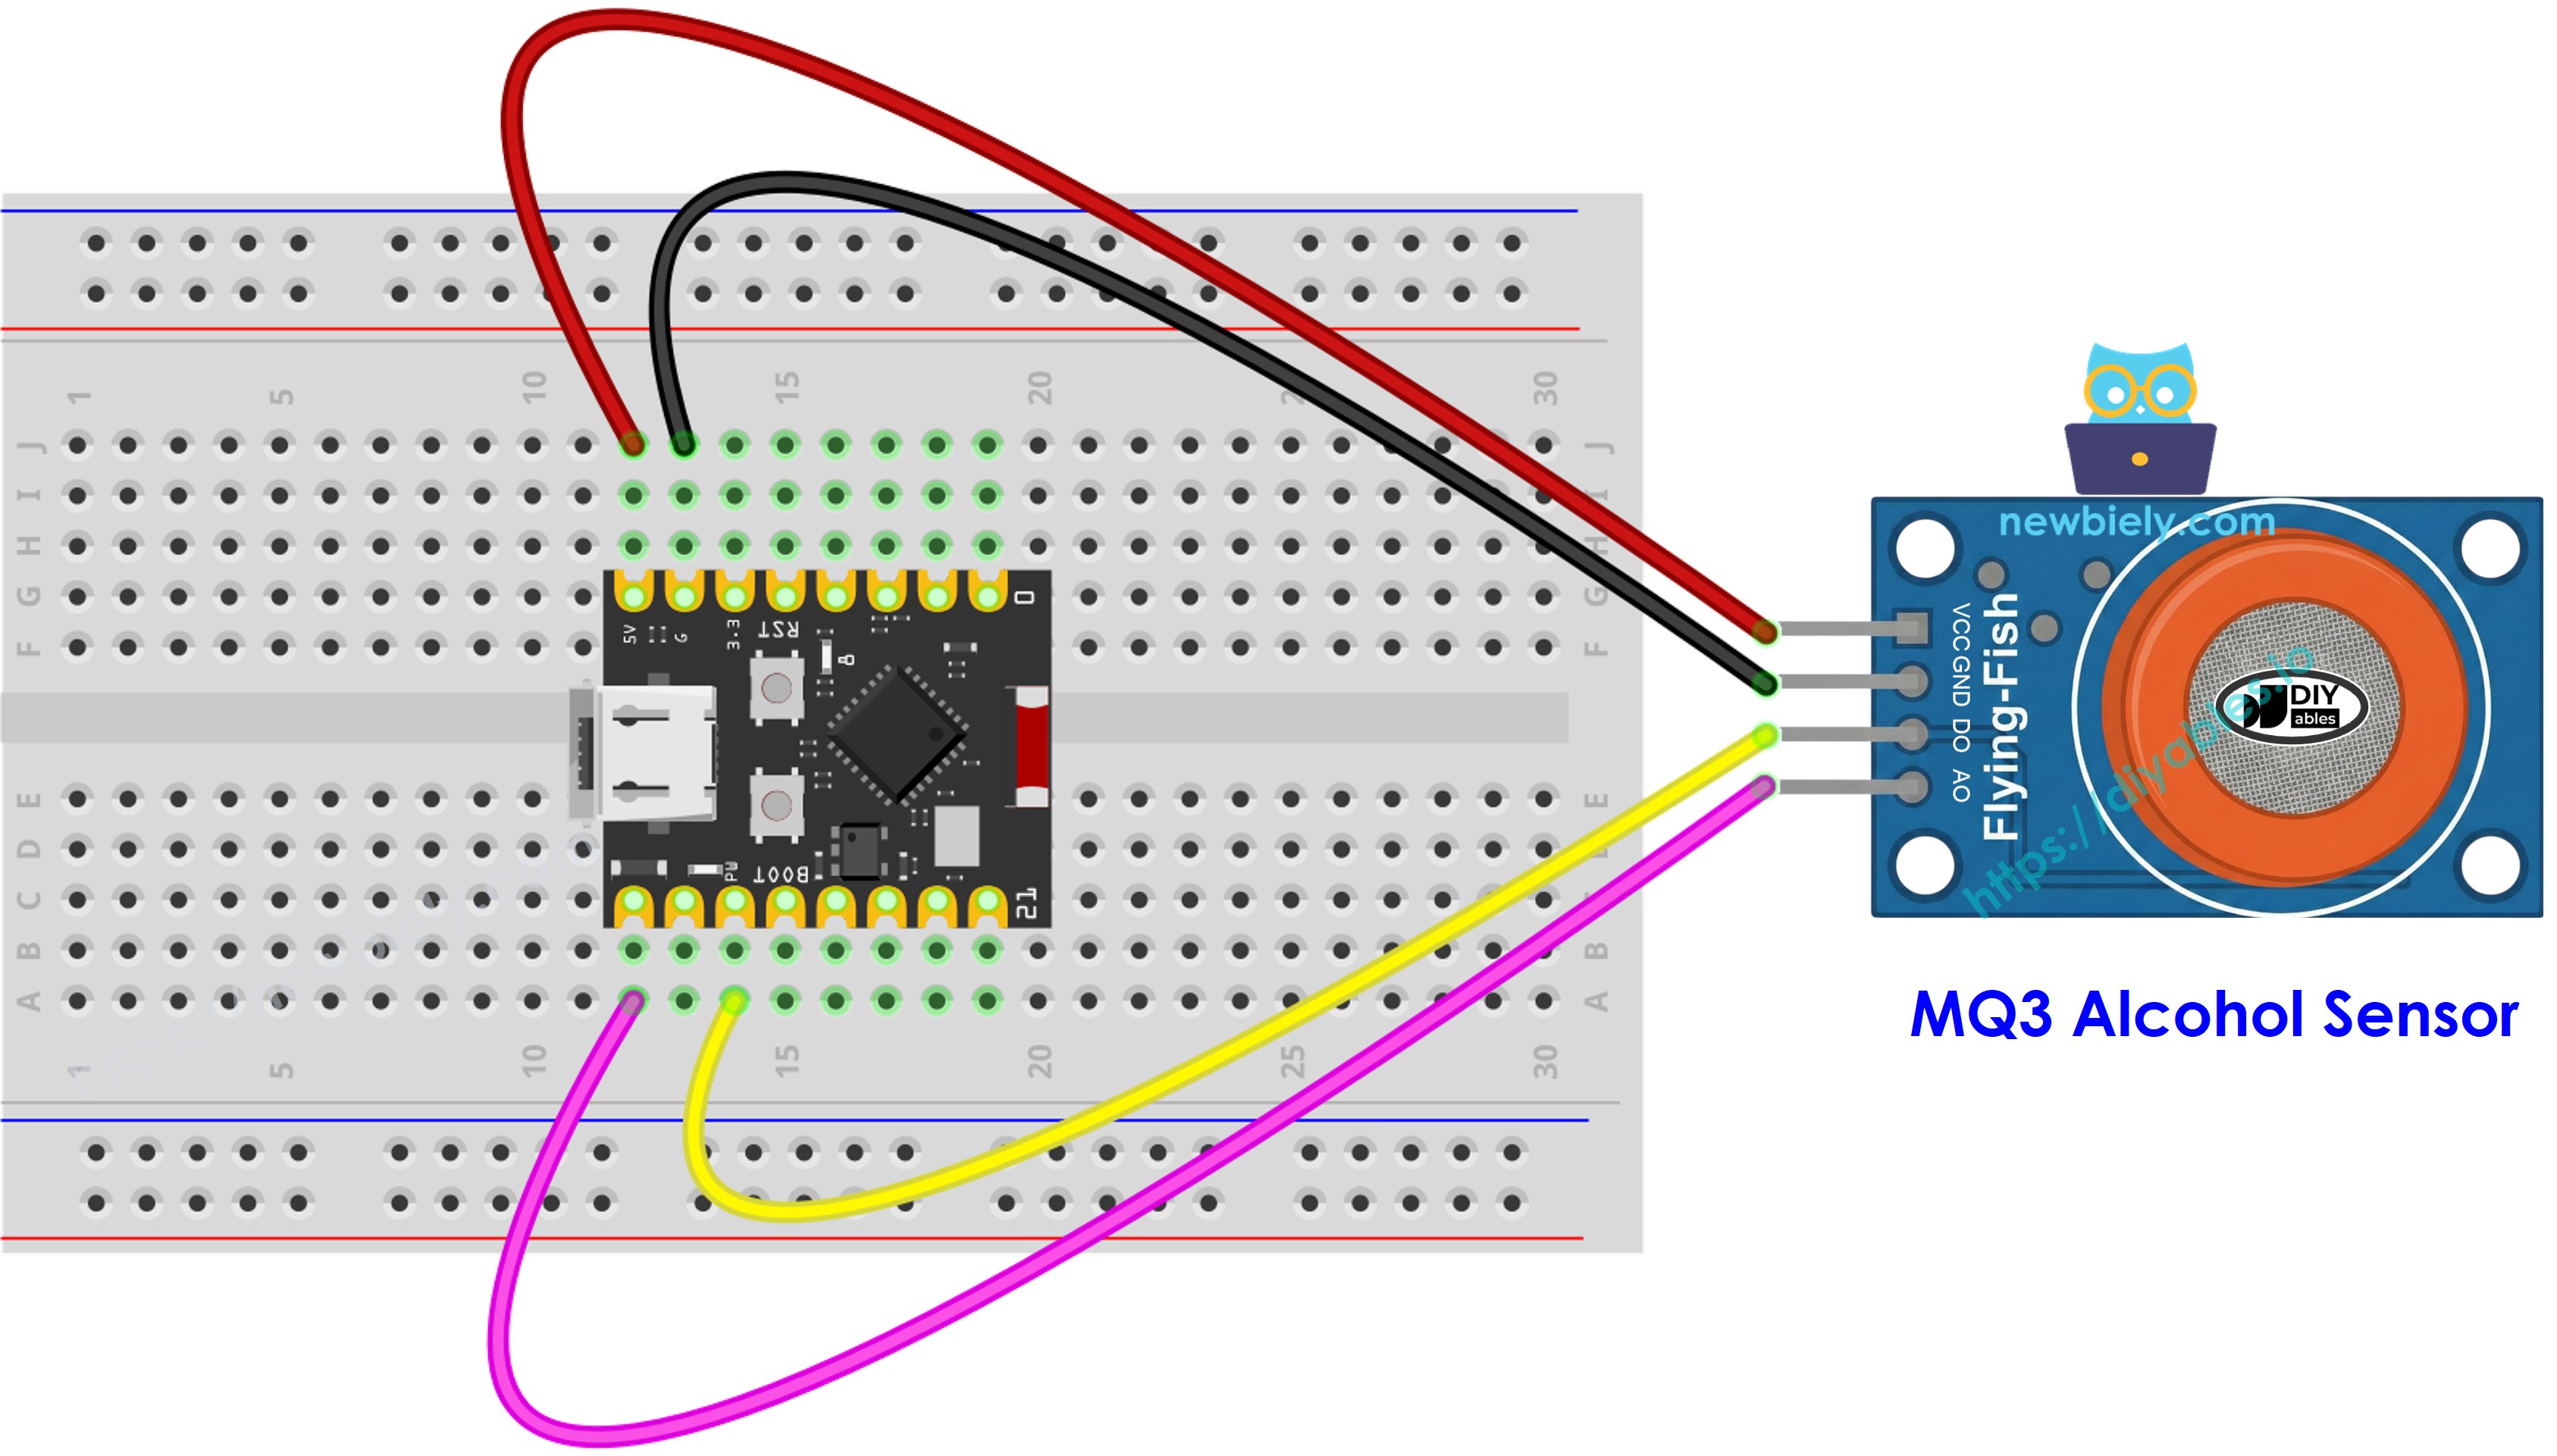
This image is created using Fritzing. Click to enlarge image
| MQ3 Alcohol Sensor | ESP32 C3 Super Mini |
|---|---|
| VCC | 5V |
| GND | GND |
| DO | D7 |
| AO | A5 |
ESP32 C3 Super Mini Code - Digital Output Reading
This code reads the digital output from the MQ3 sensor to detect alcohol presence:
- Checks DO pin status every second
- Prints detection status to Serial Monitor
- Uses threshold set by onboard potentiometer
- Simple yes/no alcohol detection
Detailed Instructions
- New to ESP32 C3 Super Mini? Complete our Getting Started with ESP32 C3 Mini tutorial first to set up your development environment.
- Open Arduino IDE: Launch the Arduino IDE on your computer
- Copy the code: Copy the code above and paste it into Arduino IDE
- Select your board: Choose ESP32 C3 Super Mini from Tools > Board menu
- Select your port: Choose the correct COM port from Tools > Port menu
- Upload the code: Click the Upload button to program your ESP32 C3 Super Mini
- Open Serial Monitor: Click the Serial Monitor icon (top-right) or press Ctrl+Shift+M
- Set baud rate: Select 115200 baud in the Serial Monitor dropdown
- Test with alcohol: Bring hand sanitizer or rubbing alcohol near the MQ3 sensor
- View results: Watch the detection status change in Serial Monitor
- Adjust sensitivity: If LED stays always on or off, turn the potentiometer to adjust threshold
- Pro Tip: Use a cotton ball soaked in isopropyl alcohol for consistent testing without touching the sensor.
ESP32 C3 Super Mini Code - Analog Output Reading
This code reads analog voltage values from the MQ3 sensor to measure alcohol concentration:
- Reads analog value from AO pin every second
- Shows raw ADC values (0-4095 range)
- Higher values indicate more alcohol vapor
- Displays readings in Serial Monitor
Detailed Instructions
- New to ESP32 C3 Super Mini? Complete our Getting Started with ESP32 C3 Mini tutorial first to set up your development environment.
- Copy the code: Paste the code above into Arduino IDE
- Upload to board: Click Upload button to program ESP32 C3 Super Mini
- Open Serial Monitor: Set baud rate to 115200
- Note baseline value: Observe the reading in clean air (typically 100-150)
- Test with alcohol: Introduce hand sanitizer or rubbing alcohol vapor near sensor
- Watch values increase: Readings will jump significantly when alcohol is detected
- Record values: Note the range for calibration purposes
- Pro Tip: Write down your clean air baseline and alcohol vapor readings to calculate accurate thresholds for breathalyzer projects.
ESP32 C3 Super Mini Code - Breathalyzer with Threshold Detection
This code creates a simple breathalyzer by interpreting analog readings with calibrated thresholds:
- Reads analog alcohol concentration values
- Compares readings against calibrated thresholds
- Classifies sobriety levels (Sober, Drinking, Drunk)
- Displays status and sensor value in Serial Monitor
- Updates readings every second
Detailed Instructions
- New to ESP32 C3 Super Mini? Complete our Getting Started with ESP32 C3 Mini tutorial first to set up your development environment.
- Calibrate first: Run the analog reading code to find your sensor's baseline and alcohol detection values
- Update thresholds: Replace SOBER_THRESHOLD and DRUNK_THRESHOLD with your calibrated values
- Example calibration: If your clean air reads 130 and alcohol vapor reads 500+, use SOBER_THRESHOLD = 150 and DRUNK_THRESHOLD = 400
- Upload code: Click Upload button to program ESP32 C3 Super Mini
- Open Serial Monitor: Set baud rate to 115200
- Test system: Breathe normally near sensor first (should read "Stone Cold Sober")
- Test with alcohol: Use hand sanitizer or isopropyl alcohol vapor to simulate alcohol breath
- Observe status changes: Watch the system classify different concentration levels
- Pro Tip: For more accurate readings, wait 30 seconds after each test to let the sensor return to baseline before testing again.
Educational Use Only: This is strictly an educational project for learning about gas sensors and the ESP32 C3 Super Mini. Never use this device as a legal breathalyzer, for assessing driving safety, or for any official alcohol testing purposes.
※ NOTE THAT:
This tutorial uses the analogRead() function to read values from an ADC (Analog-to-Digital Converter) connected to a sensor or component. The ESP32 C3 Super Mini's ADC is suitable for projects that do not require high accuracy. However, for projects needing precise measurements, keep the following in mind:
- The ESP32 C3 Super Mini's ADC is not perfectly accurate and might require calibration for correct results. Each ESP32 C3 Super Mini board can vary slightly, so calibration is necessary for each individual board.
- Calibration can be challenging, especially for beginners, and might not always yield the exact results you want.
For projects requiring high precision, consider using an external ADC (e.g ADS1115) with the ESP32 C3 Super Mini or using another Arduino, such as the Arduino Uno R4 WiFi, which has a more reliable ADC. If you still want to calibrate the ESP32 C3 Super Mini's ADC, refer to the ESP32 ADC Calibration Driver.
Project Ideas and Applications
Here are some practical projects you can build using the ESP32 C3 Super Mini with MQ3 alcohol sensor:
- DIY breathalyzer system: Build an educational breath analyzer to demonstrate alcohol detection principles
- Alcohol vapor alarm: Create a warning system that triggers when alcohol vapors exceed safe levels
- Bar or brewery monitoring: Monitor alcohol vapor concentrations in fermentation or brewing areas
- Home safety detector: Alert when alcohol-based cleaning products reach unsafe vapor levels
- Laboratory gas monitor: Track ethanol vapor in chemistry labs or research facilities
- Vehicle safety system: Prototype an alcohol interlock concept for educational demonstrations
- Air quality station: Include alcohol detection as part of a multi-sensor air quality monitor
Video Tutorial
Watch the video below for a visual walkthrough of this project with the ESP32 C3 Super Mini and MQ3 alcohol sensor.
Challenge Yourself
Ready to take your ESP32 C3 Super Mini alcohol sensor project further? Try these challenges:
- Easy: Add an LED that lights up when alcohol is detected above your sober threshold
- Easy: Add a buzzer that beeps when the sensor detects high alcohol concentrations
- Medium: Create a traffic light system (Green/Yellow/Red LEDs) showing sober, moderate, and drunk levels
- Medium: Log sensor readings to an SD card with timestamps for data analysis
- Advanced: Add WiFi connectivity to send alcohol detection alerts to your smartphone via Blynk or MQTT
- Advanced: Build a complete breathalyzer with OLED display showing real-time readings and status messages