ESP32 C3 Super Mini - Temperature Humidity Sensor
This tutorial shows you how to connect DHT11 or DHT22 temperature and humidity sensors to your ESP32 C3 Super Mini and read environmental data in real-time. Perfect for beginners building weather stations or home automation projects!
In this tutorial, you'll learn:
- What DHT11 and DHT22 sensors are and how they differ
- How to wire DHT11/DHT22 sensors to ESP32 C3 Super Mini
- How to install the DHT sensor library for ESP32
- How to write code to read temperature and humidity values
- How to display sensor readings on the Serial Monitor
Hardware Preparation
Or you can buy the following kits:
| 1 | × | DIYables Sensor Kit (18 sensors/displays) |
Additionally, some of these links are for products from our own brand, DIYables .
Overview of DHT11 and DHT22 Temperature and Humidity Sensor
DHT11 and DHT22 are digital temperature and humidity sensors that provide calibrated output for easy integration with ESP32 C3 Super Mini projects.
The Commons Between DHT11 and DHT22
- Identical 4-pin pinout configuration
- Same wiring connections to ESP32 C3 Super Mini
- Compatible code with minimal changes
- Both use single-wire digital communication
- Low power consumption ideal for battery projects
The Differences Between DHT11 and DHT22
The table below shows the detailed specifications comparison:
| DHT22 | DHT11 | |
|---|---|---|
| The price | low cost | ultra low cost |
| The humidity range | 0% to 100% | 20% to 80% |
| The humidity accuracy | ± 2% to 5% | 5% |
| The temperature range | -40°C to 80°C | 0°C to 50°C |
| The temperature accuracy | ± 0.5°C | ± 2°C |
| The reading rate | 0.5Hz (one time per 2 seconds) | 1Hz (one time per second) |
| Dimension | 15.1mm x 25mm x 7.7mm | 15.5mm x 12mm x 5.5mm |
| Operating Voltage | 3 to 5V | 3 to 5V |
Key Takeaway:
- DHT22 offers better accuracy and wider range
- DHT11 is more affordable for basic projects
- Both work perfectly with ESP32 C3 Super Mini
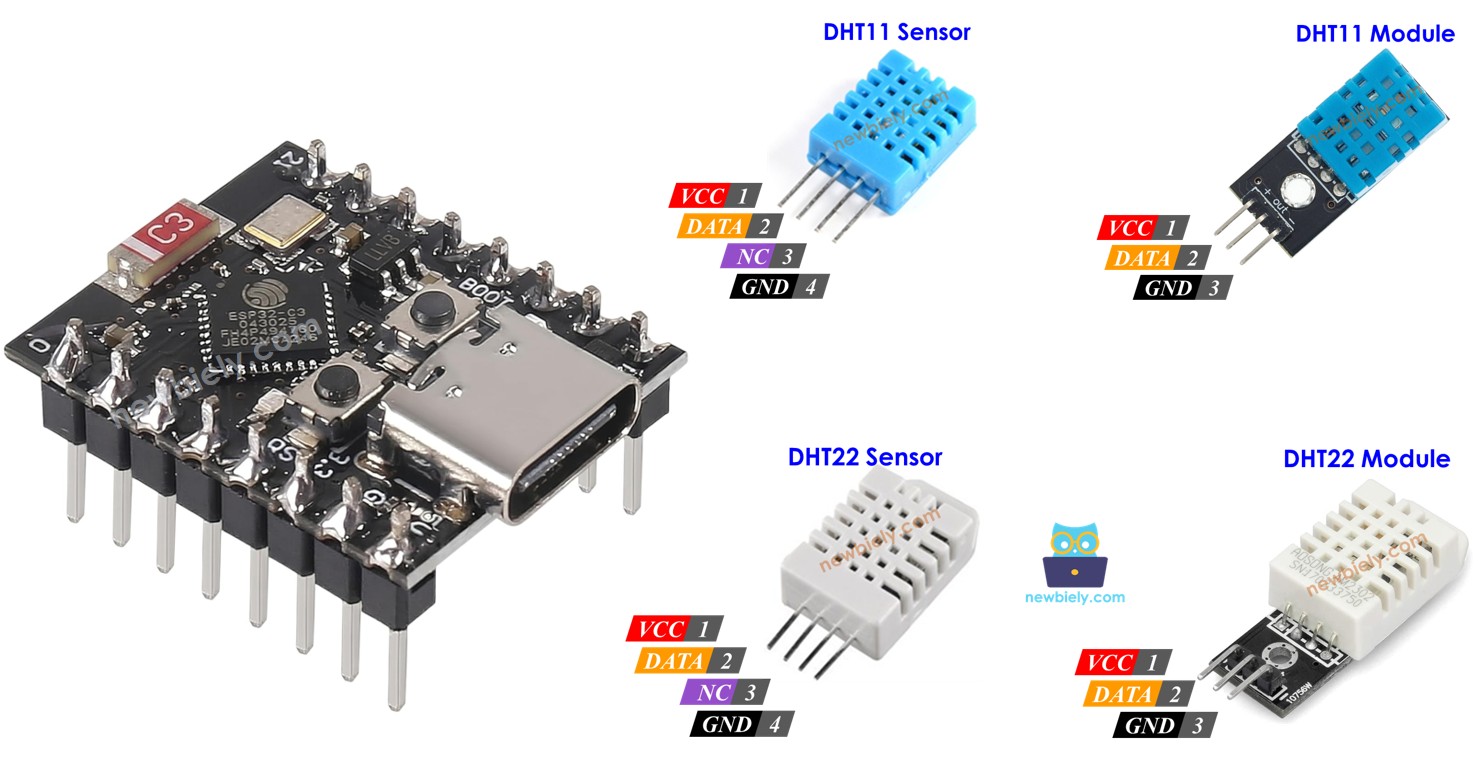
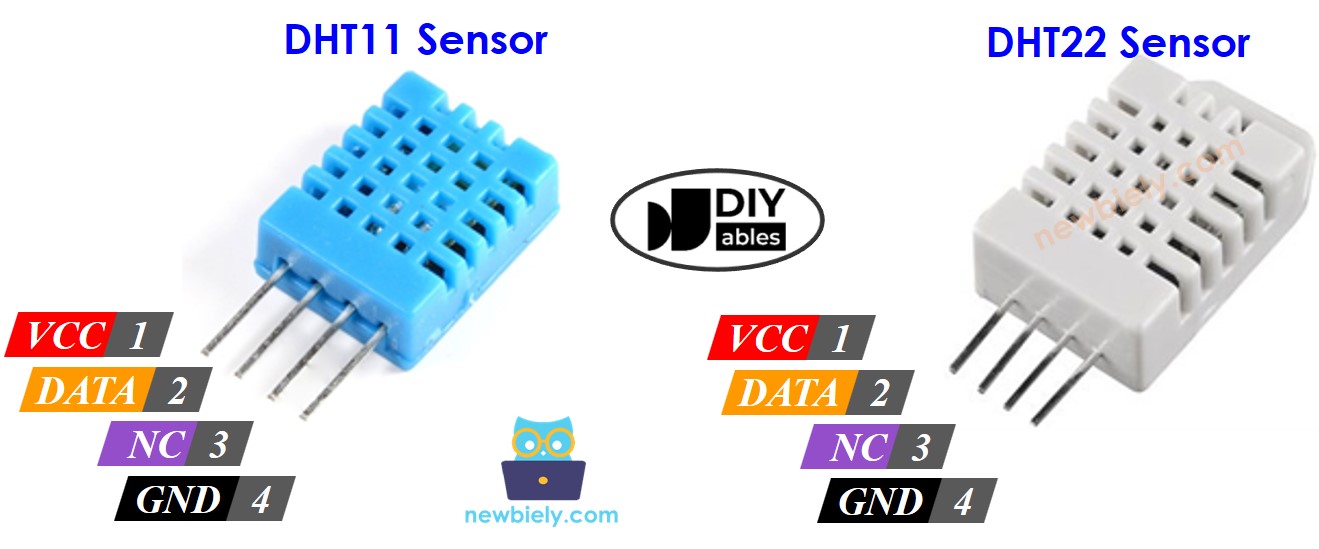
DHT11 and DHT22 Pinout
Both DHT11 and DHT22 temperature humidity sensors share the same 4-pin configuration:
- GND pin: Connect to ground (0V)
- VCC pin: Connect to power supply (3.3V or 5V)
- DATA pin: Digital signal pin for communication with ESP32 C3 Super Mini
- NC pin: Not connected (leave unconnected)
Module Version (Recommended):
We highly recommend using DHT11 and DHT22 sensor modules for easier wiring:
- Built-in pull-up resistor (no external resistor needed)
- Only 3 pins: VCC, GND, and DATA (or +, -, OUT)
- More convenient for breadboard projects

Note: Pin order may vary between manufacturers - always check the labels printed on your module.
Wiring Diagram between DHT11/DHT22 and ESP32 C3 Super Mini
The wiring connections are identical for both DHT11 and DHT22 sensors with ESP32 C3 Super Mini.
Important Note:
- For original sensors (4-pin), a 10kΩ pull-up resistor is required between DATA and VCC
- For sensor modules (3-pin), the resistor is built-in
ESP32 C3 Super Mini - DHT11 Sensor Wiring
| DHT11 Pin | ESP32 C3 Super Mini Pin |
|---|---|
| VCC | 3.3V |
| GND | GND |
| DATA | D4 (or any digital pin) |
| NC | Not connected |
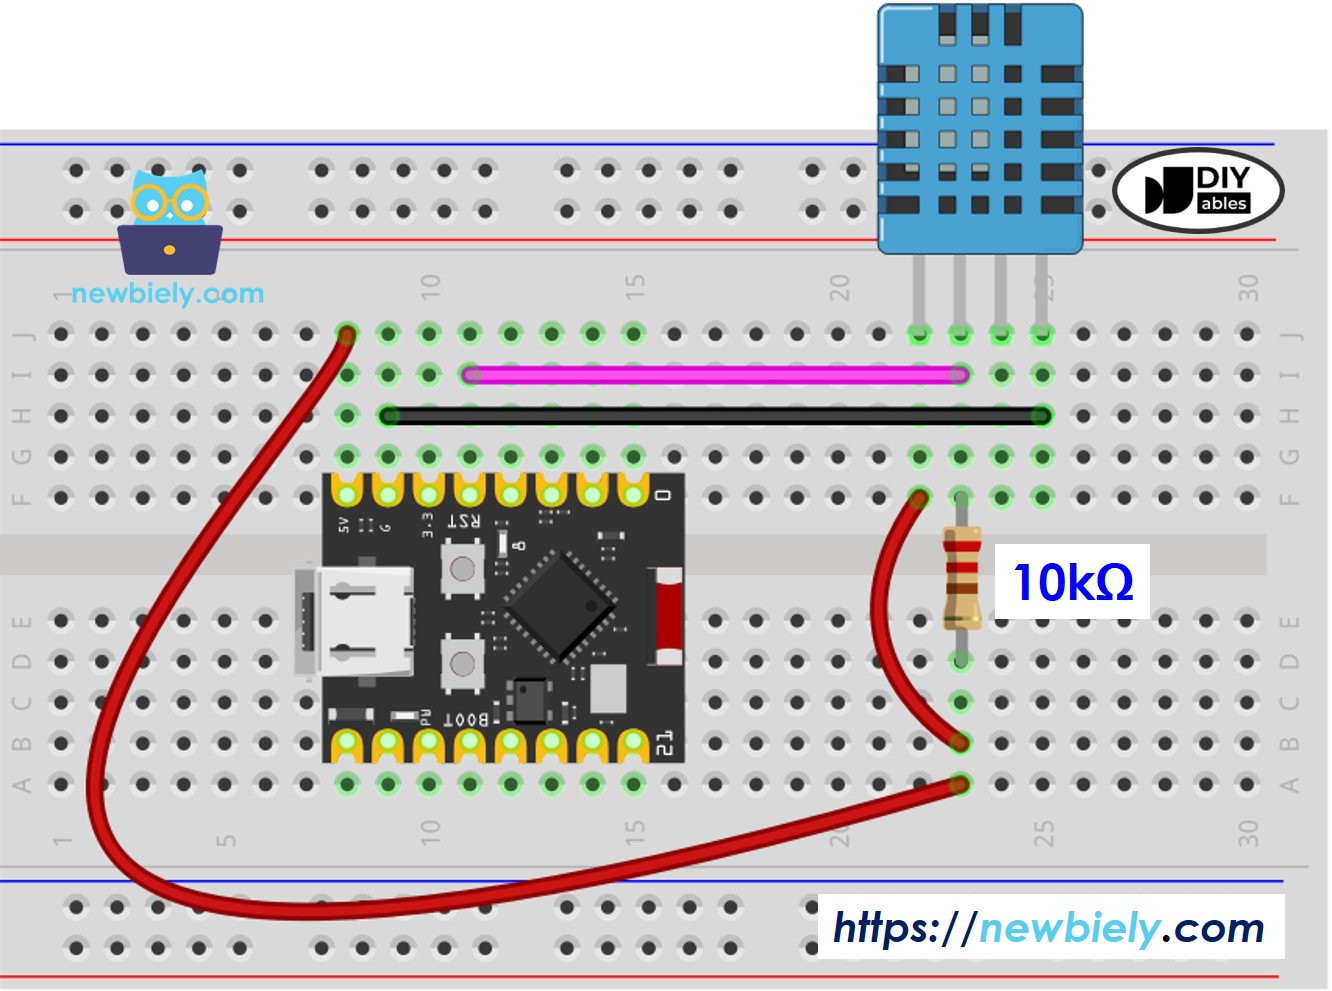
This image is created using Fritzing. Click to enlarge image
ESP32 C3 Super Mini - DHT22 Sensor Wiring
| DHT22 Pin | ESP32 C3 Super Mini Pin |
|---|---|
| VCC | 3.3V |
| GND | GND |
| DATA | D4 (or any digital pin) |
| NC | Not connected |
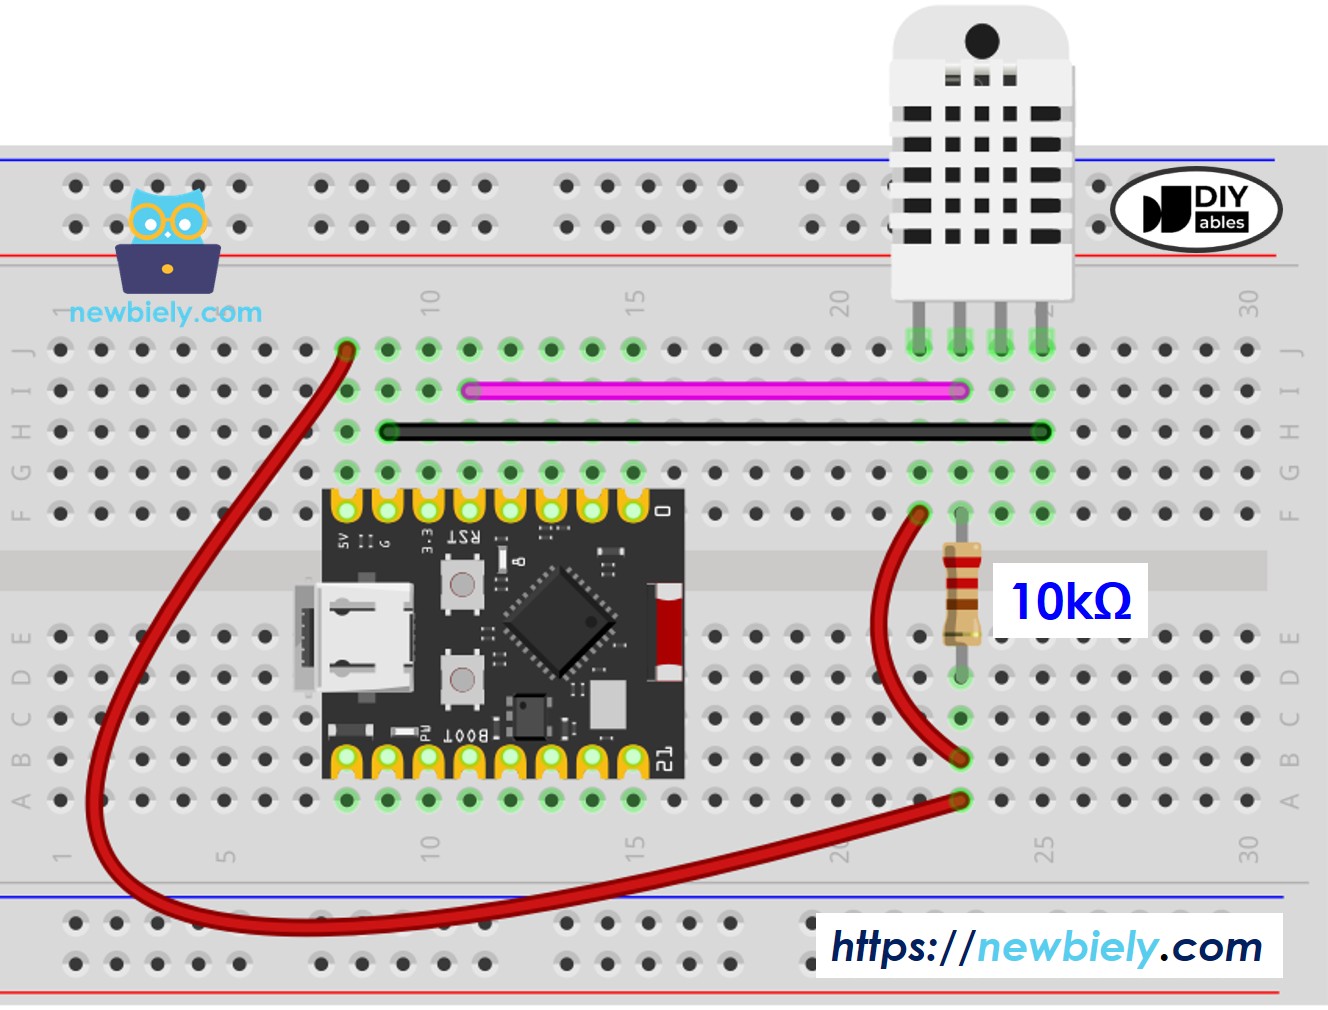
This image is created using Fritzing. Click to enlarge image
ESP32 C3 Super Mini - DHT11 Module Wiring
Most DHT11 sensor modules include a built-in resistor, simplifying your wiring setup:
| DHT11 Module Pin | ESP32 C3 Super Mini Pin |
|---|---|
| + (or VCC) | 3.3V |
| * (or GND) | GND |
| OUT (or DATA) | D4 |
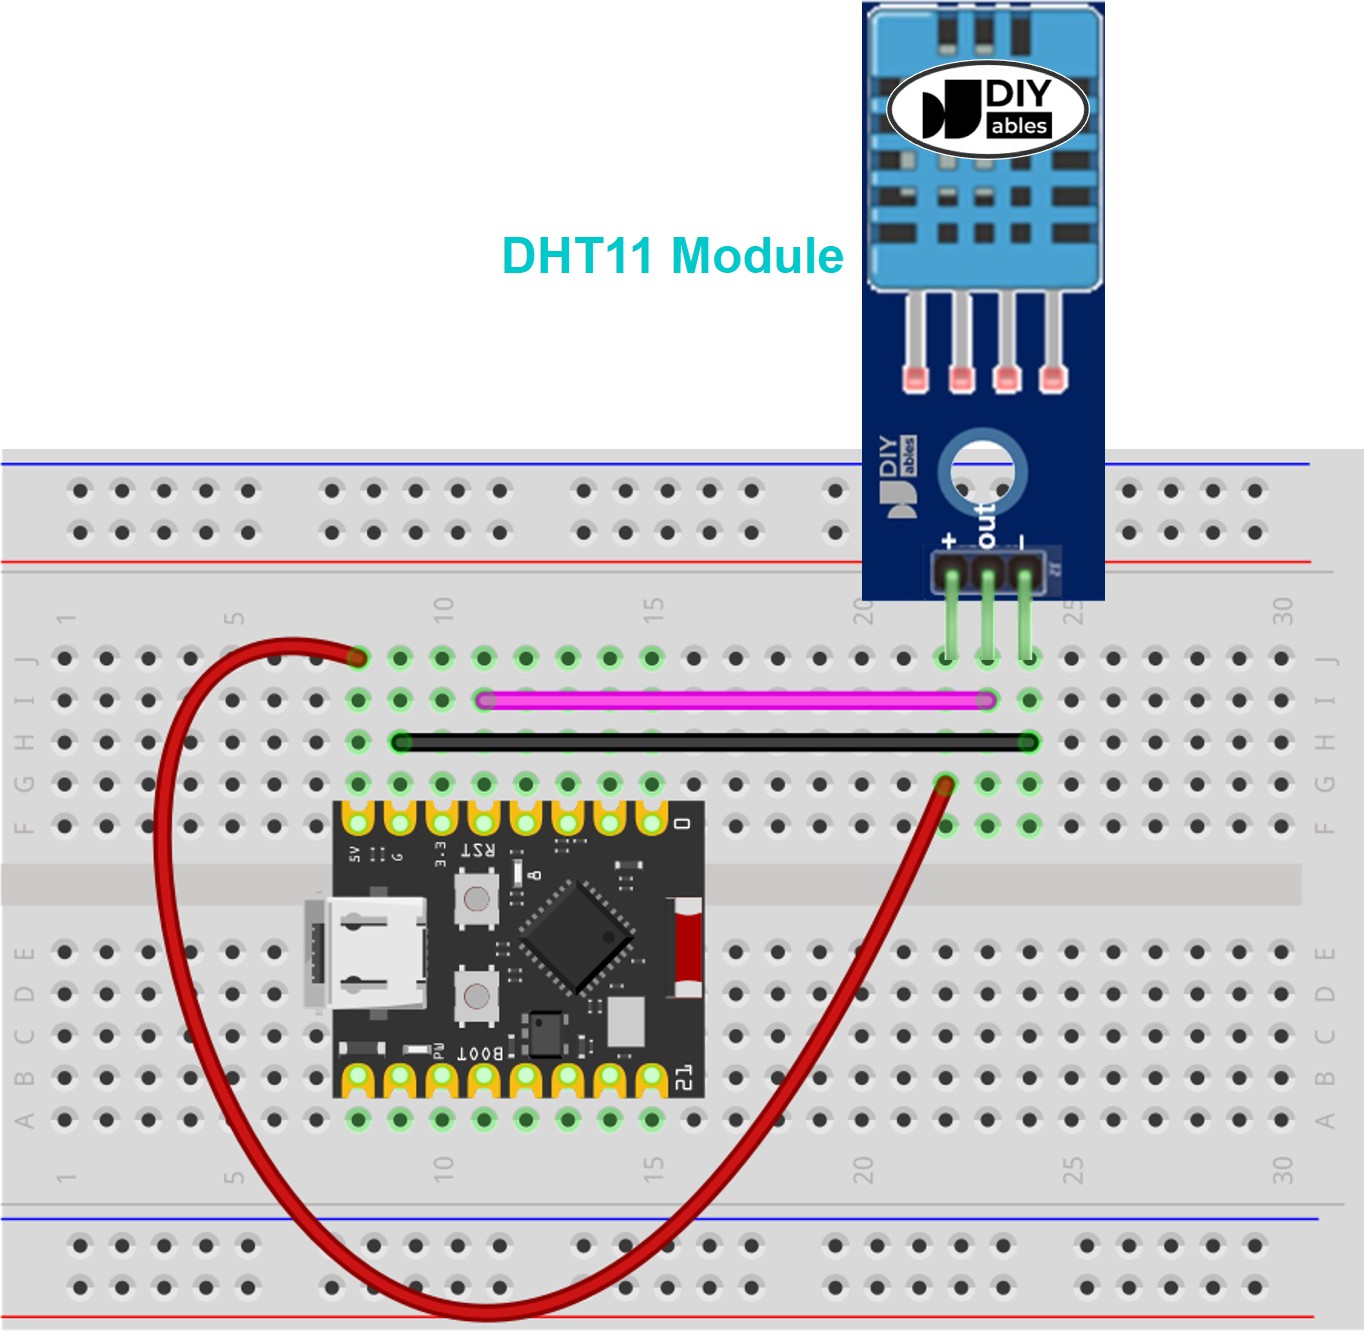
This image is created using Fritzing. Click to enlarge image
ESP32 C3 Super Mini - DHT22 Module Wiring
Most DHT22 sensor modules include a built-in resistor, eliminating the need for external components:
| DHT22 Module Pin | ESP32 C3 Super Mini Pin |
|---|---|
| + (or VCC) | 3.3V |
| * (or GND) | GND |
| OUT (or DATA) | D4 |
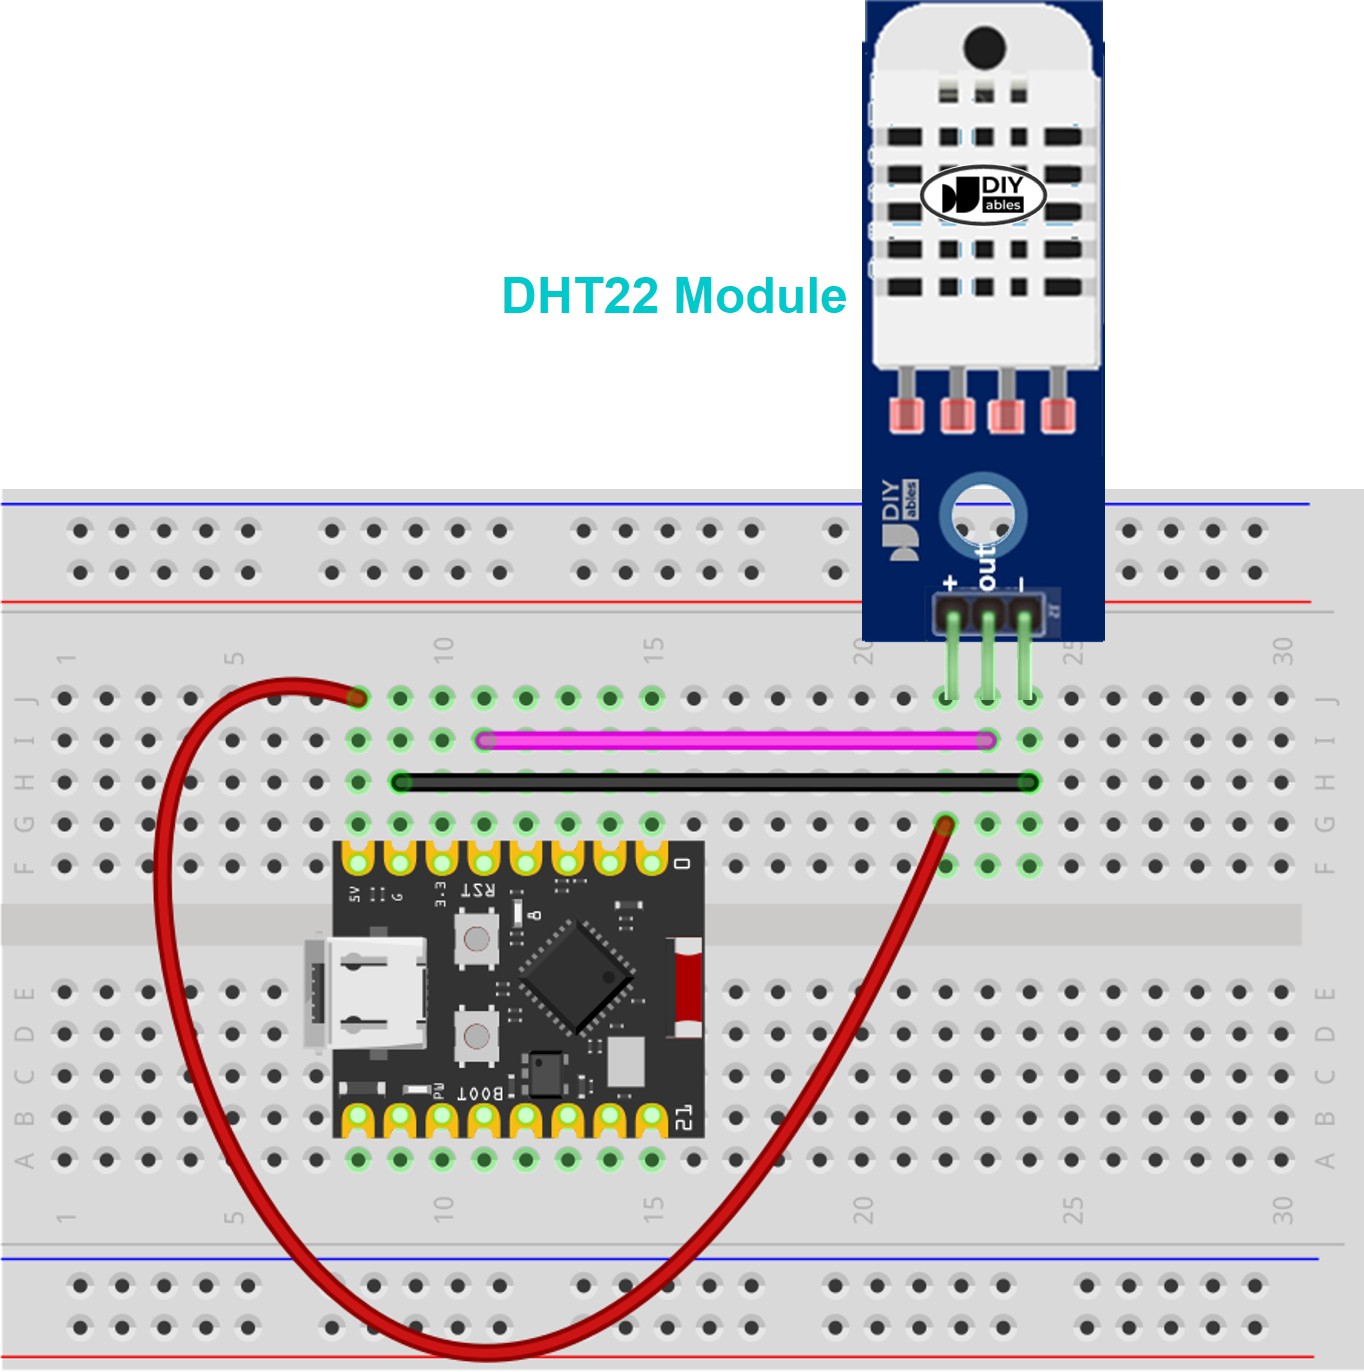
This image is created using Fritzing. Click to enlarge image
ESP32 C3 Super Mini Code - DHT11
This code reads temperature and humidity from the DHT11 sensor and displays the values on Serial Monitor:
ESP32 C3 Super Mini Code - DHT22
This code reads temperature and humidity from the DHT22 sensor with improved accuracy:
Important: The two code examples above differ by only one line - the sensor type definition (DHT11 vs DHT22).
Detailed Instructions
- New to ESP32 C3 Mini? Complete our Getting Started with ESP32 C3 Mini tutorial first to set up your development environment.
- Wire the components: Follow the wiring diagram above to connect your DHT sensor to ESP32 C3 Super Mini
- Connect USB cable: Plug your ESP32 C3 Super Mini into your computer using a Type-C cable
- Open Arduino IDE: Launch the Arduino IDE software on your computer
- Select board: Choose ESP32 C3 Super Mini from the board menu
- Select COM port: Choose the correct COM port for your ESP32 C3 Super Mini
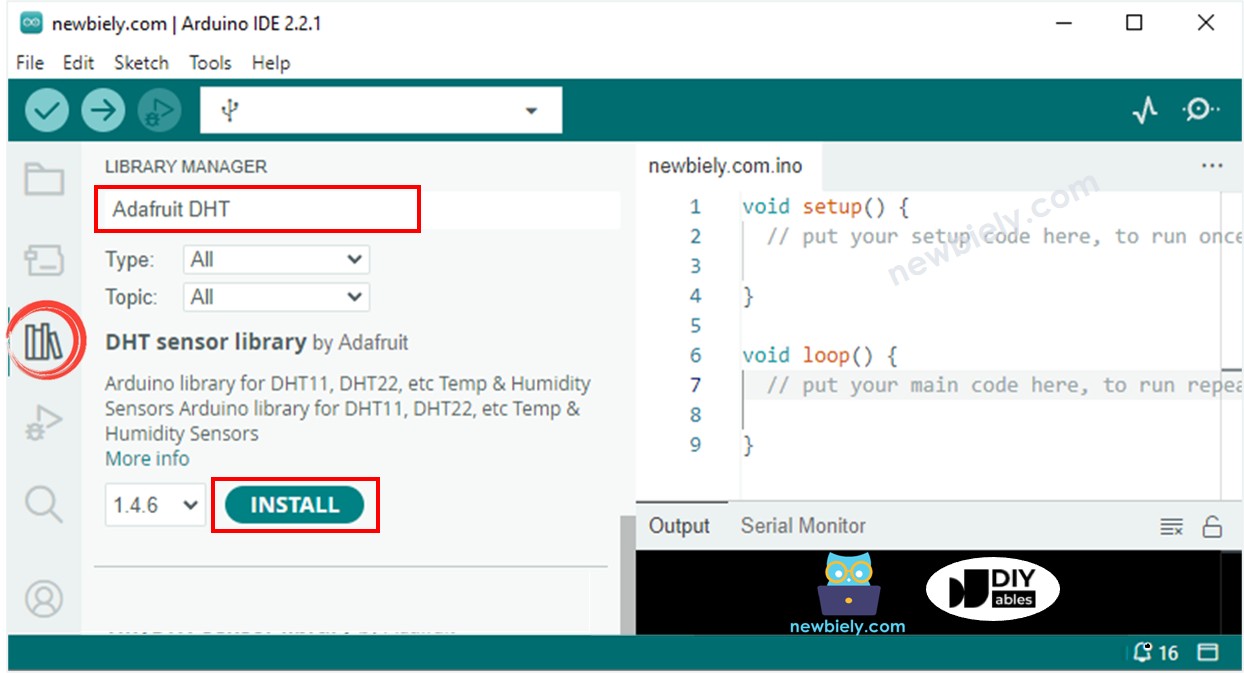
- Install DHT library: Click the Library Manager icon in the left sidebar
- Search for library: Type "Adafruit DHT" in the search box
- Install Adafruit DHT: Click Install on the DHT sensor library by Adafruit
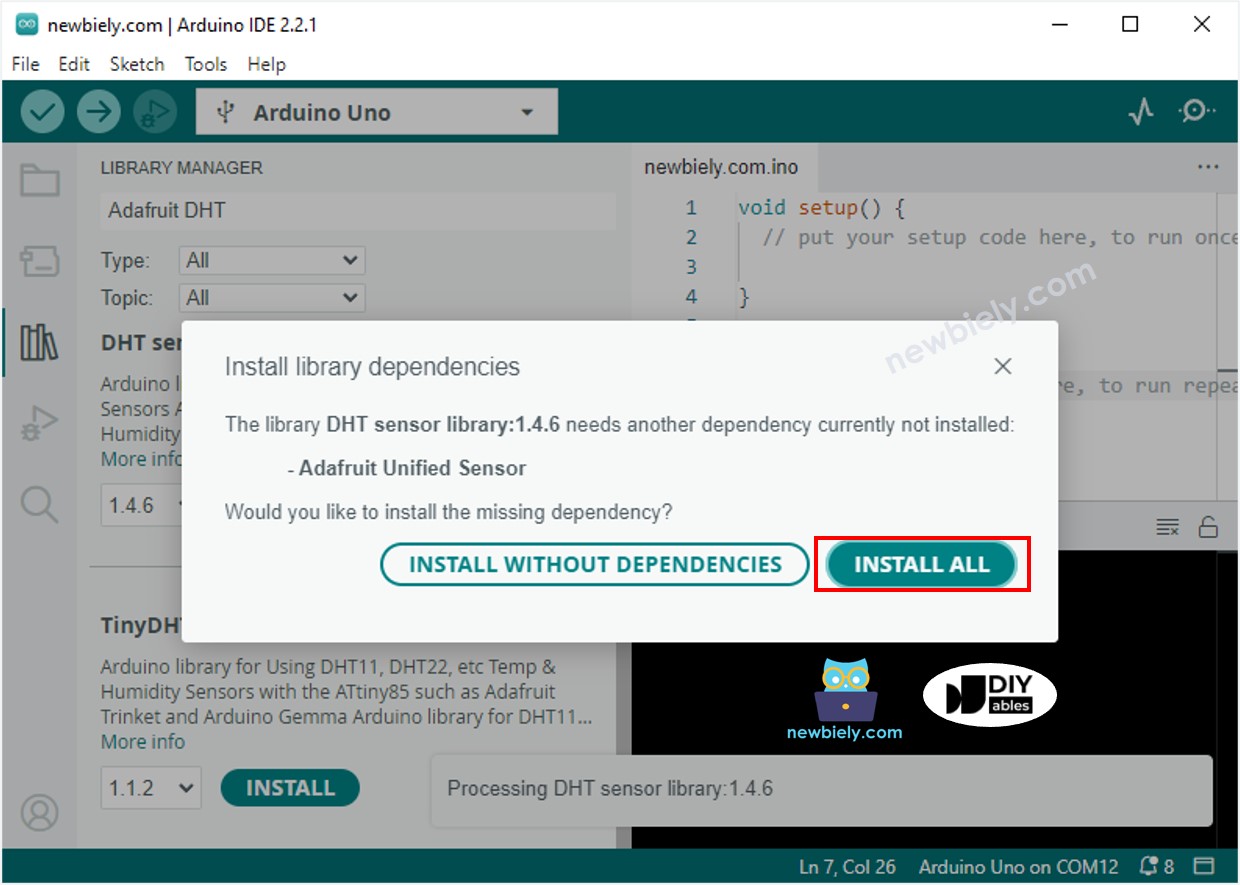
- Install dependencies: When prompted, click Install All to add required dependencies
- Copy the code: Select either the DHT11 or DHT22 code based on your sensor
- Upload code: Click the Upload button to program your ESP32 C3 Super Mini
- Open Serial Monitor: Set baud rate to 115200 to view sensor readings
- Test the sensor: Place the sensor near a heat source (like a coffee cup) to see values change
- Pro Tip: Wait 2-3 seconds between readings for stable measurements, as DHT sensors need time to stabilize.
Serial Monitor Output
After uploading the code, open the Serial Monitor at 115200 baud rate to see real-time temperature and humidity readings:
Application and Project Ideas
Here are practical projects you can build using DHT11 or DHT22 sensors with ESP32 C3 Super Mini:
- Home weather station: Monitor indoor temperature and humidity on a display
- Smart greenhouse controller: Automate watering and ventilation based on humidity levels
- Bathroom exhaust fan automation: Turn on fan automatically when humidity exceeds threshold
- Server room monitor: Alert when temperature rises above safe levels
- Smart thermostat: Create a WiFi-enabled temperature controller for home automation
- Data logger: Record environmental data to SD card for long-term analysis
- Comfort index calculator: Calculate heat index or dew point from sensor readings
Video Tutorial
Watch the video below for a visual walkthrough of this project.
Challenge Yourself
Take your ESP32 C3 Super Mini temperature humidity sensor project to the next level:
- Easy: Add an LED that lights up when temperature exceeds 25°C
- Easy: Display temperature in Celsius only or add a Fahrenheit conversion button
- Medium: Add a buzzer alarm that sounds when humidity drops below 30% or rises above 70%
- Medium: Create a web server to display sensor readings on your smartphone browser
- Advanced: Log temperature and humidity data to an SD card with timestamps
- Advanced: Send sensor data to a cloud platform like ThingSpeak or Blynk for remote monitoring
- Advanced: Build a complete climate control system that controls a fan and humidifier based on sensor readings