
ESP32 C3 Super Mini - SW520D Tilt Sensor
SW520D tilt sensors detect orientation changes and enable your ESP32 C3 Super Mini to create interactive, tilt-responsive projects like alarms that activate when objects are moved or servo motors that respond to orientation. This tutorial will show you how to connect and program a SW520D tilt sensor with your ESP32 C3 Super Mini board.
In this tutorial, you'll learn:
- What a SW520D tilt sensor is and how it detects tilt
- How to wire a SW520D tilt sensor to ESP32 C3 Super Mini
- How to program ESP32 C3 Super Mini to detect tilt
- How to read the SW520D digital output
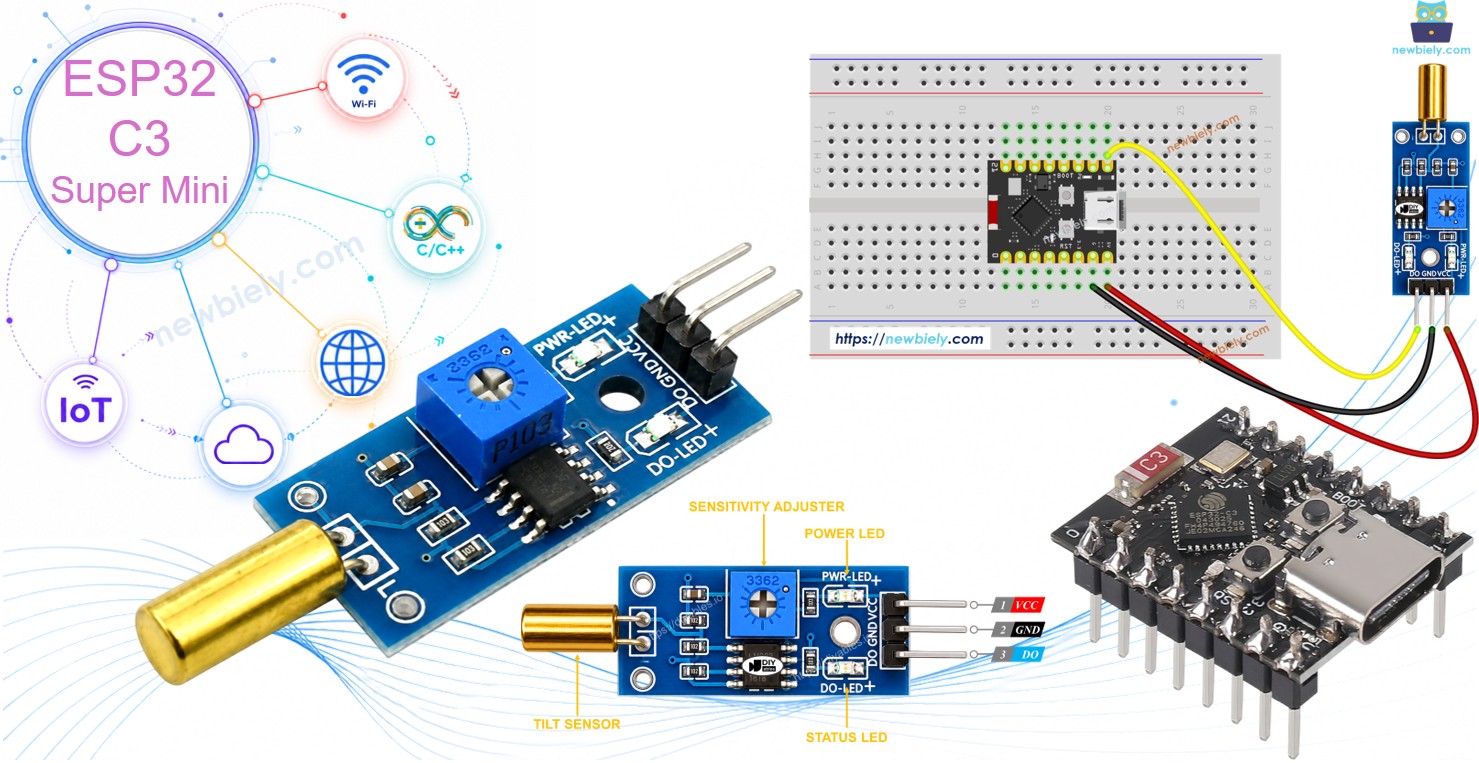
After completing this tutorial, you can modify the code to trigger actions when tilt is detected - turn on an LED, activate a relay to control lights, or rotate a servo motor based on tilt input.
Hardware Preparation
| 1 | × | ESP32 C3 Super Mini | |
| 1 | × | USB Cable Type-A to Type-C (for USB-A PC) | |
| 1 | × | USB Cable Type-C to Type-C (for USB-C PC) | |
| 1 | × | SW520D Tilt Sensor Module | |
| 1 | × | Breadboard | |
| 1 | × | Jumper Wires | |
| 1 | × | Optionally, 5V Power Adapter |
Or you can buy the following kits:
| 1 | × | DIYables Sensor Kit (18 sensors/displays) |
Additionally, some of these links are for products from our own brand, DIYables .
Overview of SW520D Tilt Sensor
The SW520D is a detection module that senses tilt and orientation changes using a simple ball switch mechanism. Inside the module, a small metal ball rolls between two electrical contacts depending on the angle of the sensor.
Key features:
- Simple digital output — no analog reading required
- Works with 3.3V to 5V microcontrollers like ESP32 C3 Super Mini
- LED indicators for power and tilt state
- Low cost and easy to integrate
- No calibration needed
The SW520D Tilt Sensor Pinout
The SW520D tilt sensor has three connection pins for easy wiring.
- VCC pin: Connect to power supply (3.3V to 5V)
- GND pin: Connect to ground (0V)
- DO pin: Digital output pin - outputs HIGH when the sensor is upright, LOW when the sensor is tilted - connect to ESP32 C3 Super Mini digital input pin
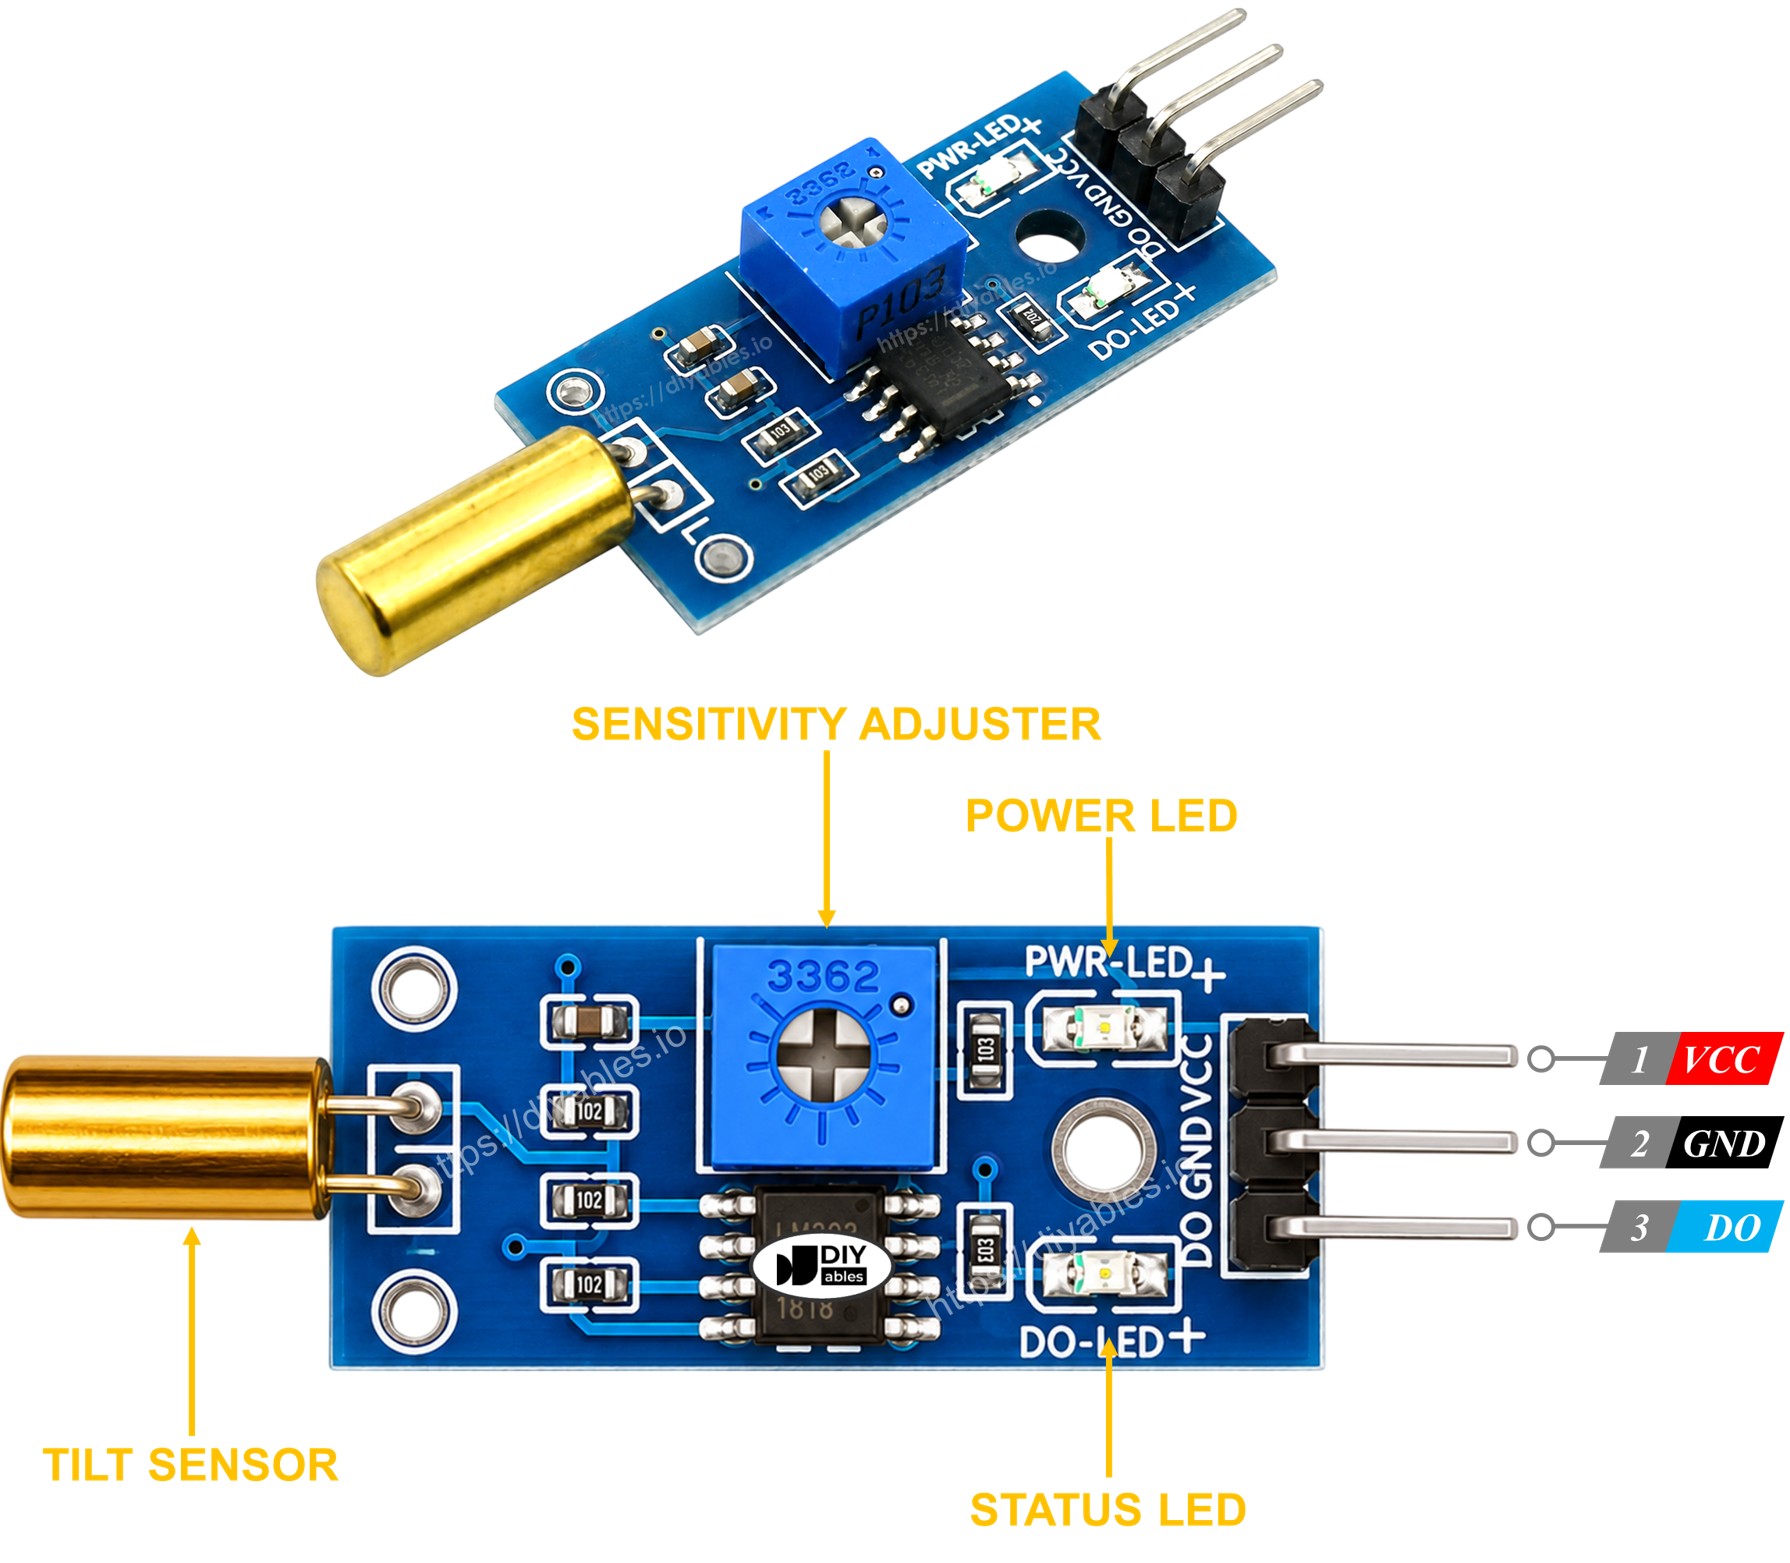
Additional features:
- Power LED indicator shows when the sensor is powered
- Status LED indicator reflects the tilt state — on when upright, off when tilted
How It Works
The SW520D tilt sensor uses a ball switch mechanism that your ESP32 C3 Super Mini can read.
Digital output behavior:
- When the sensor is upright: metal ball closes the contact → output pin goes HIGH
- When the sensor is tilted: metal ball opens the contact → output pin goes LOW
Wiring Diagram
Connect your SW520D tilt sensor to the ESP32 C3 Super Mini following the diagram below.
Important notes:
- Note: Double-check all connections before powering on to avoid damaging your components
- Note: The SW520D tilt sensor uses only 3 wires
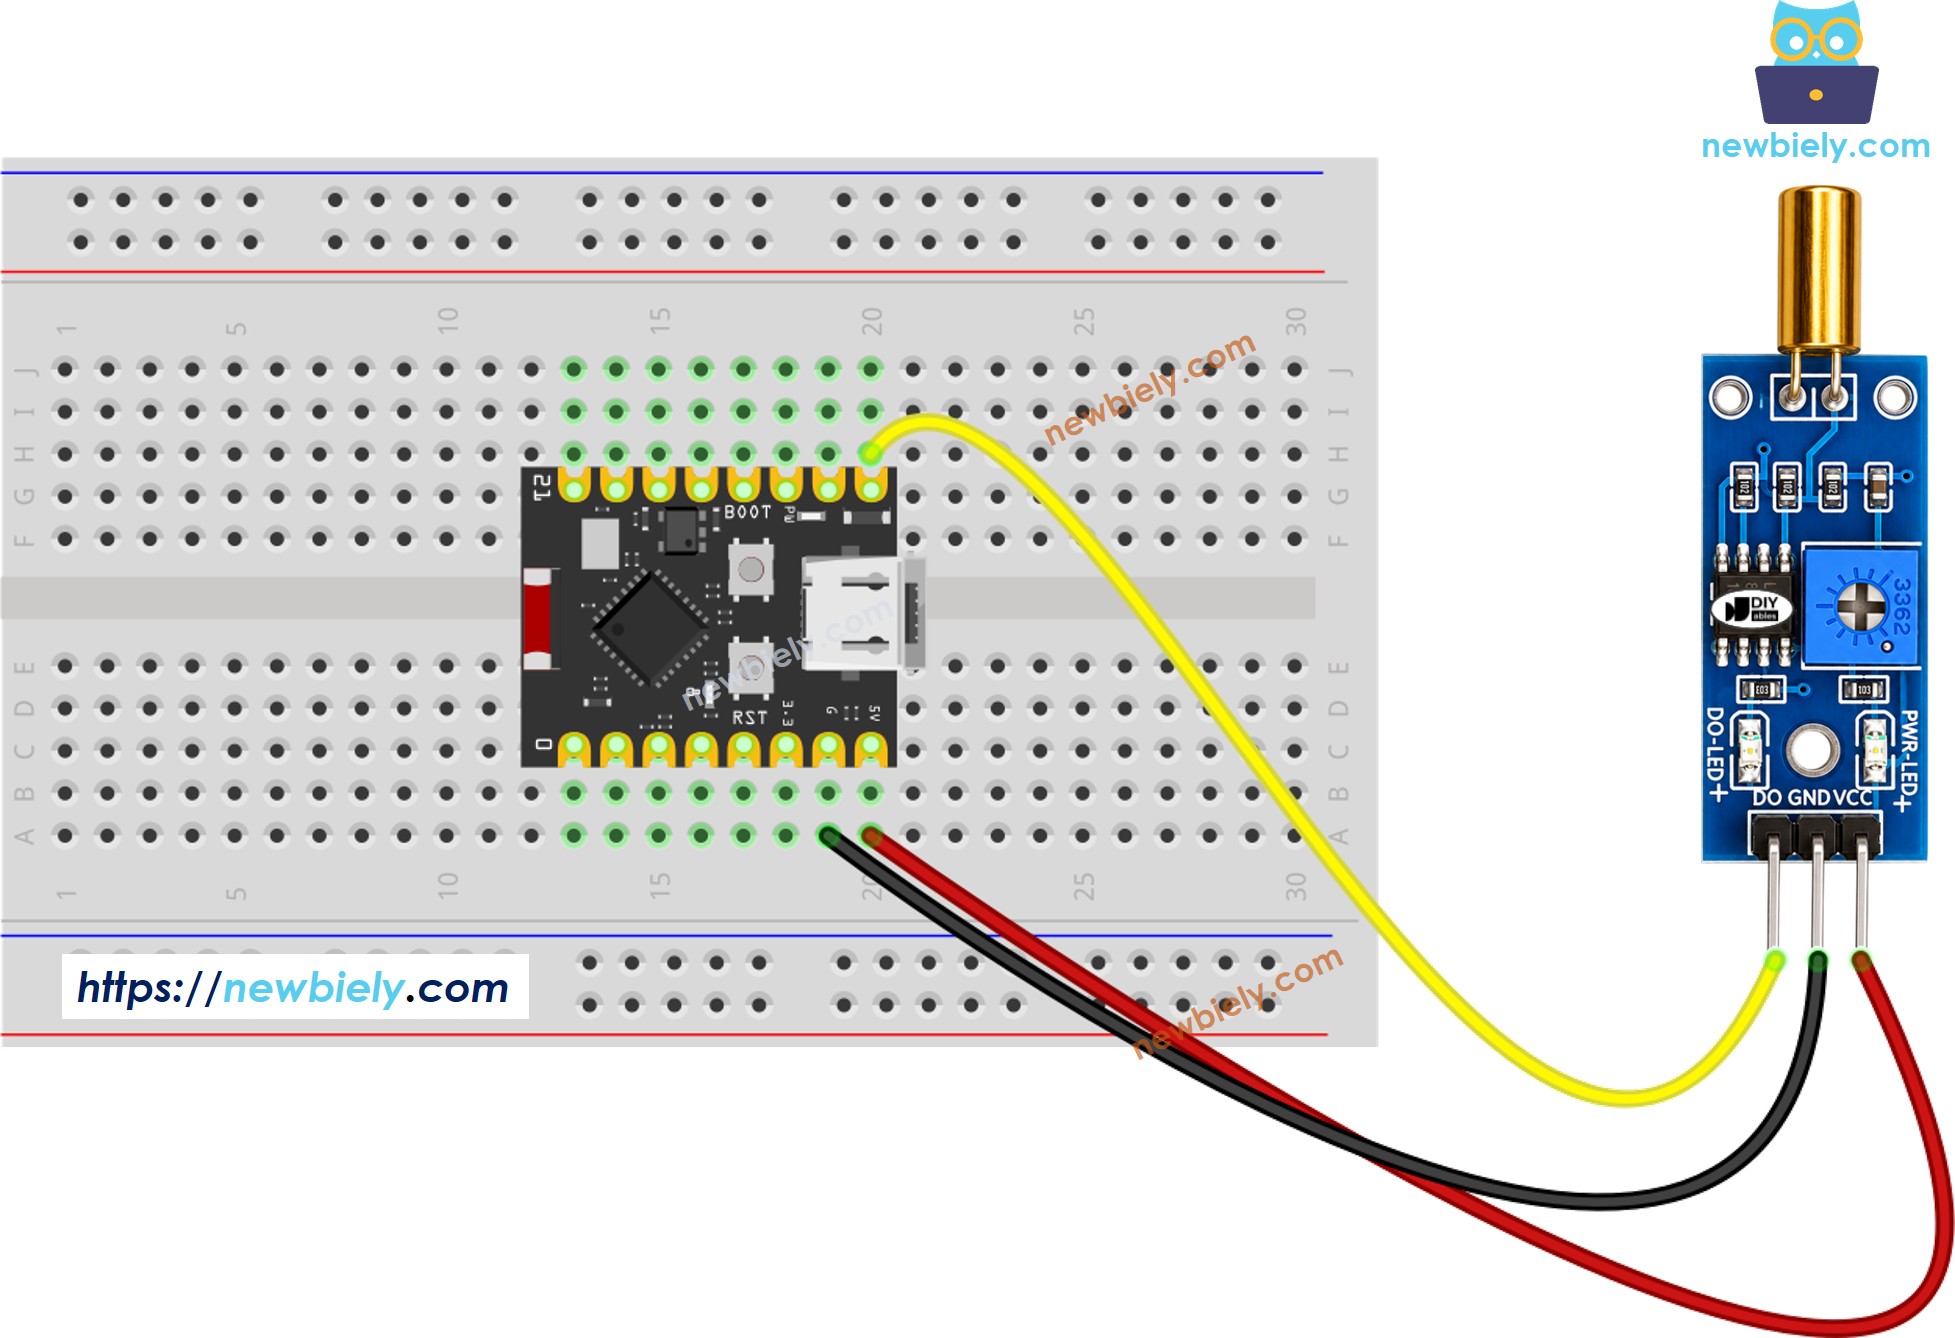
This image is created using Fritzing. Click to enlarge image
| SW520D Tilt Sensor Pin | ESP32 C3 Super Mini Pin |
|---|---|
| VCC | 3.3V or 5V |
| GND | GND |
| DO | D3 (GPIO3) |
How To Program For SW520D Tilt Sensor
Programming the ESP32 C3 Super Mini to read a SW520D tilt sensor involves two simple steps.
What the code does:
- Configures the ESP32 C3 Super Mini pin as a digital input
- Reads the tilt sensor state (HIGH or LOW)
- Determines if tilt is detected based on the pin state
- Displays the detection status on Serial Monitor
Step 1 - Initialize the pin:
Step 2 - Read the sensor state:
ESP32 C3 Super Mini Code - Detecting the tilt
Detailed Instructions
- New to ESP32 C3 Mini? Complete our Getting Started with ESP32 C3 Mini tutorial first to set up your development environment.
- Check the wiring: Verify all connections match the wiring diagram above
- Copy the code: Copy the provided code and open it in Arduino IDE
- Select your board: Choose ESP32 C3 Super Mini from the boards menu
- Upload the code: Click the Upload button to transfer code to your ESP32 C3 Super Mini
- Open Serial Monitor: Set baud rate to 115200 in the Serial Monitor
- Test the sensor: Tilt the SW520D sensor back and forth
- Observe the output: Check the Serial Monitor for tilt detection messages
Now you can customize the code to trigger actions when tilt is detected - activate an LED, control a relay to switch lights, or rotate a servo motor in response to tilt. Check the application ideas and challenge sections below for inspiration.
Application and Project Ideas
Use your ESP32 C3 Super Mini SW520D tilt sensor setup to create interactive tilt-responsive projects.
- Build a tilt-activated alarm system using a buzzer or relay module
- Create a tilt-controlled servo motor that responds to orientation changes
- Design an anti-tamper system for enclosures or equipment
- Build a tilt-triggered notification system using WiFi
- Create a simple digital level indicator with LED bar graph
Video Tutorial
Watch the video below for a visual walkthrough of this project.
Challenge Yourself
Take your ESP32 C3 Super Mini SW520D tilt sensor skills to the next level with these challenges.
- Easy: Add an LED that lights up when tilt is detected and turns off when upright
- Easy: Display the tilt state on an LCD screen instead of Serial Monitor
- Medium: Create a tilt counter that counts how many times the sensor has been tilted
- Medium: Combine the tilt sensor with a relay to build a tilt-activated switch
- Advanced: Build a multi-axis tilt detection system using multiple SW520D sensors
Troubleshooting
If your ESP32 C3 Super Mini SW520D tilt sensor isn't working properly, try these solutions.
Common issues and fixes:
- Check orientation: The SW520D is sensitive to its mounting angle — make sure it is installed in the correct upright position for reliable detection
- Reduce vibrations: Mount the tilt sensor on a stable, vibration-free surface — mechanical vibrations can cause false triggers
- Verify power supply: Ensure clean, stable power for consistent readings
- Check wiring: Verify all connections match the wiring diagram — loose or incorrect connections cause erratic behavior
- Test LED indicators: Power LED should be on constantly; status LED should reflect the current tilt state