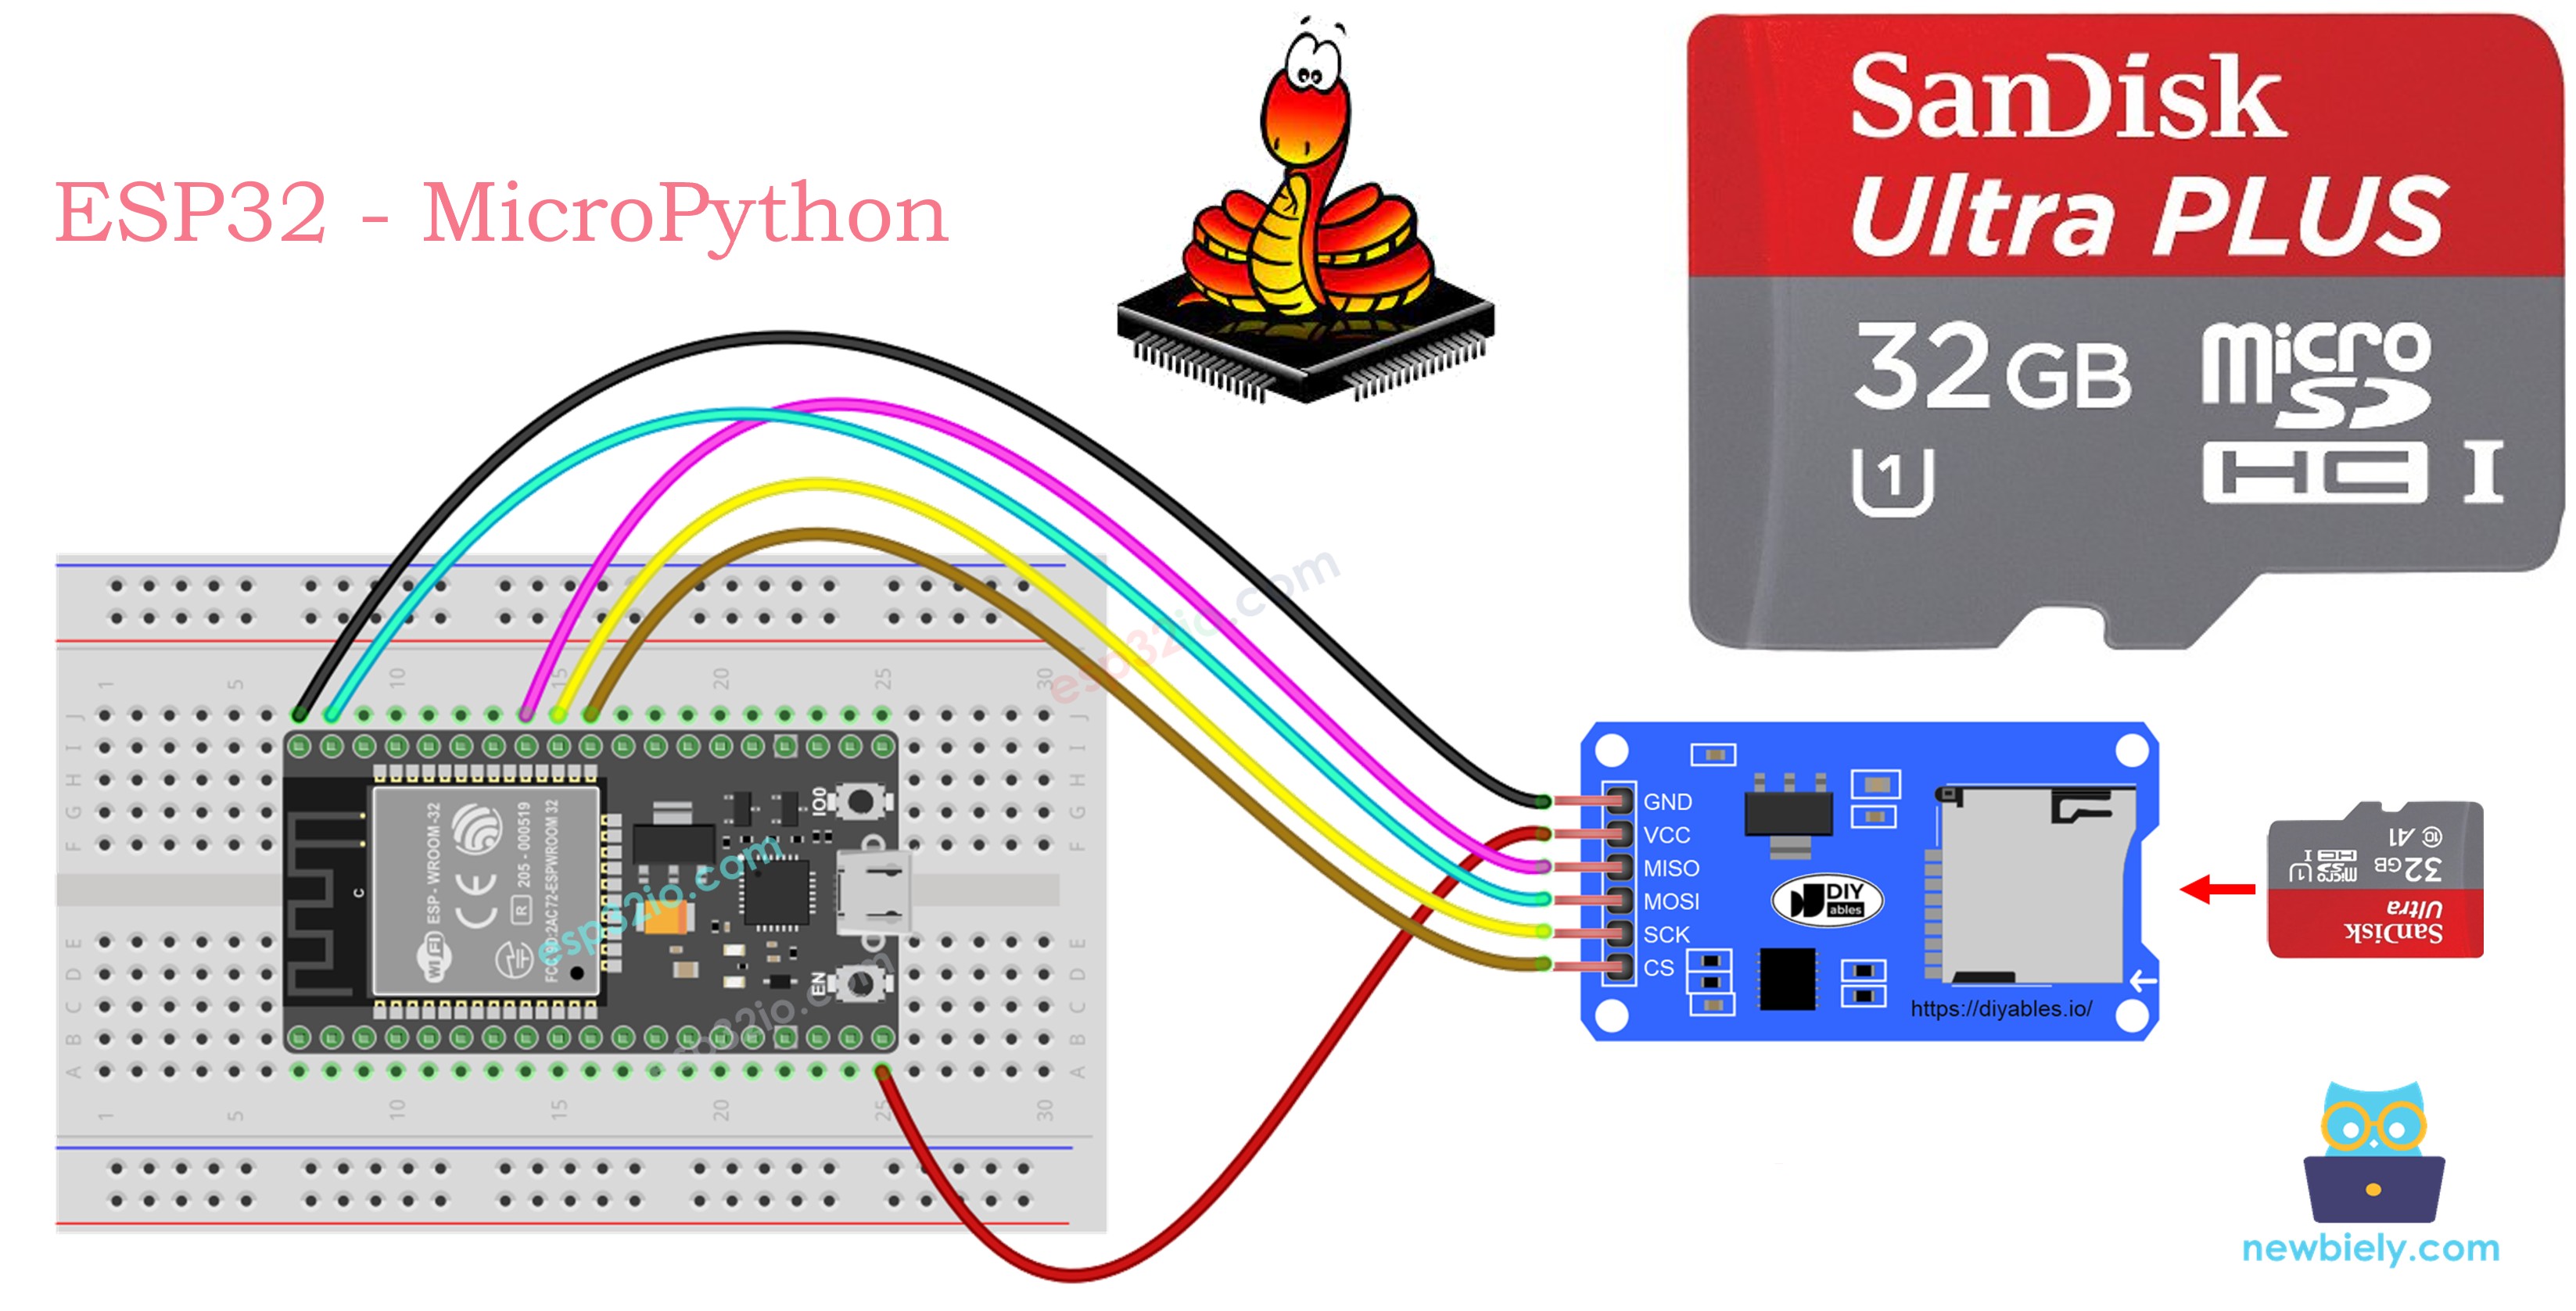
ESP32 MicroPython Micro SD Card
This guide walks you through interfacing a Micro SD Card with the ESP32 using MicroPython. You will learn how to:
- Open or create a file on the Micro SD Card with MicroPython on the ESP32.
- Save data to a file stored on the Micro SD Card.
- Read file contents one character at a time from the Micro SD Card.
- Process a file on the Micro SD Card by reading it line by line.
- Append new data to an existing file on the Micro SD Card.
- Overwrite the contents of a file on the Micro SD Card.
Hardware Preparation
Or you can buy the following kits:
| 1 | × | DIYables ESP32 Starter Kit (ESP32 included) | |
| 1 | × | DIYables Sensor Kit (18 sensors/displays) |
Additionally, some of these links are for products from our own brand, DIYables .
Overview of Micro SD Card Module
A Micro SD Card Module acts as an adapter that allows the ESP32 to communicate with a Micro SD Card via the SPI protocol. It serves as a connector between the microcontroller and the storage card.
Pinout
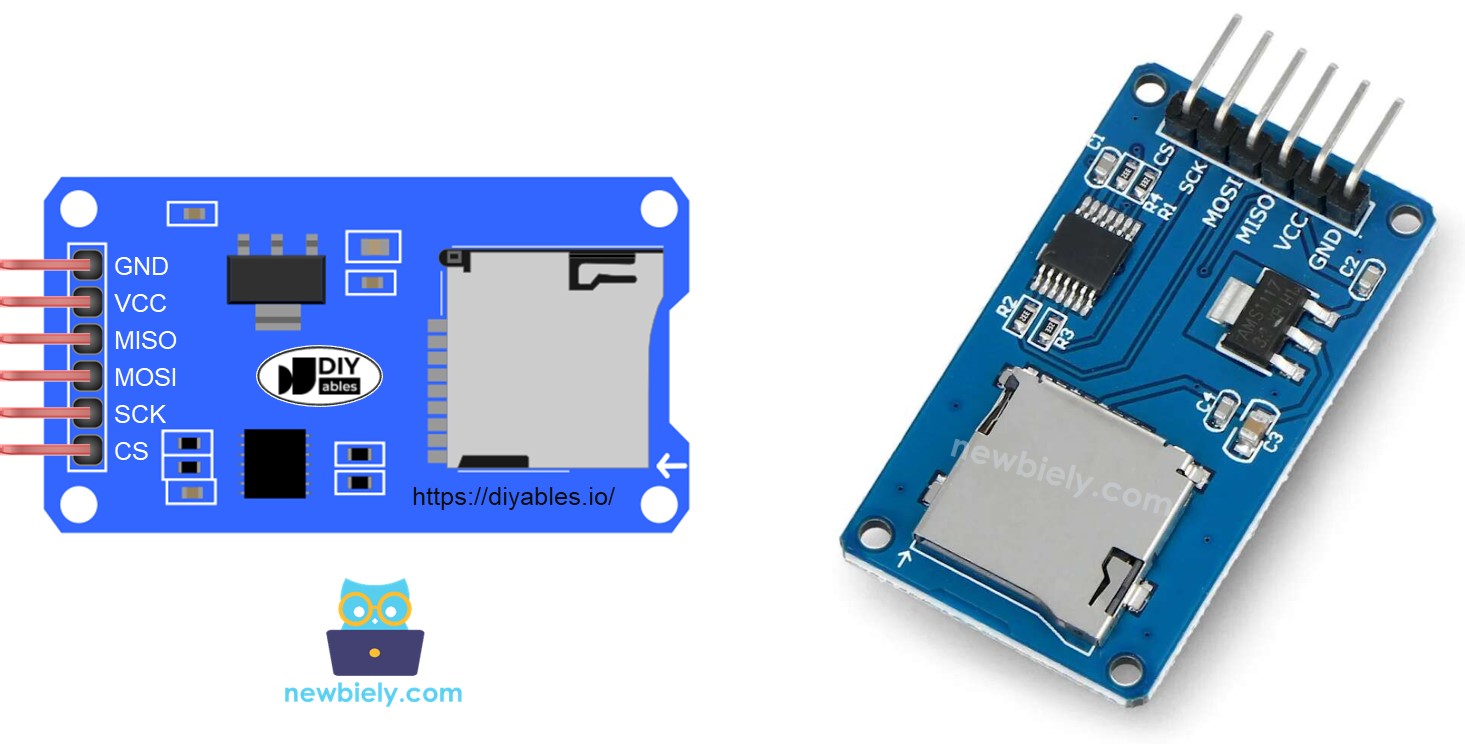
The Micro SD Card Module has 6 pins:
- VCC pin: powers the module, connect to the ESP32's 5V output.
- GND pin: ground reference, connect to the ESP32's GND.
- MISO pin: (Master In Slave Out) data line from SD card to ESP32.
- MOSI pin: (Master Out Slave In) data line from ESP32 to SD card.
- SCK pin: SPI clock signal, connect to the ESP32's SCK.
- SS pin: (Slave Select) chip select pin, assigned in the MicroPython code.
Preparation
- Plug the Micro SD Card into a USB 3.0 SD Card Reader and connect it to your PC
- Verify that the Micro SD Card uses FAT16 or FAT32 format (search online for instructions if needed)
Wiring Diagram
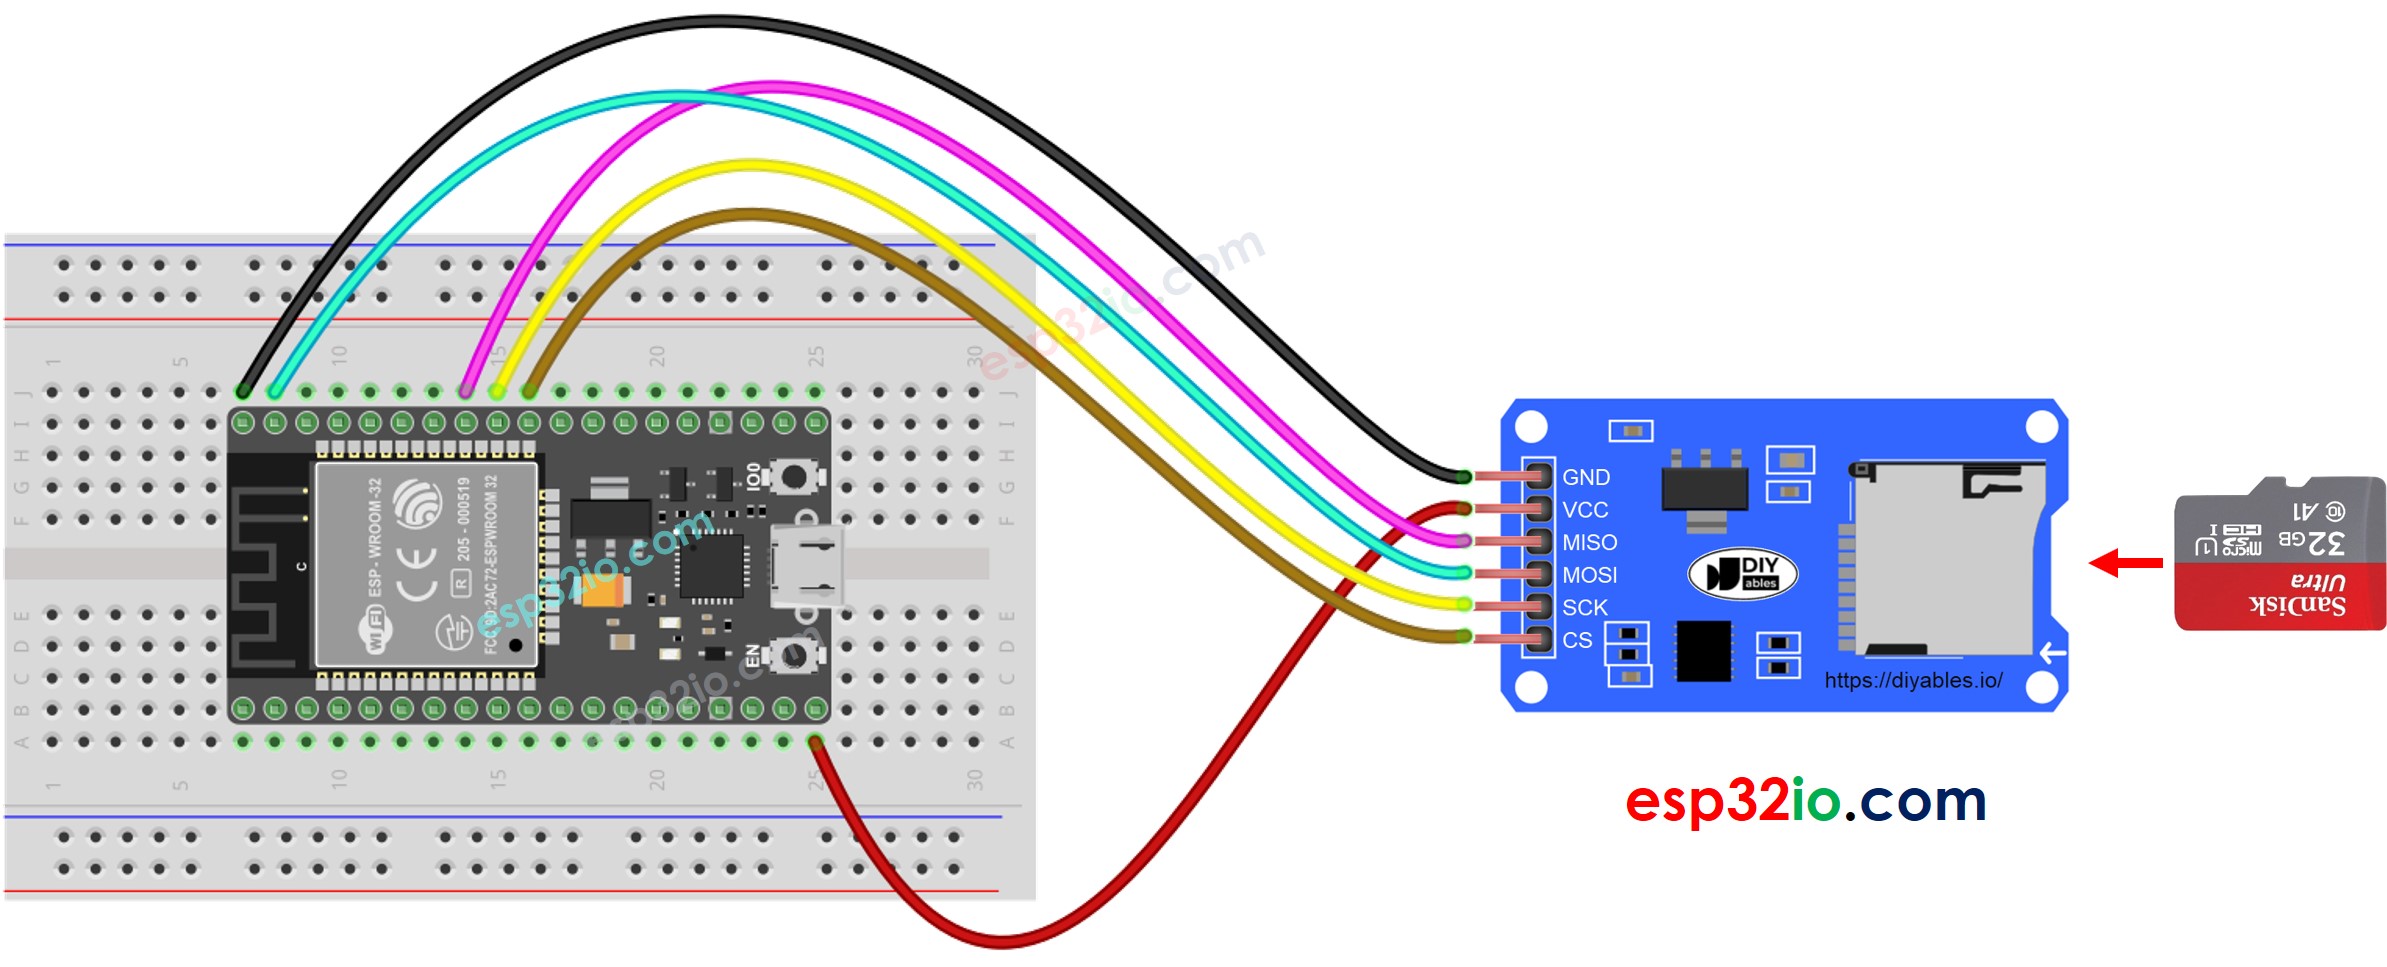
This image is created using Fritzing. Click to enlarge image
The wiring table below shows how to connect the Micro SD Card Module to the ESP32:
| Micro SD Card Module | ESP32 |
|---|---|
| VCC | 5V |
| GND | GND |
| MISO | GPIO19 |
| MOSI | GPIO23 |
| SCK | GPIO18 |
| CS | GPIO5 |
※ NOTE THAT:
If your shield (such as an Ethernet shield) already has a built-in Micro SD Card slot, you can skip the external module and simply insert the card directly into the shield.
ESP32 MicroPython - Opening and Creating a File on Micro SD Card
ESP32 MicroPython Code
Detailed Instructions
Here's instructions on how to set up and run your MicroPython code on the ESP32 using Thonny IDE:
- Make sure Thonny IDE is installed on your computer.
- Confirm that MicroPython firmware is loaded on your ESP32 board.
- If this is your first time using an ESP32 with MicroPython, check out the ESP32 MicroPython Getting Started guide for step-by-step instructions.
- Insert the Micro SD Card to the Micro SD Card module.
- Do the wiring between the Micro SD Card module and ESP32 as the above wiring diagram.
- Connect the ESP32 board to your computer with a USB cable.
- Open Thonny IDE on your computer.
- In Thonny IDE, go to Tools Options.
- Under the Interpreter tab, choose MicroPython (ESP32) from the dropdown menu.
- Make sure the correct port is selected. Thonny IDE usually detects it automatically, but you might need to select it manually (like COM3 on Windows or /dev/ttyACM0 on Linux).
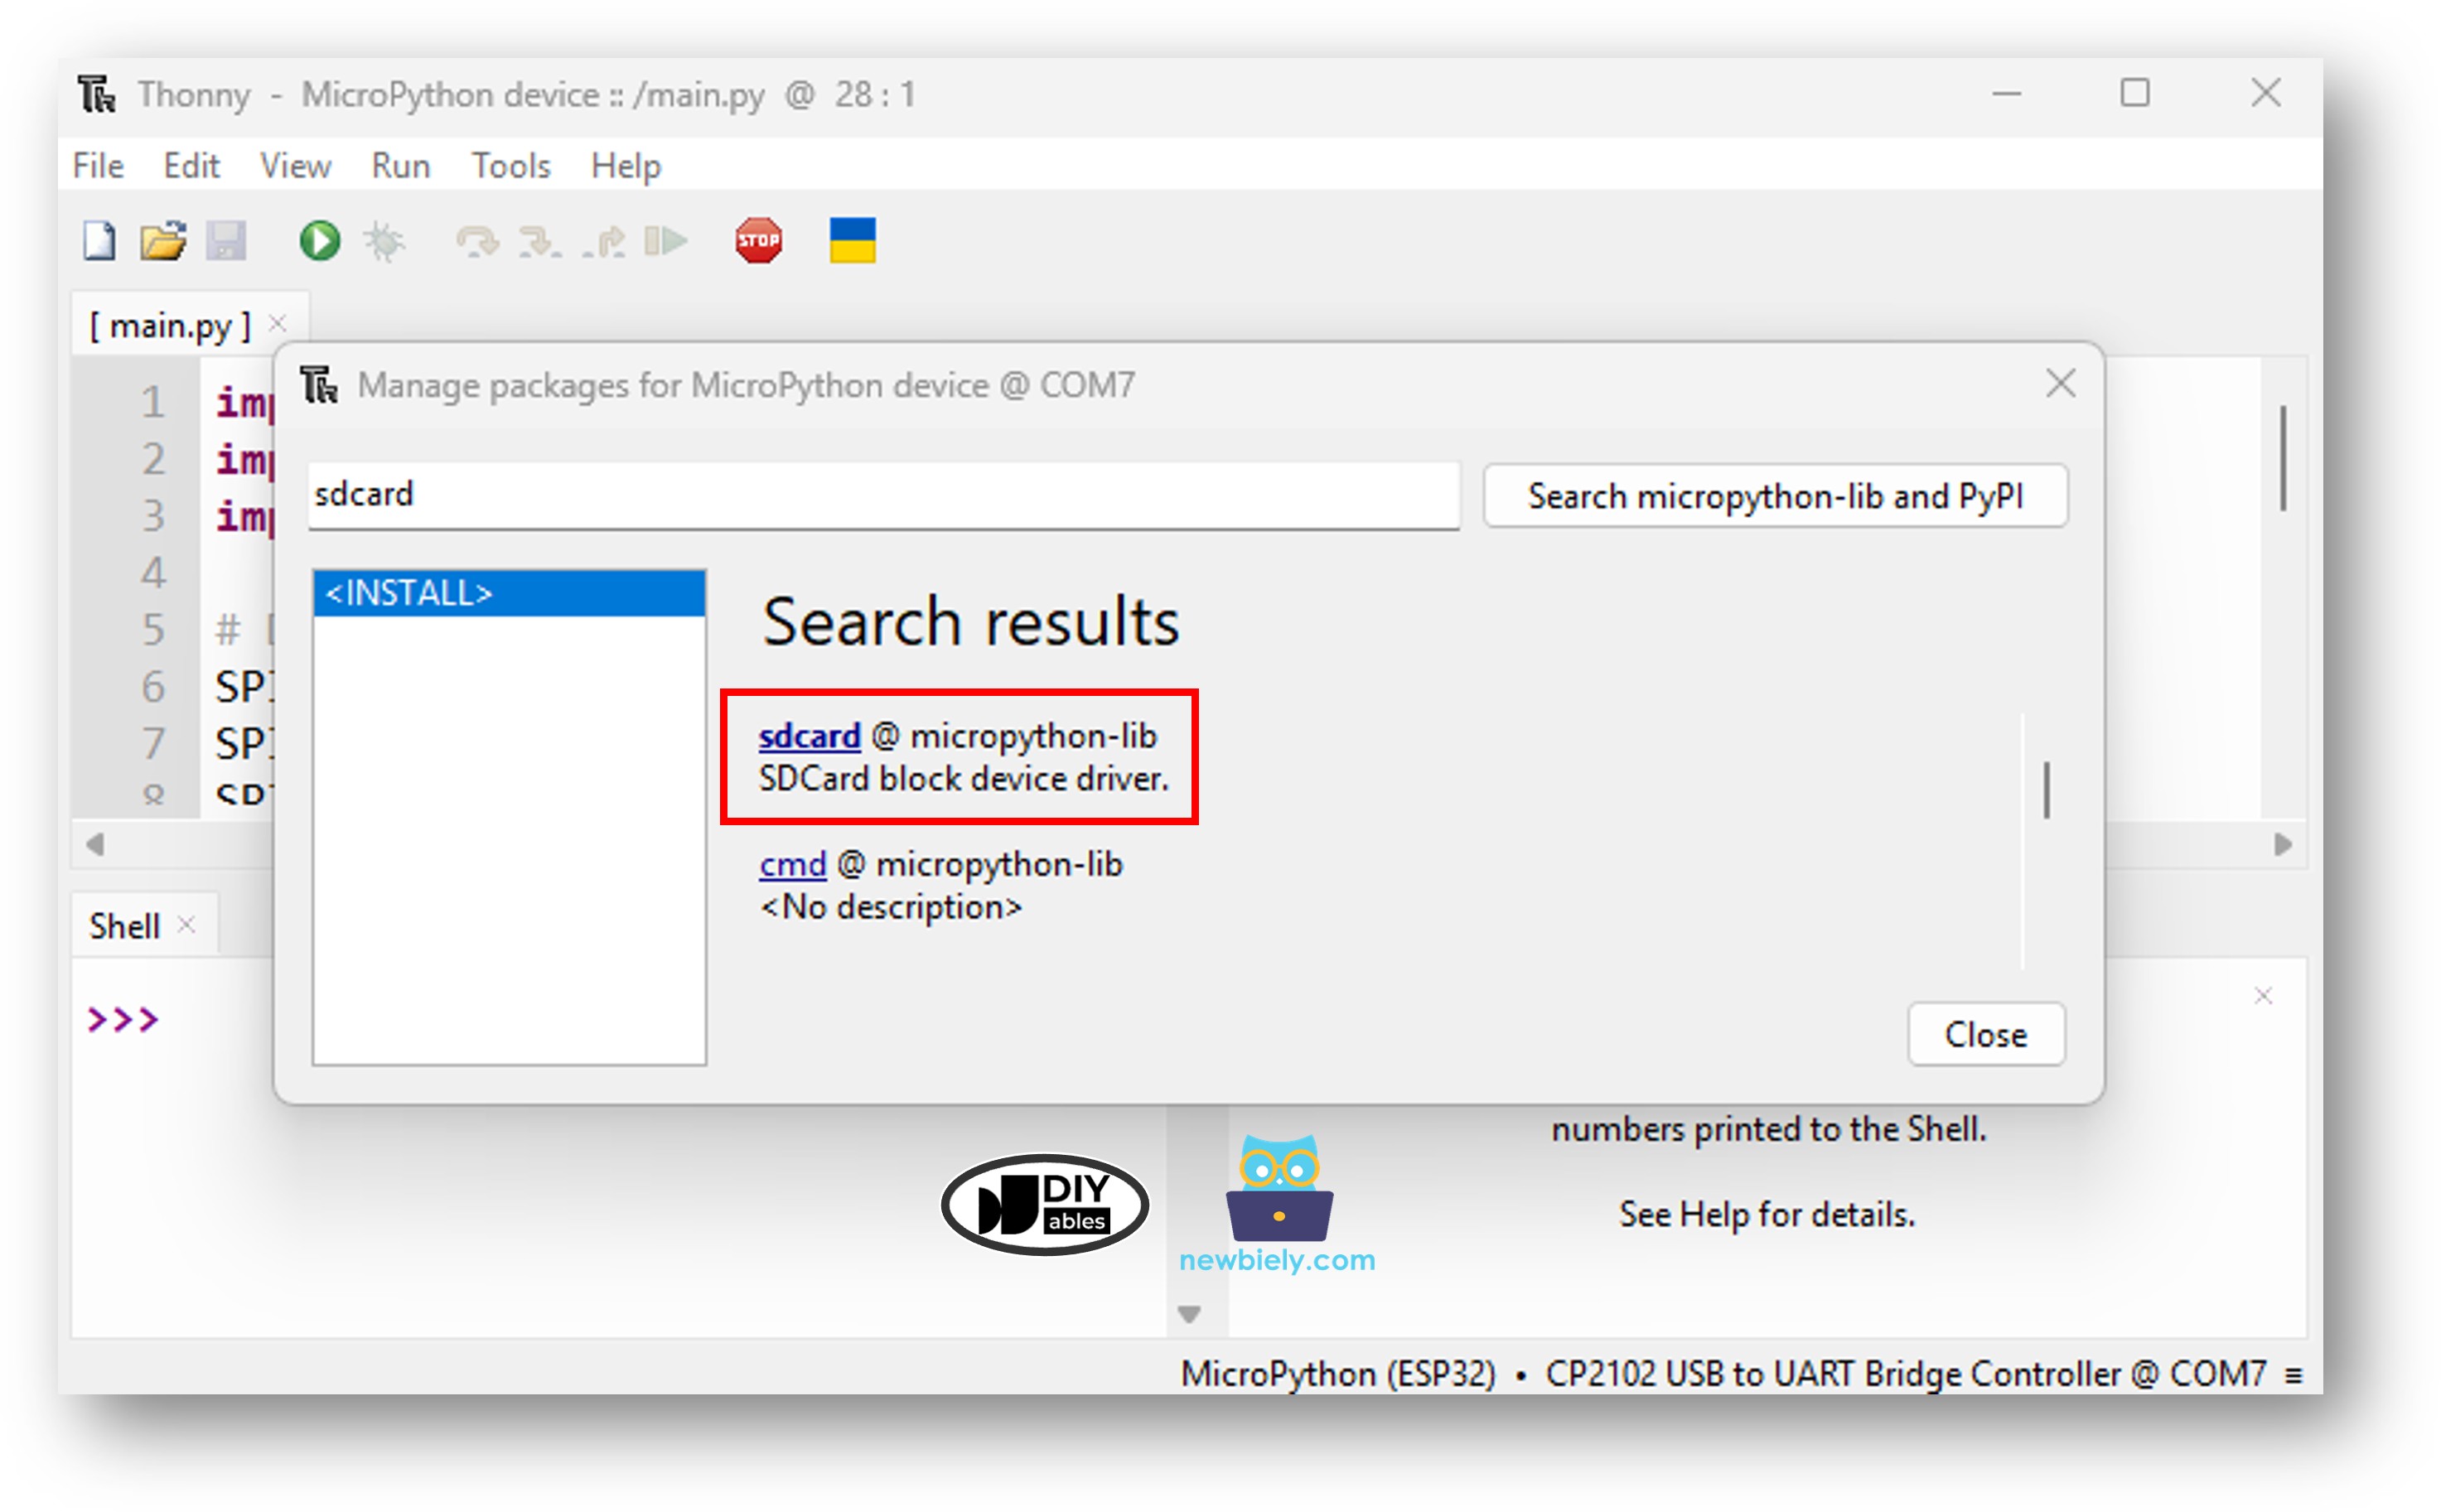
- Navigate to the Tools Manage packages on the Thonny IDE.
- Search "sdcard", then find the sdcard library provided by micropython-lib.
- Click on sdcard, then click Install button to install the SD card library.
- Copy the provided MicroPython code and paste it into Thonny's editor.
- Save the code to your ESP32 by:
- Clicking the Save button or pressing Ctrl+S.
- In the save dialog, choose MicroPython device.
- Name the file main.py.
- Click the green Run button (or press F5) to execute the script.
- Check out the message in the Shell at the bottom of Thonny.
- The result on the Shell for the first run
- The result on the Shell for the next runs
- Detach the Micro SD Card from the module
- Insert the Micro SD Card to an USB SD Card reader
- Connect the USB SD Card reader to the PC
- Check if the file exists or not
ESP32 MicroPython - Writing and Reading Data on Micro SD Card
The following MicroPython code performs two operations:
- Saves data into a file on the SD card
- Reads the file content character-by-character and displays it in the Shell
- The Shell displays the file content:
※ NOTE THAT:
By default, new data is appended at the end of the file. If you restart the ESP32 using the same code, the text gets added again, so the Shell output will look like this:
You can also remove the Micro SD Card from the module and view its contents on your PC (a USB SD Card reader is required)
ESP32 MicroPython - Reading a File Line by Line from Micro SD Card
- The result on the Shell
※ NOTE THAT:
Additional lines may appear in the Shell if the file already contains data from earlier runs.
ESP32 MicroPython - Overwriting a File on Micro SD Card
Since data is appended by default, the easiest approach to overwrite a file is to remove the existing file first and then create a fresh one with the same name.
- The result on the Shell
- Restart the ESP32
- Verify whether the file content in the Shell was replaced or appended.
Alternatively, you can remove the Micro SD Card from the module and inspect the file on your PC (a USB SD Card reader is required)