ESP32 MicroPython MQ3 Alcohol Sensor
This tutorial guides you through interfacing the MQ3 alcohol sensor with an ESP32 using MicroPython programming to detect and measure ethanol and alcohol vapor concentrations. In detail, we will learn:
- How to connect the MQ3 alcohol sensor with ESP32
- How to write MicroPython code for ESP32 to read data from the MQ3 alcohol sensor
Hardware Preparation
Or you can buy the following kits:
| 1 | × | DIYables ESP32 Starter Kit (ESP32 included) | |
| 1 | × | DIYables Sensor Kit (18 sensors/displays) |
Additionally, some of these links are for products from our own brand, DIYables .
Overview of MQ3 Alcohol Sensor
The MQ3 alcohol sensor is designed to detect ethanol and alcohol vapor in the surrounding air. It uses Metal Oxide Semiconductor (MOS) technology, where a Tin Dioxide (SnO2) sensing element changes resistance when exposed to alcohol molecules. The sensor features both a digital output pin and an analog output pin for sending signals.
The MQ3 sensor is commonly used in breathalyzer devices, alcohol detection systems, DUI detection equipment, and environmental alcohol vapor monitoring.
Pinout
The MQ3 alcohol sensor module has four pins:
- VCC pin: Connect this pin to the VCC (5V).
- GND pin: Connect this pin to the GND (0V).
- DO pin: This is the digital output pin. It goes LOW when alcohol vapor is detected and HIGH when no alcohol is present. You can adjust the detection threshold using the onboard potentiometer.
- AO pin: This is the analog output pin, which outputs a voltage that varies based on the alcohol concentration. Higher alcohol levels increase the voltage, while lower alcohol levels decrease it.
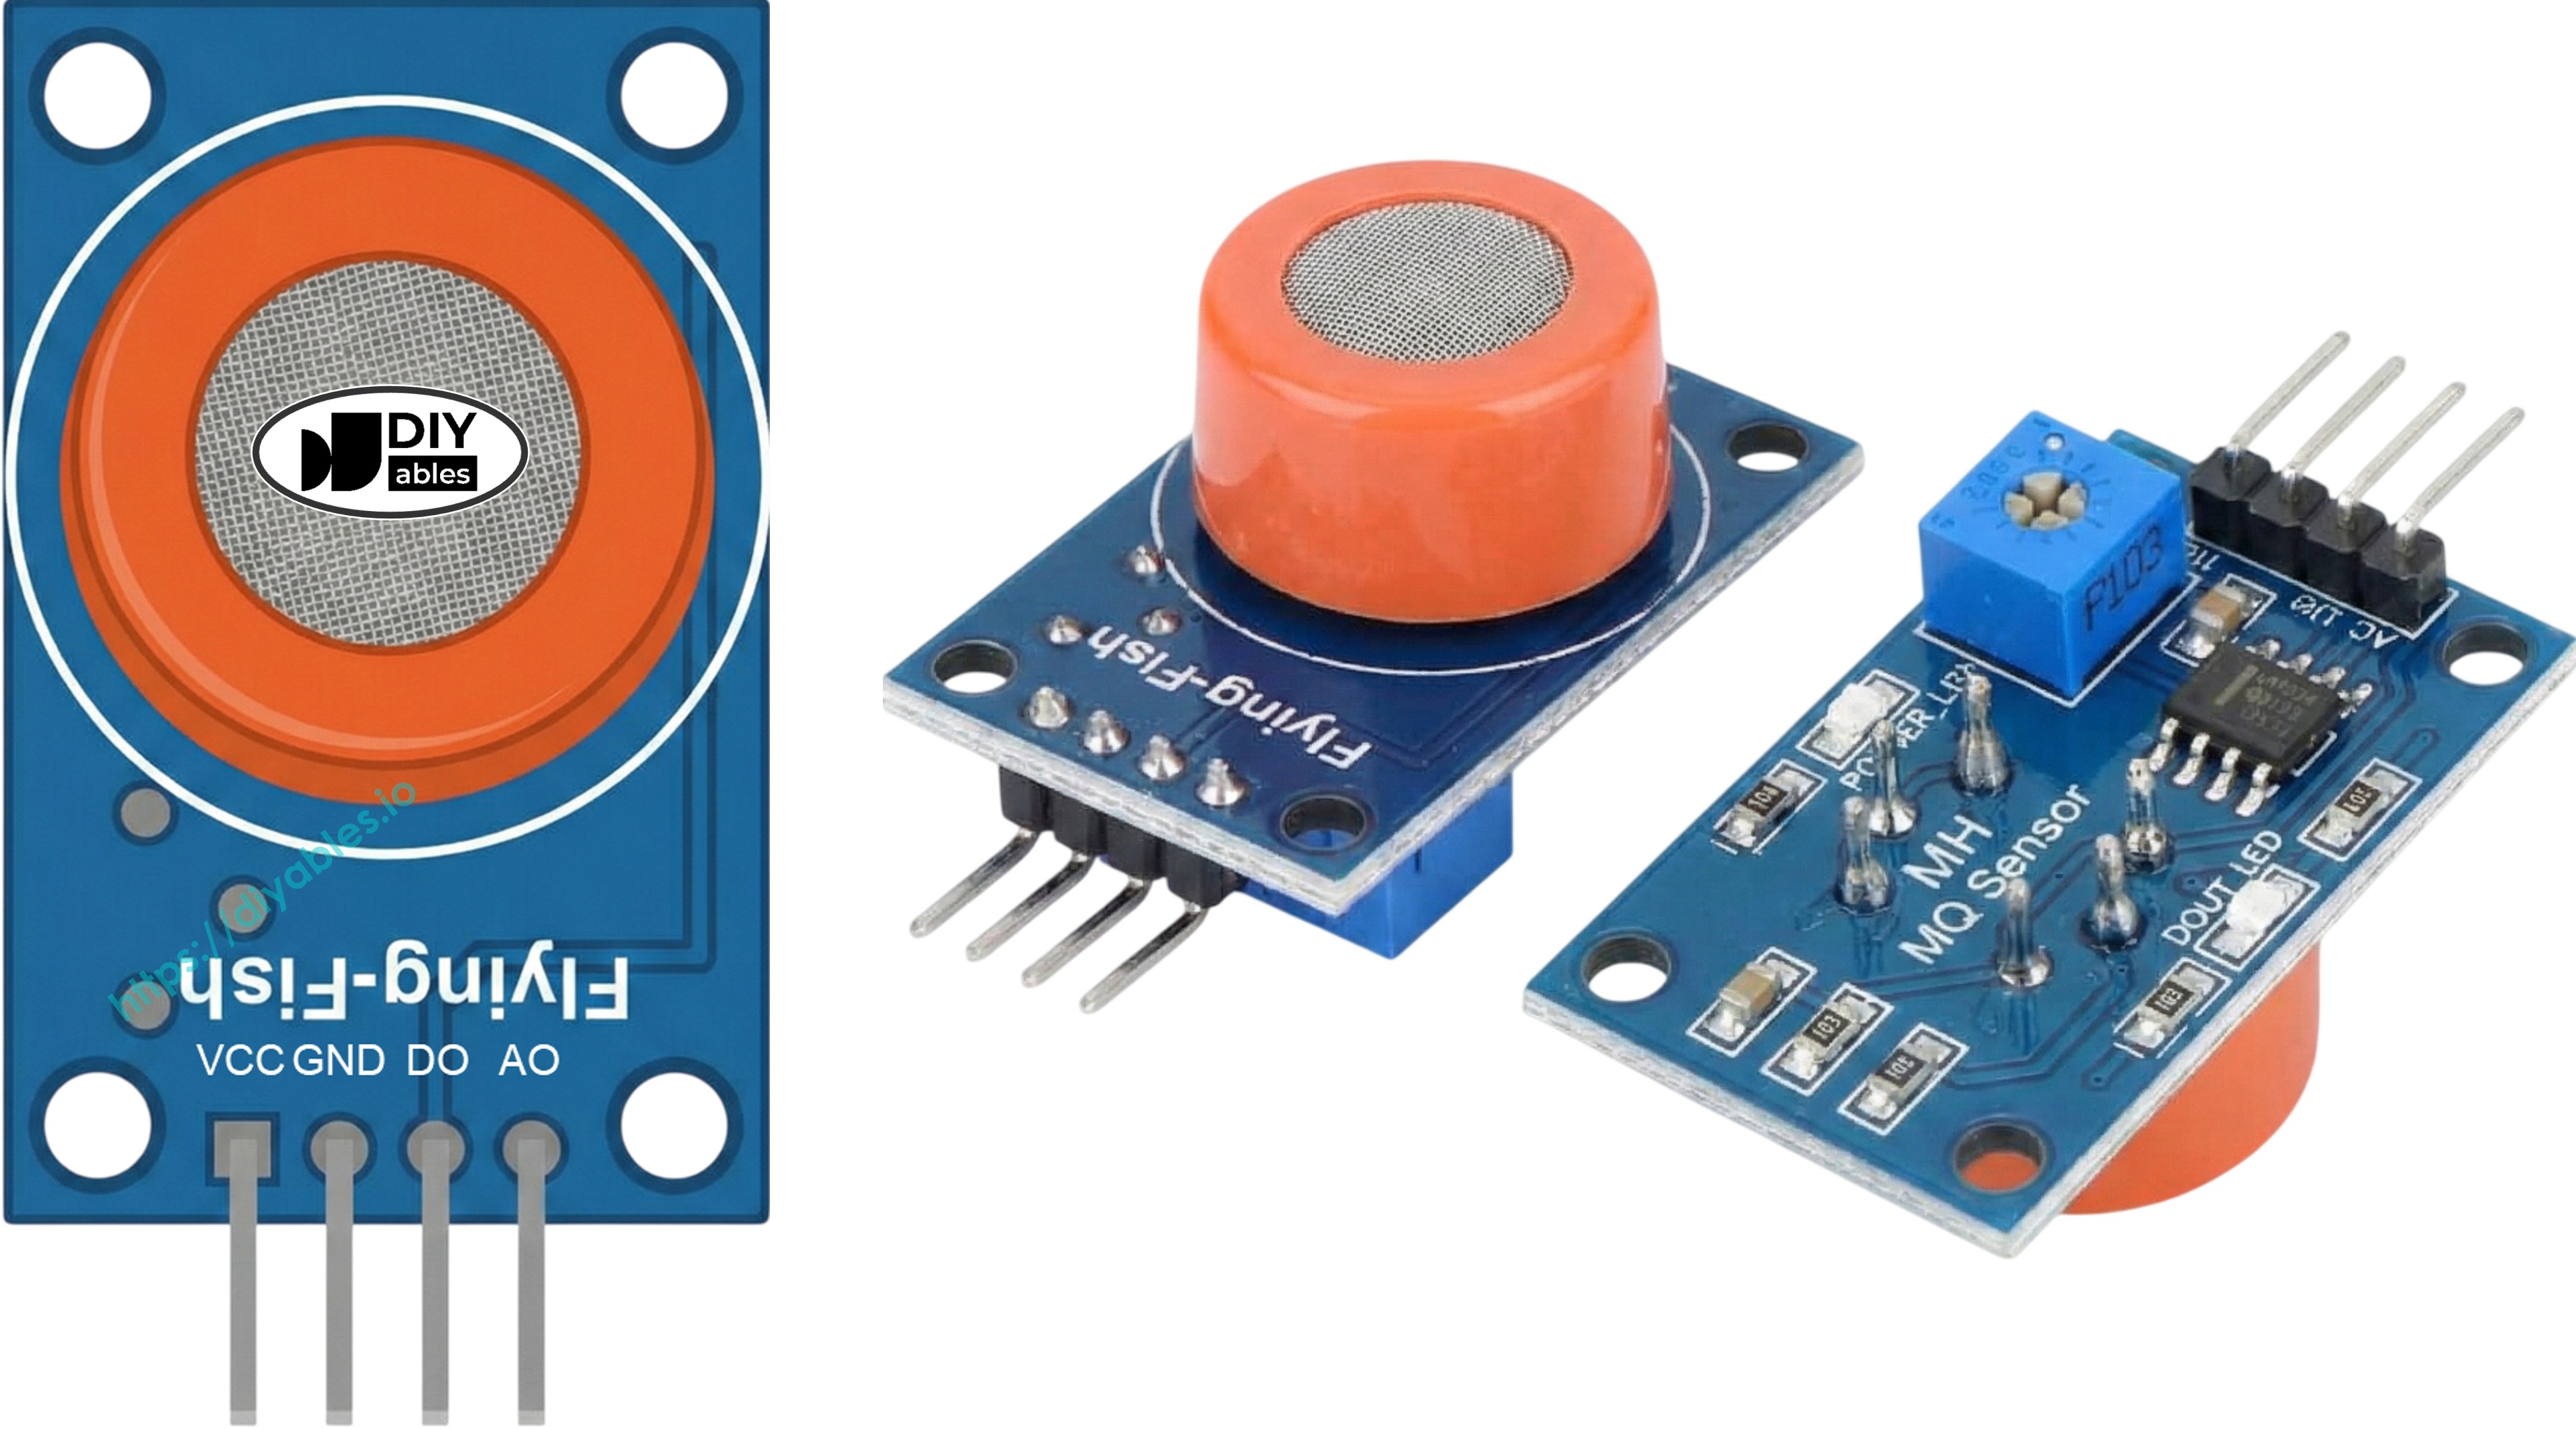
The sensor also has two LED indicators:
- PWR-LED: Indicates that the sensor is powered on.
- DO-LED: Lights up when alcohol is detected according to the DO pin value, and turns off when no alcohol is detected.
How It Works
Regarding the DO pin:
- The module has a potentiometer to adjust its sensitivity to alcohol levels.
- When the alcohol level exceeds the set threshold, the sensor's output pin goes LOW, and the DO-LED light turns on.
- When the alcohol level is below the set threshold, the sensor's output pin goes HIGH, and the DO-LED light turns off.
For the AO pin:
- As the alcohol concentration increases, the voltage rises.
- As the alcohol concentration decreases, the voltage falls.
The potentiometer does not affect the value on the AO pin.
The MQ3 Sensor Warm-up
The MQ3 alcohol sensor requires a warm-up period before use. If the sensor has not been used for over a month, allow it to warm up for 24-48 hours to ensure accurate readings. If it has been used recently, a warm-up of 5-10 minutes is sufficient. Initially, the readings may be high, but they will stabilize over time.
To warm up the MQ3 sensor, connect its VCC and GND pins to a power source or to the VCC and GND pins on an ESP32, and let it remain connected for the required time.
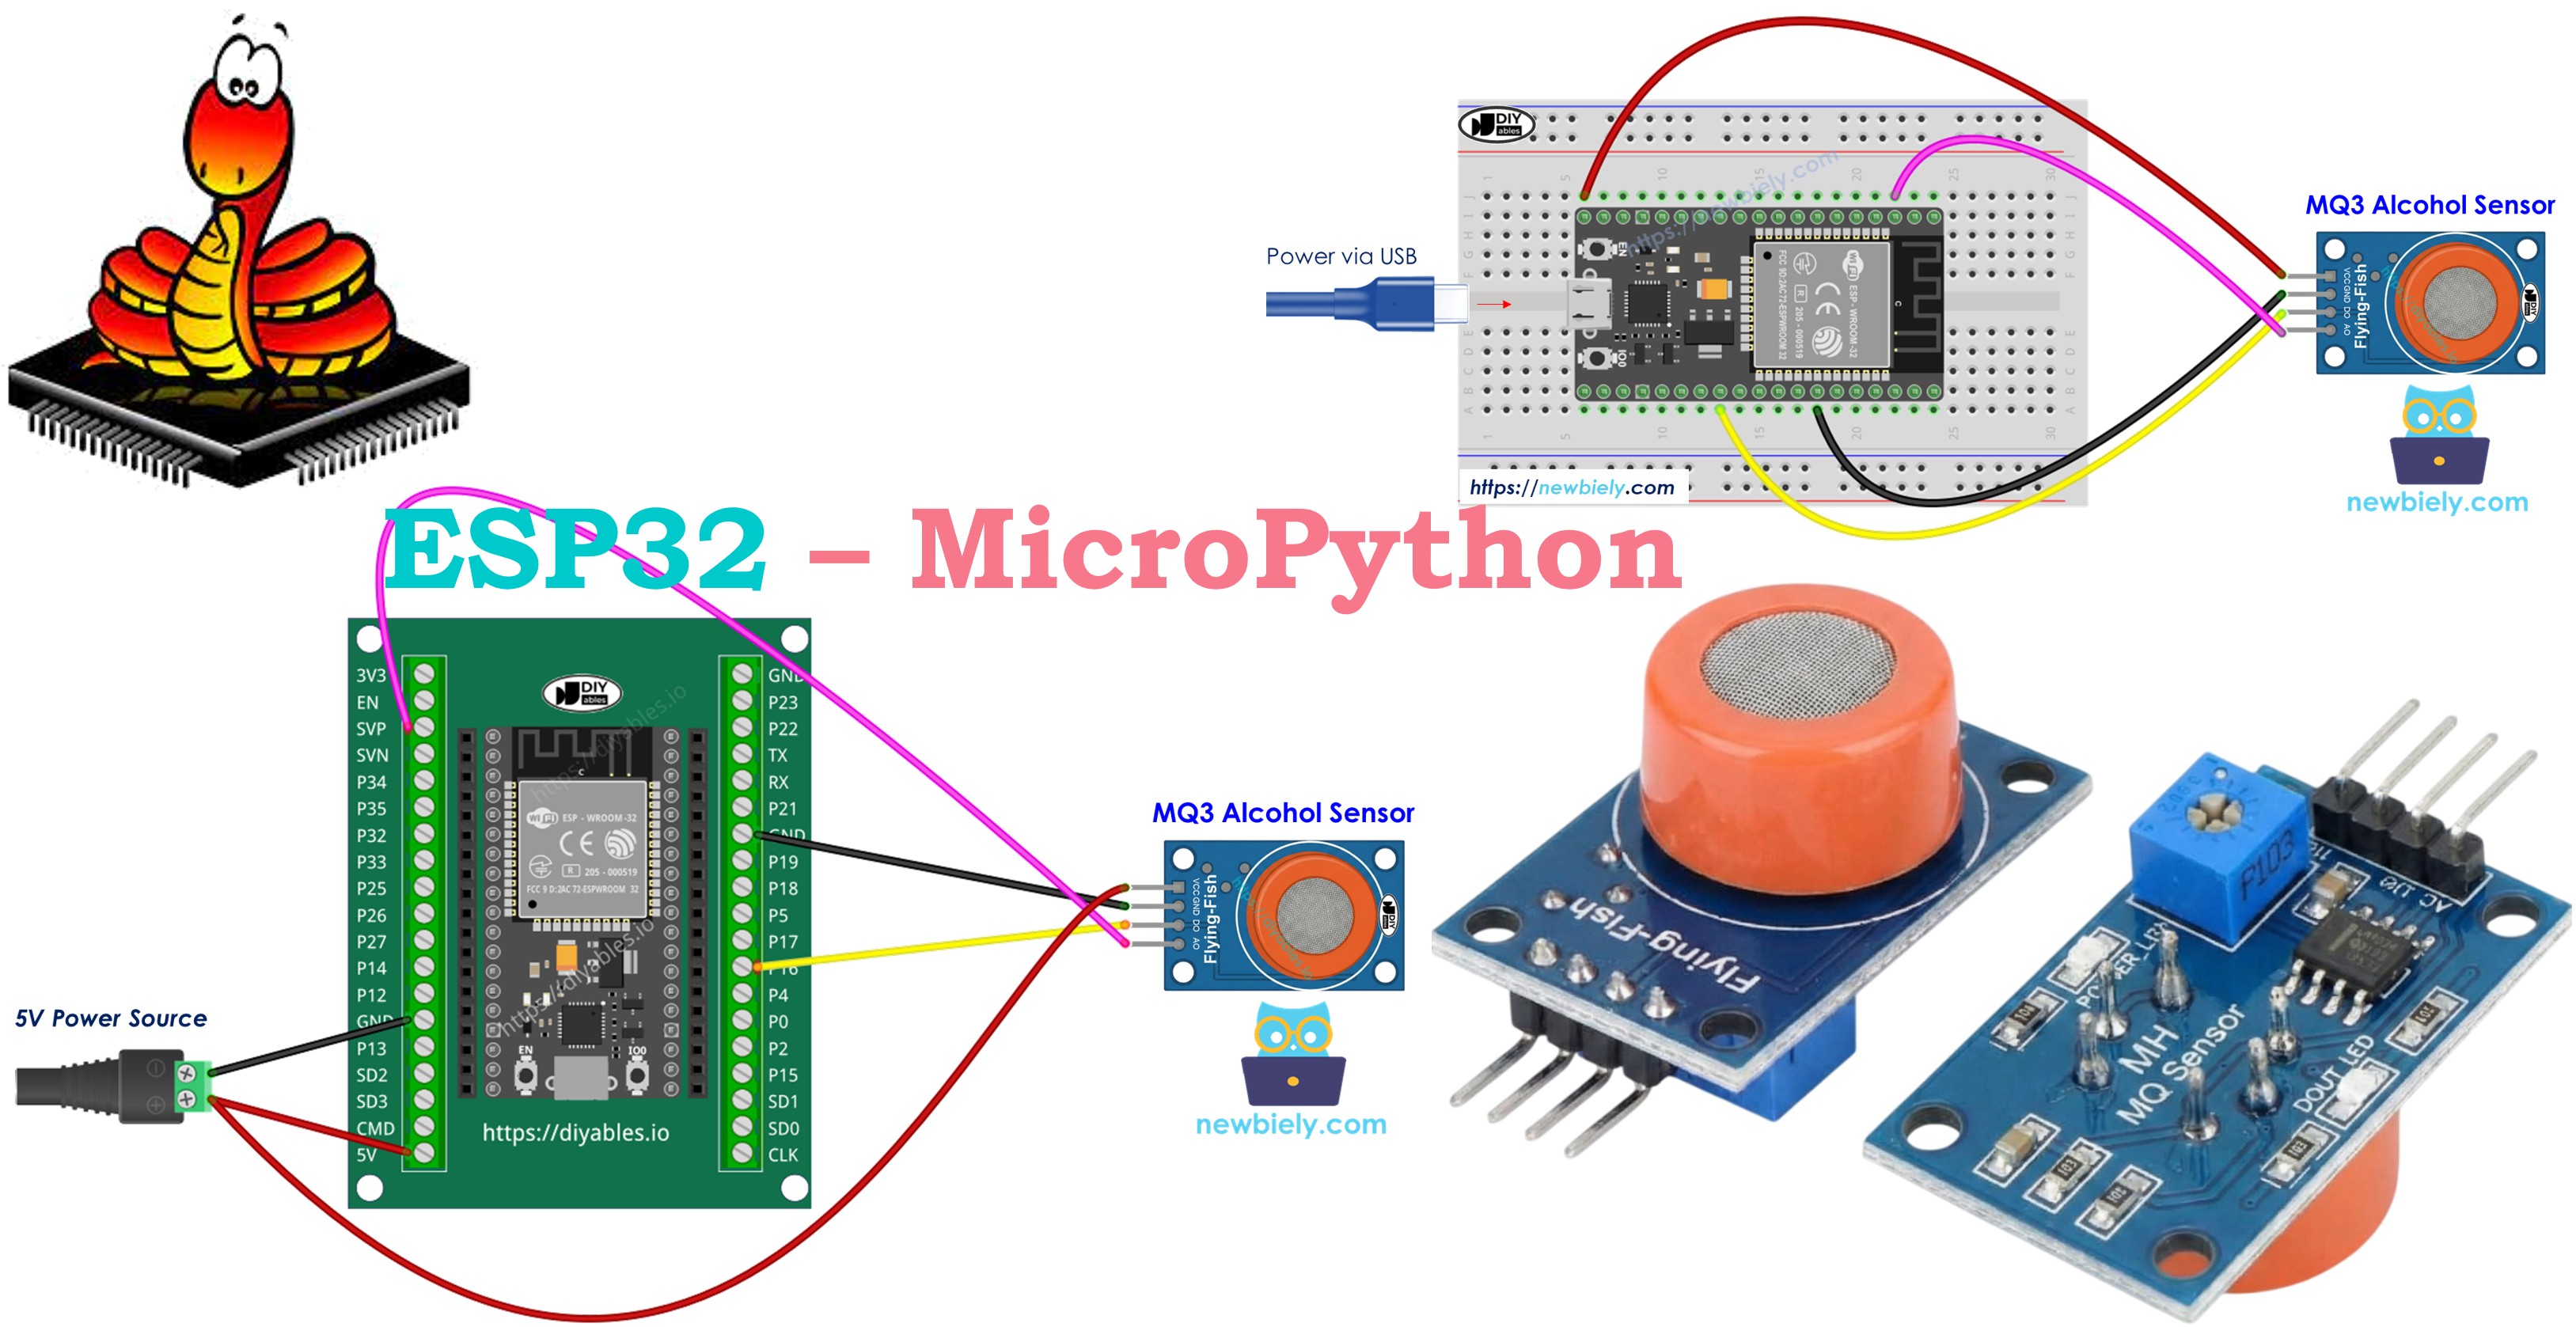
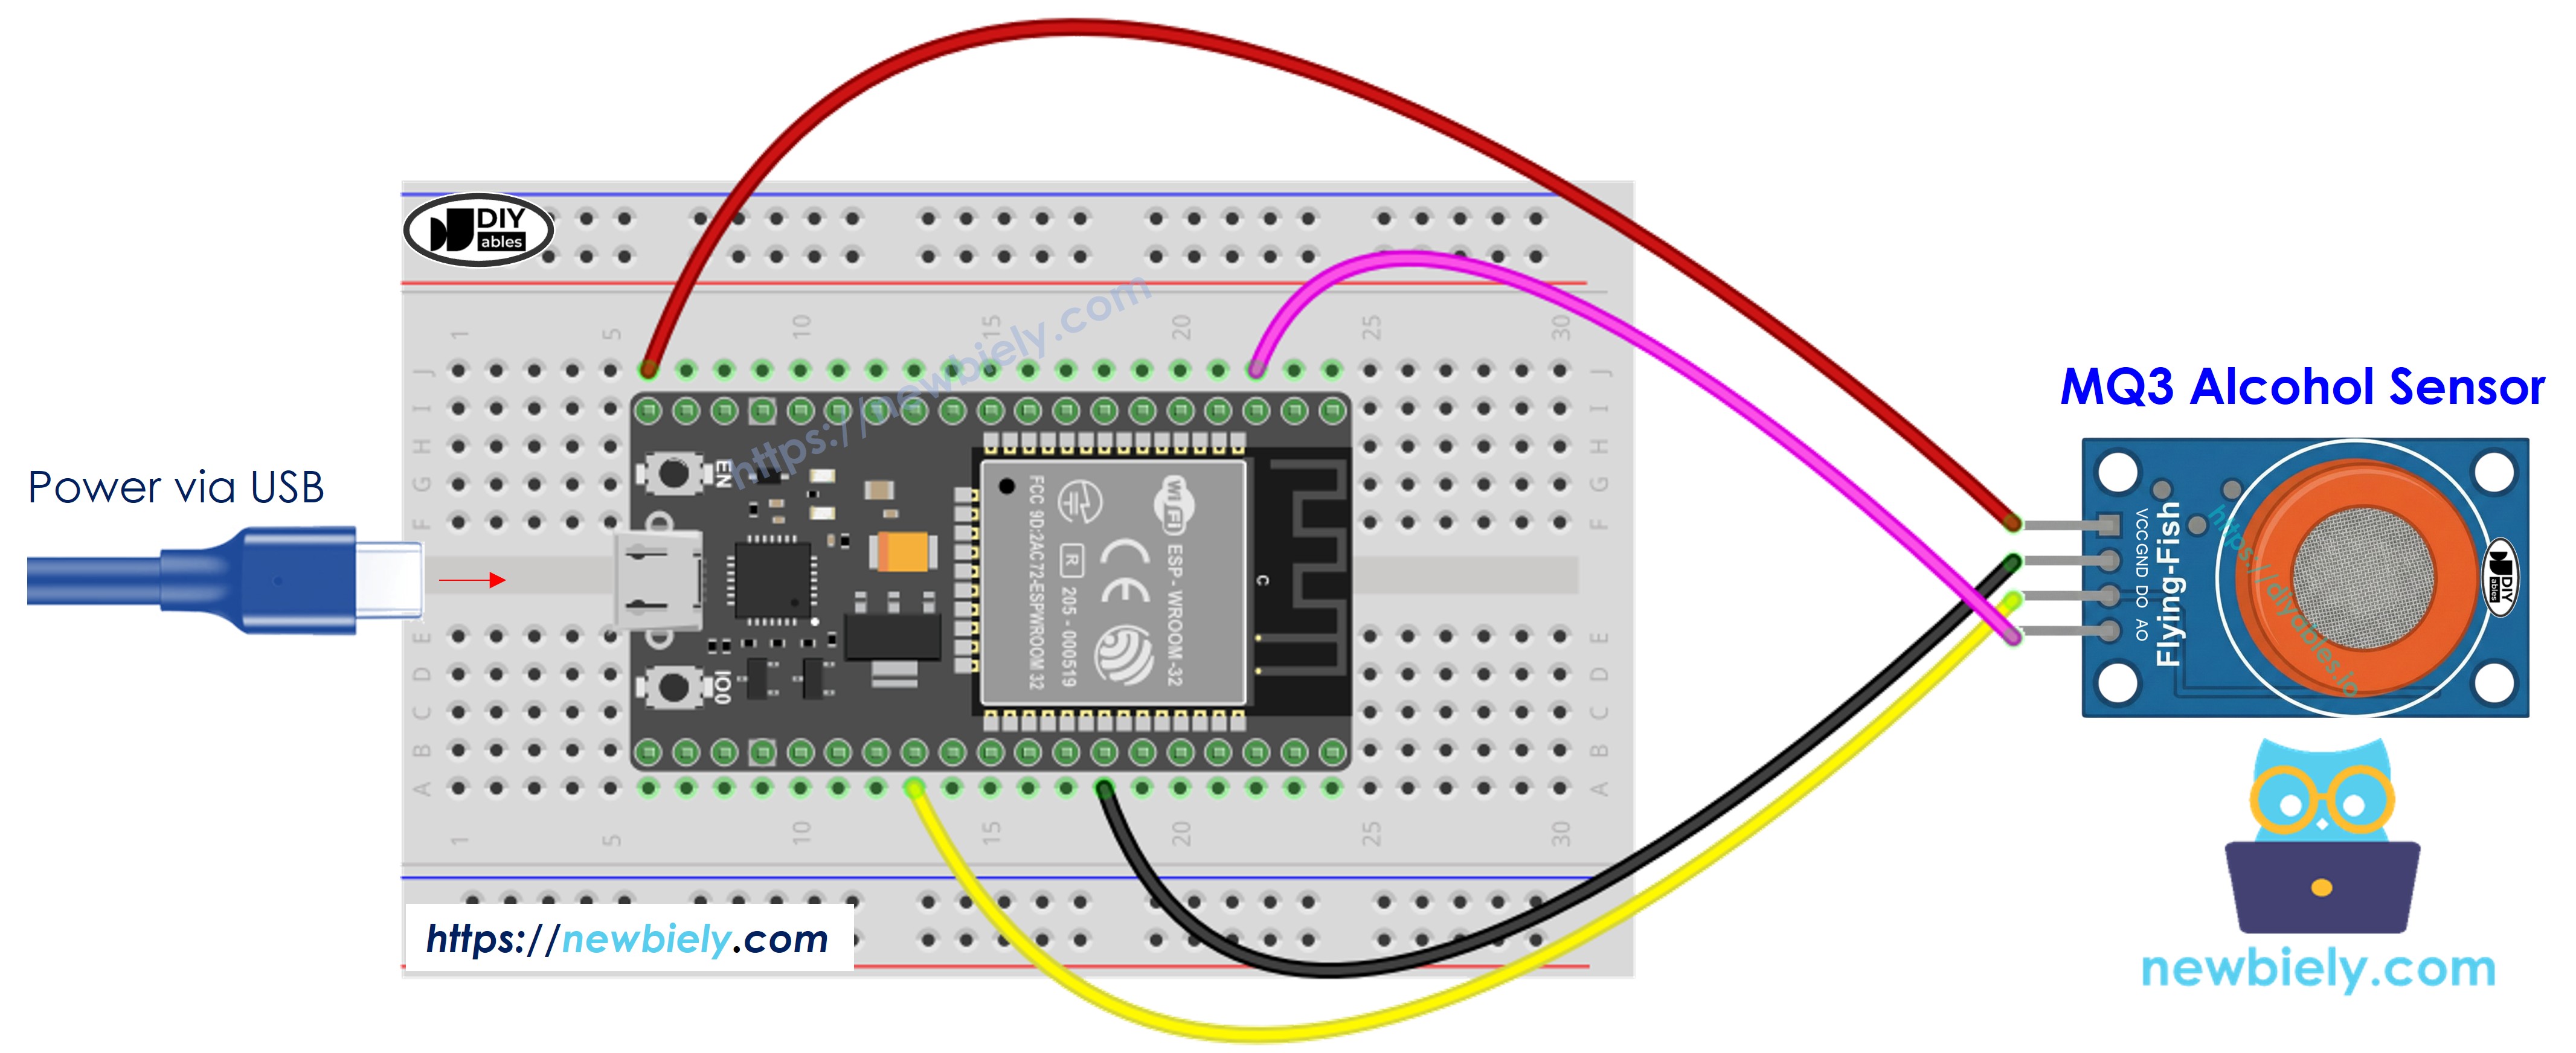
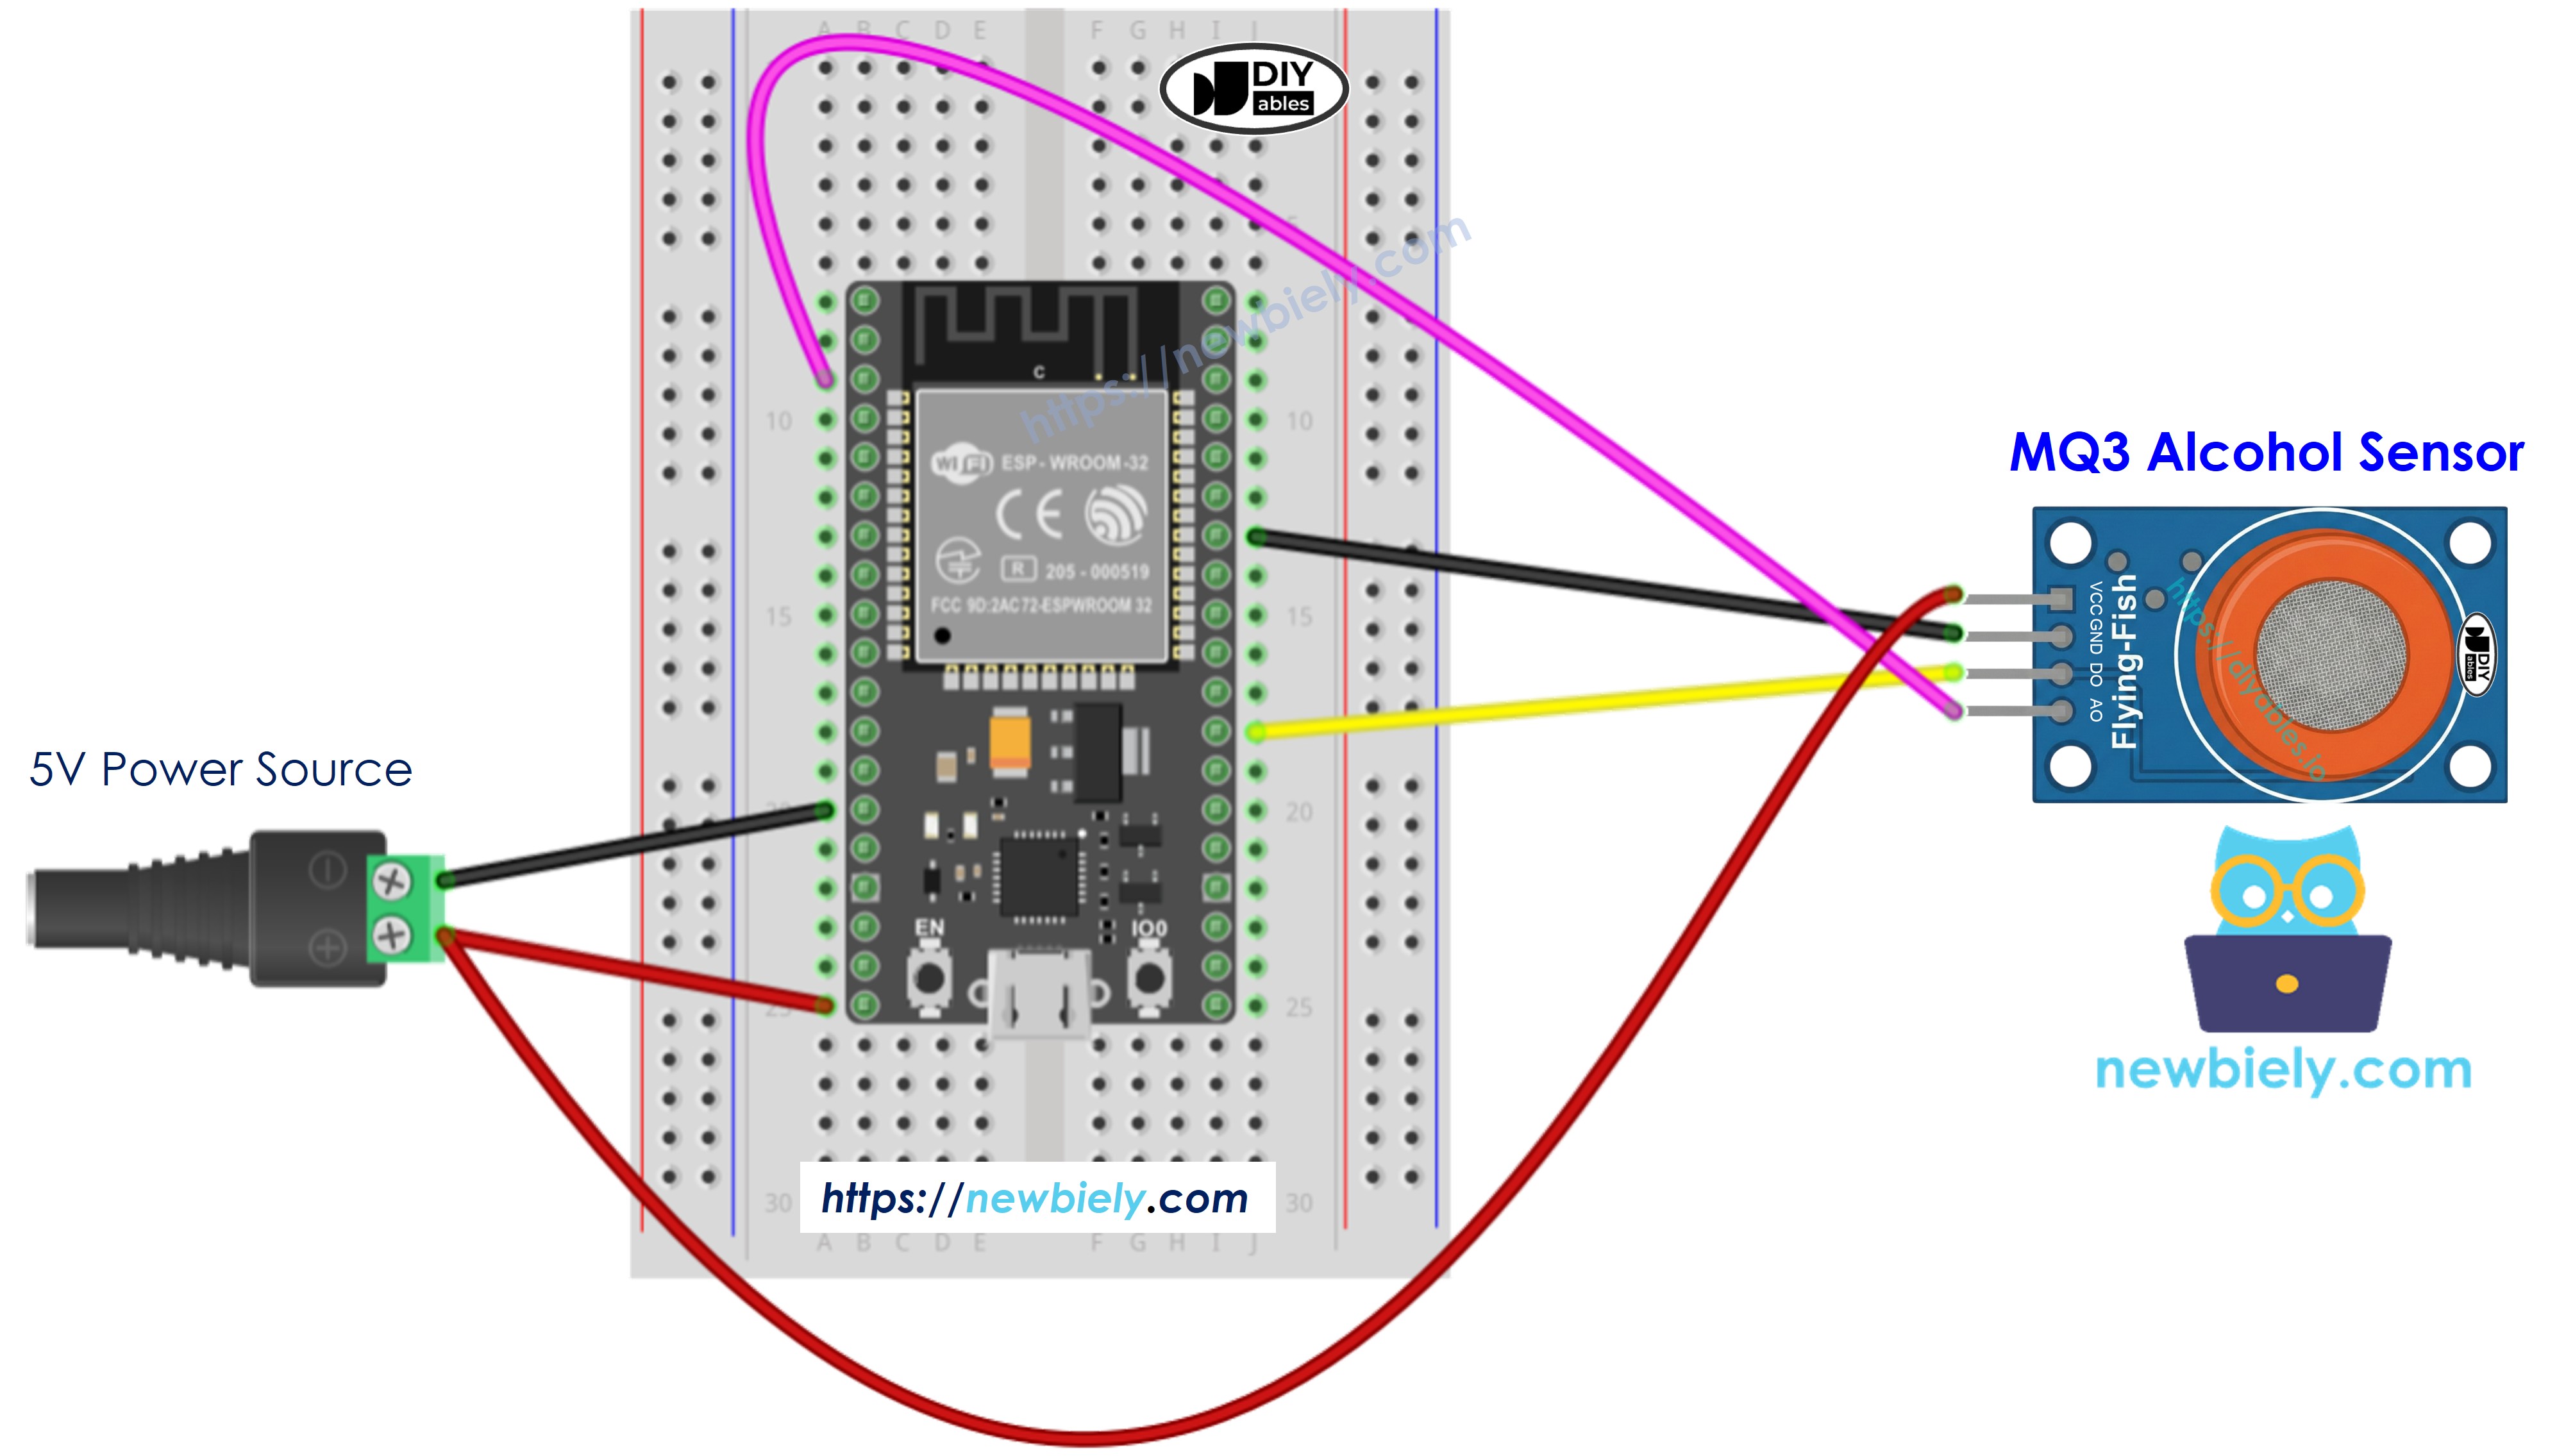
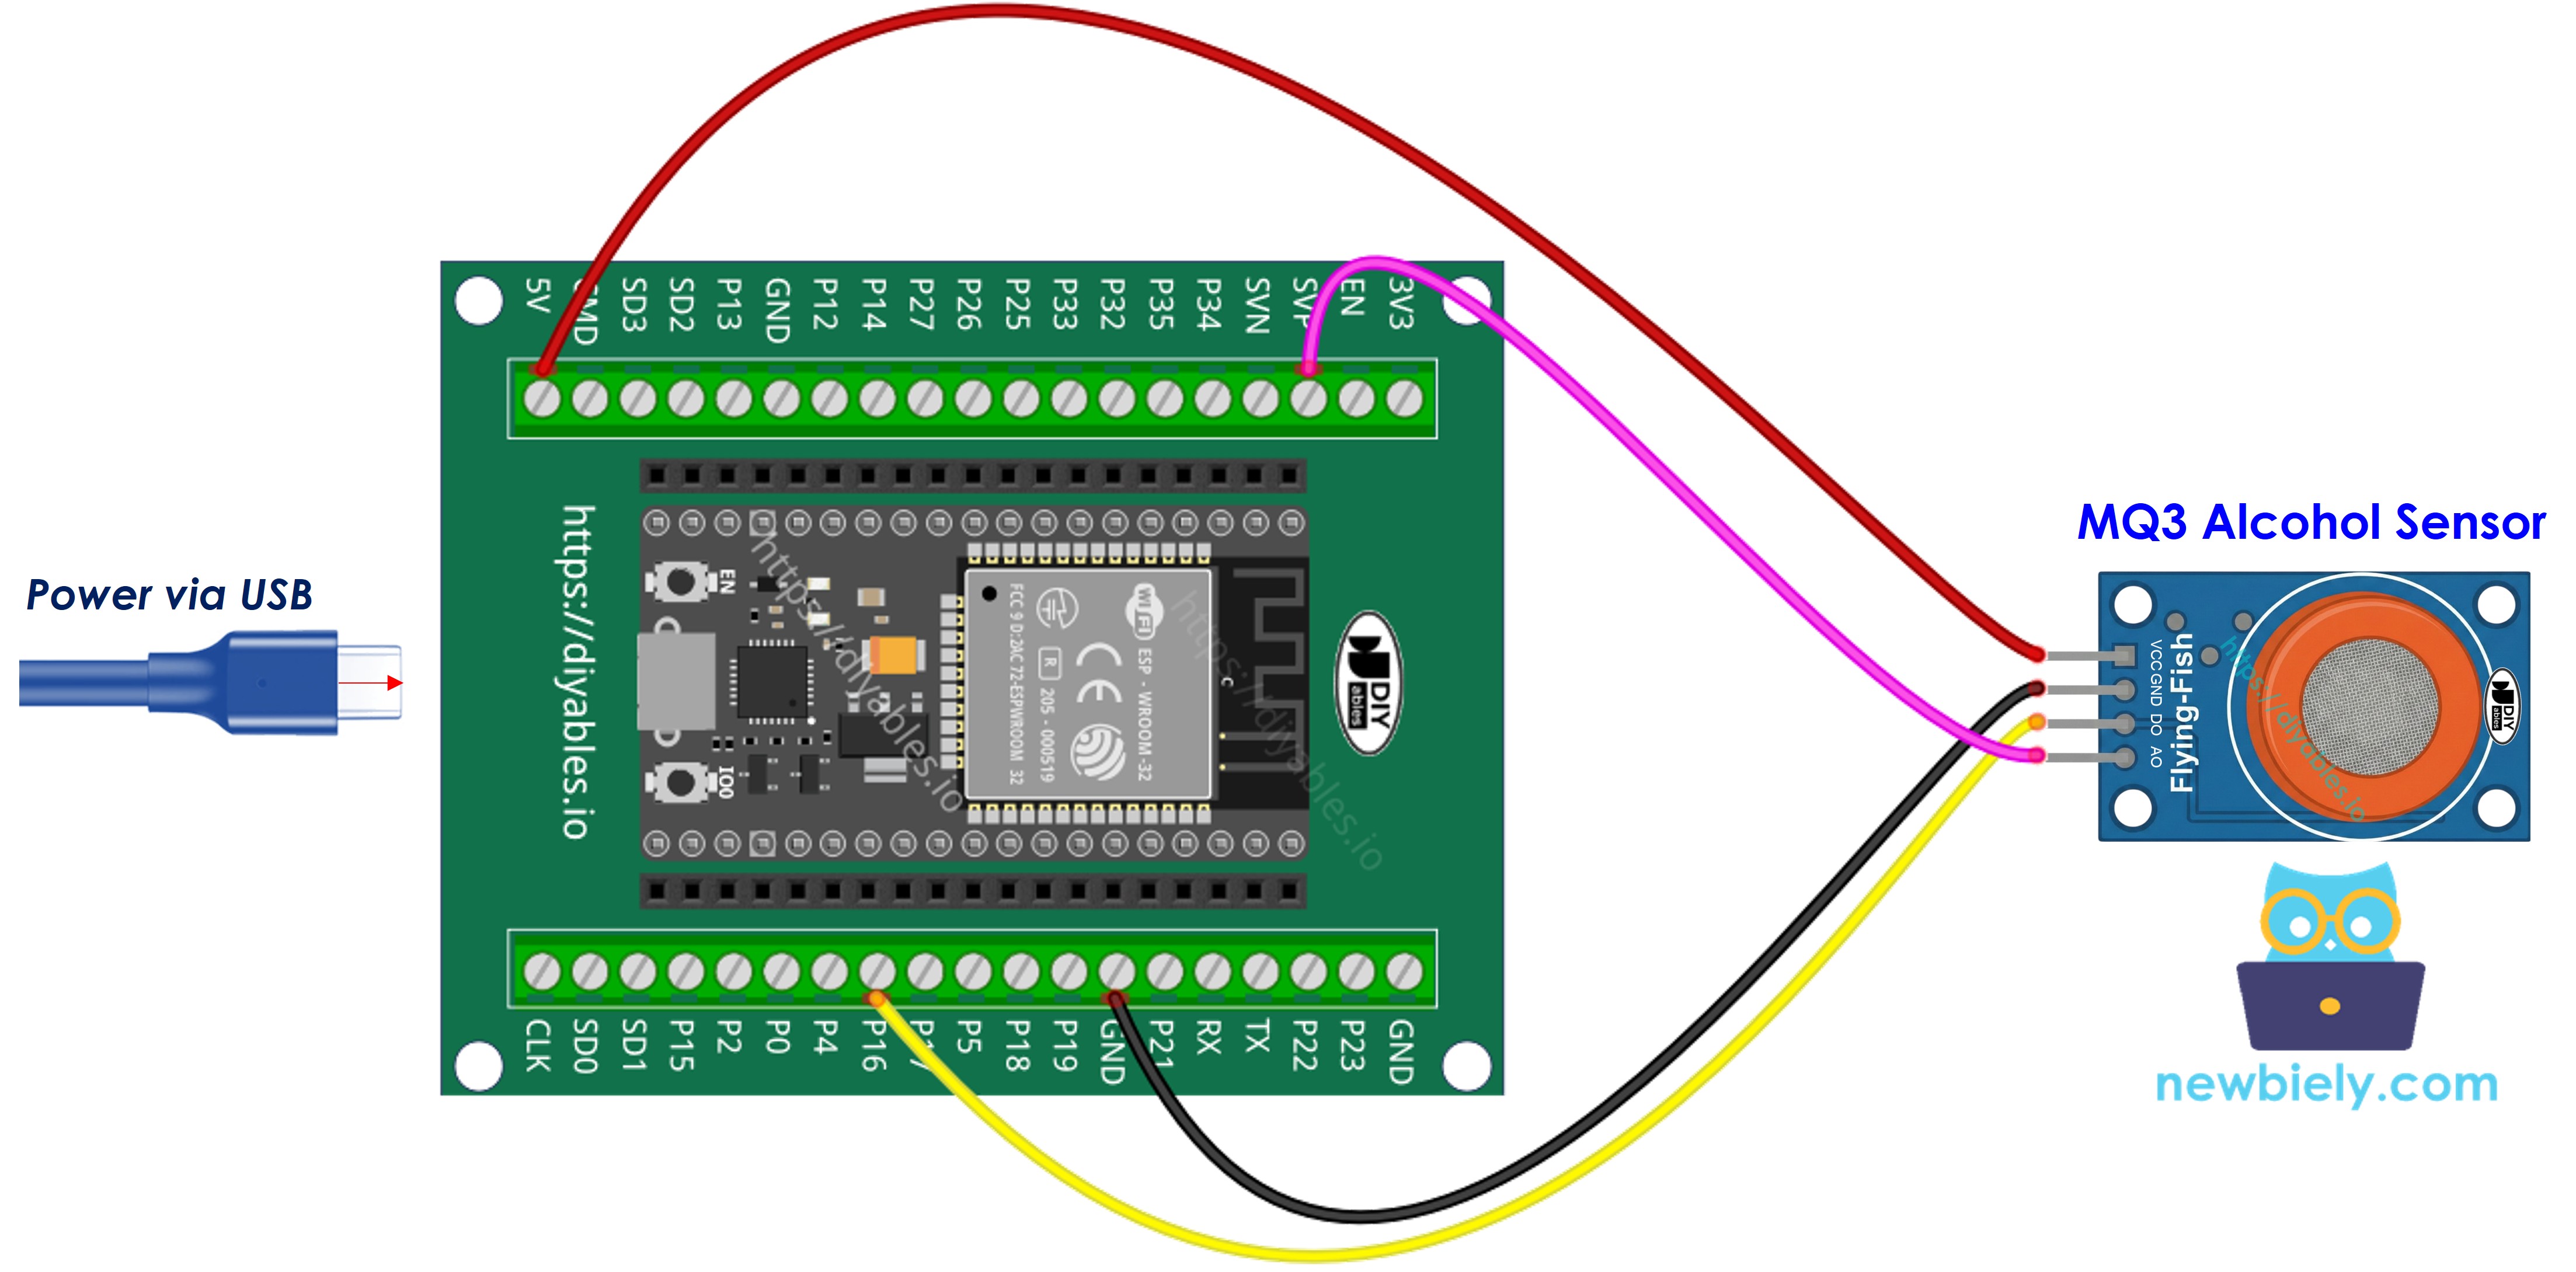
Wiring Diagram
Since the MQ3 alcohol sensor module has two outputs, you can choose to use one or both of them, depending on what you need.
- How to connect ESP32 and MQ3 alcohol sensor using breadboard (powered via USB cable)
This image is created using Fritzing. Click to enlarge image
- How to connect ESP32 and MQ3 alcohol sensor using breadboard (powered via Vin pin)
This image is created using Fritzing. Click to enlarge image
- How to connect ESP32 and MQ3 alcohol sensor using screw terminal block breakout board (powered via USB cable)
- How to connect ESP32 and MQ3 alcohol sensor using screw terminal block breakout board (powered via Vin pin)
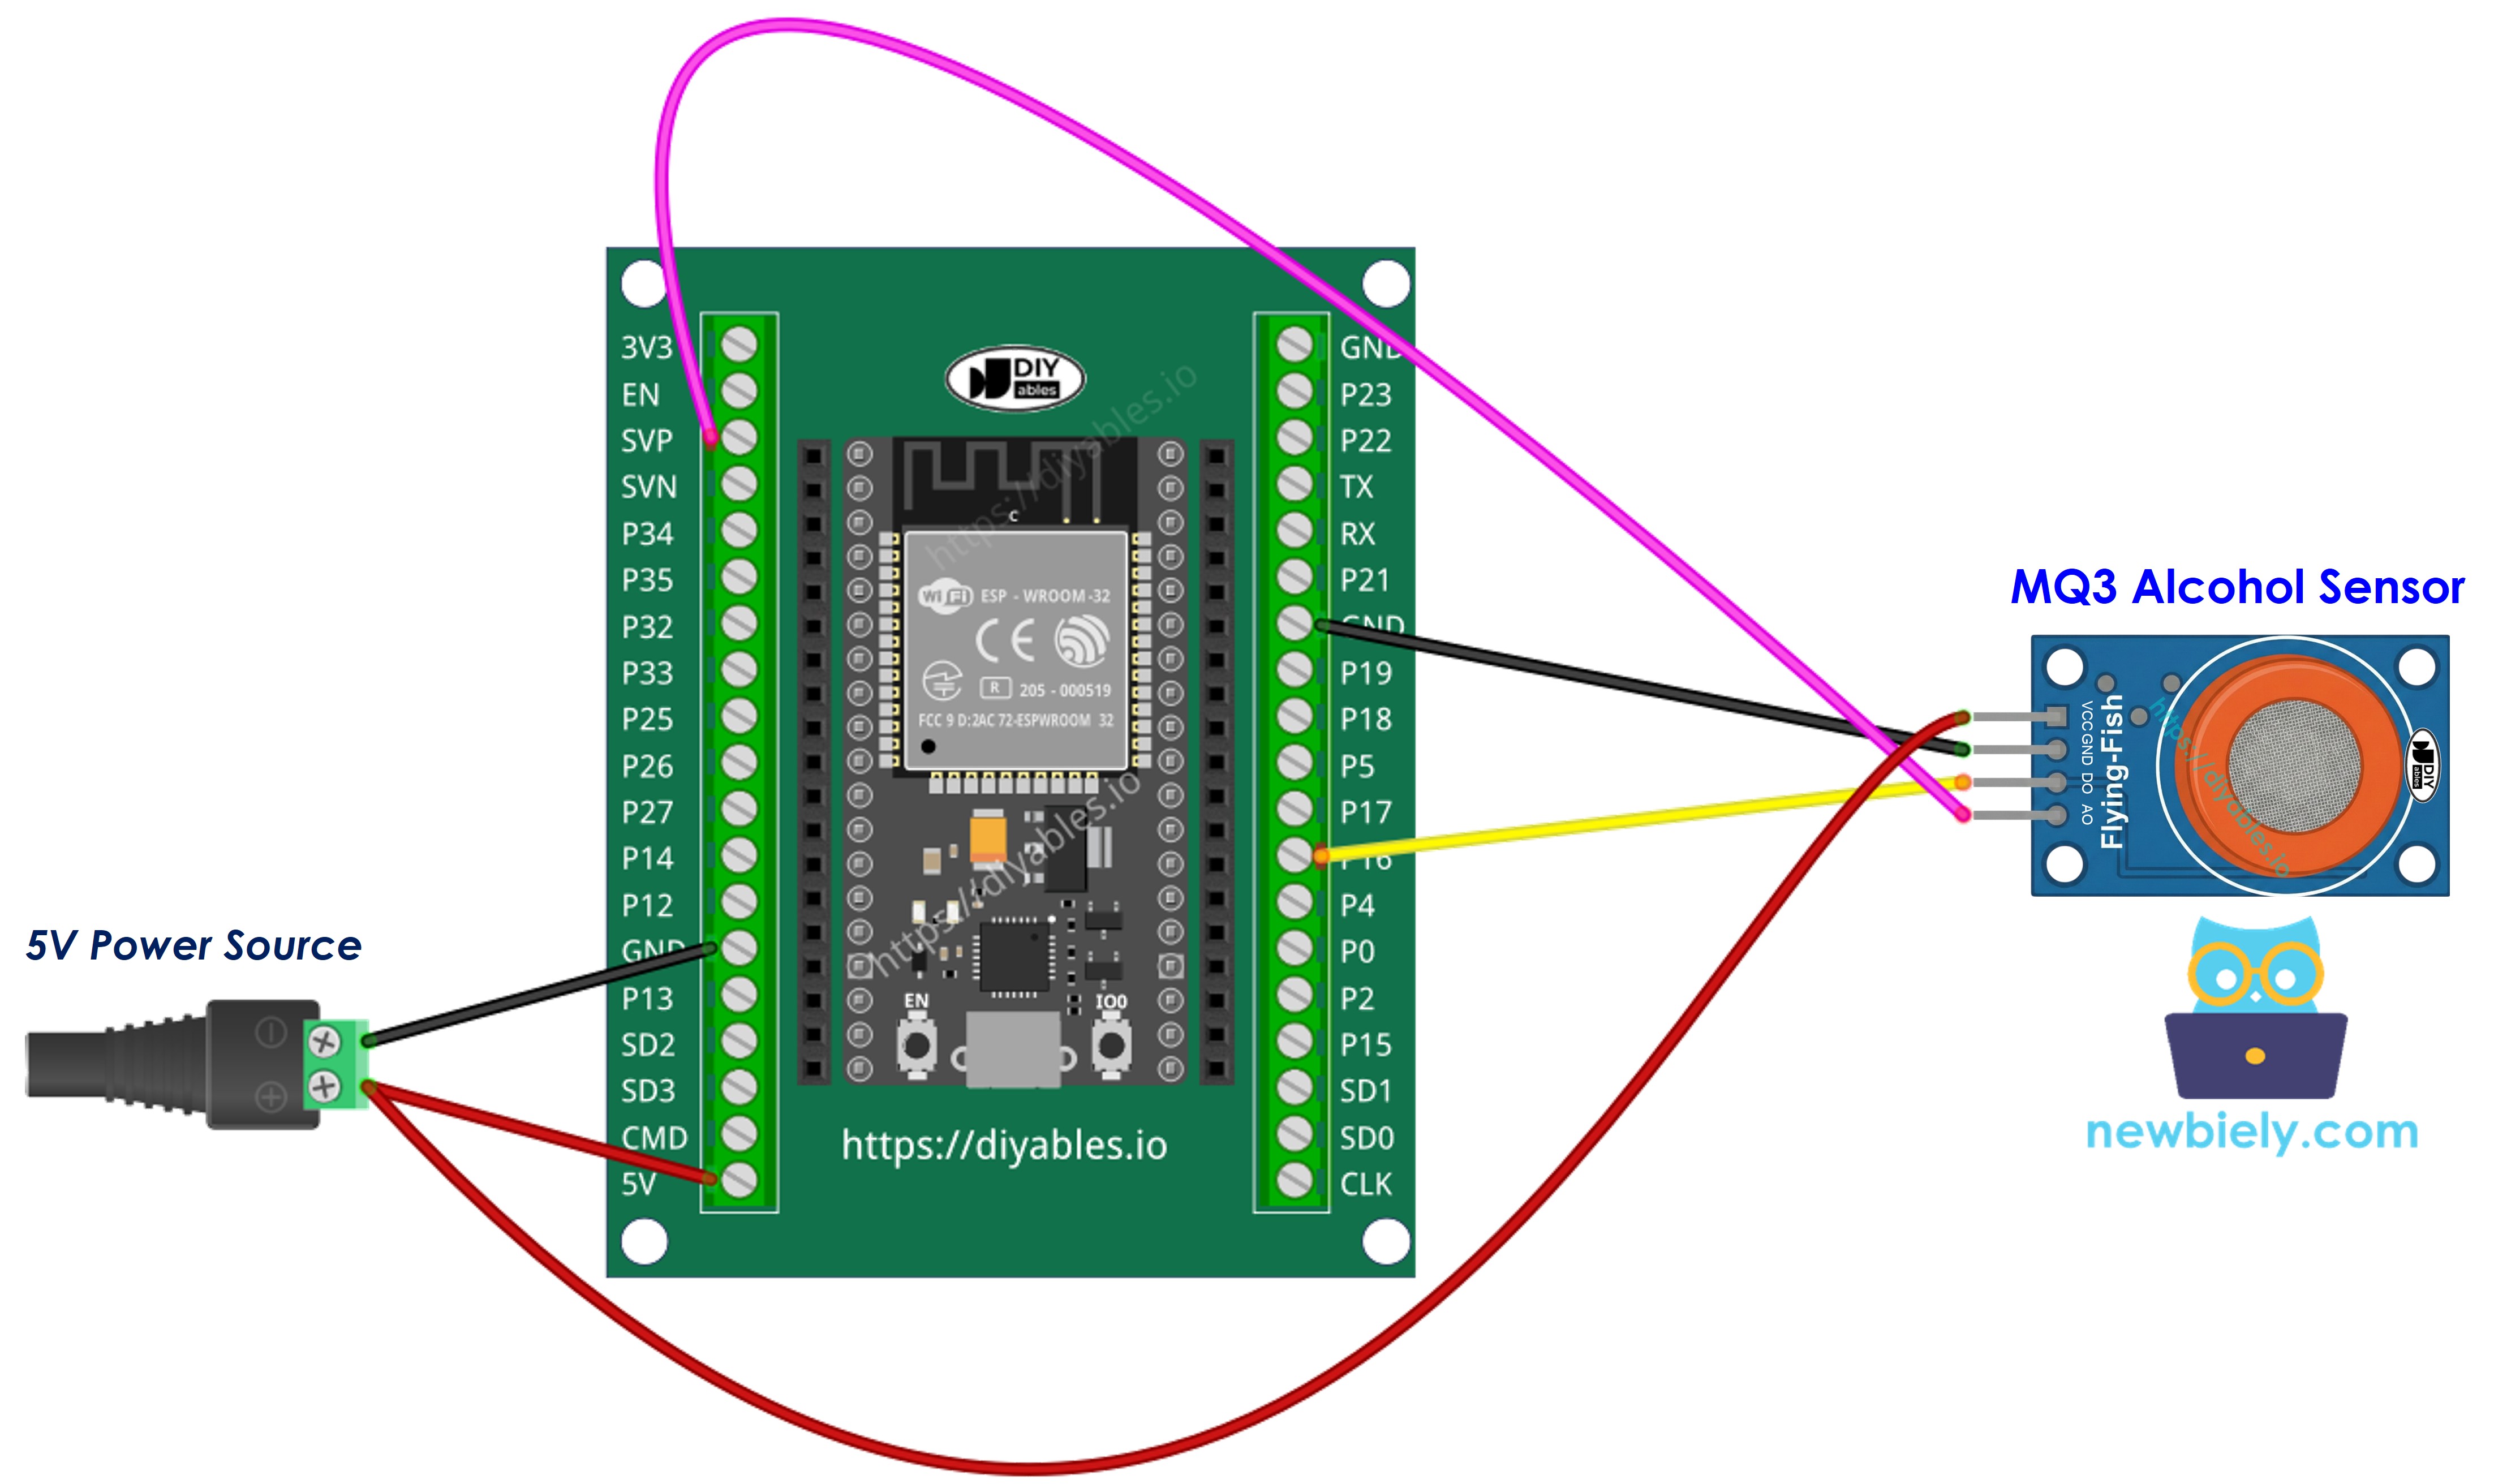
| MQ3 Alcohol Sensor | ESP32 |
|---|---|
| VCC | 3.3V |
| GND | GND |
| DO | GPIO 16 |
| AO | GPIO 36 (ADC0) |
ESP32 MicroPython Code - Read value from DO pin
Detailed Instructions
Here’s instructions on how to set up and run your MicroPython code on the ESP32 using Thonny IDE:
- Make sure Thonny IDE is installed on your computer.
- Confirm that MicroPython firmware is loaded on your ESP32 board.
- If this is your first time using an ESP32 with MicroPython, check out the ESP32 MicroPython Getting Started guide for step-by-step instructions.
- Connect the ESP32 board to the MQ3 alcohol sensor according to the provided diagram.
- Connect the ESP32 board to your computer with a USB cable.
- Open Thonny IDE on your computer.
- In Thonny IDE, go to Tools Options.
- Under the Interpreter tab, choose MicroPython (ESP32) from the dropdown menu.
- Make sure the correct port is selected. Thonny IDE usually detects it automatically, but you might need to select it manually (like COM12 on Windows or /dev/ttyACM0 on Linux).
- Copy the provided MicroPython code and paste it into Thonny's editor.
- Save the code to your ESP32 by:
- Clicking the Save button or pressing Ctrl+S.
- In the save dialog, choose MicroPython device.
- Name the file main.py.
- Click the green Run button (or press F5) to execute the script.
- Place alcohol vapor source near the MQ3 sensor (hand sanitizer or rubbing alcohol on cotton works well).
- Check out the message in the Shell at the bottom of Thonny.
If the LED light remains on always or doesn't turn on, you can adjust the sensor's sensitivity by turning the onboard potentiometer.
ESP32 MicroPython Code - Read value from AO pin
Detailed Instructions
- Copy the provided MicroPython code and paste it into Thonny's editor.
- Save the code to your ESP32 board.
- Click the green Run button (or press F5) to execute the script.
- Introduce alcohol vapor to the sensor (hand sanitizer or isopropyl alcohol).
- Check out the message in the Shell at the bottom of Thonny.
You can use the values from DO or AO to detect alcohol presence, trigger an alarm, or log data for breathalyzer applications.
※ NOTE THAT:
This tutorial demonstrates how to use the adc.read() function to read values from an ADC (Analog-to-Digital Converter) connected to an alcohol sensor. The ESP32's ADC is suitable for projects that do not require high precision. However, if your project needs accurate measurements, keep the following in mind:
- The ESP32 ADC is not perfectly accurate and may require calibration for precise results. Each ESP32 board may vary slightly, so calibration is necessary for each individual board.
- Calibration can be challenging, especially for beginners, and might not always yield the exact results you desire.
For projects requiring high precision, consider using an external ADC (e.g., ADS1115) with the ESP32 or opt for an Arduino, which has a more reliable ADC. If you still wish to calibrate the ESP32 ADC, refer to the ESP32 ADC Calibration Driver.