ESP32 MicroPython Read Config from SD Card
This guide shows you how to load settings from a configuration file stored on a Micro SD Card using ESP32 and MicroPython. Here is what we will cover:
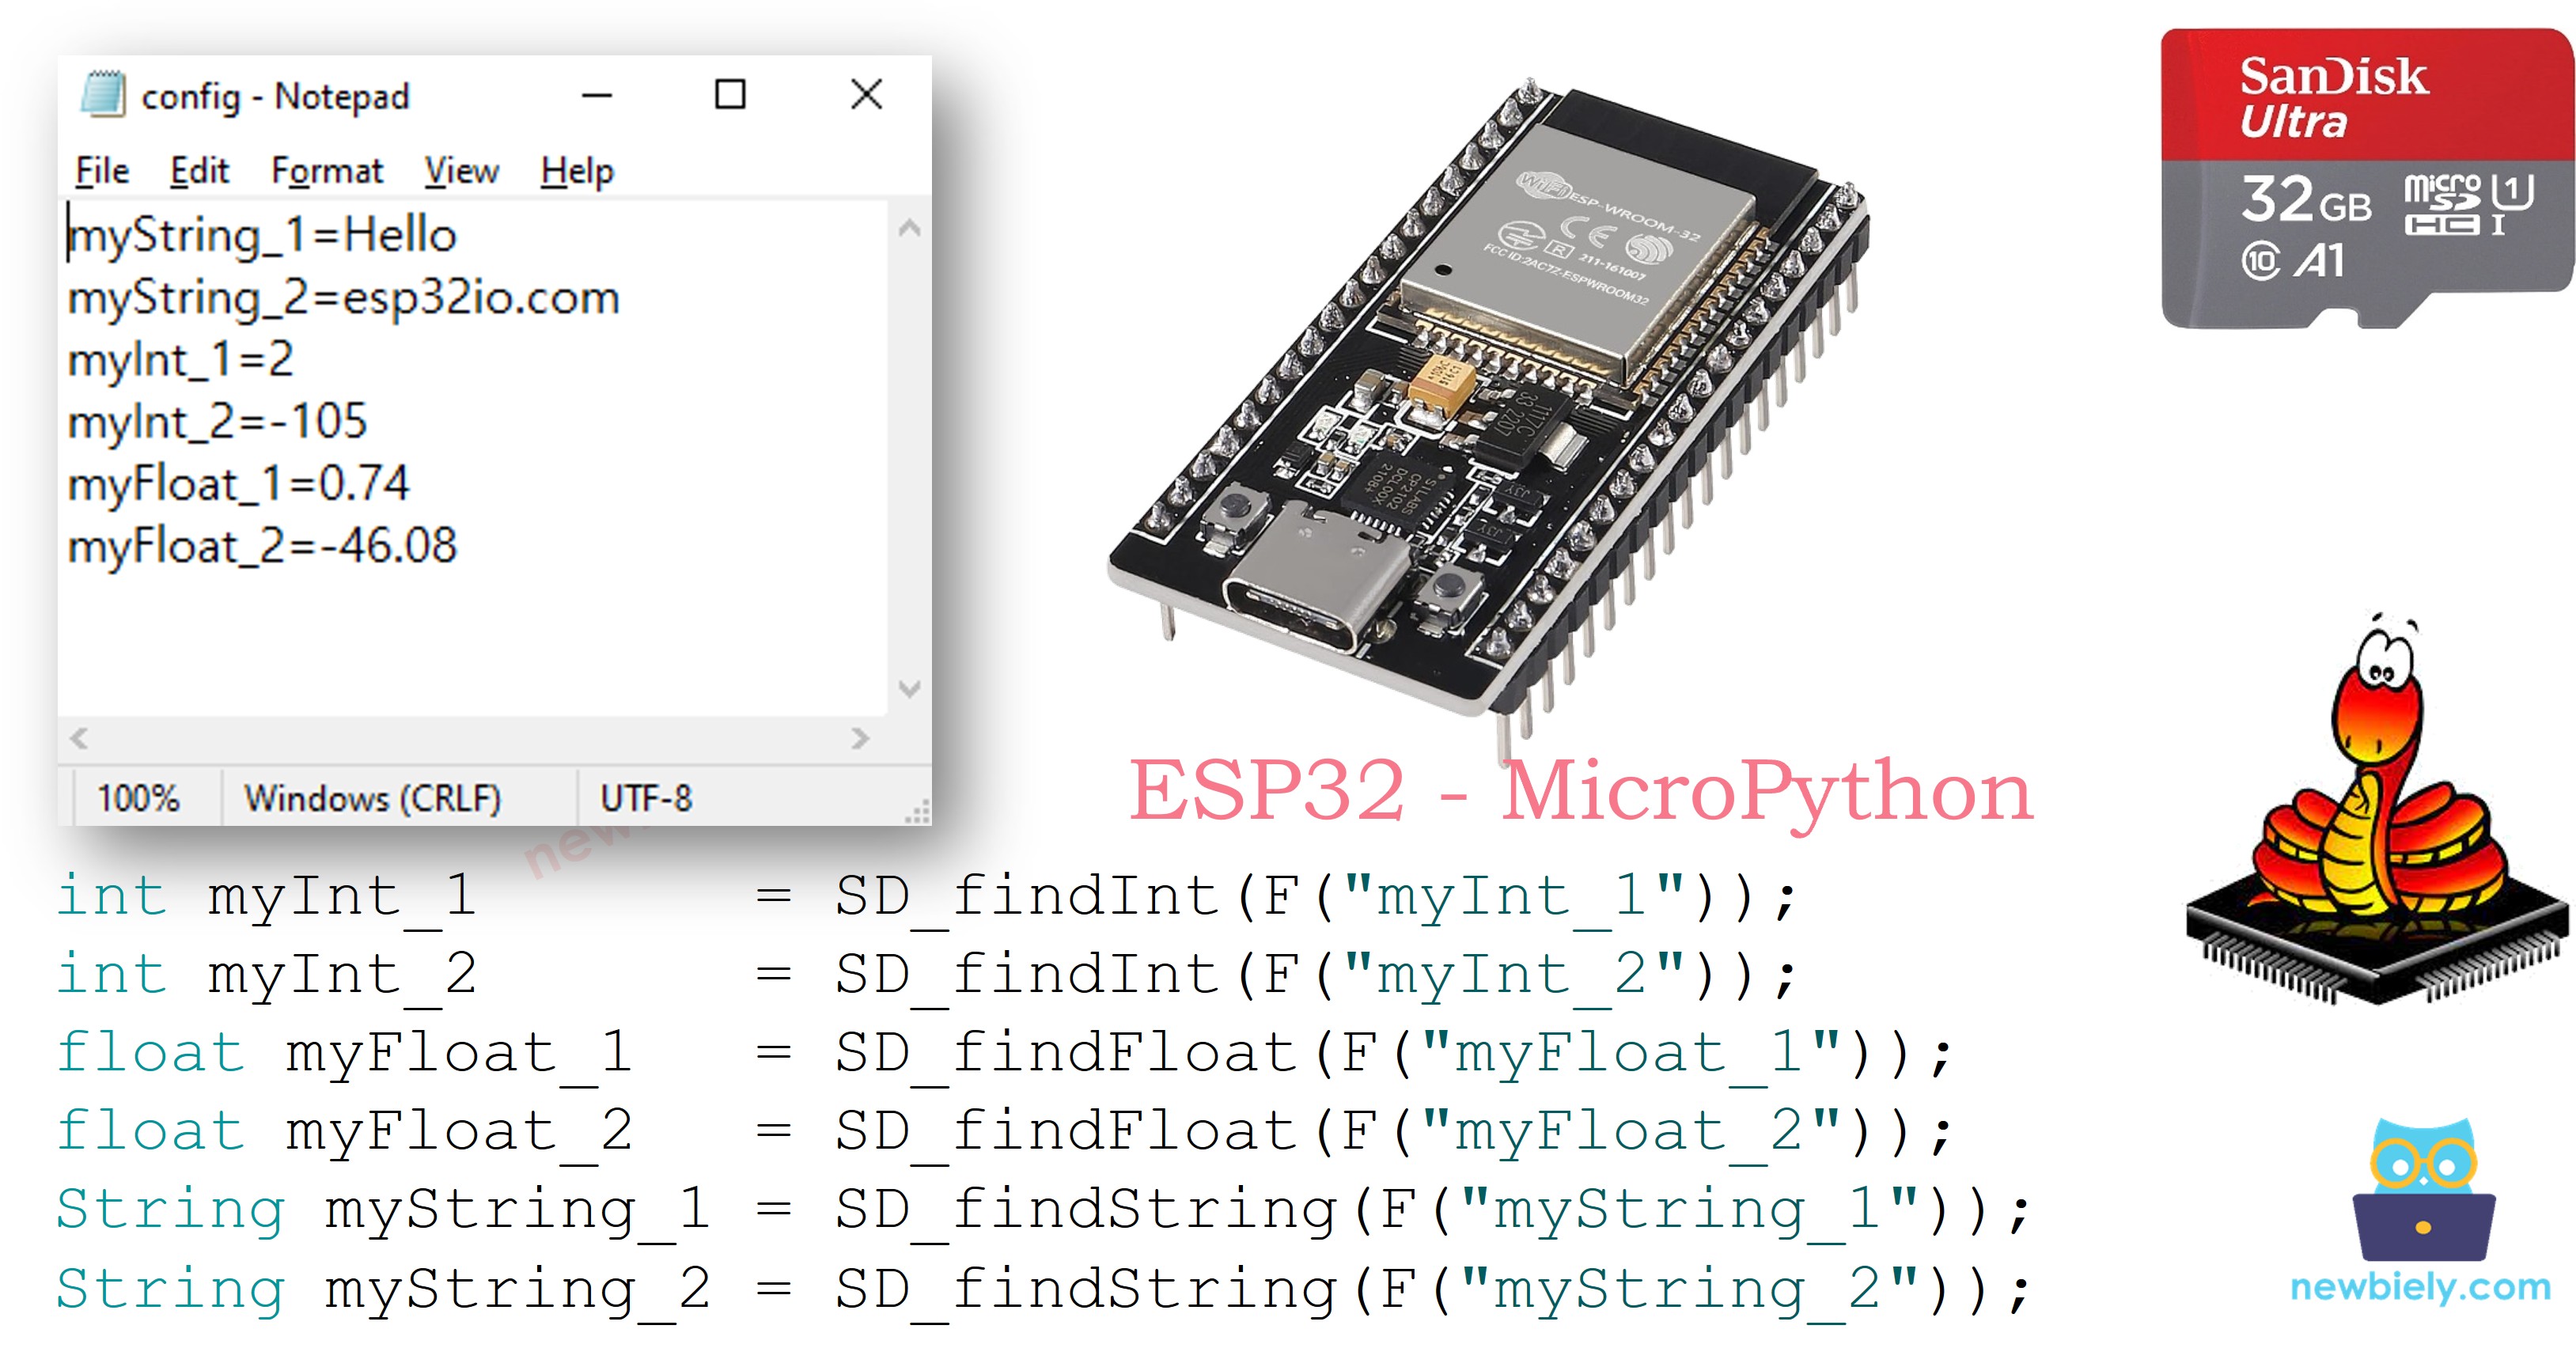
- Preparing a config.txt file on the Micro SD Card containing key-value settings.
- Parsing an integer value from the config file and storing it in a variable.
- Parsing a floating-point value from the config file and storing it in a variable.
- Parsing a string value from the config file and storing it in a variable.
With this approach, you can manage your project settings through a simple text file on the Micro SD Card, supporting various data types including integers, floats, and strings.
Hardware Preparation
Or you can buy the following kits:
| 1 | × | DIYables ESP32 Starter Kit (ESP32 included) | |
| 1 | × | DIYables Sensor Kit (18 sensors/displays) |
Additionally, some of these links are for products from our own brand, DIYables .
Overview of Micro SD Card Module
New to the Micro SD Card Module? Find out everything about its pins, how it works, and how to program it in the ESP32 MicroPython - Micro SD Card tutorial.
How It Works
The configuration file on the Micro SD Card follows a simple structure:
- Each setting occupies its own line — key-value pairs are separated by newline characters.
- Within each line, the key and value are separated by the = character.
The MicroPython code scans the file for a specific key, extracts the matching value, and assigns it to a variable. The value can be converted to int, float, or string as needed.
Wiring Diagram
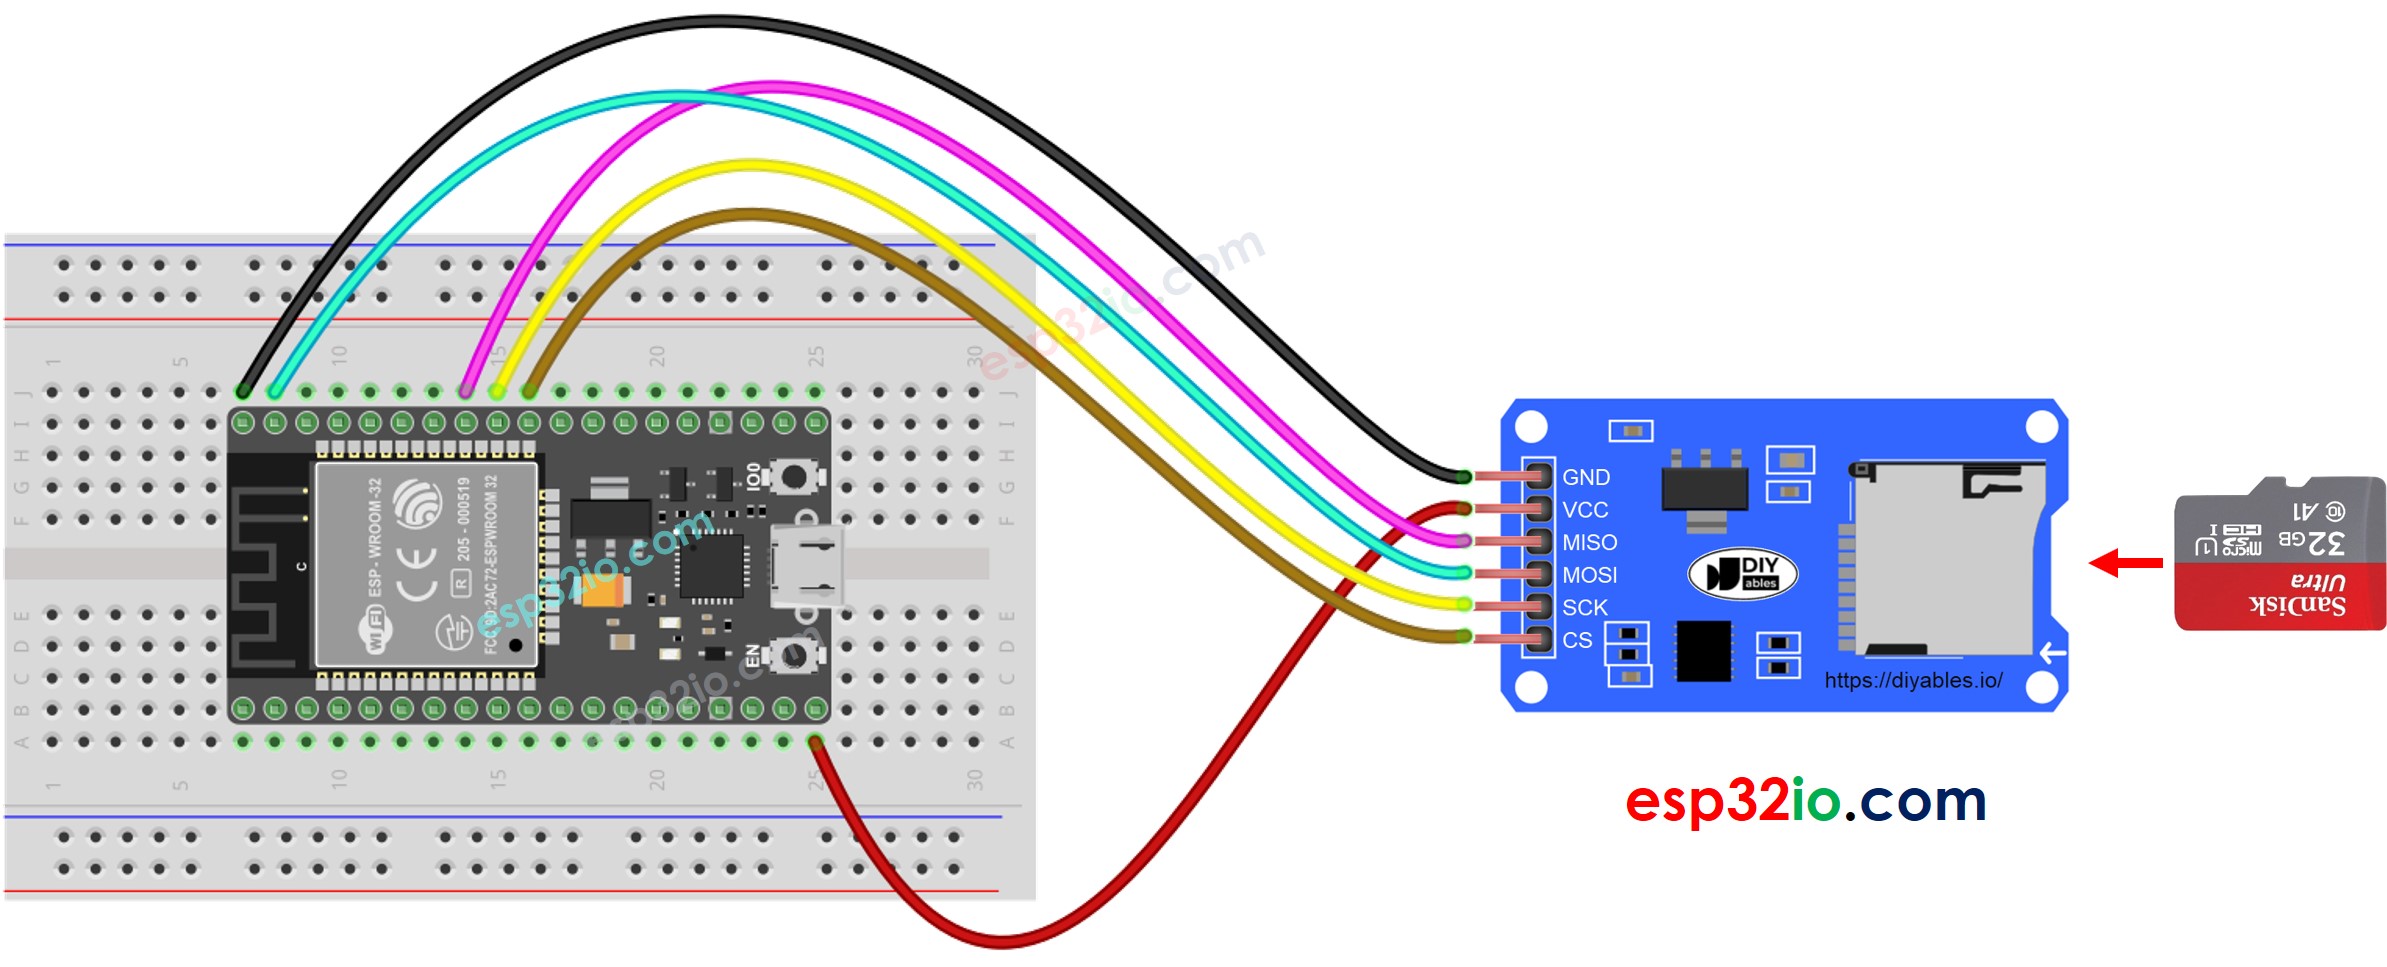
This image is created using Fritzing. Click to enlarge image
The wiring table below shows how to connect the Micro SD Card Module to the ESP32:
| Micro SD Card Module | ESP32 |
|---|---|
| VCC | 5V |
| GND | GND |
| MISO | GPIO19 |
| MOSI | GPIO23 |
| SCK | GPIO18 |
| CS | GPIO5 |
※ NOTE THAT:
If your shield (such as an Ethernet shield) already has a built-in Micro SD Card slot, you can skip the external module and simply insert the card directly into the shield.
How to Load Config Settings into Variables
- Create a config.txt file on your PC using Notepad or Notepad++
- Copy the following key-value pairs into the config.txt file:
- Plug the Micro SD Card into a USB 3.0 SD Card Reader and connect it to your PC
- Verify that the Micro SD Card uses FAT16 or FAT32 format (search online for instructions if needed)
- Transfer the config.txt file to the root directory of the Micro SD Card
- Safely remove the Micro SD Card from the PC
- Attach the Micro SD Card to the ESP32 through the Micro SD Card Module following the wiring diagram above
- Copy the MicroPython code below
Here's instructions on how to set up and run your MicroPython code on the ESP32 using Thonny IDE:
- Make sure Thonny IDE is installed on your computer.
- Confirm that MicroPython firmware is loaded on your ESP32 board.
- If this is your first time using an ESP32 with MicroPython, check out the ESP32 MicroPython Getting Started guide for step-by-step instructions.
- Connect the ESP32 board to your computer with a USB cable.
- Open Thonny IDE on your computer.
- In Thonny IDE, go to Tools Options.
- Under the Interpreter tab, choose MicroPython (ESP32) from the dropdown menu.
- Make sure the correct port is selected. Thonny IDE usually detects it automatically, but you might need to select it manually (like COM3 on Windows or /dev/ttyACM0 on Linux).
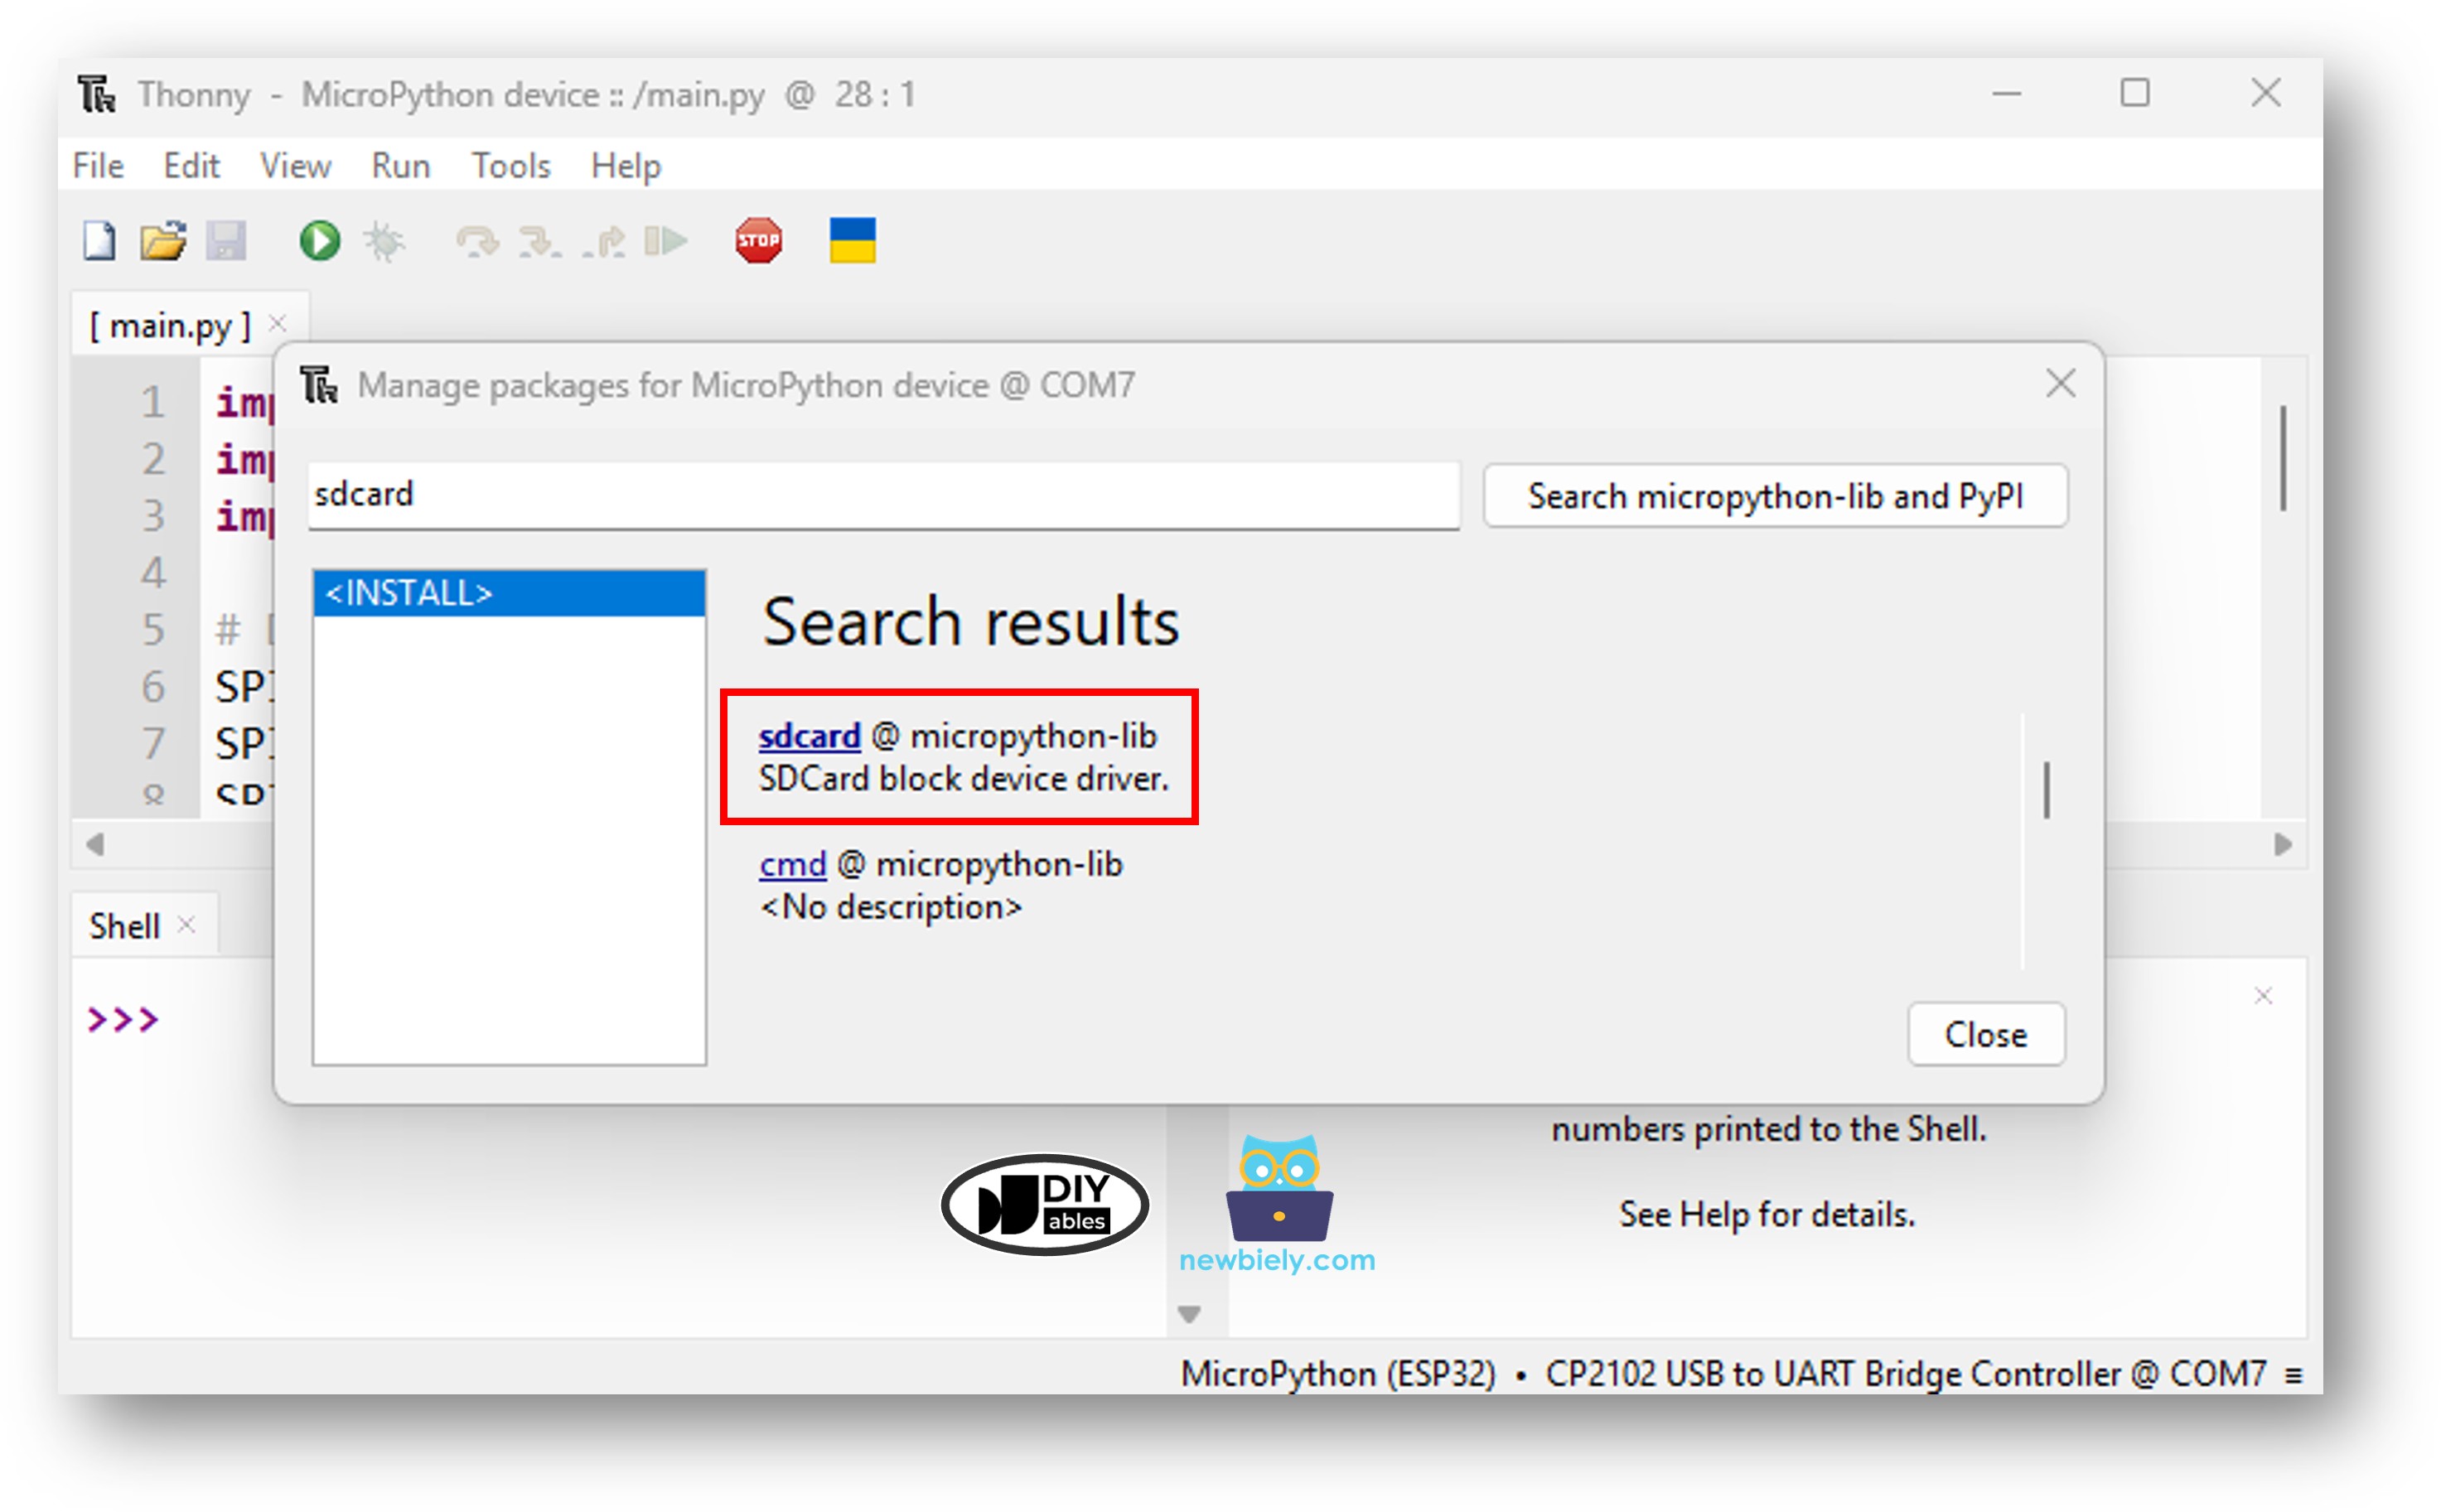
- Navigate to the Tools Manage packages on the Thonny IDE.
- Search "sdcard", then find the sdcard library provided by micropython-lib.
- Click on sdcard, then click Install button to install the SD card library.
- Paste the above MicroPython code into Thonny's editor.
- Save the code to your ESP32 by:
- Clicking the Save button or pressing Ctrl+S.
- In the save dialog, choose MicroPython device.
- Name the file main.py.
- Click the green Run button (or press F5) to execute the script.
- Check out the message in the Shell at the bottom of Thonny.
- The Shell displays the parsed values, which match exactly what was saved in the config file on the Micro SD Card.
Feel free to extend the code by adding more key-value pairs to suit your project.
※ NOTE THAT:
The code does not depend on the order of entries in the config file. It searches from the top of the file to the bottom until it finds a matching key.