
ESP32 MicroPython SW-420 Vibration Sensor
This tutorial shows you how to pair a SW-420 vibration sensor with an ESP32 running MicroPython so you can catch shocks and vibration in your own project. Here's what you'll pick up along the way:
- How to wire a SW-420 vibration sensor module to an ESP32
- How to write MicroPython code that makes the ESP32 report vibration or shock events coming from a SW-420 sensor
Once it's working, you can build on this same code to sound a buzzer, flash an LED, or fire off a notification whenever vibration is picked up.
Hardware Preparation
Or you can buy the following kits:
| 1 | × | DIYables ESP32 Starter Kit (ESP32 included) | |
| 1 | × | DIYables ESP32 S3 Starter Kit (ESP32 S3 included) | |
| 1 | × | DIYables Sensor Kit (18 sensors/displays) |
Additionally, some of these links are for products from our own brand, DIYables .
Overview of SW-420 Vibration Sensor
A SW-420 vibration sensor module is handy whenever you need to notice a knock, bump, or shake on whatever it's mounted to. Inside the module, a small spring-based switch hovers close to a metal contact; the onboard LM393 comparator keeps watch over that switch and outputs a clean digital signal the instant vibration or shock disturbs it. A small potentiometer on the board lets you dial in exactly how much shaking it takes before the output fires.
Pinout
The SW-420 vibration sensor module has three pins:
- VCC pin: connect to VCC (3.3 volts to 5 volts)
- GND pin: connect to GND (0 volts)
- DO pin: this output pin sits LOW while things are still, and jumps HIGH the moment vibration or shock is detected. Connect it to an input pin on your ESP32.
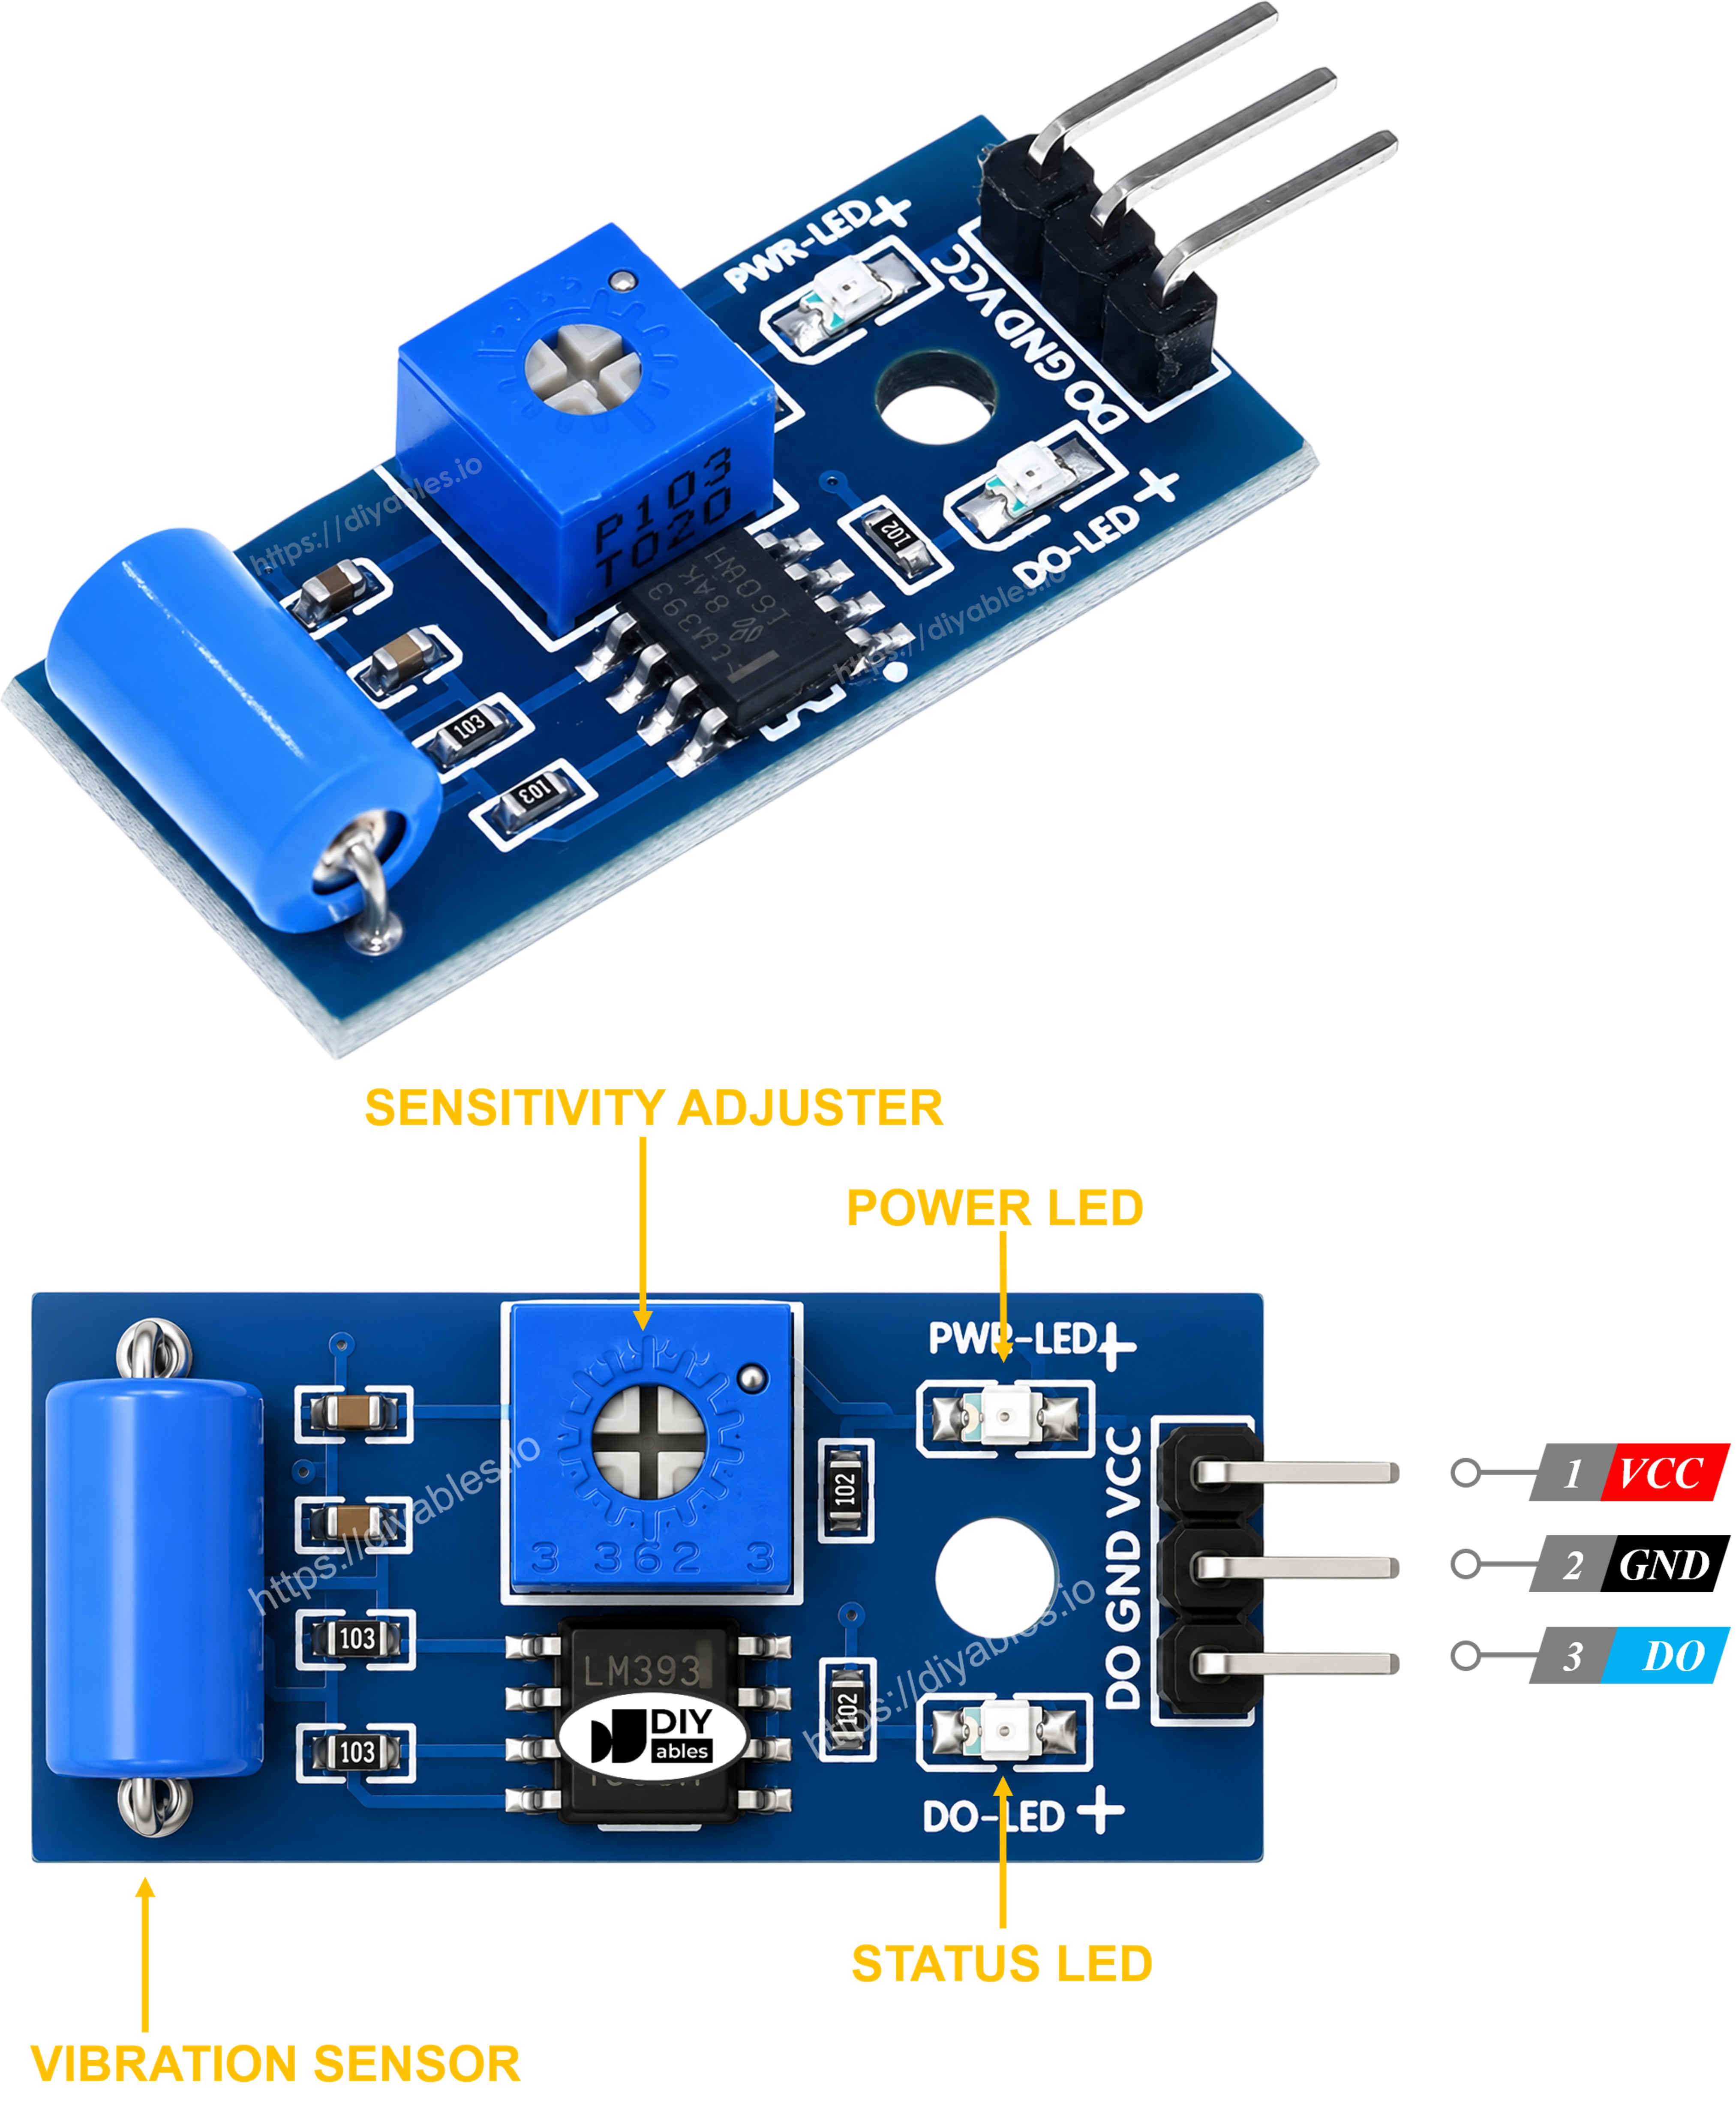
The module also carries two onboard LEDs.
- One LED simply confirms the board is powered
- One LED lights up whenever the DO pin goes HIGH, meaning vibration was detected
How It Works
Underneath the cover sits a tiny spring switch positioned next to a fixed contact.
- While the module is at rest, the spring stays clear of the contact, so the output pin reads LOW.
- When vibration or a shock jolts the spring into the contact, the comparator drives the output pin HIGH.
- Turning the onboard potentiometer raises or lowers how much shaking it takes to trigger that switch, so you can tune it from light taps up to hard knocks.
Wiring Diagram
- How to wire an ESP32 to a SW-420 vibration sensor using breadboard
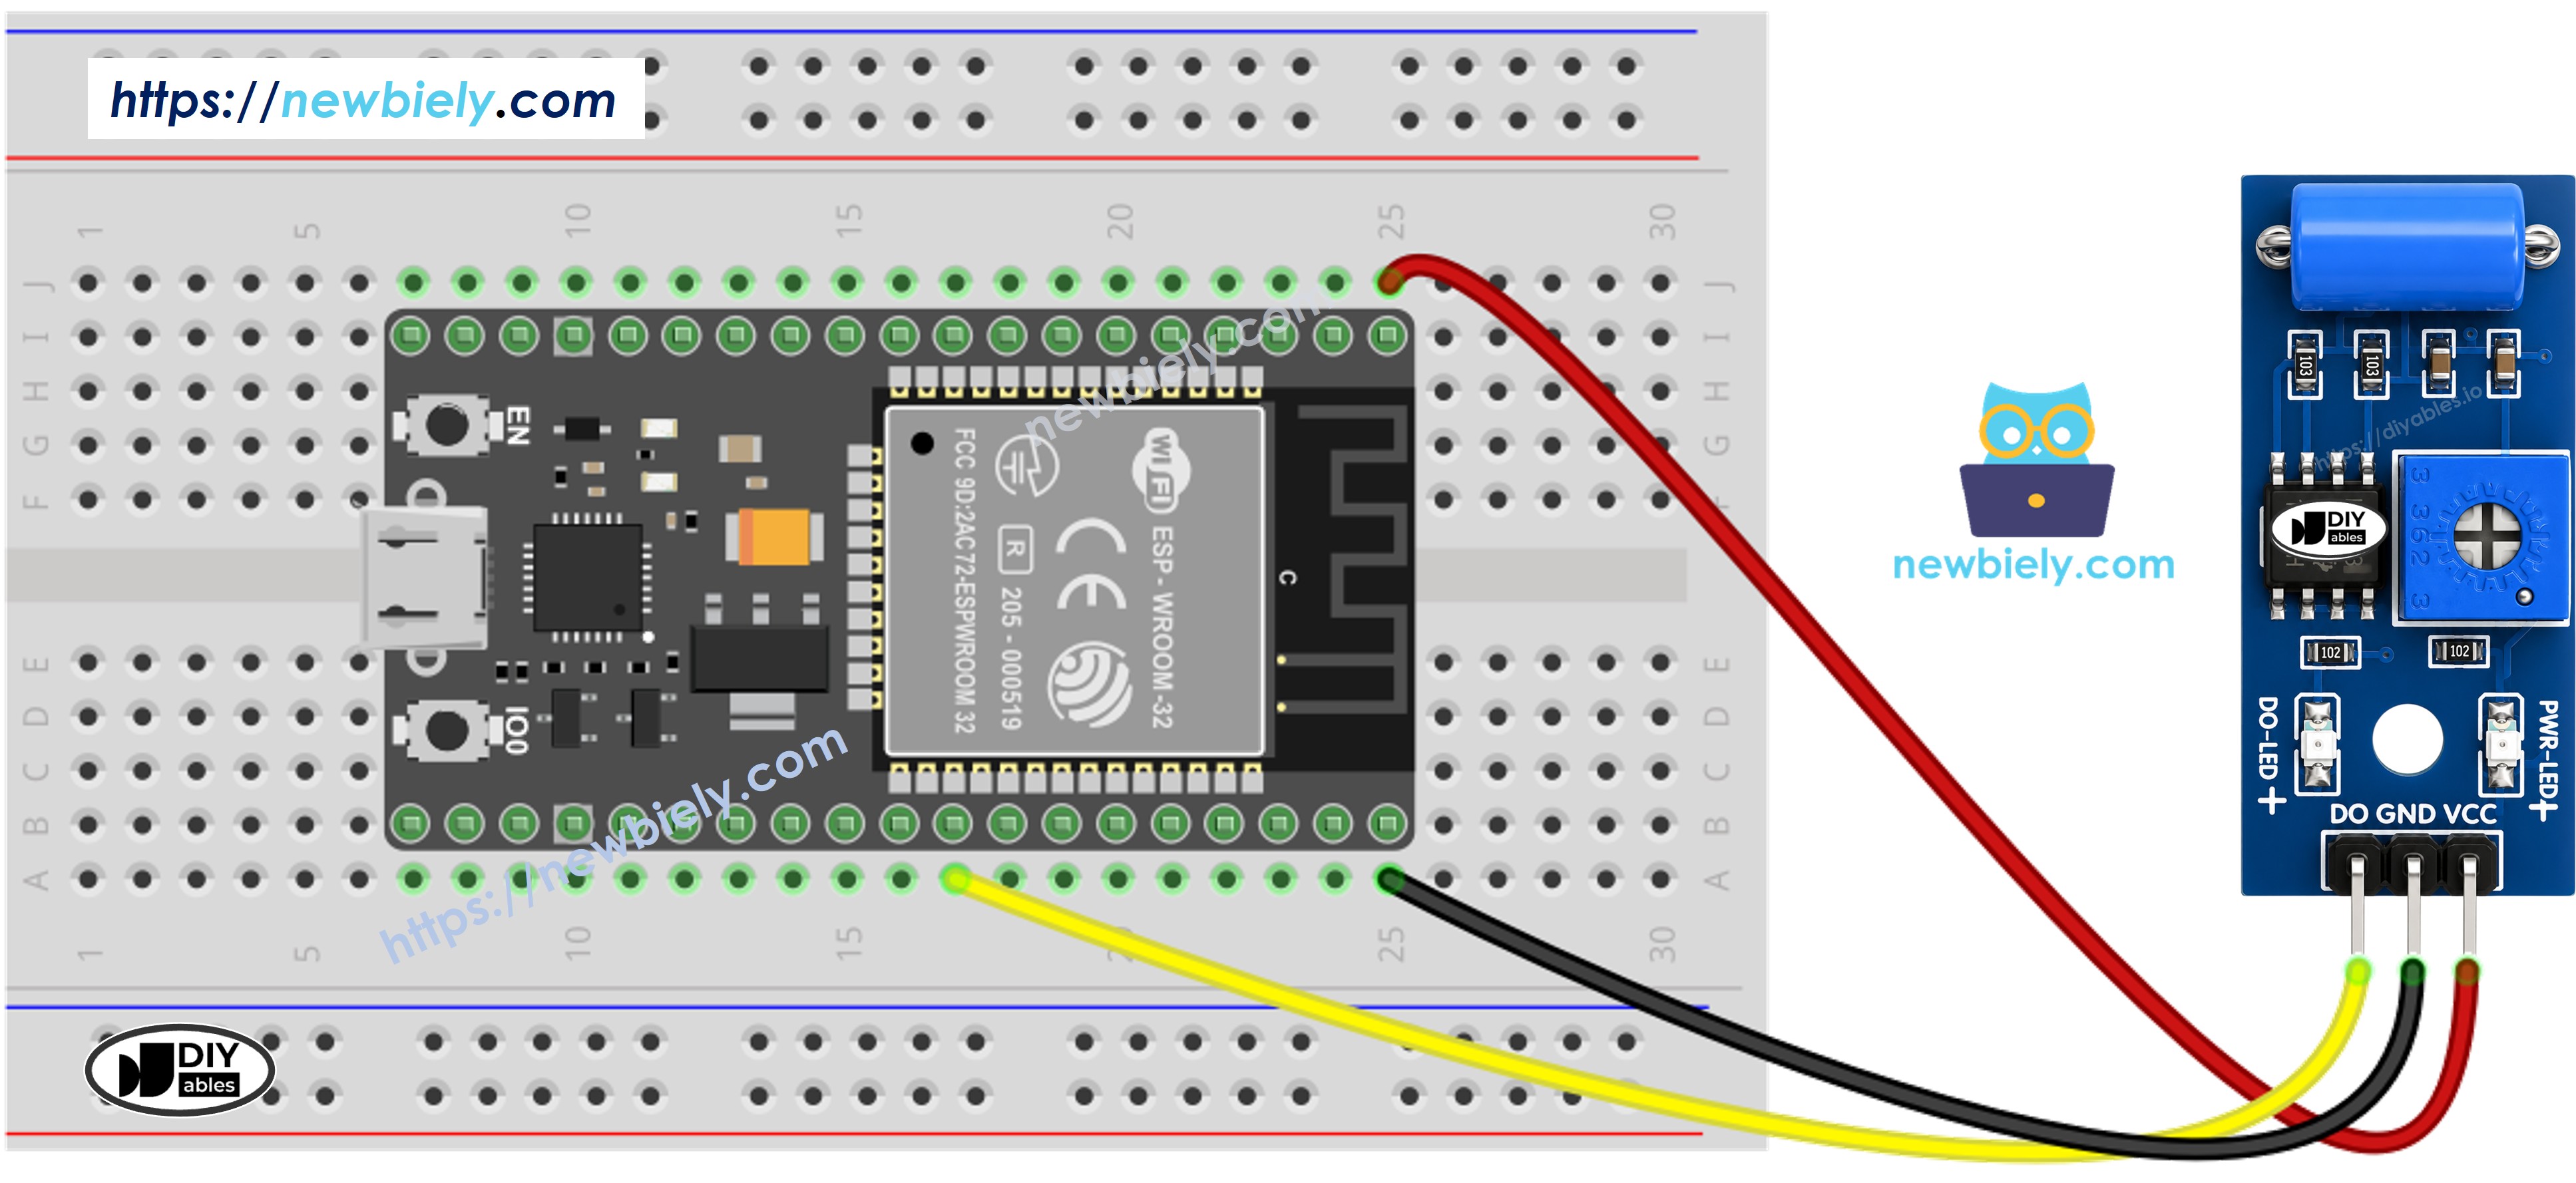
This image is created using Fritzing. Click to enlarge image
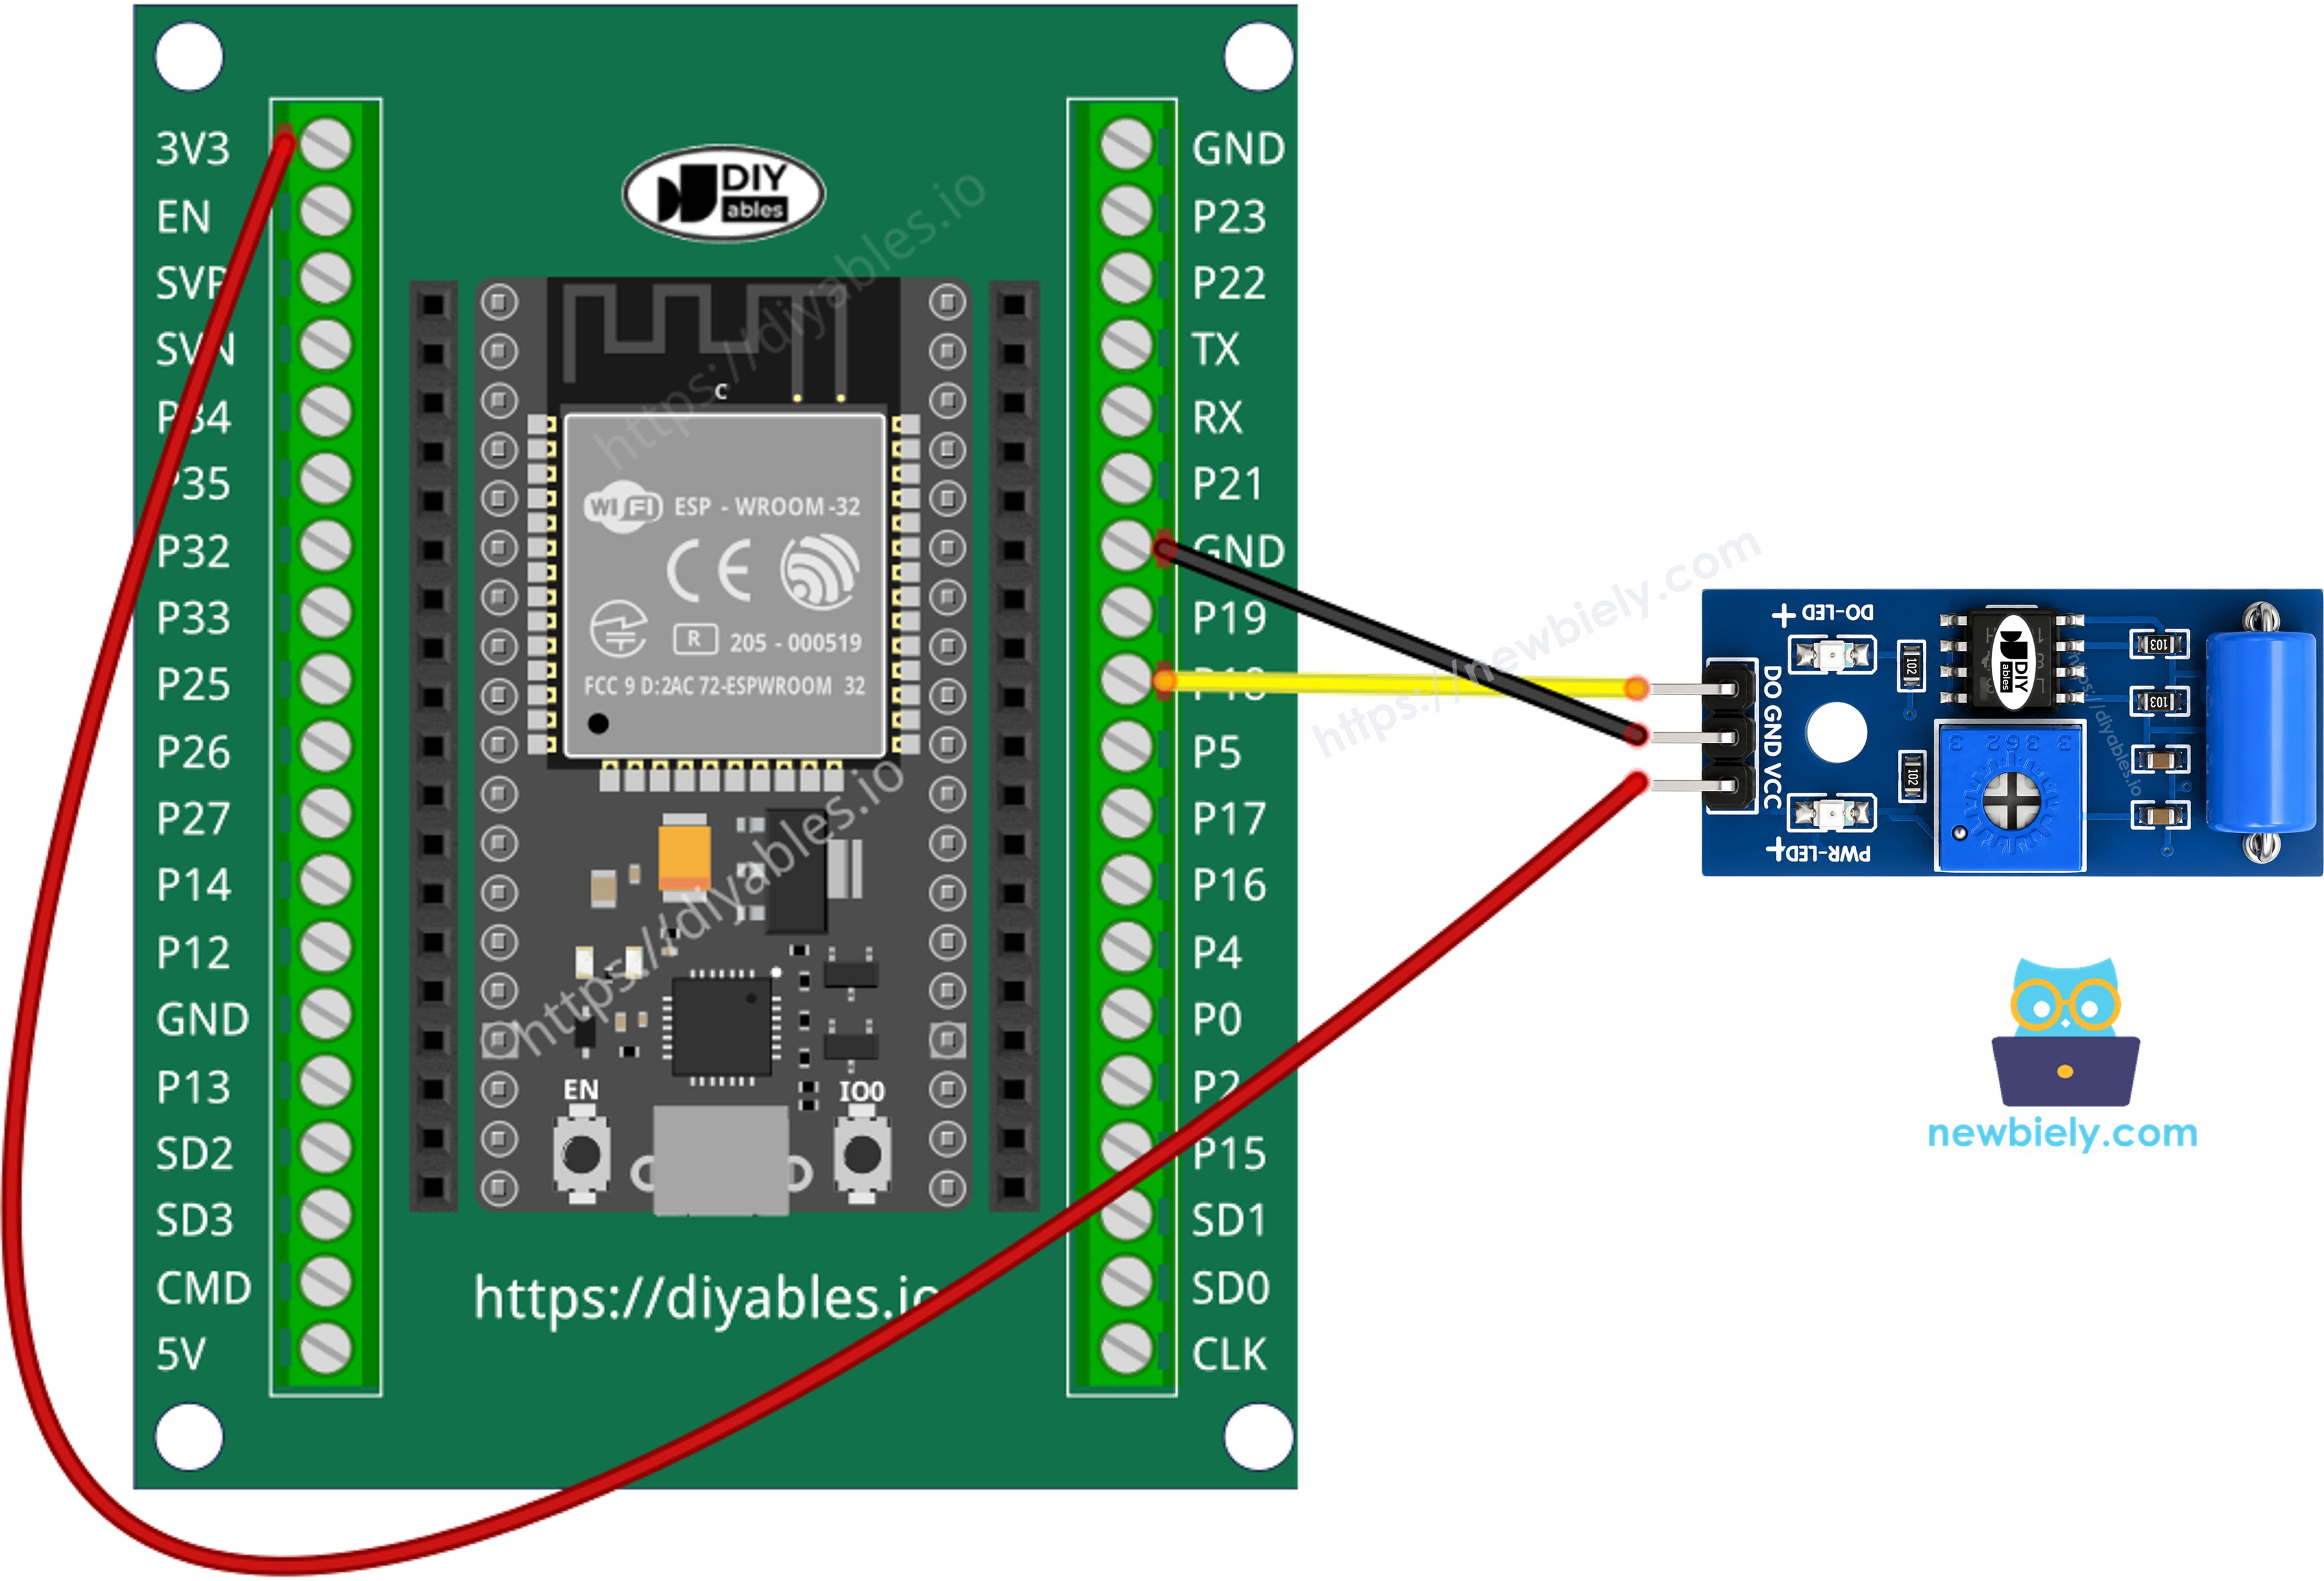
- How to wire an ESP32 to a SW-420 vibration sensor using screw terminal block breakout board
How To Program For SW-420 Vibration Sensor
- Configures the ESP32 pin as a digital input.
- Reads the current state of that pin on the ESP32.
ESP32 MicroPython Code - Detecting vibration
Detailed Instructions
Follow these steps to get the MicroPython script running on your ESP32 through Thonny IDE:
- Install Thonny IDE on your computer, if it isn't there already.
- Make sure your ESP32 board already has MicroPython firmware flashed onto it.
- First time pairing MicroPython with an ESP32? Work through the ESP32 MicroPython Getting Started guide before continuing.
- Wire the SW-420 vibration sensor to the ESP32 following the diagram above.
- Plug the ESP32 into your computer using a USB cable.
- Launch Thonny IDE.
- In Thonny, go to Tools Options.
- On the Interpreter tab, pick MicroPython (ESP32) from the dropdown menu.
- Make sure the right port is selected. Thonny usually finds it on its own, but you may need to pick it manually (such as COM12 on Windows or /dev/ttyACM0 on Linux).
- Copy the MicroPython code below and paste it into Thonny's editor.
- Save the script onto your ESP32:
- Click the Save button or press Ctrl+S.
- In the save dialog, pick MicroPython device.
- Name the file main.py.
- Press the green Run button (or hit F5) to start the script.
- Tap or shake the SW-420 sensor to give it a vibration to catch.
- Watch the Shell pane at the bottom of Thonny for the printed messages.
Troubleshooting
If the SW-420 vibration sensor isn't behaving as expected, try the following steps:
- Adjust the sensitivity: Turn the onboard potentiometer to make the sensor more or less sensitive, then test again with a light tap and a firmer knock.
- Isolate it from stray vibration: Mount the sensor firmly and away from motors, fans, or surfaces that shake on their own, so it doesn't trigger from ambient noise.
- Check the wiring: Make sure the VCC, GND, and DO pins are connected correctly and securely.
- Check the power supply: Make sure the ESP32 is receiving stable power, since voltage dips can cause erratic readings.