
ESP32 C3 Super Mini - SW-420 Vibration Sensor
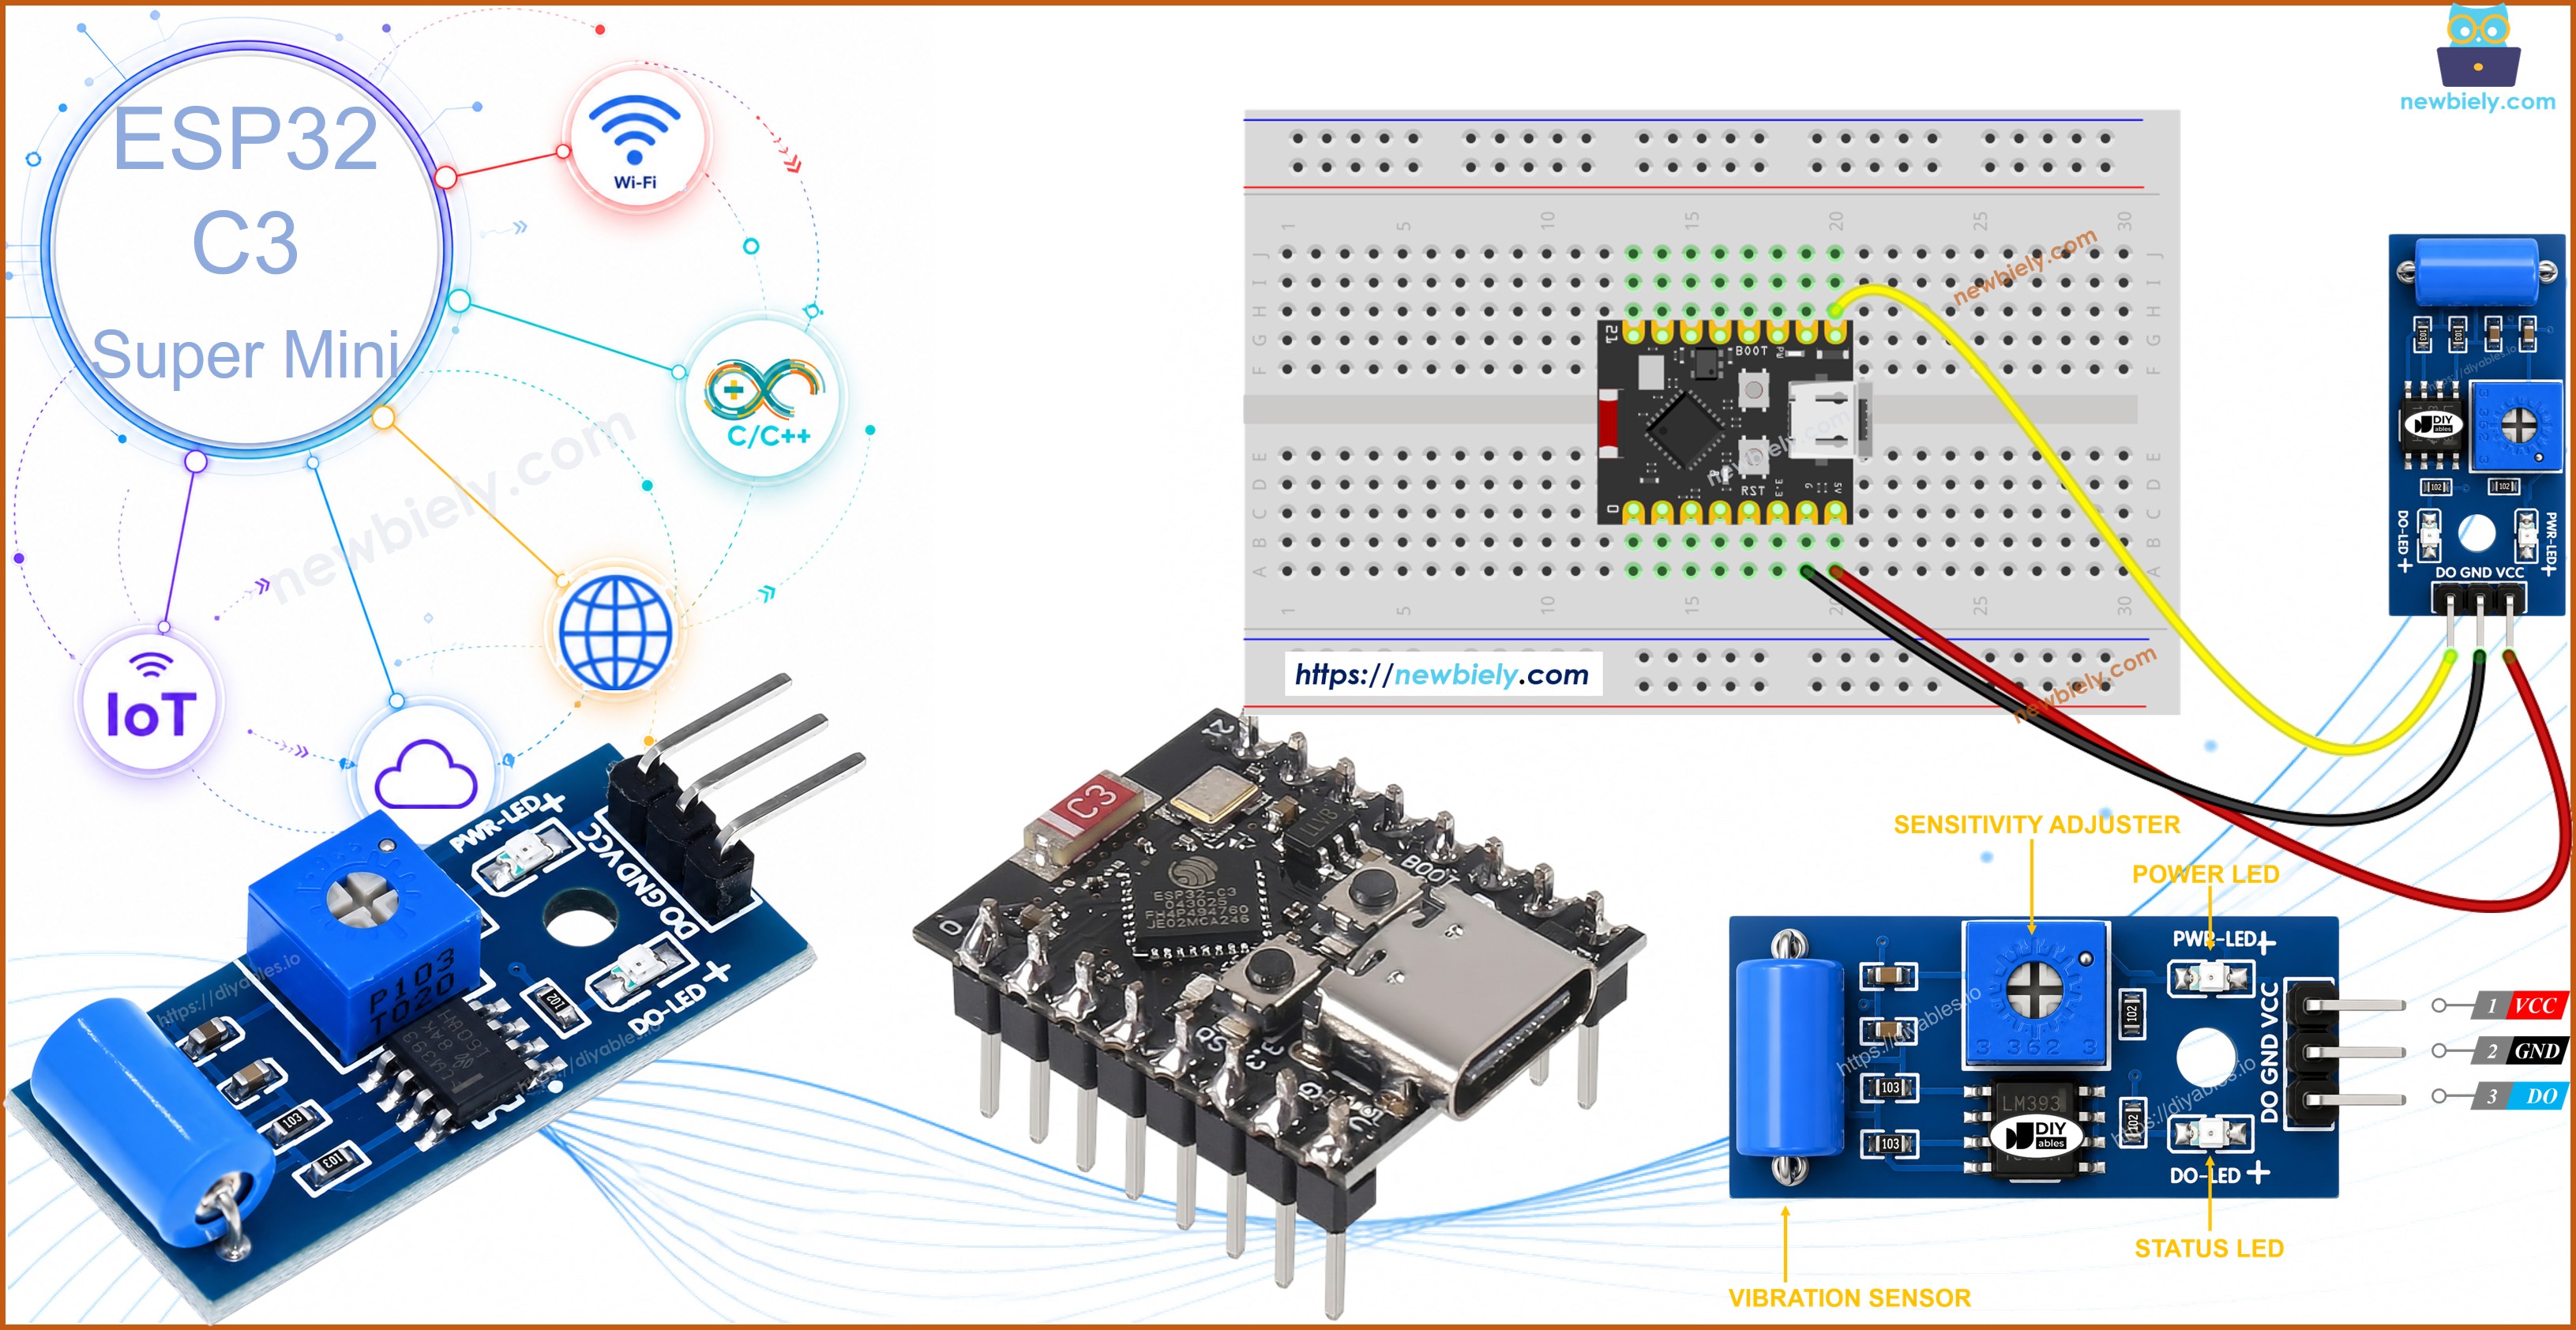
The SW-420 vibration sensor module wakes up your ESP32 C3 Super Mini the moment something shakes, bumps, or knocks against it, making it a handy building block for shock alarms, impact counters, and shipment monitors. This tutorial walks through wiring an SW-420 module to your board and writing the sketch that reacts to vibration events.
In this tutorial, you'll learn:
- What the SW-420 vibration sensor module is and how it senses shock
- How to wire an SW-420 module to the ESP32 C3 Super Mini
- How to program the ESP32 C3 Super Mini to catch vibration events
- How to interpret the SW-420 digital output
Once the basic sketch is running, you can extend it to sound a buzzer, send a notification, or log every shock event your project picks up.
Hardware Preparation
Or you can buy the following kits:
| 1 | × | DIYables Sensor Kit (18 sensors/displays) |
Additionally, some of these links are for products from our own brand, DIYables .
Overview of SW-420 Vibration Sensor
The SW-420 is a shock-detection module built around a small spring-based vibration switch. Inside the module, the spring sits close to a metal contact; any knock or shake momentarily disturbs it, and the onboard LM393 comparator turns that disturbance into a clean digital pulse your ESP32 C3 Super Mini can read directly.
Key features:
- Onboard LM393 comparator for a clean, debounced digital signal
- Adjustable trigger threshold via an onboard potentiometer
- Runs happily from 3.3V to 5V, matching the ESP32 C3 Super Mini logic level
- Onboard LEDs show power and trigger status at a glance
- No library required — just a couple of GPIO calls
The SW-420 Vibration Sensor Pinout
Wiring is simple since the module exposes only three pins.
- VCC pin: Connect to power supply (3.3V to 5V)
- GND pin: Connect to ground (0V)
- DO pin: Digital output pin - stays LOW while idle, goes HIGH when vibration or shock is detected - connect to an ESP32 C3 Super Mini digital input pin
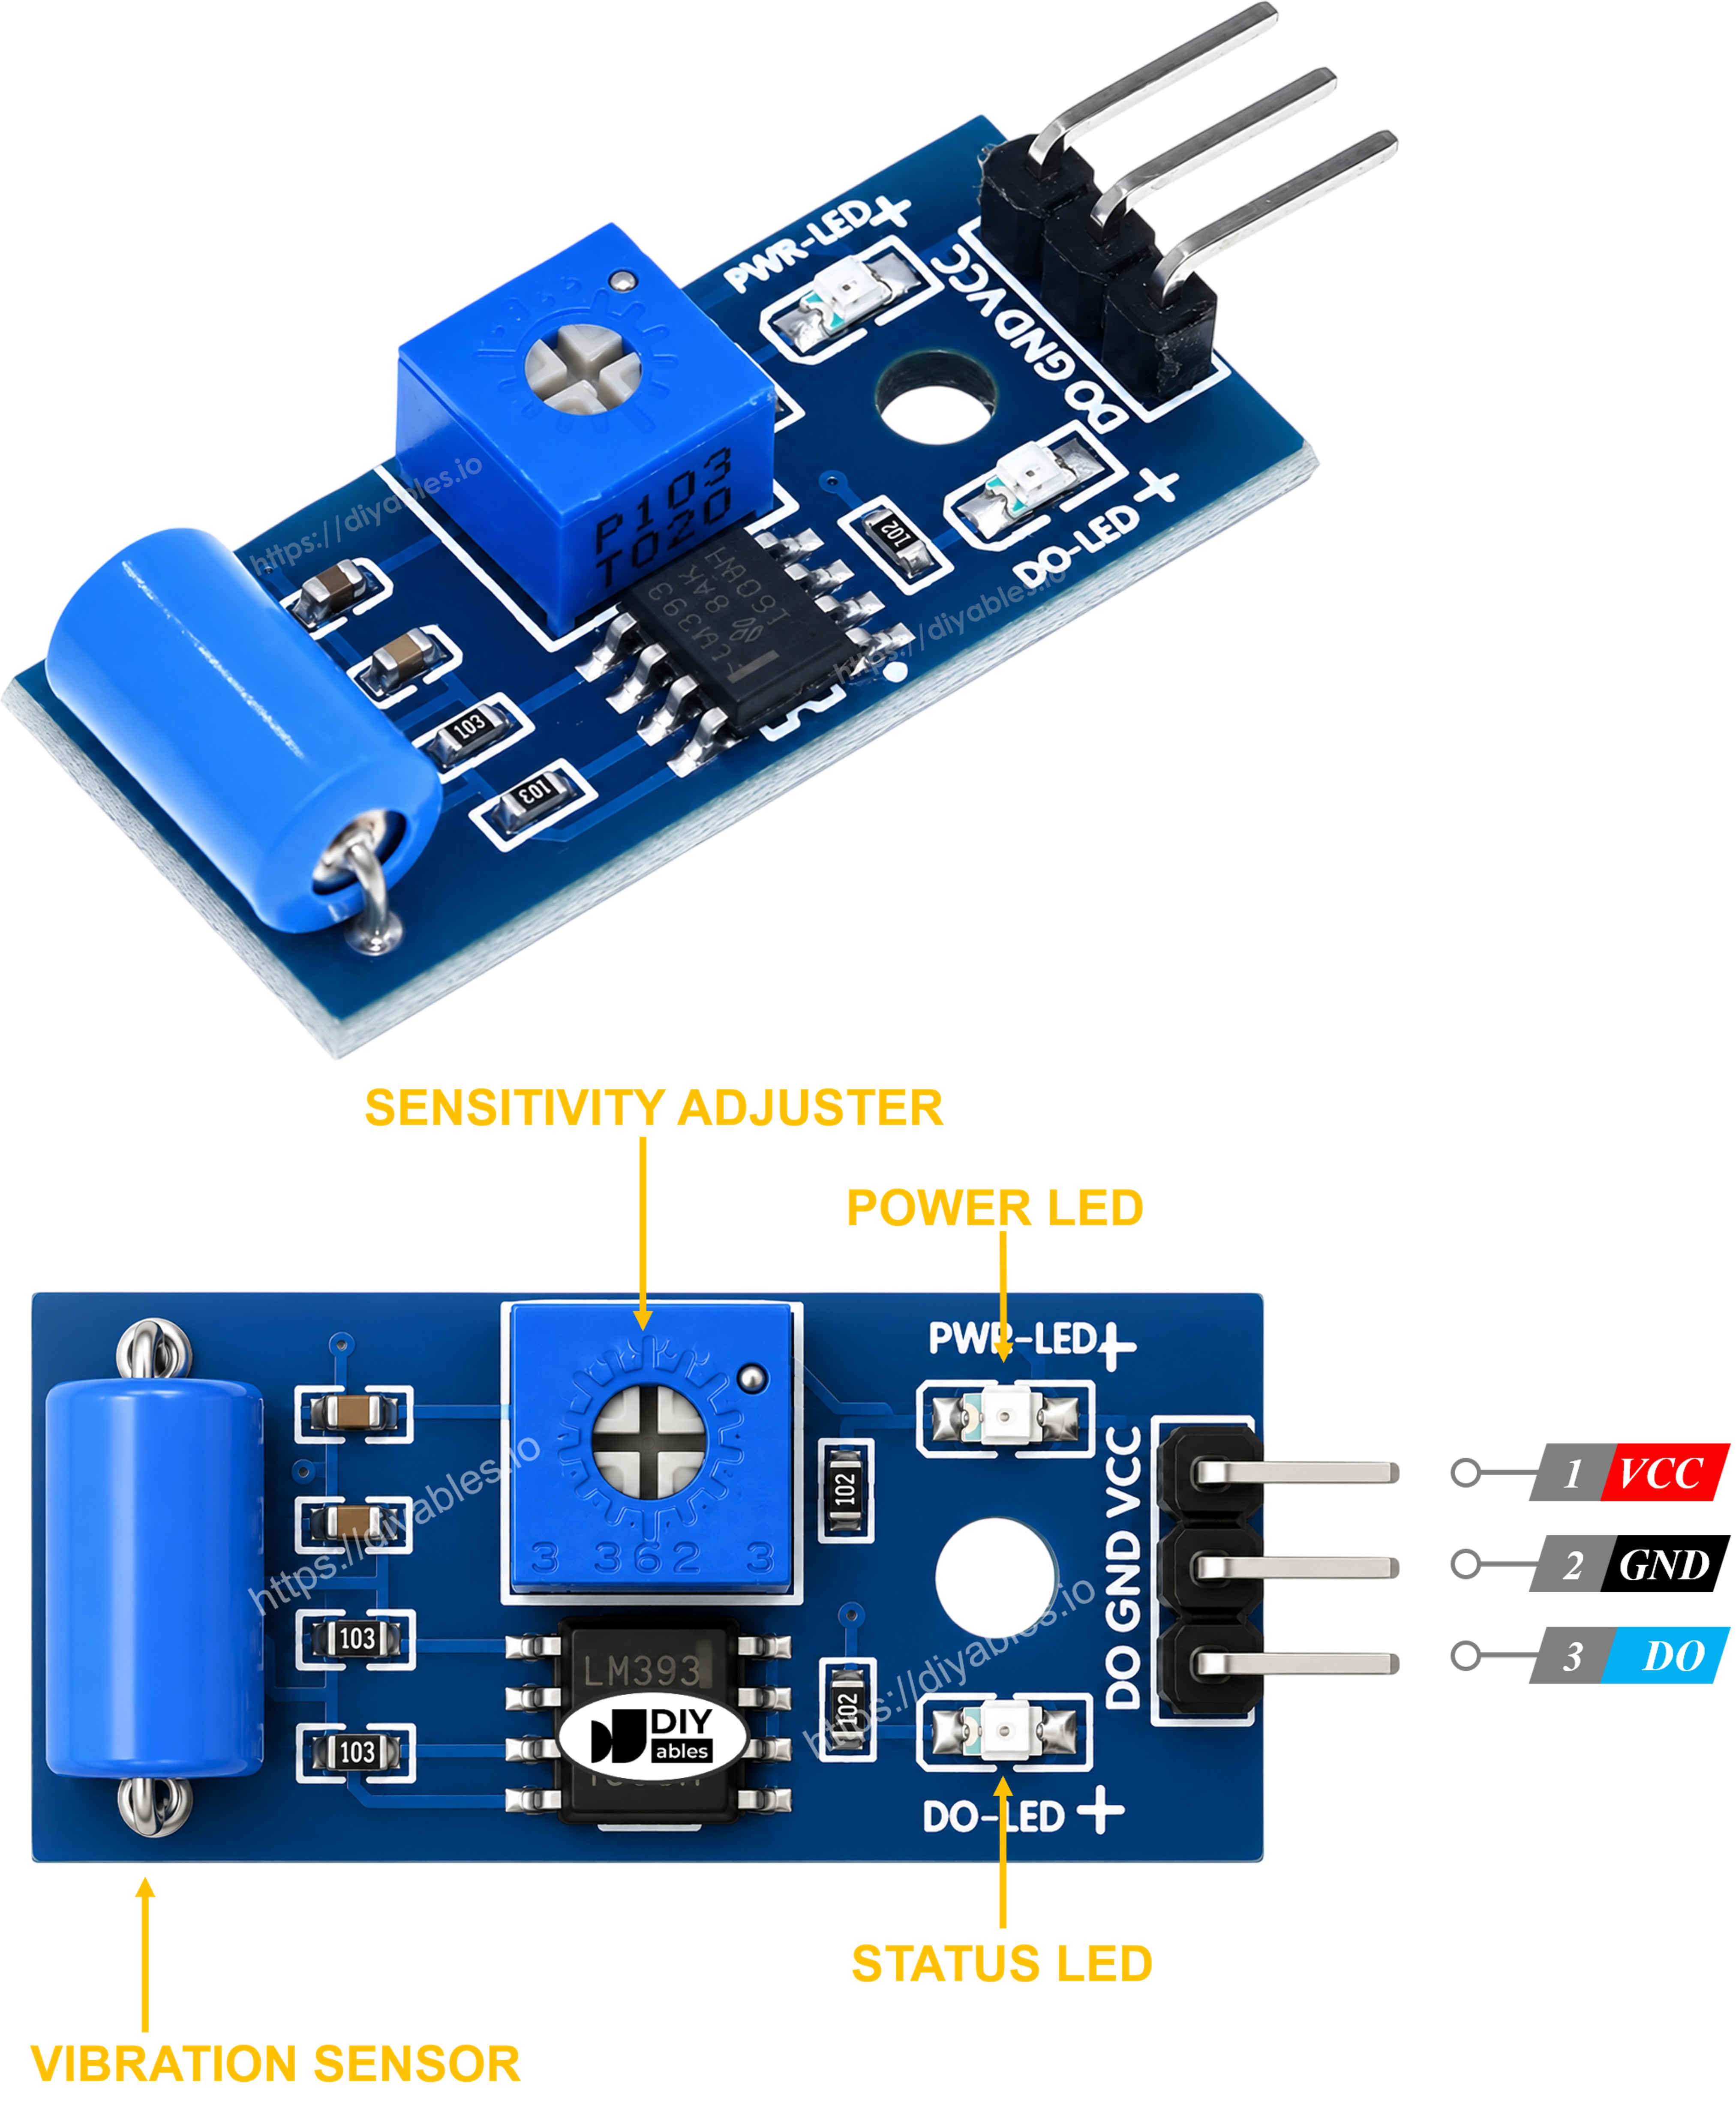
Additional features:
- Power LED stays lit whenever the board is powered
- Trigger LED flashes on briefly each time the DO pin goes HIGH
How It Works
A small onboard trimmer potentiometer sets how strong a knock needs to be before the comparator flips its output, so you can tune the module from feather-light taps to hard impacts.
Digital output behavior:
- At rest, no vibration → DO pin stays LOW
- A knock, shake, or shock disturbs the internal switch → DO pin goes HIGH
- Turn the onboard potentiometer clockwise or counter-clockwise → raises or lowers the sensitivity threshold
Wiring Diagram
Wire the SW-420 module to your ESP32 C3 Super Mini as shown below.
Important notes:
- Note: Power down the board before connecting or disconnecting wires
- Note: Only three wires are needed — VCC, GND, and DO
- Note: No pull-up resistor is needed; the module's comparator already drives the DO line
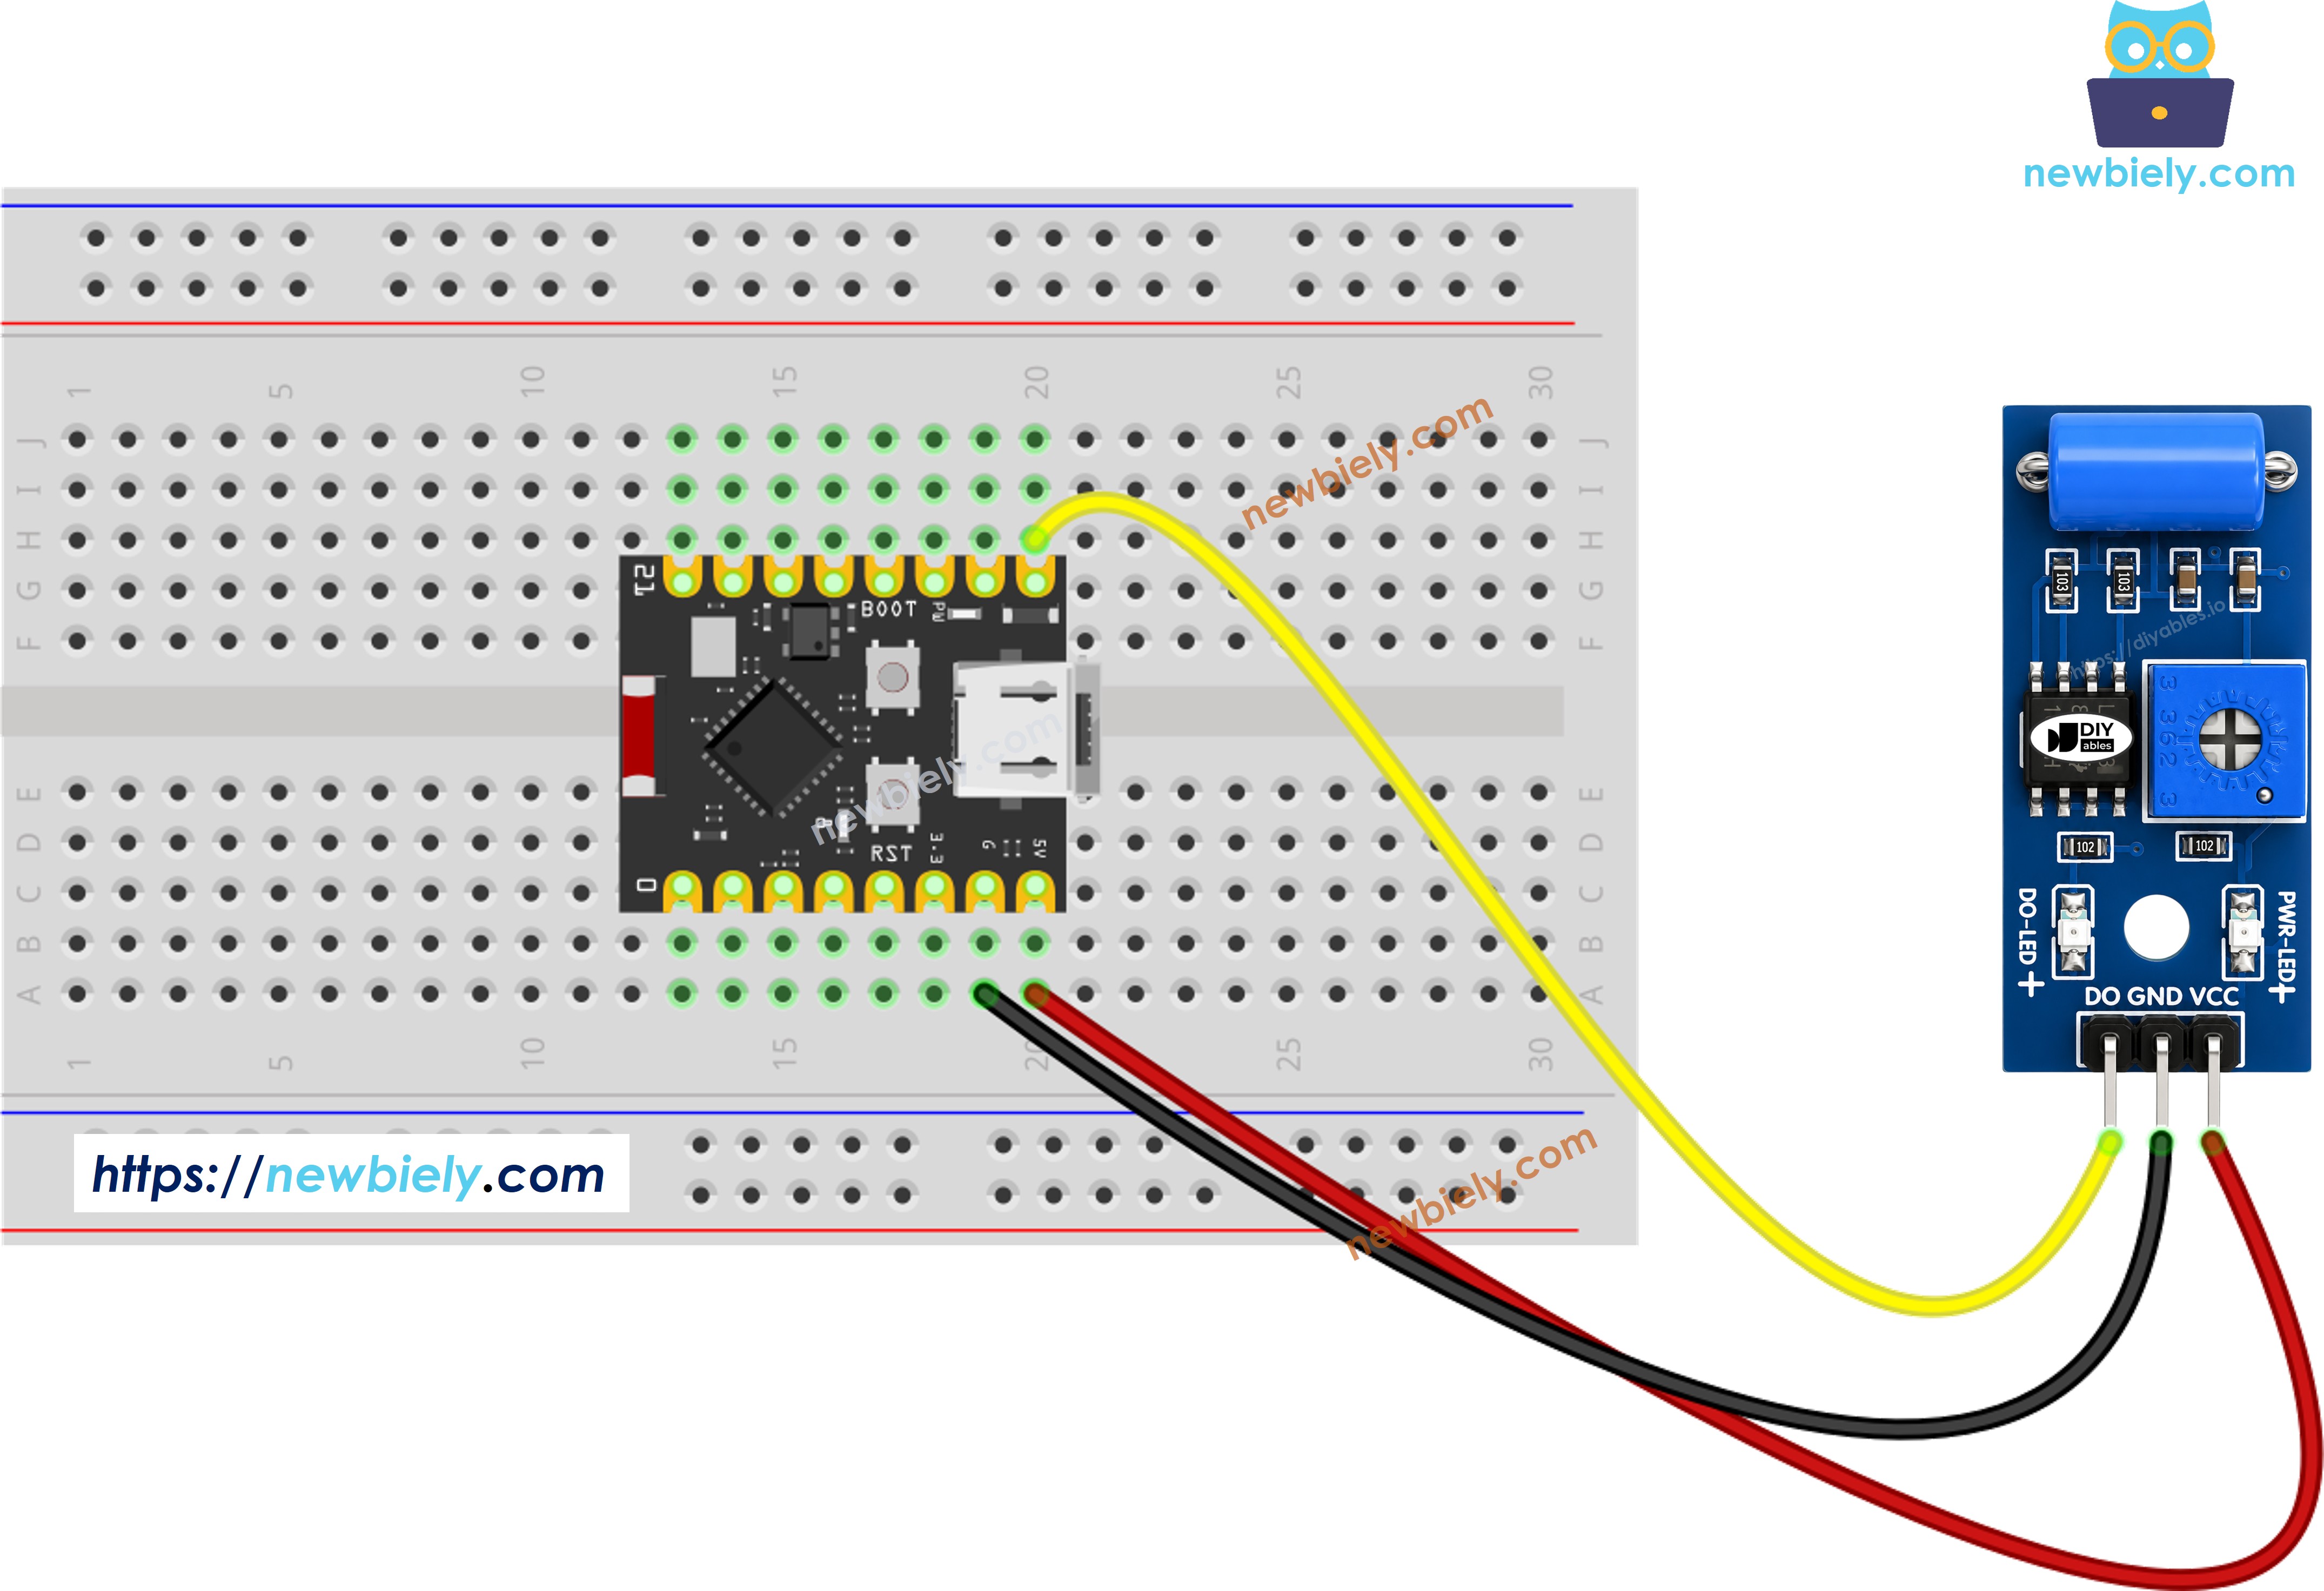
This image is created using Fritzing. Click to enlarge image
| SW-420 Vibration Sensor Pin | ESP32 C3 Super Mini Pin |
|---|---|
| VCC | 3.3V or 5V |
| GND | GND |
| DO | D3 (GPIO3) |
How To Program For SW-420 Vibration Sensor
Reading the SW-420 module only takes a digital input pin and a comparison against its previous state.
What the code does:
- Sets up the ESP32 C3 Super Mini pin connected to DO as a digital input
- Polls the pin on every loop iteration
- Compares the new reading against the previous one to spot a change
- Prints a message on Serial Monitor the instant vibration starts or stops
Step 1 - Initialize the pin:
Step 2 - Read the sensor state:
ESP32 C3 Super Mini Code - Detecting the vibration
Detailed Instructions
- New to ESP32 C3 Mini? Complete our Getting Started with ESP32 C3 Mini tutorial first to set up your development environment.
- Check the wiring: Match every connection against the wiring diagram above
- Copy the code: Copy the provided sketch into Arduino IDE
- Select your board: Choose ESP32 C3 Super Mini from the boards menu
- Upload the code: Click Upload to flash the sketch onto your ESP32 C3 Super Mini
- Open Serial Monitor: Set the baud rate to 115200
- Test the sensor: Tap or gently shake the SW-420 module
- Observe the output: Watch Serial Monitor for the vibration messages
From here you can wire in a buzzer, blink an onboard LED, or push an alert over WiFi whenever a shock event fires. See the ideas and challenges below for inspiration.
Application and Project Ideas
Put your ESP32 C3 Super Mini and SW-420 module to work in projects that react to shock and movement.
- Build a vibration-triggered alarm that sounds a buzzer when someone bumps a door or window
- Log every shock a package takes in transit to catch rough handling during shipping
- Monitor a washing machine or motor for abnormal vibration that signals an imbalance
- Turn knocks on a door into a doorbell trigger or smart-lock wake-up signal
- Build a simple impact counter that tallies how many times an object has been struck
Video Tutorial
Watch the video below for a visual walkthrough of this project.
Challenge Yourself
Push your ESP32 C3 Super Mini SW-420 project further with these challenges.
- Easy: Light an LED for two seconds every time vibration is detected
- Easy: Print a running total of vibration events instead of just on/off messages
- Medium: Add a debounce timer so a single knock doesn't register as several events
- Medium: Combine the sensor with a buzzer to build a simple shock alarm
- Advanced: Log timestamped shock events to an SD card or send them over WiFi to a server
Troubleshooting
If your ESP32 C3 Super Mini isn't catching vibration events correctly, work through these checks.
Common issues and fixes:
- Adjust the potentiometer: Too sensitive or not sensitive enough — turn the onboard trimmer to tune the trigger threshold
- Isolate ambient vibration: Mount the module away from motors, fans, or surfaces that shake on their own to avoid constant false triggers
- Check the wiring: Confirm VCC, GND, and DO match the wiring diagram — a loose DO connection reads as constant LOW
- Verify the power supply: Unstable power can cause the comparator to chatter or miss real events
- Watch the trigger LED: It should flash whenever DO goes HIGH — if it never lights up during a hard tap, recheck the sensitivity setting