Arduino MKR WiFi 1010 - OLED 128x64 Display
Introduction
Ready to add a crystal-clear display to your Arduino MKR WiFi 1010 projects? OLED displays offer stunning contrast, wide viewing angles, and vibrant visuals that bring your projects to life! In this comprehensive tutorial, you'll learn everything you need to use an OLED 128x64 display with your Arduino MKR WiFi 1010.
Unlike traditional LCD displays, OLED (Organic Light-Emitting Diode) screens produce their own light, resulting in perfect blacks, excellent contrast, and no backlight requirements. The SSD1306 OLED display is the most popular choice for Arduino MKR WiFi 1010 projects, and you'll master it in this guide!
What You'll Learn:
- Connecting an OLED 128x64 display to Arduino MKR WiFi 1010
- Installing the SSD1306 OLED library for Arduino MKR WiFi 1010
- Programming Arduino MKR WiFi 1010 to display text on OLED screens
- Showing numbers on OLED displays with Arduino MKR WiFi 1010
- Centering text on OLED 128x64 displays using Arduino MKR WiFi 1010
- Drawing shapes and graphics on OLED with Arduino MKR WiFi 1010
- Converting and displaying images on OLED 128x64 screens
- Understanding I2C communication between Arduino MKR WiFi 1010 and OLED
- Using the Adafruit SSD1306 library with Arduino MKR WiFi 1010
- Troubleshooting OLED display issues on Arduino MKR WiFi 1010
Real-World Applications:
- Sensor displays: Show Arduino MKR WiFi 1010 sensor readings on OLED screens
- Status indicators: Display Arduino MKR WiFi 1010 system status on compact OLED displays
- Wearable projects: Use OLED 128x64 displays with Arduino MKR WiFi 1010 for portable devices
- Smart home displays: Build Arduino MKR WiFi 1010 information panels with OLED technology
- Data visualization: Create Arduino MKR WiFi 1010 graphs and charts on OLED displays
By the end of this tutorial, you'll be able to create stunning visual displays for your Arduino MKR WiFi 1010 projects using OLED 128x64 screens!
Hardware Preparation
| 1 | × | Arduino MKR WiFi 1010 | |
| 1 | × | Micro USB Cable | |
| 1 | × | SSD1306 I2C OLED Display 128x64 | |
| 1 | × | Jumper Wires |
Or you can buy the following kits:
| 1 | × | DIYables Sensor Kit (18 sensors/displays) |
Additionally, some of these links are for products from our own brand, DIYables .
Buy Note: If you want a bigger OLED display, use the 2.42 inch OLED Display 128x64 .
About OLED Displays
OLED (Organic Light-Emitting Diode) displays are a modern alternative to traditional LCD screens. Each pixel in an OLED generates its own light, which means:
- Perfect blacks - Pixels can turn completely off
- High contrast - Stunning visual clarity
- Wide viewing angles - Readable from almost any position
- No backlight needed - Lower power consumption
- Thin profile - Compact and lightweight
Common OLED Types for Arduino MKR WiFi 1010
There are many OLED displays available, but the most popular for Arduino MKR WiFi 1010 projects are:
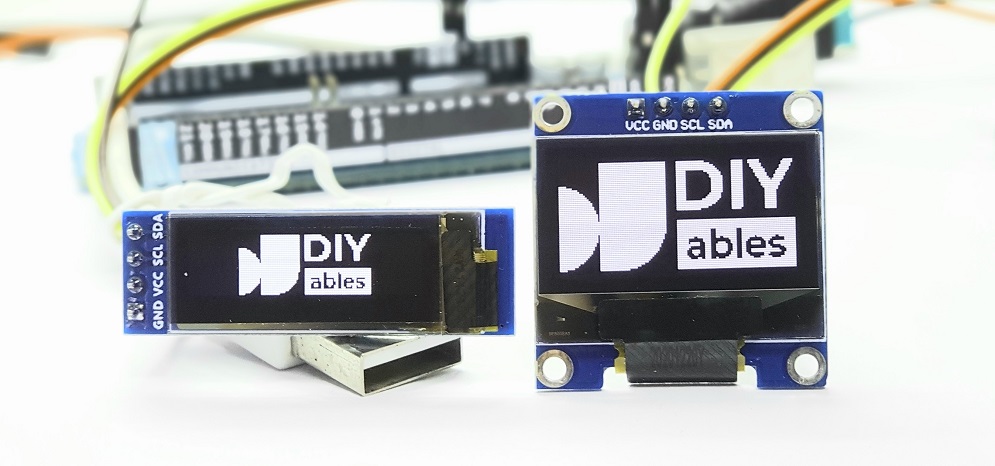
- SSD1306 I2C OLED 128x64 - The most common size, perfect for text and simple graphics
- SSD1306 I2C OLED 128x32 - Smaller version for space-constrained projects
Both use the I2C interface, which requires only two wires for communication, making them easy to connect to your Arduino MKR WiFi 1010!
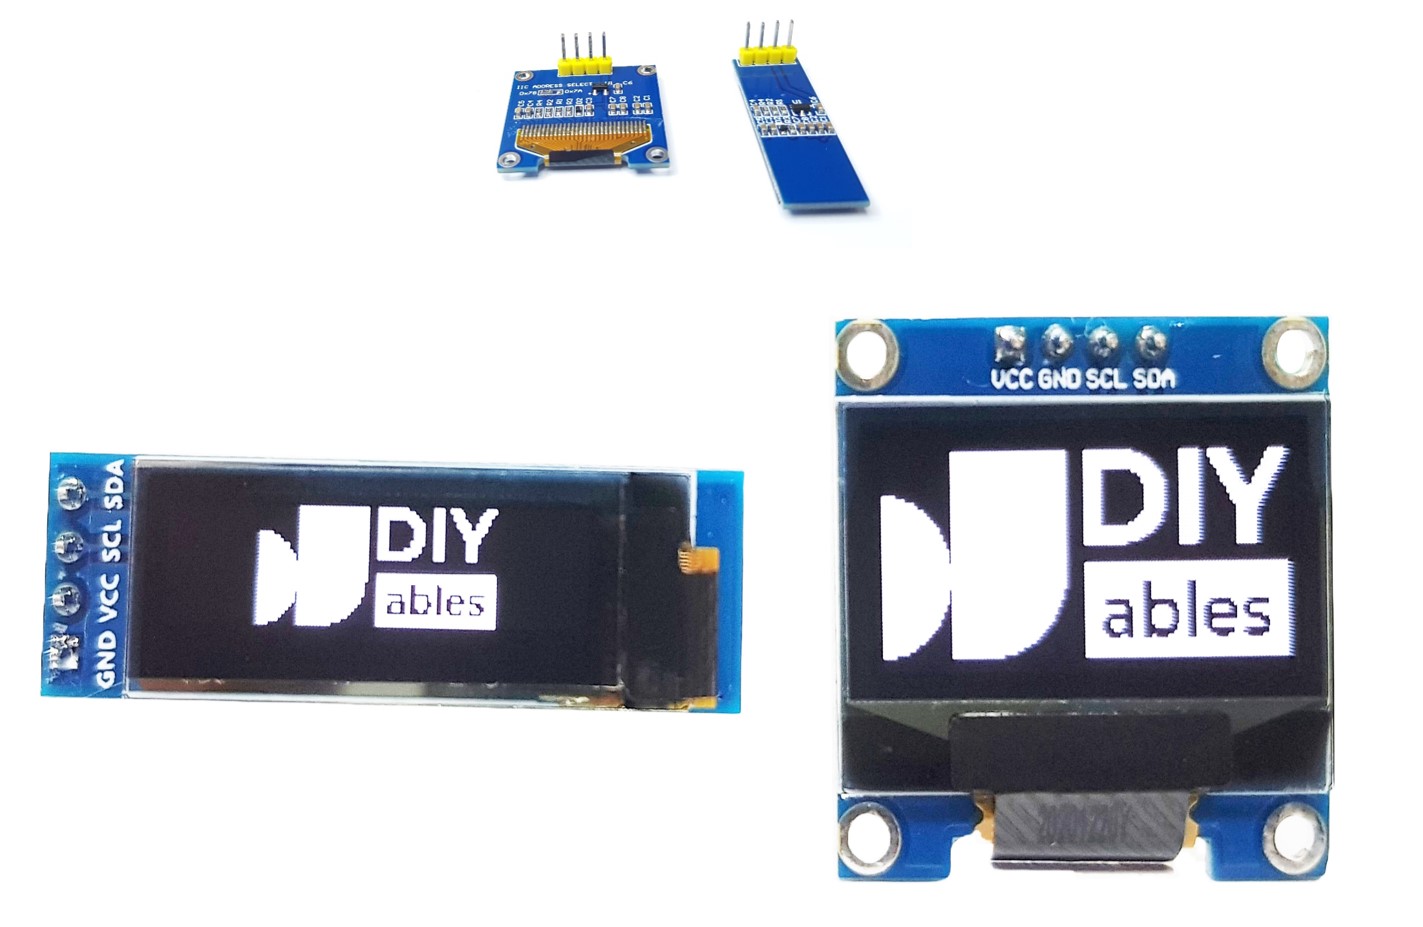
I2C OLED Display Pinout
Most SSD1306 OLED displays have four pins for easy connection:
- GND pin: Connect to ground (0V) on your Arduino MKR WiFi 1010
- VCC pin: Power supply - connect to 3.3V or 5V (most OLED modules work with both)
- SCL pin: Serial Clock Line for I2C communication
- SDA pin: Serial Data Line for I2C communication
※ NOTE THAT:
- The connections on the OLED module might be different depending on who made it and its type. Please use the labels shown on your OLED module. Look carefully!
- This guide uses an OLED screen that works with the SSD1306 I2C driver. We tested it with the OLED display from DIYables and it works great.
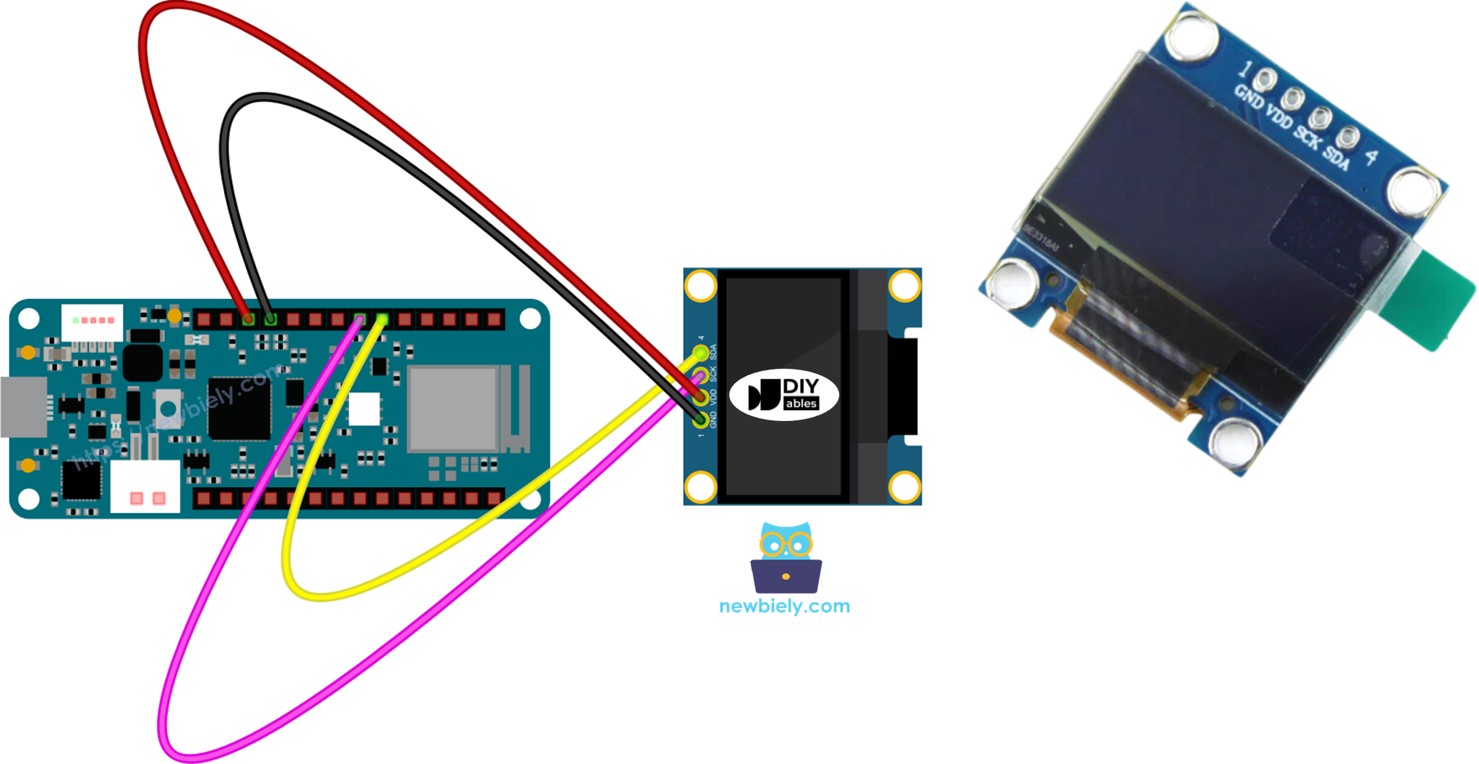
Wiring Diagram
Connecting your OLED display to the Arduino MKR WiFi 1010 is straightforward thanks to the I2C interface. Here's the complete wiring setup:

This image is created using Fritzing. Click to enlarge image
Connection Table
Follow this table to wire your OLED display to the Arduino MKR WiFi 1010:
| OLED Module | Arduino MKR WiFi 1010 |
|---|---|
| Vin | 3.3V |
| GND | GND |
| SDA | SDA (pin 11) |
| SCL | SCL (pin 12) |
How To Use OLED with Arduino MKR WiFi 1010
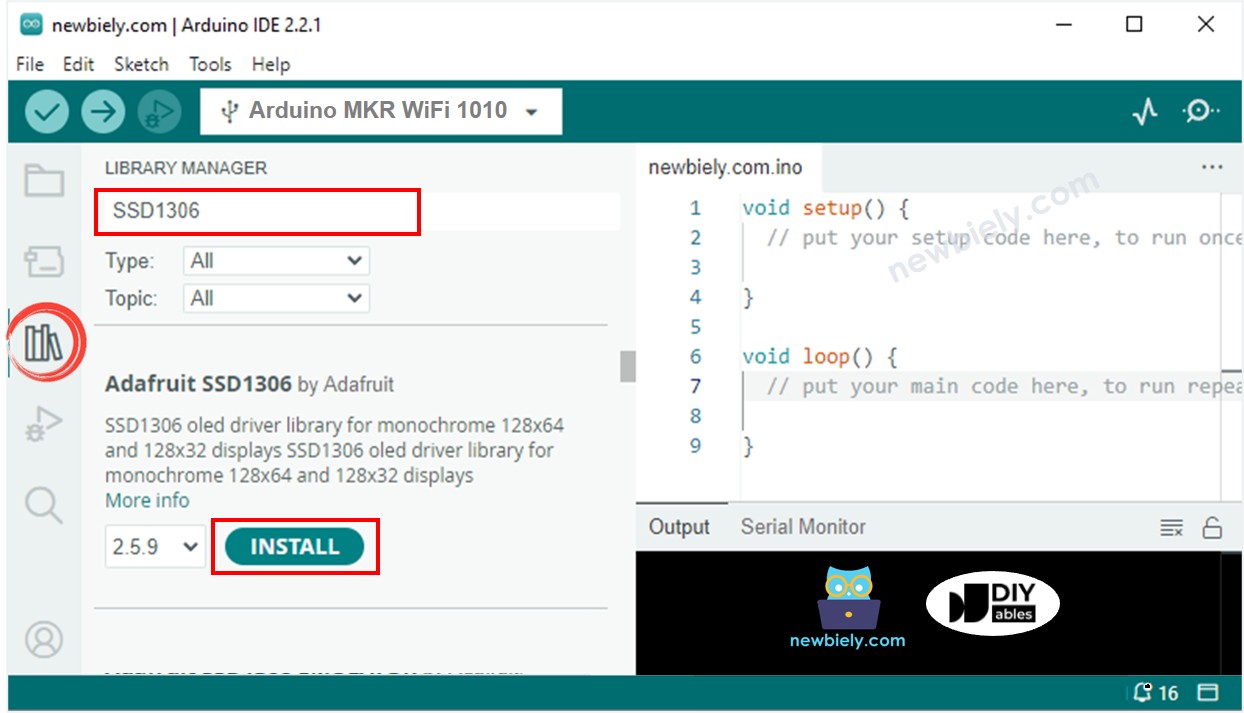
Install SSD1306 OLED Library
Before you can program your OLED display, you need to install the necessary libraries in the Arduino IDE. Follow these simple steps:
- Open Library Manager - Click on the Libraries icon on the left sidebar of the Arduino IDE (it looks like a stack of books).
- Search for SSD1306 - Type SSD1306 in the search box and look for the Adafruit SSD1306 library.
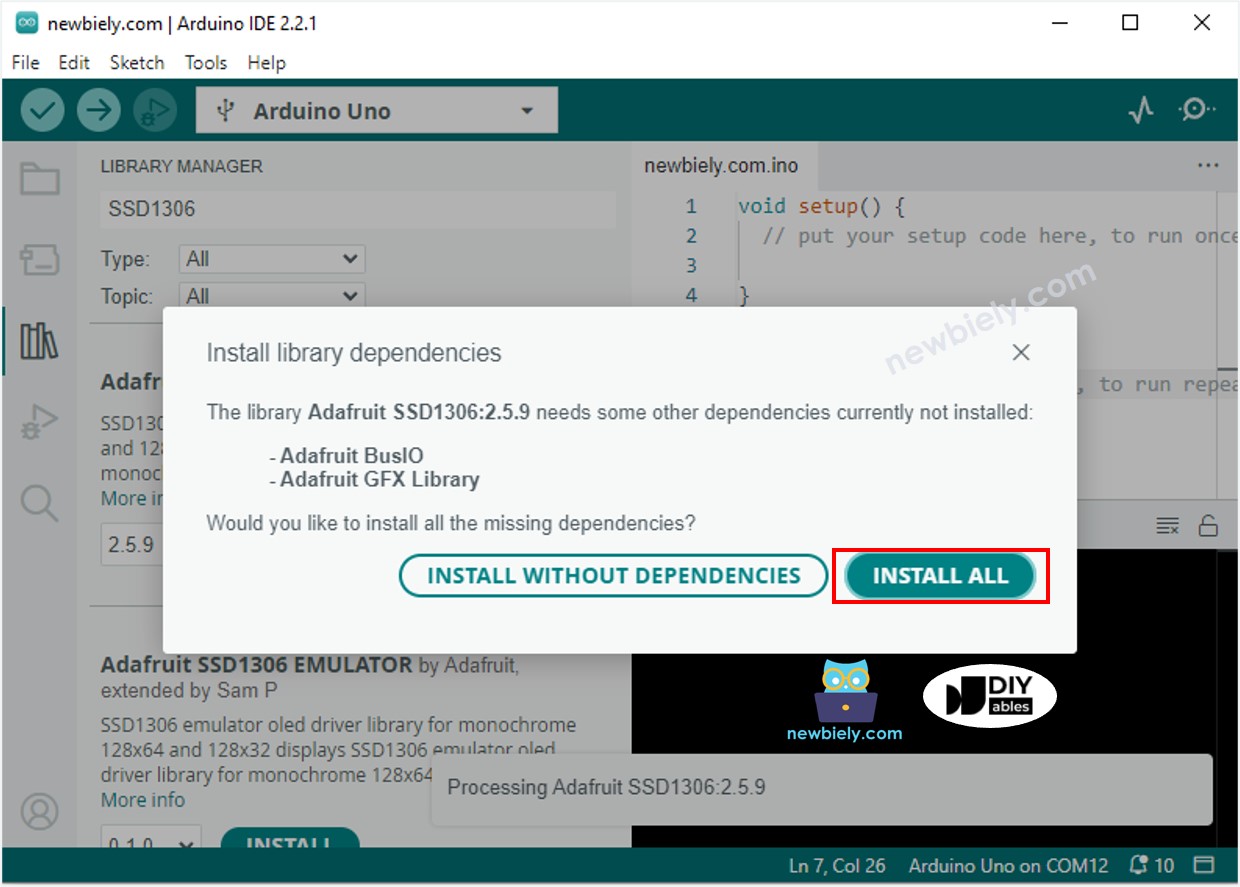
- Install the library - Click the Install button next to the Adafruit SSD1306 library.
- Install dependencies - A popup will appear asking to install additional required libraries. Click Install All to add the Adafruit GFX library and other dependencies.
What These Libraries Do:
- Adafruit_SSD1306: Controls the OLED display hardware
- Adafruit_GFX: Provides graphics functions for drawing shapes, text, and images
Programming Your OLED Display
Now let's walk through the essential code structure for controlling your OLED with Arduino MKR WiFi 1010.
Step 1: Include Required Libraries
Start every OLED sketch by including the necessary libraries:
Step 2: Define Display Dimensions
Specify your OLED's resolution. For a 128x64 display:
Step 3: Create an OLED Display Object
Initialize the display object with the dimensions and communication settings:
Step 4: Initialize the Display in setup()
In your setup() function, initialize the OLED display with its I2C address (typically 0x3C):
What This Does:
- SSD1306_SWITCHCAPVCC: Sets the internal voltage mode
- 0x3C: The I2C address of most OLED displays (some use 0x3D)
- If initialization fails, the code stops and prints an error message
Step 5: Display Content
After initialization, you can display text, draw graphics, and show images using the library's functions!
Arduino MKR WiFi 1010 Code - Display Text on OLED
Here's a complete example that displays text on your OLED screen:
Essential OLED Text Functions
The Adafruit libraries provide powerful functions for displaying text on your OLED:
- Oled.clearDisplay() – Turns off every pixel on the screen.
- Oled.drawPixel(x, y, color) – Draws a pixel at the specified x and y position.
- Oled.setTextSize(n) – Sets how big the text will be; you can choose a size between 1 and 8.
- Oled.setCursor(x, y) – Moves the starting point for writing text to the x and y coordinates.
- Oled.setTextColor(WHITE) – Sets the text color to white.
- Oled.setTextColor(BLACK, WHITE) – Sets the text color to black and the background color to white.
- Oled.println("message") – Writes a text message on the screen.
- Oled.println(number) – Writes a number on the screen.
- Oled.println(number, HEX) – Writes a number in hexadecimal (base 16) format.
- Oled.display() – Updates the screen so that your changes appear.
- Oled.startscrollright(start, stop) – Scrolls the text from left to right between the chosen start and stop points.
- Oled.startscrollleft(start, stop) – Scrolls the text from right to left between the chosen start and stop points.
- Oled.startscrolldiagright(start, stop) – Scrolls the text from the bottom left to the top right.
- Oled.startscrolldiagleft(start, stop) – Scrolls the text from the bottom right to the top left.
- Oled.stopscroll() – Stops the scrolling text.
Centering Text on Your OLED Display
Want perfectly centered text on your OLED 128x64 display? Calculating the position manually can be tricky, but we've got you covered!
For a detailed guide with code examples on how to center align text both vertically and horizontally on your OLED display, check out this comprehensive tutorial: How to vertical/horizontal center on OLED.
Quick Tip: To center text, you'll need to:
- Calculate the pixel width of your text using getTextBounds()
- Subtract half the text width from half the screen width
- Do the same for vertical centering with text height
Arduino MKR WiFi 1010 Code - Drawing Shapes on OLED
Beyond text, you can create lines, circles, rectangles, and other shapes on your OLED display:
Common Drawing Functions:
- drawLine(x1, y1, x2, y2, color) - Draw a straight line
- drawRect(x, y, width, height, color) - Draw rectangle outline
- fillRect(x, y, width, height, color) - Draw filled rectangle
- drawCircle(x, y, radius, color) - Draw circle outline
- fillCircle(x, y, radius, color) - Draw filled circle
- drawTriangle(x1, y1, x2, y2, x3, y3, color) - Draw triangle outline
Experiment with these functions to create custom interfaces and visualizations!
Arduino MKR WiFi 1010 Code - Display Images on OLED
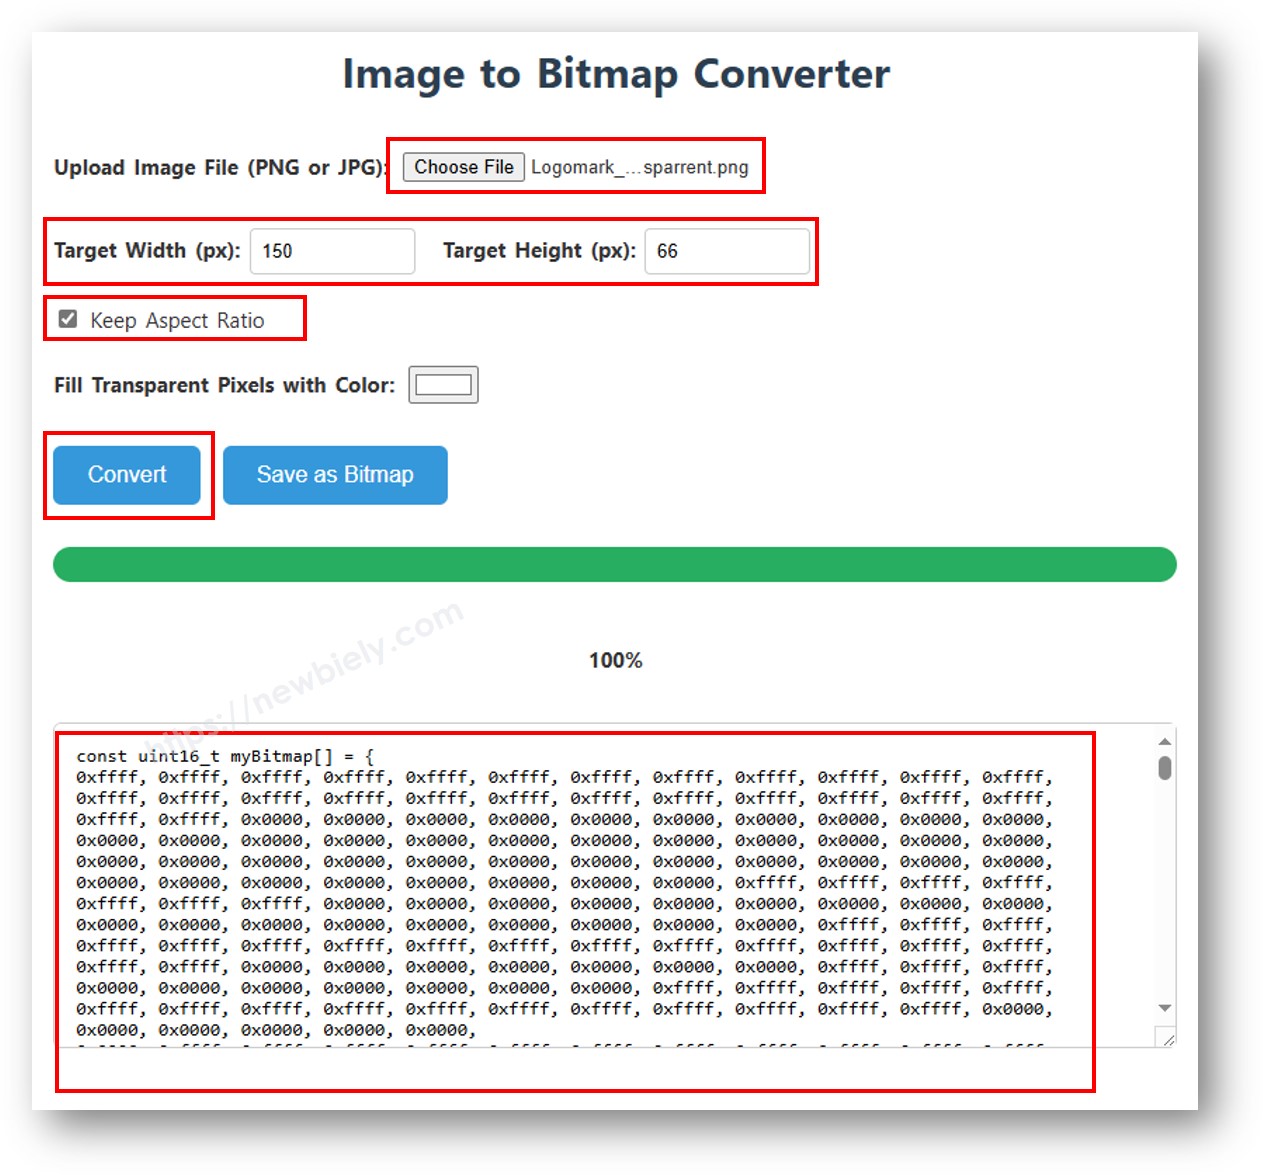
Want to display custom images, logos, or icons on your OLED? You'll need to convert your images into a special bitmap array format that the Arduino MKR WiFi 1010 can understand.
Converting Images to Bitmap Arrays
- Choose your image - Any format works (JPG, PNG, GIF, etc.)
- Use the online converter - Visit image2cpp
- Configure settings:
- Set canvas size to 128x64 (or your display size)
- Choose "Arduino code" as output format
- Select "Vertical - 1 bit per pixel" for drawing mode
- Generate the array - Copy the generated code
Here's an example showing the conversion process with an Arduino MKR WiFi 1010 icon:
Using the Bitmap in Your Code
After converting your image, copy the generated array and replace the ArduinoIcon array in this code:
Tips for Best Results:
- Use high-contrast images with clear outlines
- Simple black and white images work best
- Resize your images to 128x64 before converting
- Smaller images load faster and use less memory on your Arduino MKR WiFi 1010
OLED Troubleshooting Guide
If your OLED display isn't working properly, follow these troubleshooting steps:
Display Not Turning On
Check Your Wiring:
- Verify VCC connects to 3.3V (not 5V if your module is 3.3V only)
- Confirm GND connects to GND
- Make sure SDA goes to SDA (pin 11) and SCL goes to SCL (pin 12) on Arduino MKR WiFi 1010
- Check for loose connections or broken wires
Verify the Driver Chip:
- Most OLED displays use the SSD1306 driver chip
- Look at your module's specifications or markings
- Some modules use SH1106 or other drivers (these need different libraries)
Finding Your OLED's I2C Address
Most OLED displays use address 0x3C, but some use 0x3D. If your display isn't working, scan for the correct address:
I2C Scanner Code:
Upload this code and check the Serial Monitor. You should see:
If your address is different (like 0x3D), update your code:
Common Issues and Solutions
"SSD1306 allocation failed" Error:
- Wrong I2C address - run the scanner code above
- Incorrect wiring - double-check all connections
- Faulty display - try a different OLED module
Display Shows Random Pixels:
- Add oled.clearDisplay() at the start of your loop
- Make sure you call oled.display() to update the screen
Text is Too Small/Large:
- Use oled.setTextSize(2) or higher for bigger text
- Text size 1 is the smallest, size 8 is the largest
Display is Upside Down:
- Physically rotate the display, or
- Add oled.setRotation(2) after initialization
Quick Steps for OLED Projects
New to Arduino MKR WiFi 1010? Complete our Getting Started with Arduino MKR WiFi 1010 tutorial first to set up your development environment.
- Wire the OLED - Connect your OLED display to the Arduino MKR WiFi 1010 following the wiring diagram (VCC to 3.3V, GND to GND, SDA to SDA pin 11, SCL to SCL pin 12)
- Install libraries - Open Library Manager in Arduino IDE and install Adafruit SSD1306 and Adafruit GFX libraries
- Connect your board - Plug your Arduino MKR WiFi 1010 into your computer via USB
- Select board and port - Choose Arduino MKR WiFi 1010 and the correct COM port in Arduino IDE
- Upload example code - Copy one of the code examples above, paste into Arduino IDE, and click Upload
- Test the display - Your OLED should light up and show the programmed content!
Challenge Yourself - Creative OLED Projects
Once you've mastered the basics, try these exciting enhancements:
Sensor Data Display
Combine your OLED with sensors to create real-time monitoring displays:
Animated Graphics
Create simple animations by updating the display in a loop:
Custom Menu System
Build an interactive menu using buttons and your OLED display - perfect for standalone projects!
Advanced Ideas to Explore
- Scrolling text ticker - Display long messages that scroll across the screen
- Graph sensor data - Plot real-time values as line graphs
- Display WiFi status - Show connection status and IP address
- Game graphics - Create simple games like Snake or Pong
- QR codes - Generate and display QR codes for WiFi credentials
- Weather station - Show temperature, humidity, and forecast icons
Check out our other Arduino MKR WiFi 1010 sensor tutorials to combine with your new OLED display skills!