Arduino MKR WiFi 1010 - SSD1309 OLED Display
Introduction
Want to add a high-contrast display to your Arduino MKR WiFi 1010 project? The SSD1309 OLED 128×64 — the 2.42-inch (sometimes labeled 2.4-inch) I2C module — delivers sharp, self-emitting pixels with deep blacks and wide viewing angles that a standard LCD simply cannot match.
In this tutorial you will add the DIYables_OLED_SSD1309 library and go from a bare module to a fully functional display, covering:
What You'll Build:
- A wired I2C connection between the SSD1309 OLED and the Arduino MKR WiFi 1010
- Sketches that print text, numbers, and centered content
- Shape-drawing routines using the Adafruit GFX primitives
- Bitmap image rendering from a byte array
- Hardware-assisted scrolling in four directions
- Contrast and dim control via the library API
- Custom typeface rendering using Adafruit FreeFont headers
Real-World Use Cases for This Display:
- IoT dashboards — show live Wi-Fi sensor readings on a compact 2.42-inch screen
- Wearable gadgets — pair the MKR WiFi 1010 with the SSD1309 for a slim, portable display
- Status panels — display connection state, IP address, or alert messages at a glance
- Data loggers — overlay timestamps and measured values without an external monitor
By the end of this tutorial your Arduino MKR WiFi 1010 will be driving the SSD1309 OLED confidently across all these scenarios.

Hardware Preparation
| 1 | × | Arduino MKR WiFi 1010 | |
| 1 | × | Micro USB Cable | |
| 1 | × | SSD1309 I2C OLED Display 128x64 (2.42 inch) | |
| 1 | × | Jumper Wires |
Or you can buy the following kits:
| 1 | × | DIYables Sensor Kit (18 sensors/displays) |
Additionally, some of these links are for products from our own brand, DIYables .
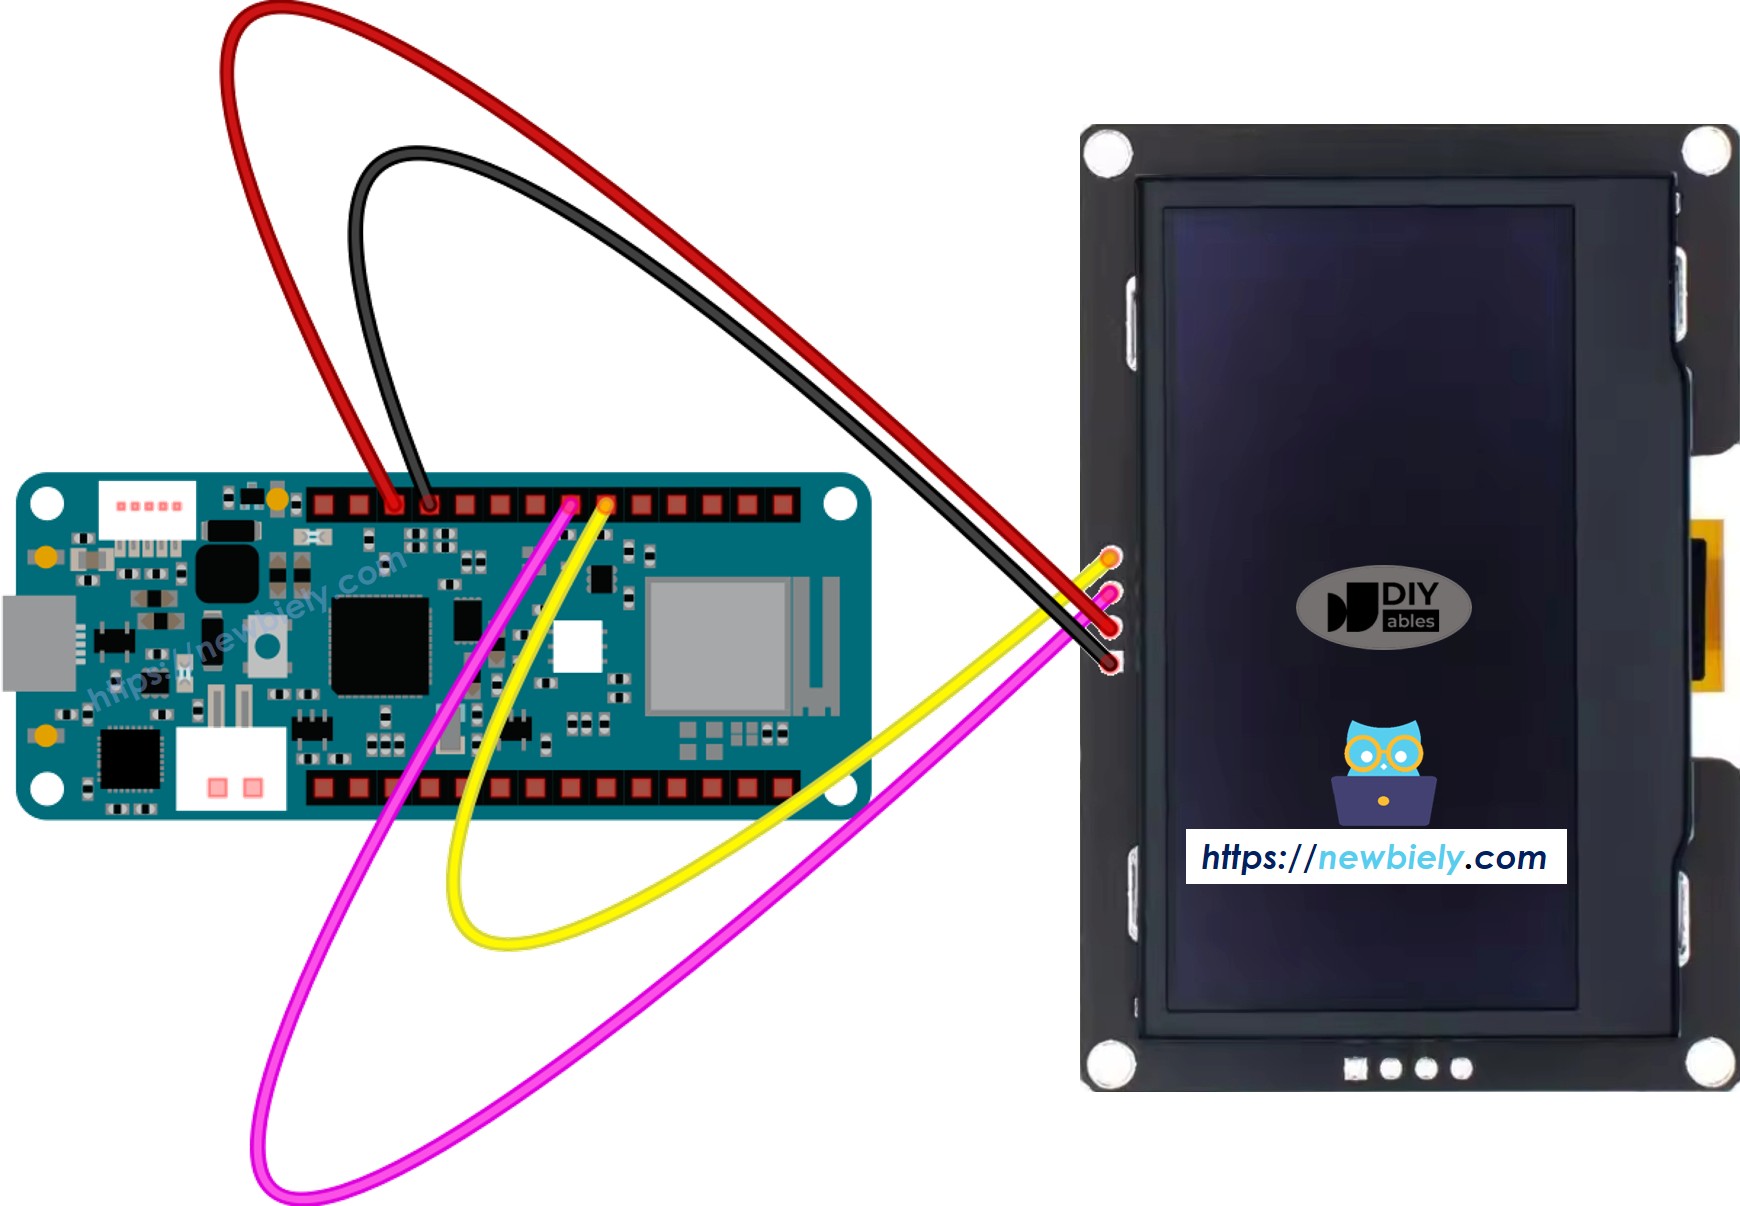
About the SSD1309 OLED Display
Unlike LCD modules that rely on a backlight, OLED displays generate light at the pixel level. The result is perfect blacks (unlit pixels draw zero current), outstanding contrast, and true wide-angle readability. The SSD1309 driver chip is commonly found on 2.42-inch 128×64 I2C modules and offers two important advantages over the ubiquitous SSD1306:
- Register compatibility with SSD1306 — most SSD1306 libraries work after minor initialization changes, and the DIYables_OLED_SSD1309 library handles this for you automatically.
- No internal charge pump — power is supplied externally, but every commercial breakout board ships with an onboard boost converter, so there is nothing extra to wire.
Panel colour (white, blue, yellow-blue, or green) is a physical property of the OLED material and cannot be changed in software.
SSD1309 OLED Module Pinout
| Pin | Function | Connect to (MKR WiFi 1010) |
|---|---|---|
| GND | Ground | GND |
| VCC | Power supply | 3.3V |
| SCL | I2C serial clock | SCL (pin 12) |
| SDA | I2C serial data | SDA (pin 11) |
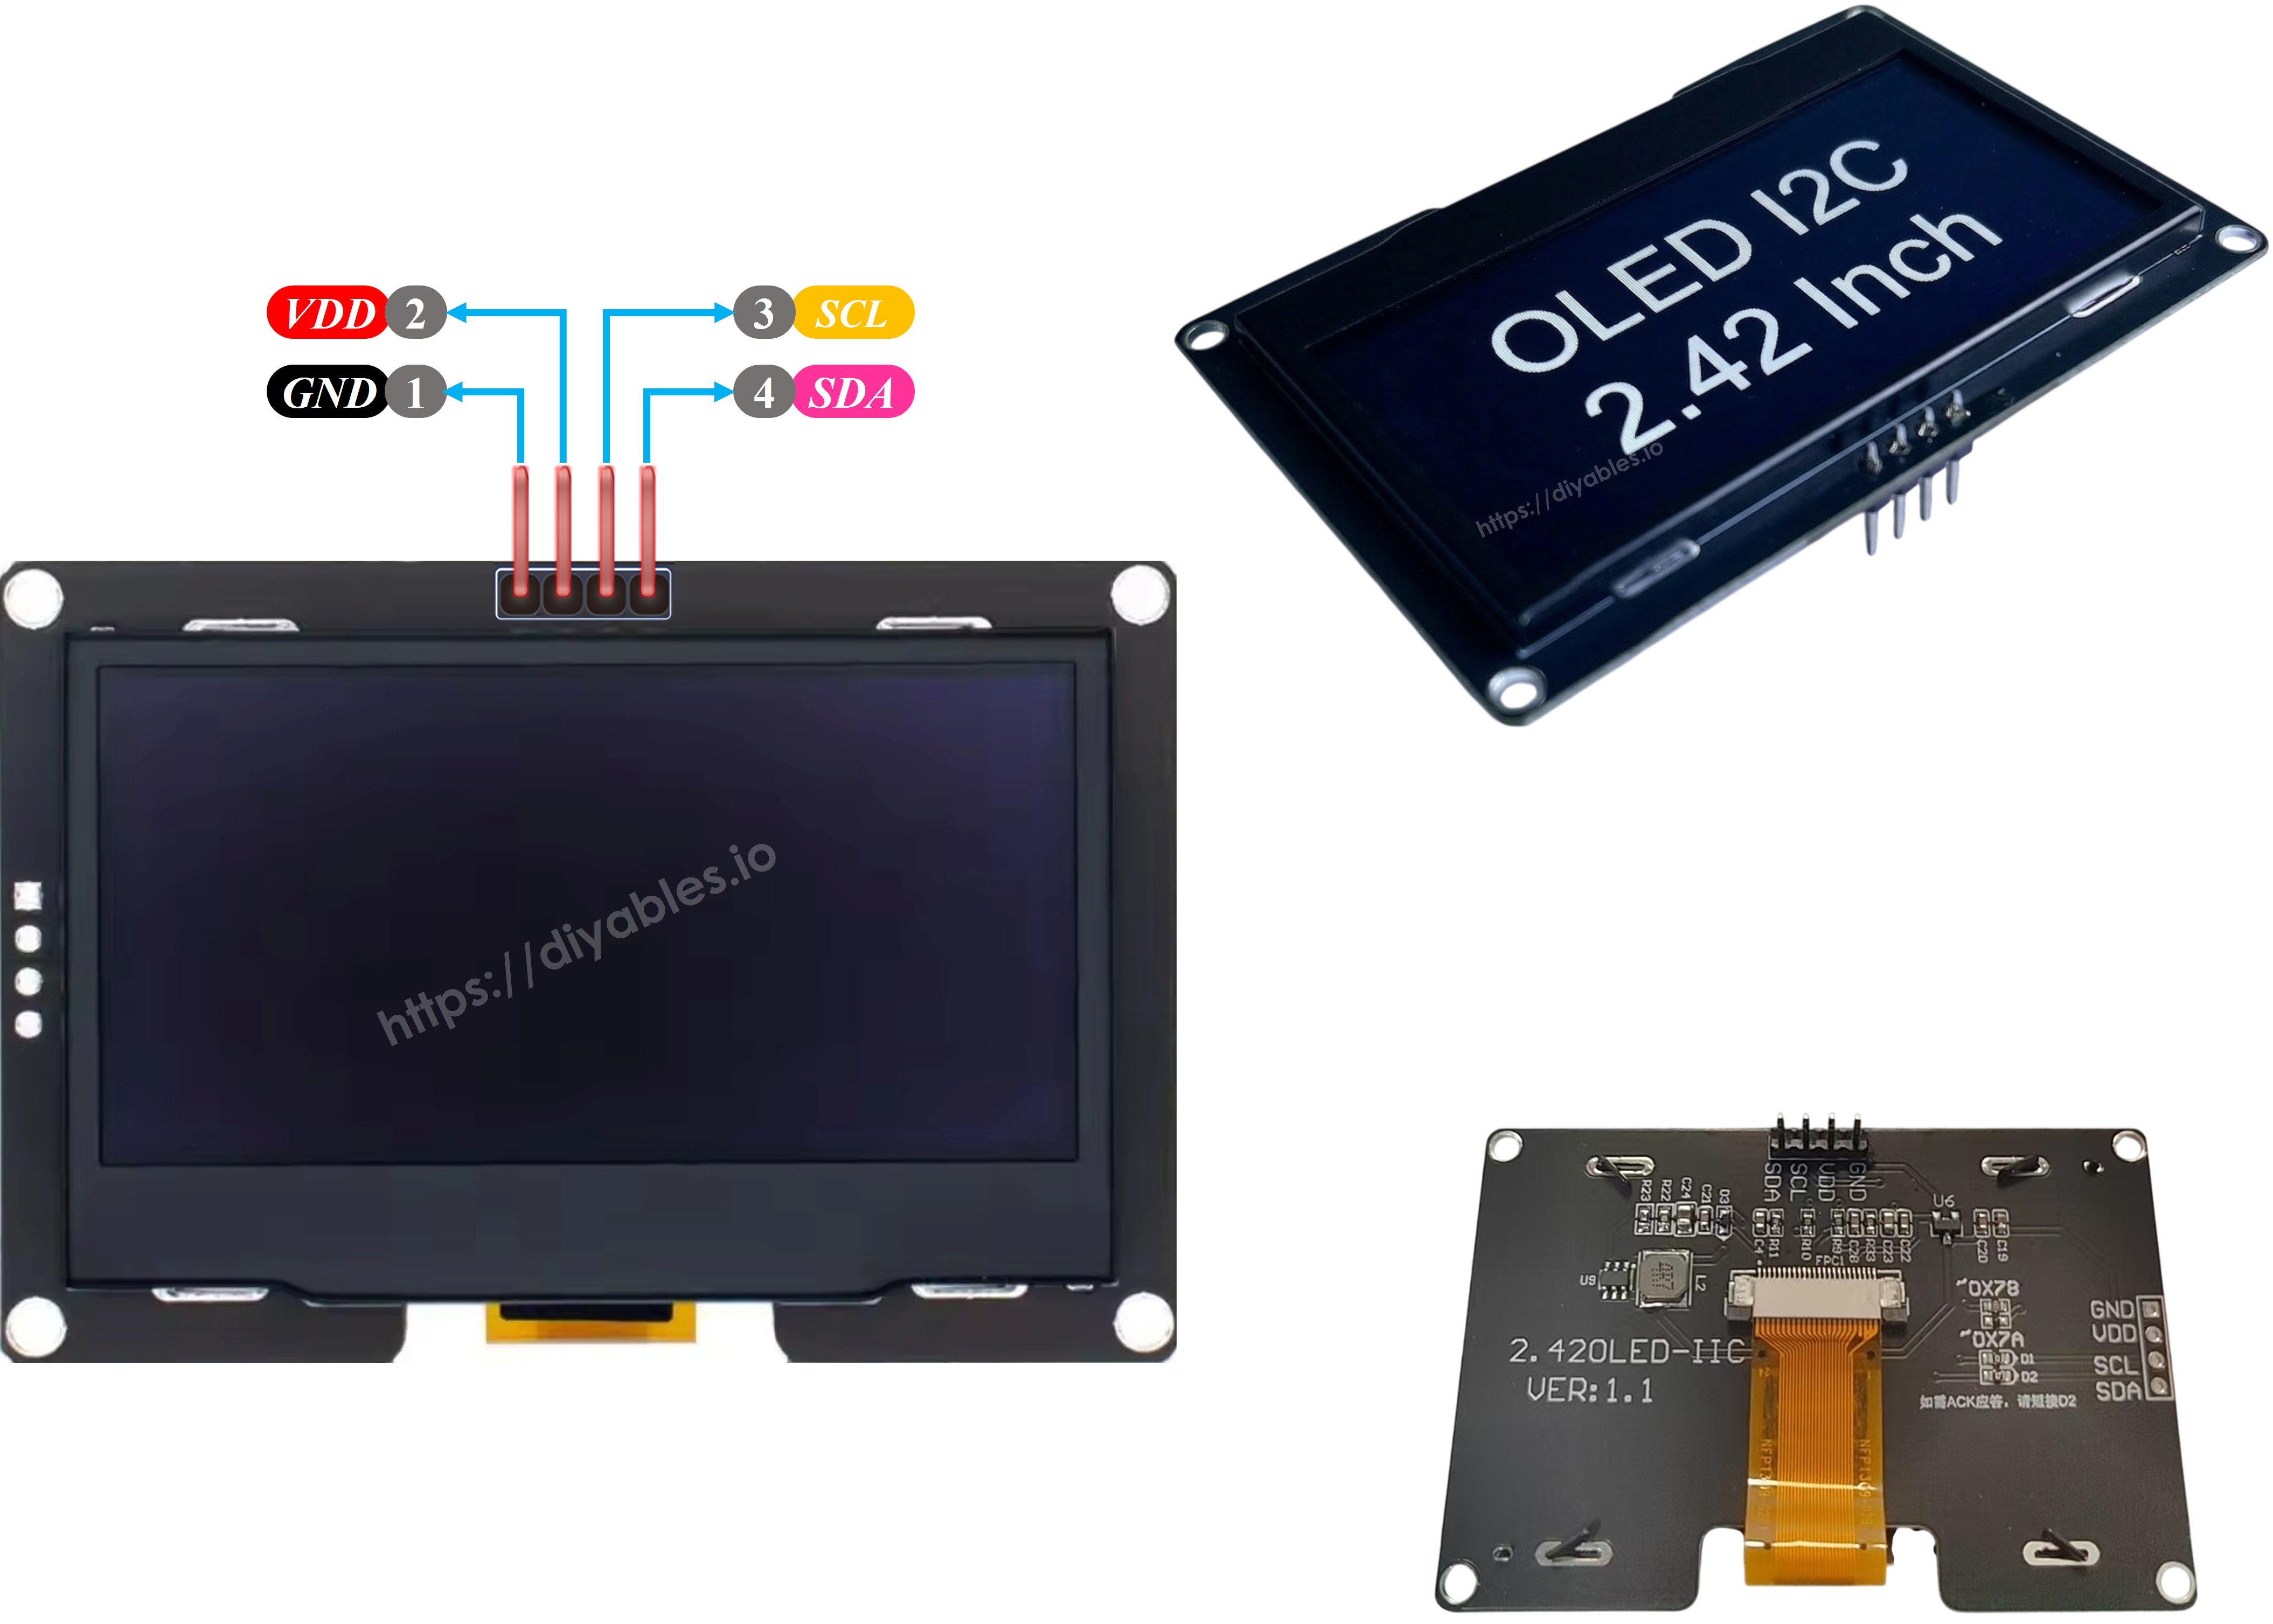
※ NOTE THAT:
- Pin labels can vary between manufacturers — always read the silk-screen on your specific module.
- This tutorial was developed and tested with the SSD1309 I2C OLED from DIYables.
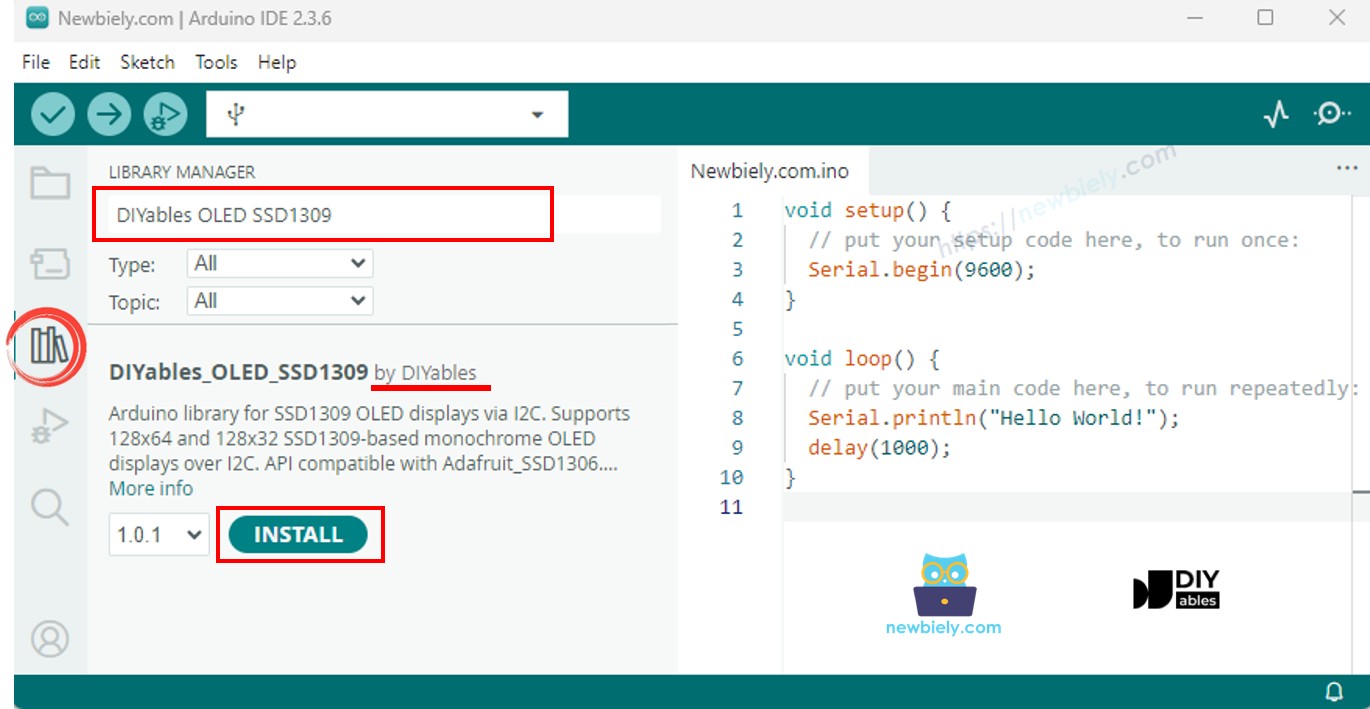
Wiring Diagram
Connect the SSD1309 OLED to the Arduino MKR WiFi 1010 as shown below. The I2C bus uses only two signal wires, keeping your project tidy.
This image is created using Fritzing. Click to enlarge image
Connection Table
| OLED Module | Arduino MKR WiFi 1010 |
|---|---|
| VCC | 3.3V |
| GND | GND |
| SDA | SDA (pin 11) |
| SCL | SCL (pin 12) |
Setting Up Your Arduino MKR WiFi 1010 for the SSD1309 OLED
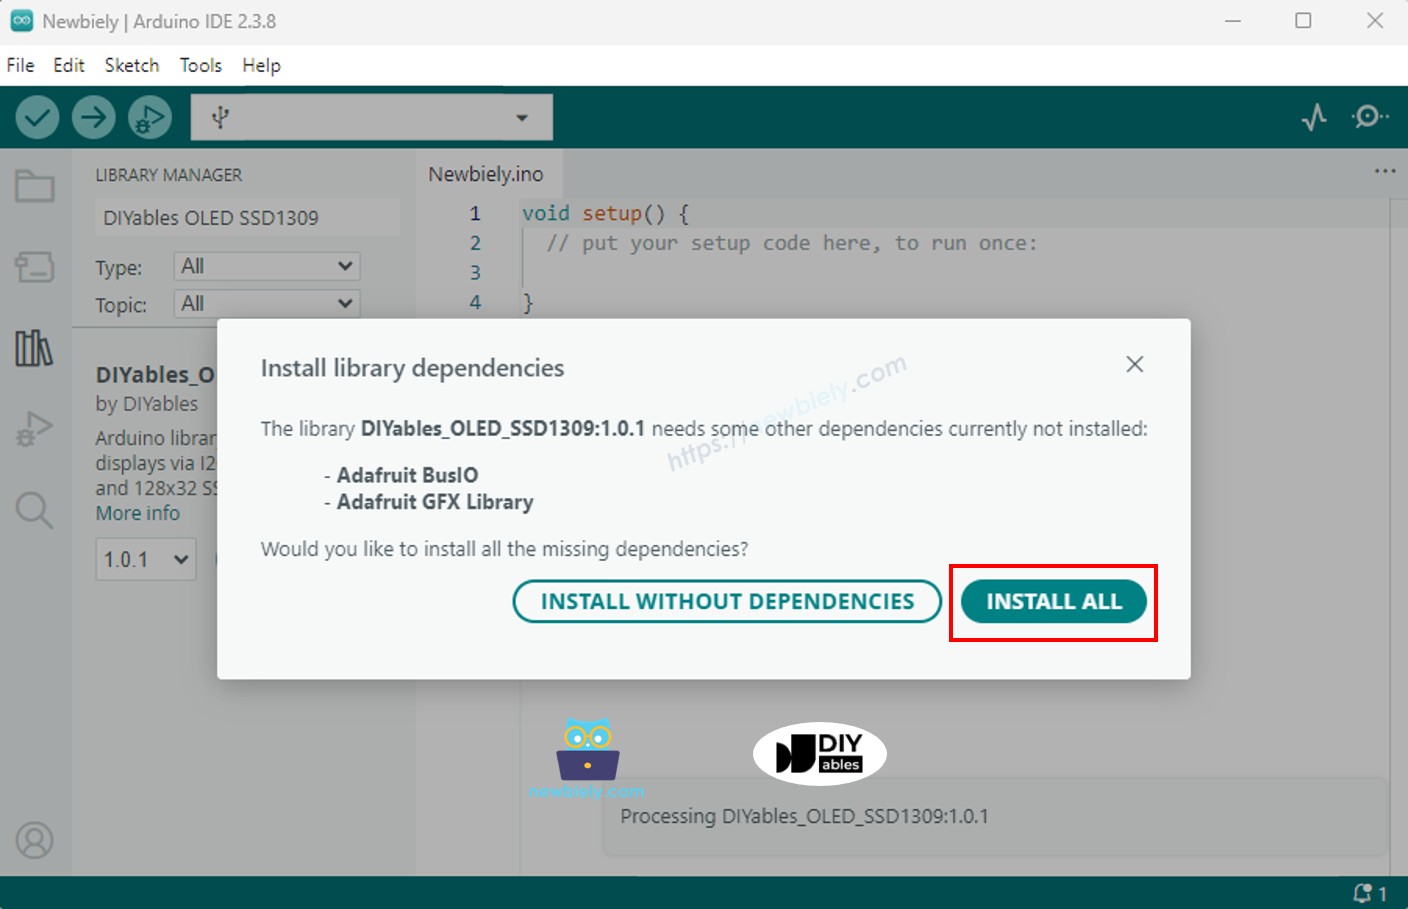
Step 1 — Install the DIYables_OLED_SSD1309 Library
- Open the Arduino IDE and click the Libraries icon in the left sidebar.
- Type DIYables_OLED_SSD1309 in the search box and locate the entry by DIYables.
- Click Install to add the library.
- When prompted to install dependencies, click Install All — this adds the required Adafruit GFX library and any other needed packages.
Step 2 — Understand the Core API
Every SSD1309 sketch on the Arduino MKR WiFi 1010 follows the same four-step pattern:
1. Include headers
2. Define screen dimensions and create the display object
3. Initialize in setup()
4. Draw and push to screen
Quick API Reference
| Function | Purpose |
|---|---|
| clearDisplay() | Wipe the RAM buffer (all pixels off) |
| display() | Push the buffer to the physical screen |
| drawPixel(x, y, color) | Toggle a single pixel |
| setTextSize(n) | Font scale factor (1–8) |
| setCursor(x, y) | Set the text insertion point |
| setTextColor(SSD1309_PIXEL_ON) | White text, transparent background |
| println(value) | Print text, integer, or float and newline |
| startscrollright(s, e) | Hardware scroll right (pages s to e) |
| startscrollleft(s, e) | Hardware scroll left |
| startscrolldiagright(s, e) | Diagonal scroll right |
| startscrolldiagleft(s, e) | Diagonal scroll left |
| stopscroll() | Stop active hardware scroll |
| setContrast(0–255) | Fine-tune display brightness |
| dim(true/false) | Quick minimum/normal brightness toggle |
| invertDisplay(true/false) | Invert all pixels at hardware level |
Arduino MKR WiFi 1010 Code — Hello World on SSD1309 OLED
Start here if you are new to this display. The sketch prints a few lines of text using different font sizes to verify that everything is wired and configured correctly.
Arduino MKR WiFi 1010 Code — Display Text on SSD1309 OLED
A more complete text example covering multiple font sizes, integer and float formatting, and the F() macro to keep strings in flash memory rather than RAM.
How to Center Text on the SSD1309 OLED
Arduino MKR WiFi 1010 Code — Draw Shapes on SSD1309 OLED
The DIYables_OLED_SSD1309 library inherits the full Adafruit GFX drawing API, giving you pixels, lines, rectangles, filled rectangles, circles, filled circles, triangles, filled triangles, and rounded rectangles — all available immediately without any extra setup.
Arduino MKR WiFi 1010 Code — Hardware Scrolling on SSD1309 OLED
One of the SSD1309's standout features is its on-chip scroll controller. It shifts the display contents autonomously — right, left, diagonal-right, or diagonal-left — freeing the MKR WiFi 1010 CPU for other tasks entirely. Scroll range is controlled by start and stop page numbers; each page is an 8-pixel-tall horizontal strip (pages 0–7 for a 64-pixel display).
※ NOTE THAT:
Push your content to the OLED with display() before activating any scroll. To update the screen while a scroll is running, call stopscroll() first, redraw, then restart the scroll if needed.
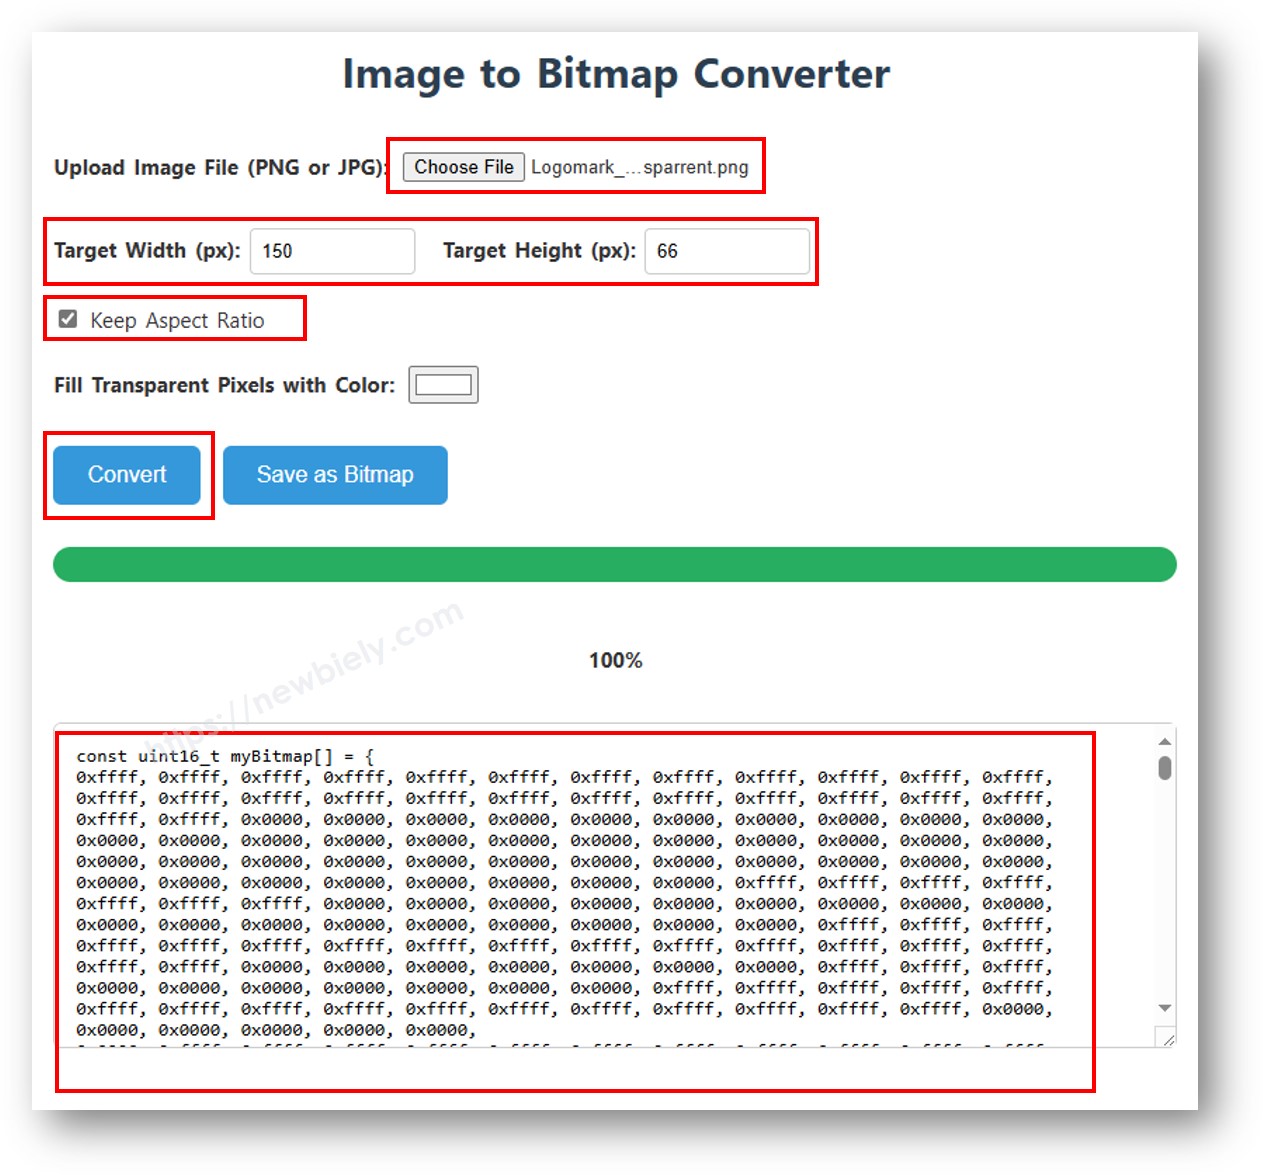
Arduino MKR WiFi 1010 Code — Display Bitmap Image on SSD1309 OLED
Displaying a custom image requires converting it to a C byte array in advance. Use the free image2cpp online tool:
- Upload your source image (PNG, JPG, BMP, GIF, etc.).
- Set the canvas size to 128×64 (or the exact dimensions you need).
- Select Arduino code as the output format.
- Copy the resulting const unsigned char array into your sketch.
※ NOTE THAT:
- Keep bitmap dimensions at or below 128×64 — the full resolution of this display module.
Arduino MKR WiFi 1010 Code — Contrast and Dim on SSD1309 OLED
Fine-tune how bright your display appears using setContrast() (256 discrete levels from 0 to 255) or use dim() as a fast on/off toggle between minimum brightness and whatever contrast level was previously set.
Arduino MKR WiFi 1010 Code — Custom External Fonts on SSD1309 OLED
Adafruit GFX ships with a large collection of FreeFont typefaces — Serif, Sans, and Mono families, each in Regular, Bold, Italic variants and four point sizes. Swap in any font by including its header file and calling setFont() before drawing text.
※ NOTE THAT:
- With an external font active, the cursor Y coordinate marks the text baseline rather than the upper-left corner. Account for this when calculating text placement.
- Font data lives in flash (PROGMEM). Choose fonts selectively; each one consumes flash space on the Arduino MKR WiFi 1010.
Troubleshooting the SSD1309 OLED on Arduino MKR WiFi 1010
Nothing on screen after uploading? Work through this checklist before revisiting your code:
Wiring problems (most common cause)
- SDA must go to SDA (pin 11), SCL to SCL (pin 12), VCC to 3.3V, and GND to GND.
- Re-seat every jumper — loose connections cause intermittent or no display output.
Wrong driver chip
- The DIYables_OLED_SSD1309 library is written specifically for the SSD1309. Modules based on the SH1106 or SSD1306 use different libraries and will not respond.
Unexpected I2C address
- 0x3C is the default for most SSD1309 modules, but some are factory-set to 0x3D. Upload the I2C scanner below to determine which address your module uses:
Expected Serial Monitor output when the SSD1309 is present:
Missing display() call
- All drawing functions write to a RAM buffer, not directly to the screen. Your sketch must call oled.display() to transfer the buffer and make changes visible.
Insufficient current
- The 2.42-inch SSD1309 module draws more current than smaller OLED displays (typically 20–40 mA at full brightness). Ensure your 3.3V supply can handle the load.