
Arduino MKR WiFi 1010 - SW520D Tilt Sensor
A SW520D tilt sensor is a fascinating component that detects orientation changes and tilt movements! You can create amazing tilt-activated projects with the Arduino MKR WiFi 1010 and a SW520D tilt sensor, like an alarm that activates when an object is moved, a display that changes when you tilt it, or even a servo motor that responds to orientation changes.
In this comprehensive guide, you'll learn how to use the Arduino MKR WiFi 1010 with a SW520D tilt sensor to build interactive projects. We'll cover everything you need to know about connecting the SW520D tilt sensor to the Arduino MKR WiFi 1010 and programming it to respond to tilt input.
What You'll Learn:
- Connecting a SW520D tilt sensor to the Arduino MKR WiFi 1010 board
- Understanding how the SW520D ball switch tilt sensor works with Arduino MKR WiFi 1010
- Programming the Arduino MKR WiFi 1010 to detect tilt using the SW520D tilt sensor
- Reading SW520D tilt sensor values on the Arduino MKR WiFi 1010 Serial Monitor
- Using the Arduino MKR WiFi 1010 and SW520D tilt sensor for tilt-activated applications
Real-World Applications:
- Security systems: Use the Arduino MKR WiFi 1010 with a SW520D tilt sensor for tamper detection alerts
- Home automation: Arduino MKR WiFi 1010 and SW520D tilt sensor projects for orientation-based control
- Robotics: Create Arduino MKR WiFi 1010 tilt sensor projects that respond to balance changes
- Learning projects: Perfect tilt sensor project for Arduino MKR WiFi 1010 beginners
- IoT monitoring: Build remote asset monitoring with the Arduino MKR WiFi 1010 and SW520D tilt sensor
Once you've mastered the basics, you can easily extend your Arduino MKR WiFi 1010 SW520D tilt sensor project to control LEDs, activate relays for high-power devices, or even trigger servo motors based on detected tilt!
Hardware Preparation
| 1 | × | Arduino MKR WiFi 1010 | |
| 1 | × | Micro USB Cable | |
| 1 | × | SW520D Tilt Sensor Module | |
| 1 | × | Breadboard | |
| 1 | × | Jumper Wires |
Or you can buy the following kits:
| 1 | × | DIYables Sensor Kit (18 sensors/displays) |
Additionally, some of these links are for products from our own brand, DIYables .
Overview of SW520D Tilt Sensor
The SW520D is a simple yet clever component that detects tilt and orientation changes. Think of it as an electronic "level sensor" for your Arduino MKR WiFi 1010 projects!
Inside the module, there is a small metal ball that rolls between two electrical contacts. When the sensor is upright, the ball rests against the contacts, closing the circuit. When the sensor is tilted past a certain angle, the ball rolls away, opening the circuit and changing the digital output.
The SW520D Tilt Sensor Pinout
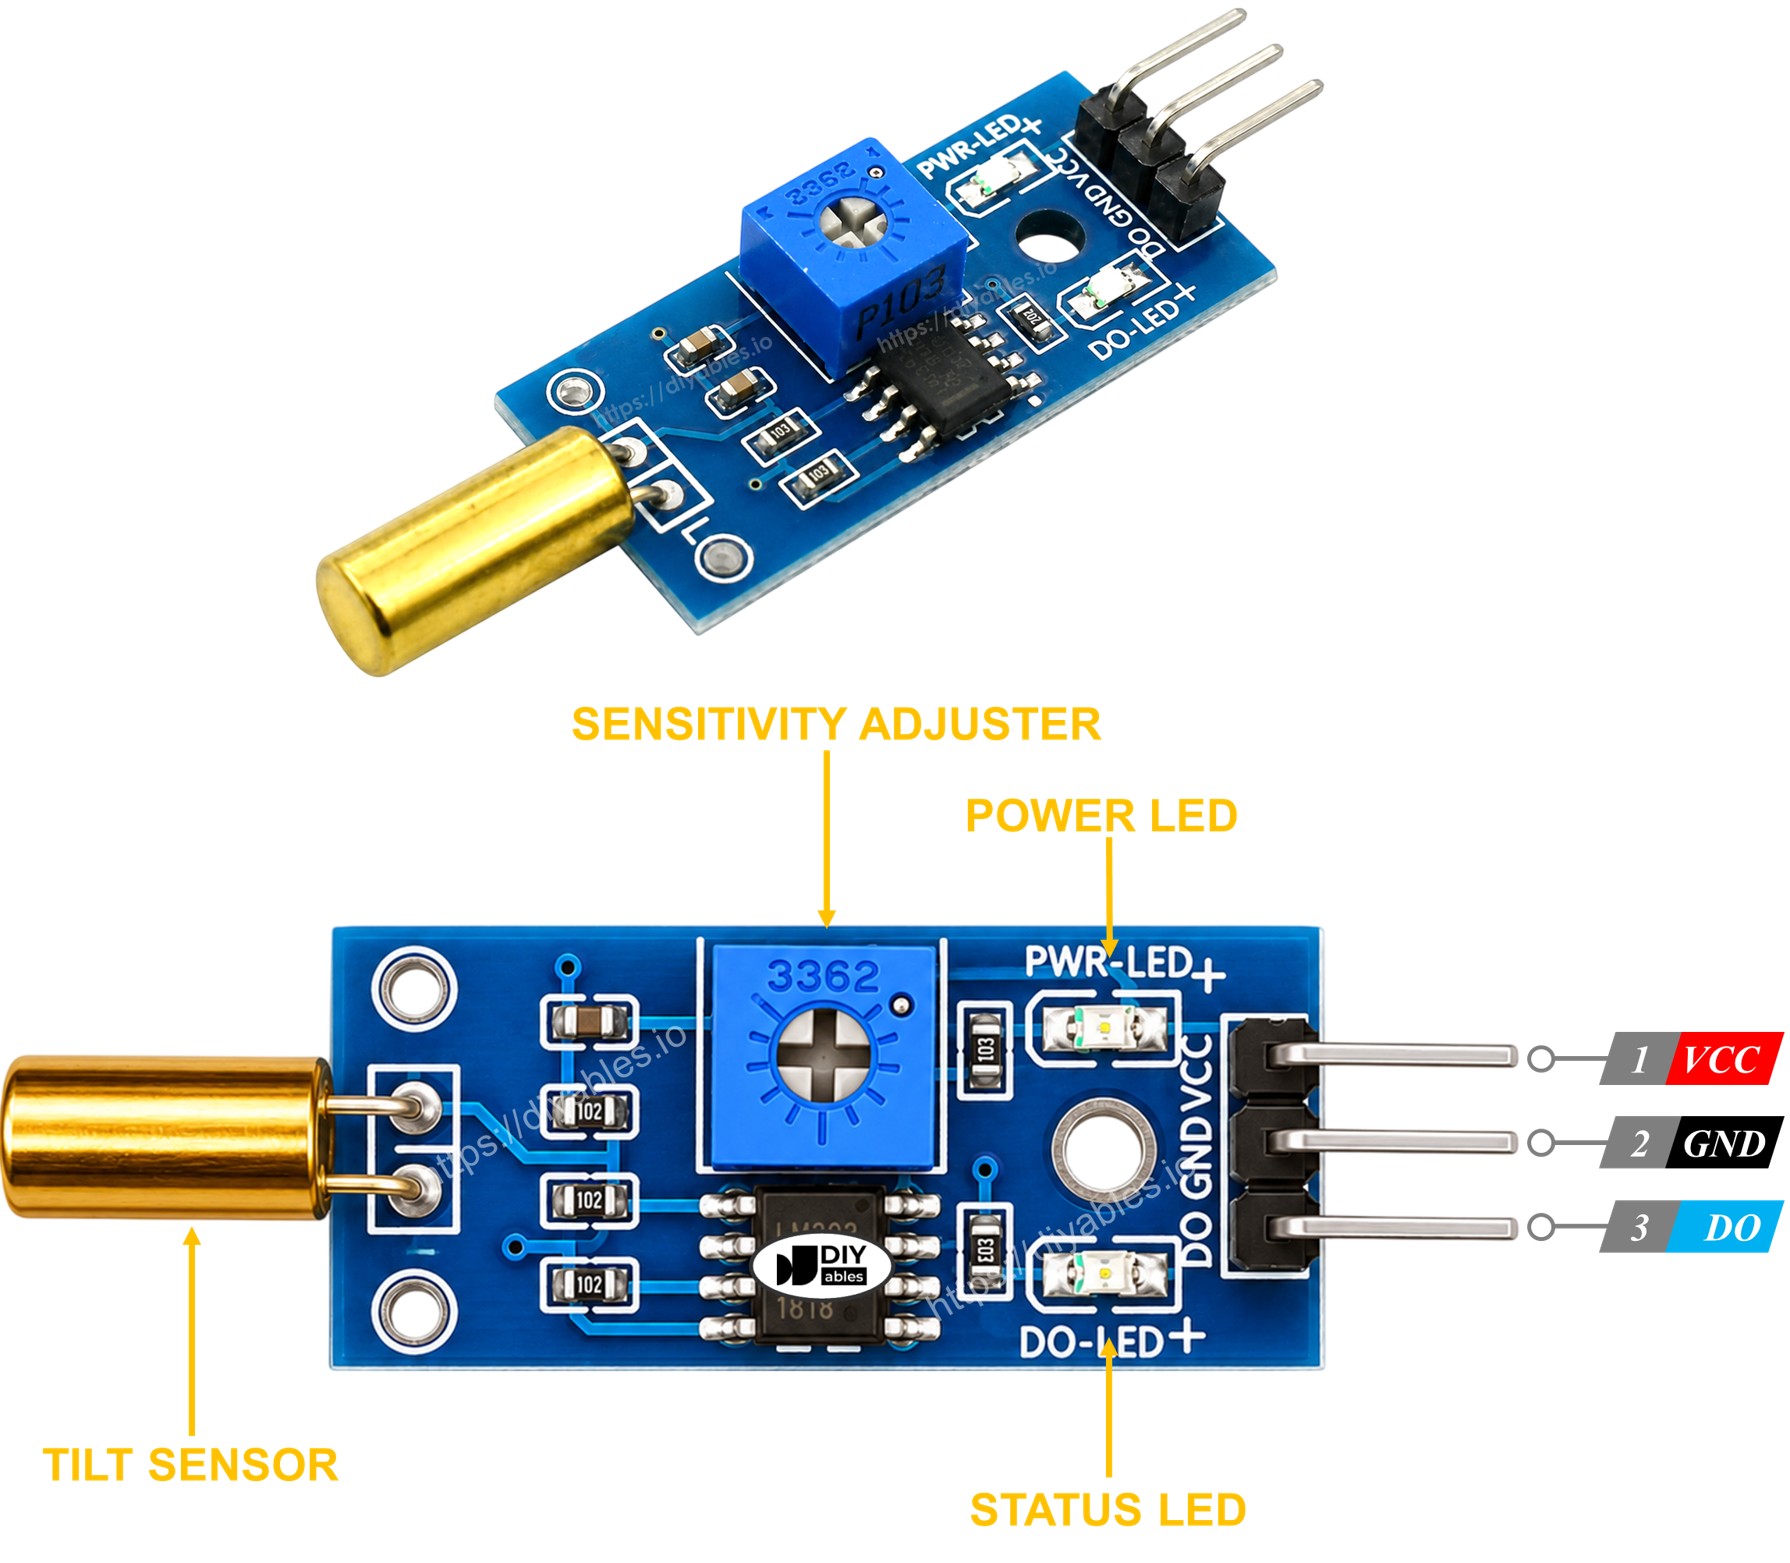
The SW520D tilt sensor module has three pins that you'll connect to your Arduino MKR WiFi 1010:
- VCC pin: Connects to your power supply. Works with both 3.3V and 5V, making it compatible with the Arduino MKR WiFi 1010's voltage levels.
- GND pin: Connects to ground (0V) - complete the circuit by connecting this to your Arduino MKR WiFi 1010's GND pin.
- DO pin: The digital output pin that sends the detection signal to your Arduino MKR WiFi 1010. This pin stays HIGH when the sensor is upright and goes LOW when it is tilted. Connect this to any digital input pin on your Arduino MKR WiFi 1010.
Helpful Features:
- LED indicators: Two helpful LEDs on the board:
- Power LED: Lights up when the module is powered, confirming proper connection
- Status LED: Reflects the tilt state, making it easy to verify the sensor's behavior during testing
- When the sensor is upright, the metal ball closes the contact, and the output pin is set to HIGH.
- When the sensor is tilted, the metal ball opens the contact, and the output pin is set to LOW.
How It Works
Here is how the sensor's output pin works:
Wiring Diagram
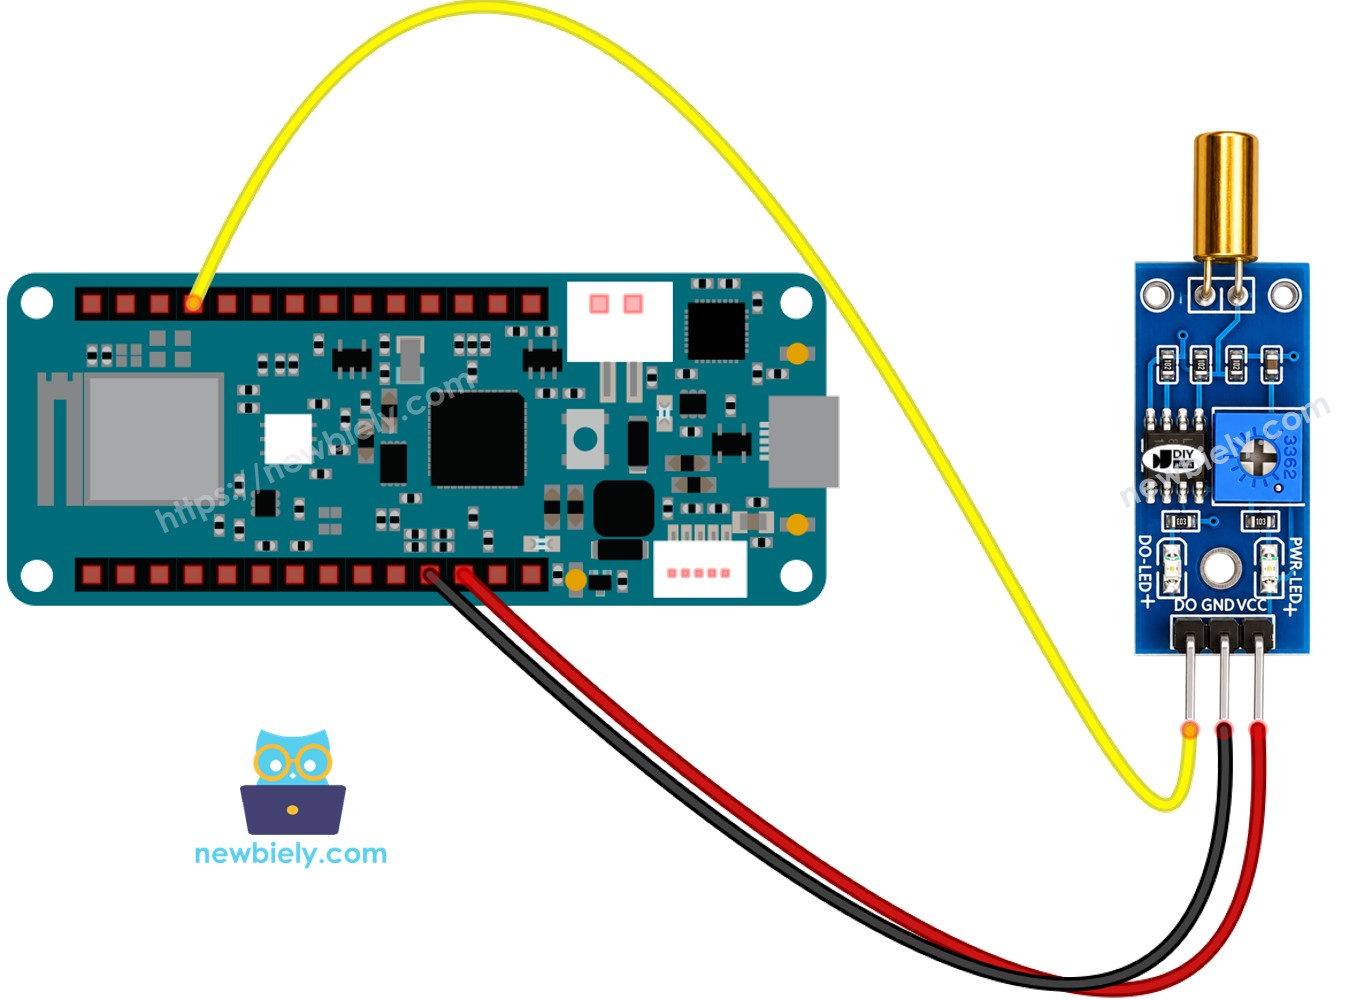
This image is created using Fritzing. Click to enlarge image
How To Program For SW520D Tilt Sensor
- This sets the Arduino MKR WiFi 1010 pin to act as a digital input using the pinMode() function. For example, you can use pin D3.
Arduino MKR WiFi 1010 Code - Detecting the tilt
Detailed Instructions
New to Arduino MKR WiFi 1010? Complete our Getting Started with Arduino MKR WiFi 1010 tutorial first to set up your development environment.
- Connect the components to the Arduino MKR WiFi 1010 board as depicted in the diagram
- Plug your Arduino MKR WiFi 1010 into your computer's USB port
- Launch the Arduino IDE on your computer
- Select the Arduino MKR WiFi 1010 board and its COM port
- Copy the above code and open it in the Arduino IDE.
- Click the Upload button in the Arduino IDE to send the code to the Arduino MKR WiFi 1010.
- Tilt the SW520D sensor back and forth.
- Check the result in the Serial Monitor.
Now, we can change the code to make an LED or light turn on when a tilt is detected. We can even make a servo motor move depending on the tilt. For more details and easy step-by-step instructions, check the tutorials at the end of this guide.
Troubleshooting
If you have any problem with the SW520D tilt sensor, please try these steps to fix it:
- Check the orientation: The SW520D is sensitive to its mounting angle. Make sure it is installed in the correct upright position for reliable detection. Small adjustments to the mounting angle can significantly affect behavior.
- Reduce vibrations: Mechanical shaking can cause the ball to bounce between states. To lessen these issues, mount the sensor on a solid, steady surface.
- Check the wiring: Make sure the VCC, GND, and DO pins are connected correctly.
- Check the power supply: Make sure the power supply is clean and free from interference for consistent readings.