
Arduino MKR WiFi 1010 - SW-420 Vibration Sensor
A SW-420 vibration sensor is a small but handy module that reacts the instant something shakes, bumps, or knocks it. Pair it with the Arduino MKR WiFi 1010 and you can build a shock alarm, a knock-triggered light, or a package that "tells" you if it has been dropped or tampered with.
In this tutorial, we are going to learn:
- How to connect a SW-420 vibration sensor to the Arduino MKR WiFi 1010
- How the SW-420 vibration sensor and its onboard comparator work
- How to program the Arduino MKR WiFi 1010 to detect vibration using the SW-420 sensor
- How to read the SW-420 vibration sensor output on the Serial Monitor
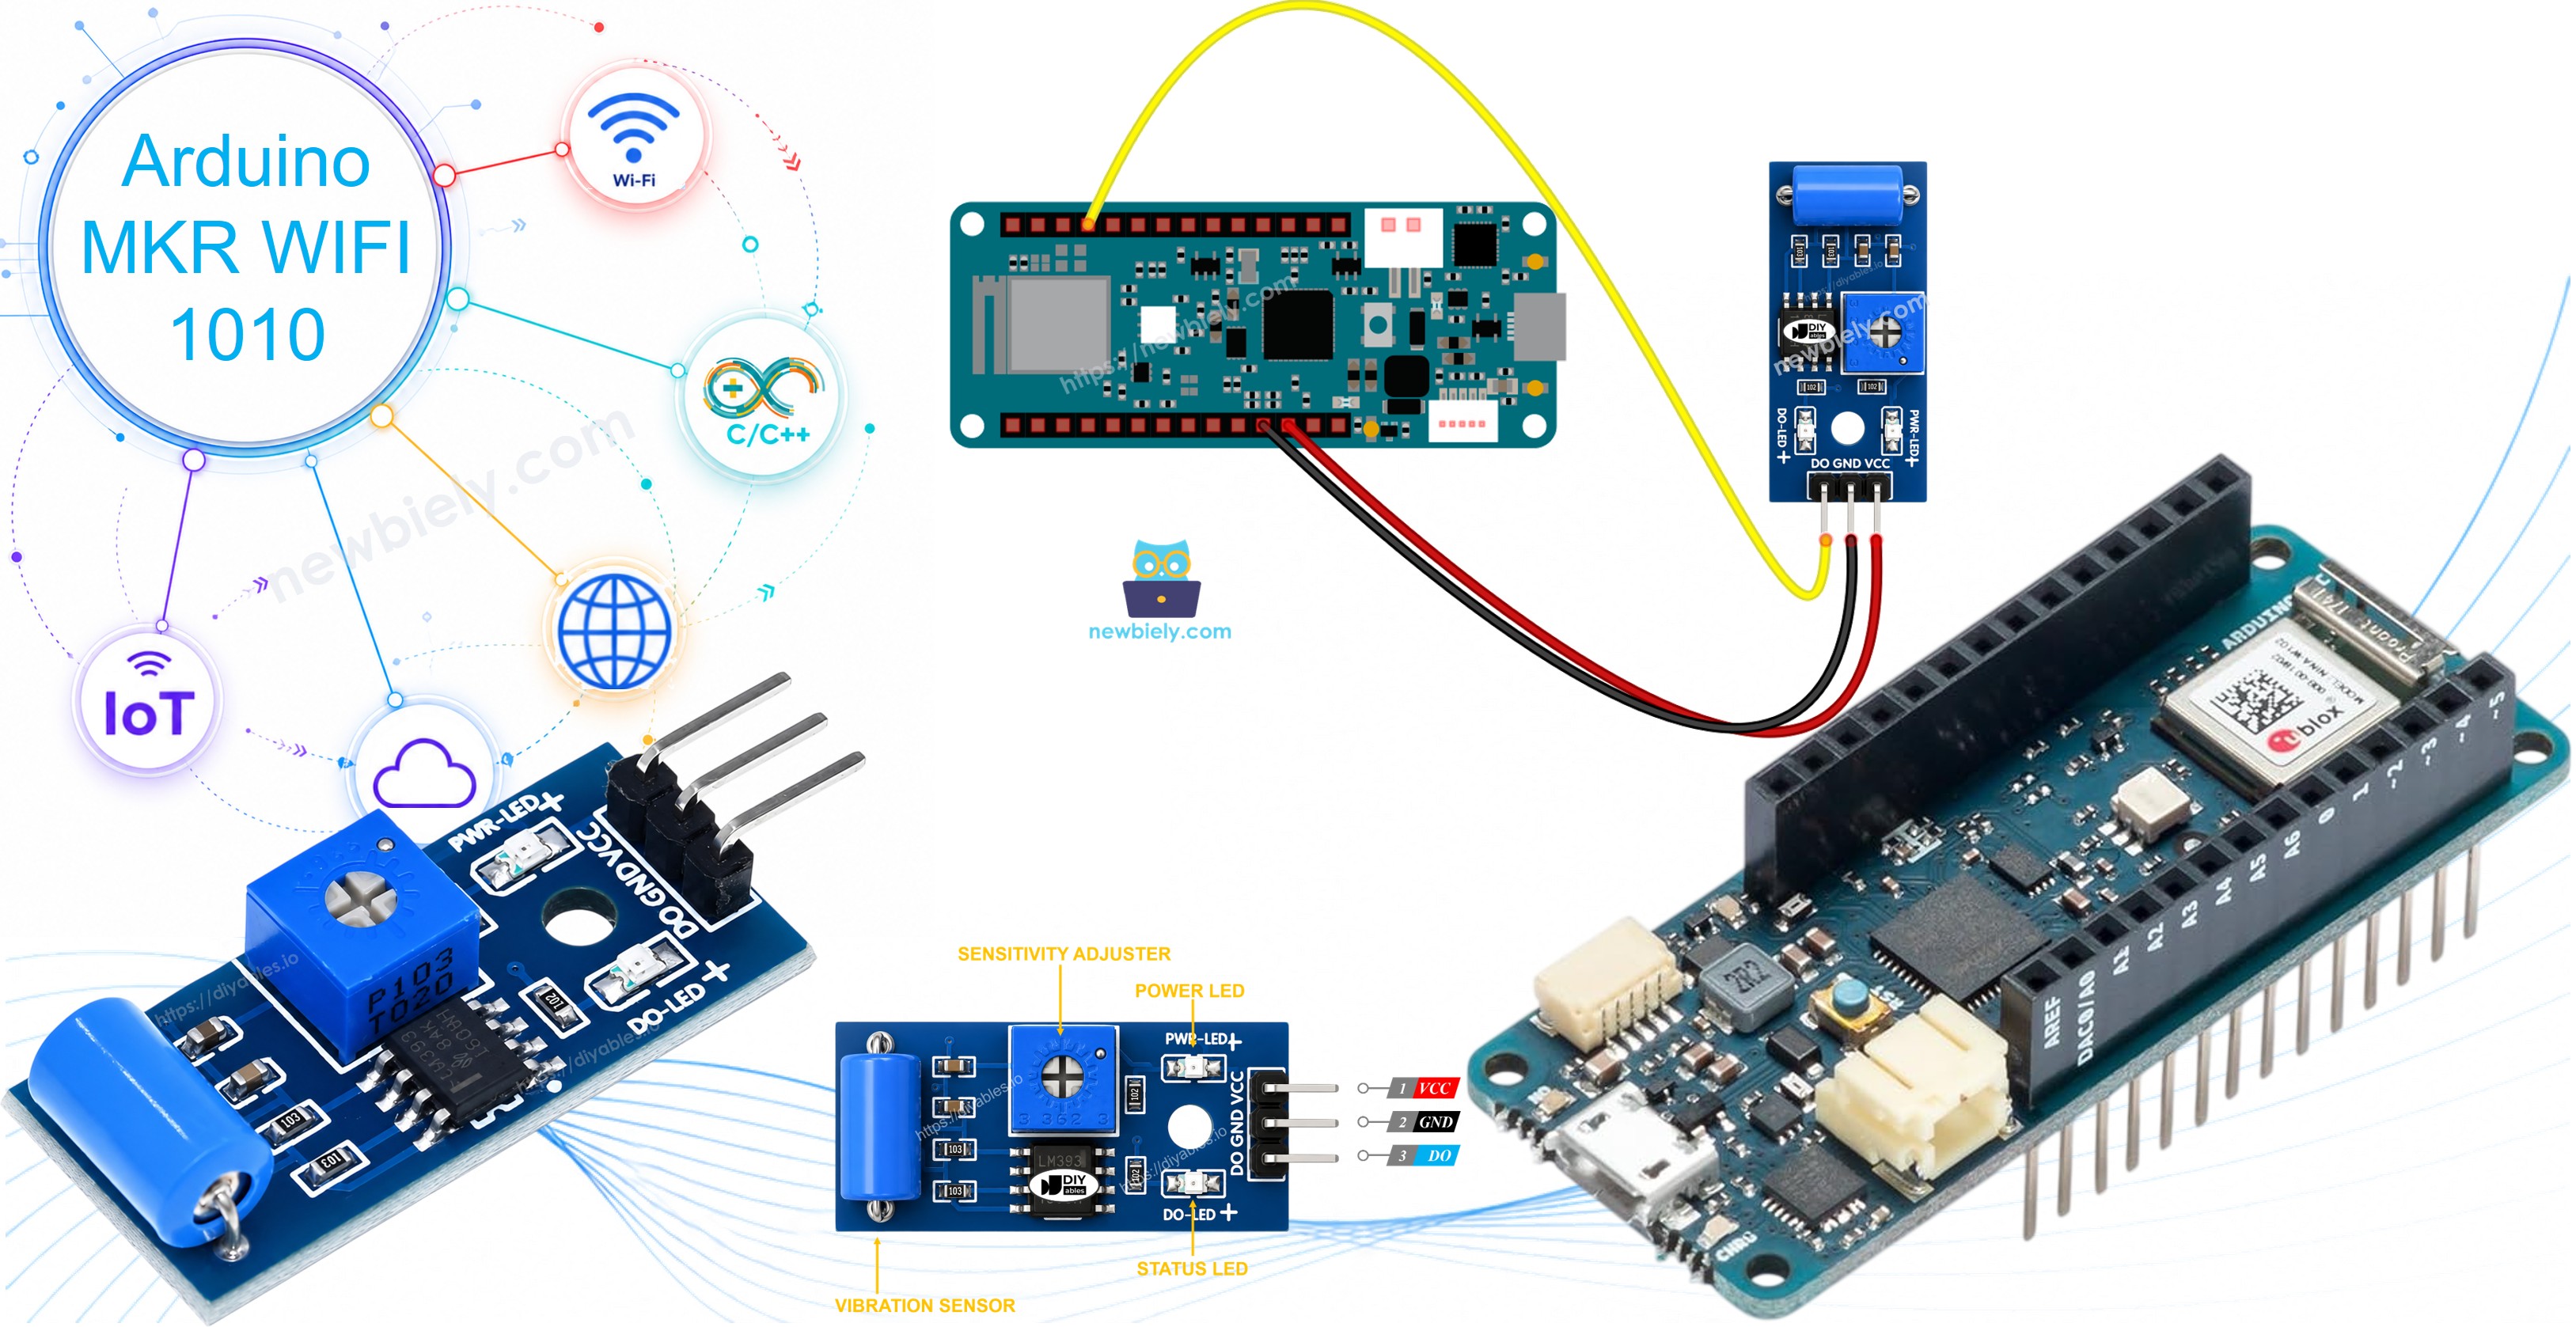
Hardware Preparation
| 1 | × | Arduino MKR WiFi 1010 | |
| 1 | × | Micro USB Cable | |
| 1 | × | SW-420 Vibration Sensor Module | |
| 1 | × | Breadboard | |
| 1 | × | Jumper Wires |
Or you can buy the following kits:
| 1 | × | DIYables Sensor Kit (18 sensors/displays) |
Additionally, some of these links are for products from our own brand, DIYables .
Overview of SW-420 Vibration Sensor
The SW-420 module is built around a tiny spring-based switch that sits close to a metal contact inside its metal can. As long as everything is still, the switch stays in its resting position. The moment the module is shaken, knocked, or bumped, the spring swings and briefly touches the contact, and an onboard LM393 comparator turns that brief touch into a clean, sharp digital signal for the Arduino MKR WiFi 1010 to read. A small potentiometer on the board lets you dial in how much shaking it takes before it reports a trigger - turn it one way for hair-trigger sensitivity, the other way for something closer to needing an actual jolt.
The SW-420 Vibration Sensor Pinout
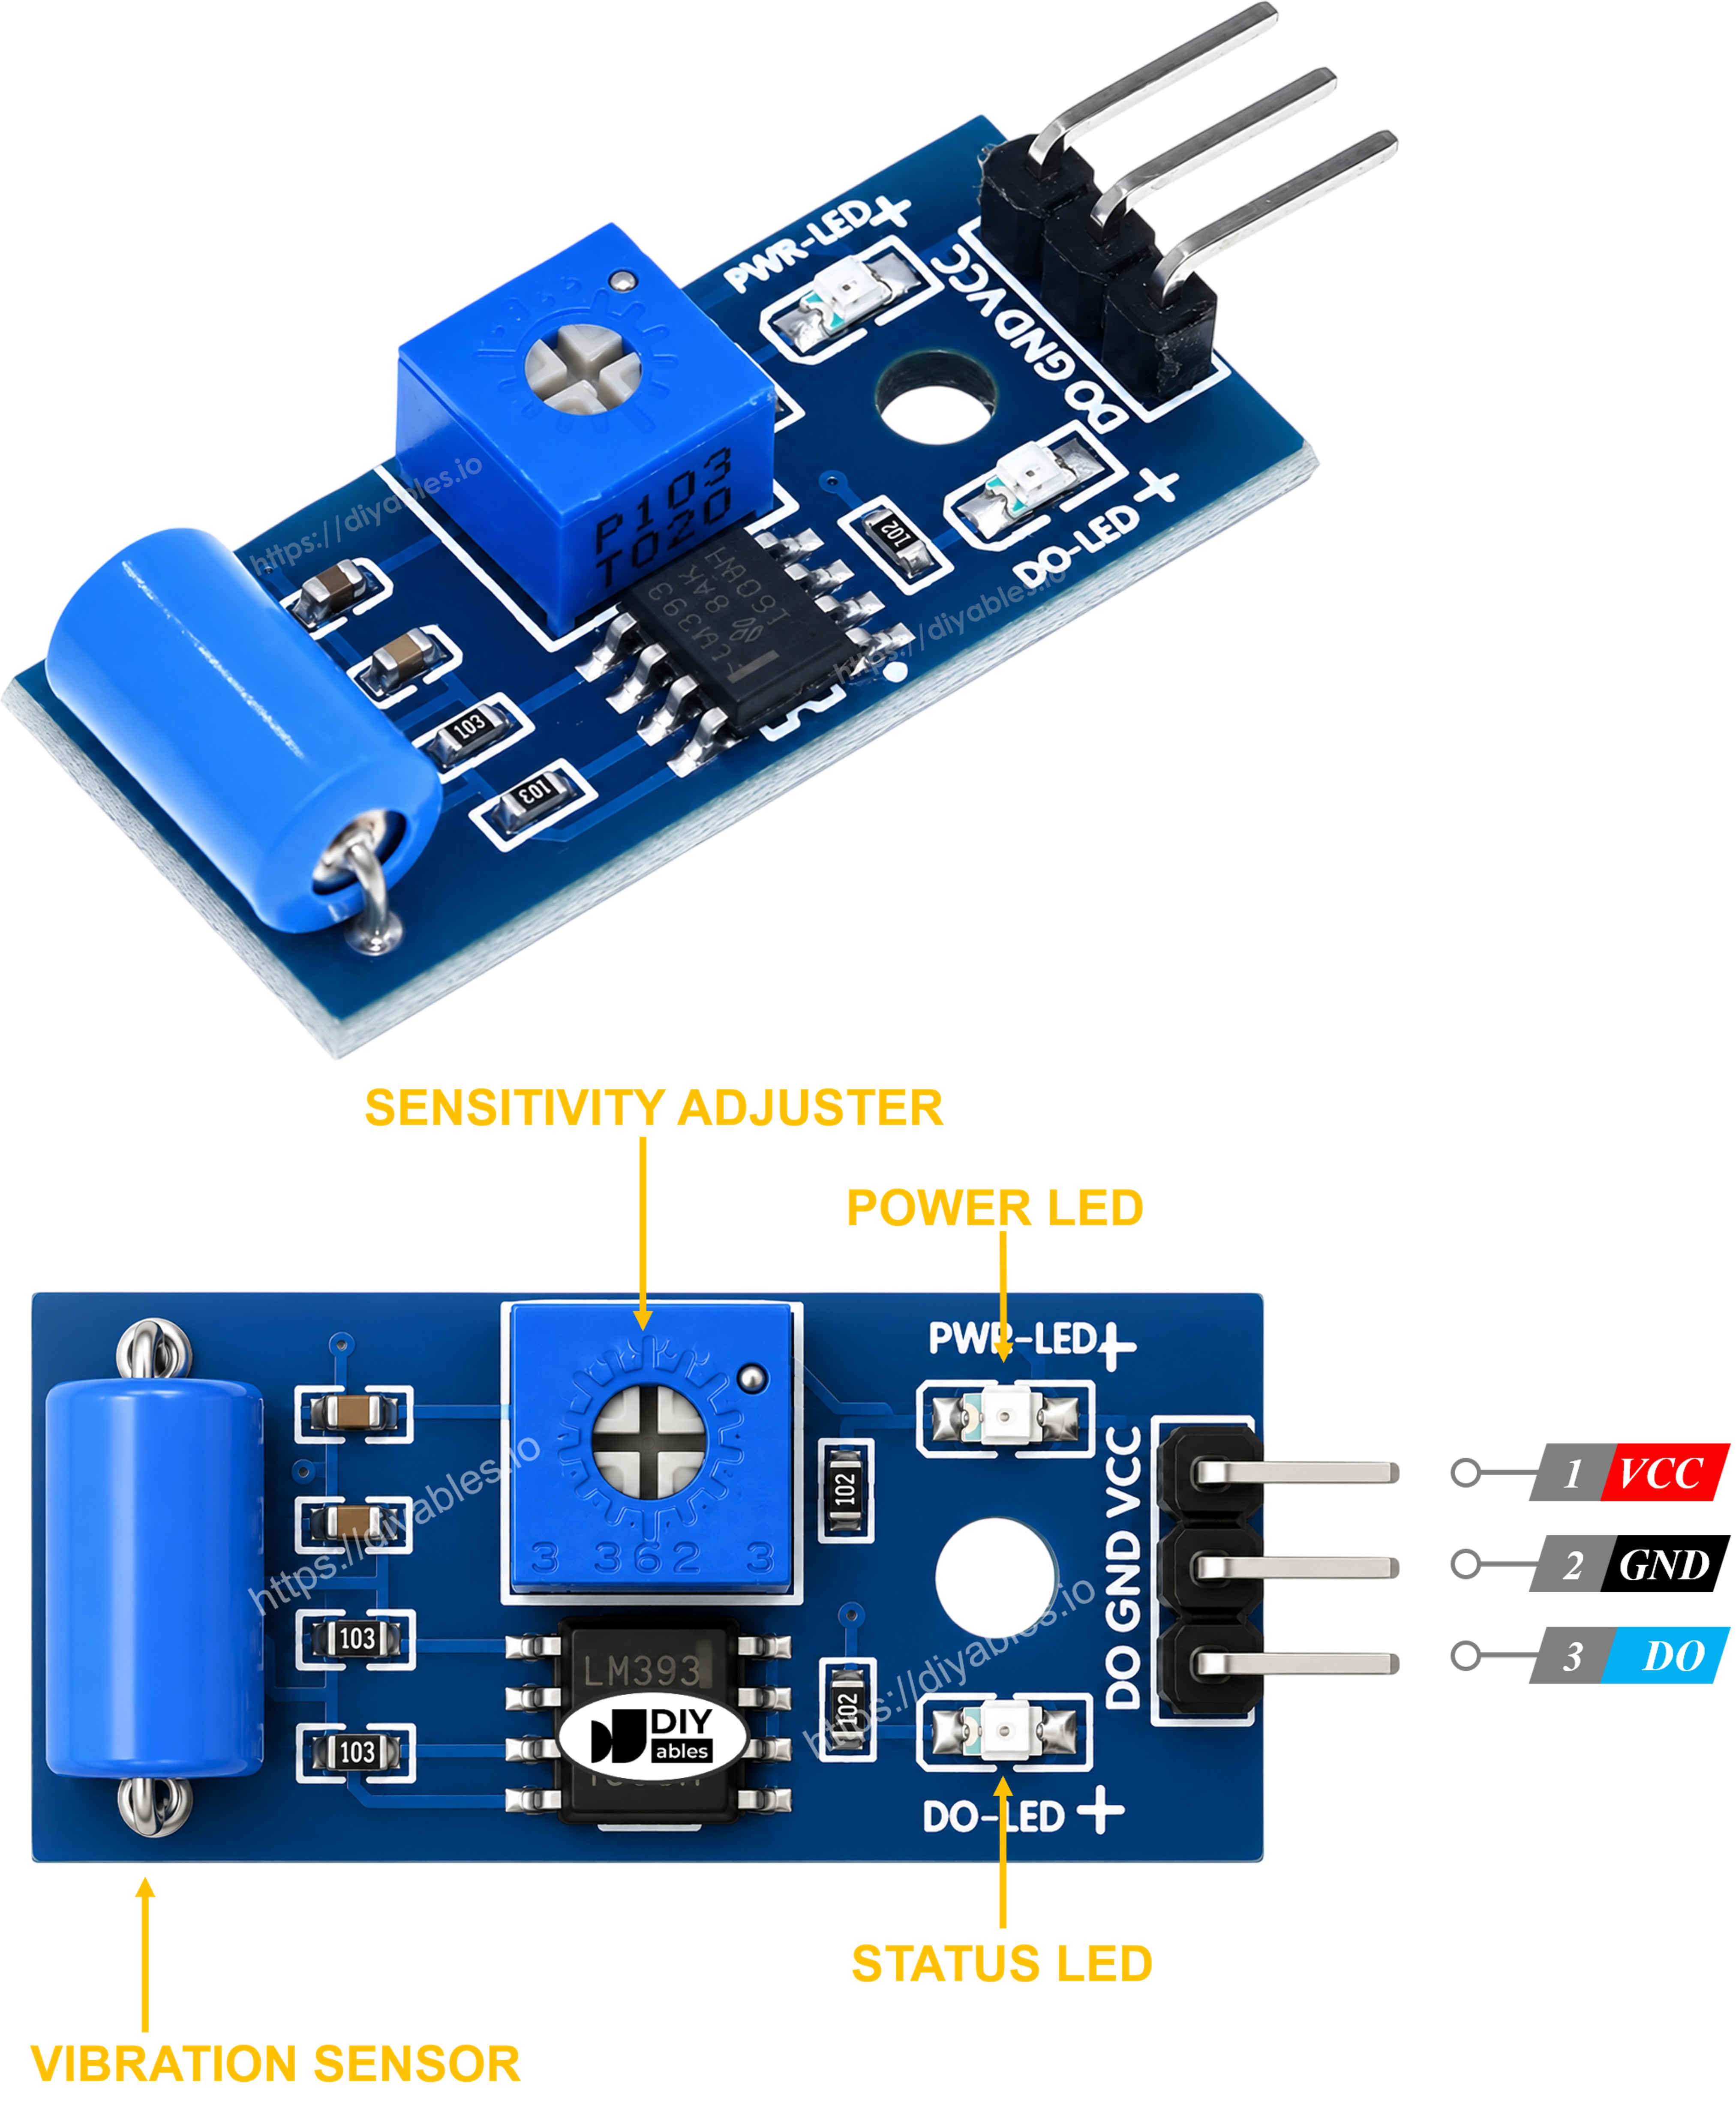
The SW-420 vibration sensor module has three pins that you'll connect to your Arduino MKR WiFi 1010:
- VCC pin: Connects to your power supply. Works with both 3.3V and 5V, making it compatible with the Arduino MKR WiFi 1010's voltage levels.
- GND pin: Connects to ground (0V) - complete the circuit by connecting this to your Arduino MKR WiFi 1010's GND pin.
- DO pin: The digital output pin that reports vibration to your Arduino MKR WiFi 1010. This pin stays LOW while everything is still and jumps to HIGH the moment vibration or shock is detected. Connect this to any digital input pin on your Arduino MKR WiFi 1010.
Helpful Features:
- LED indicators: Two helpful LEDs on the board:
- Power LED: Lights up whenever the module is powered, confirming proper connection
- Trigger LED: Lights up together with the DO pin, so you can see a trigger happen without needing the Arduino at all
- While the module sits still, the internal switch stays open and the output pin reads LOW.
- The instant vibration or a shock disturbs the switch, the output pin flips to HIGH.
How It Works
Here is how the sensor's output pin behaves:
Wiring Diagram
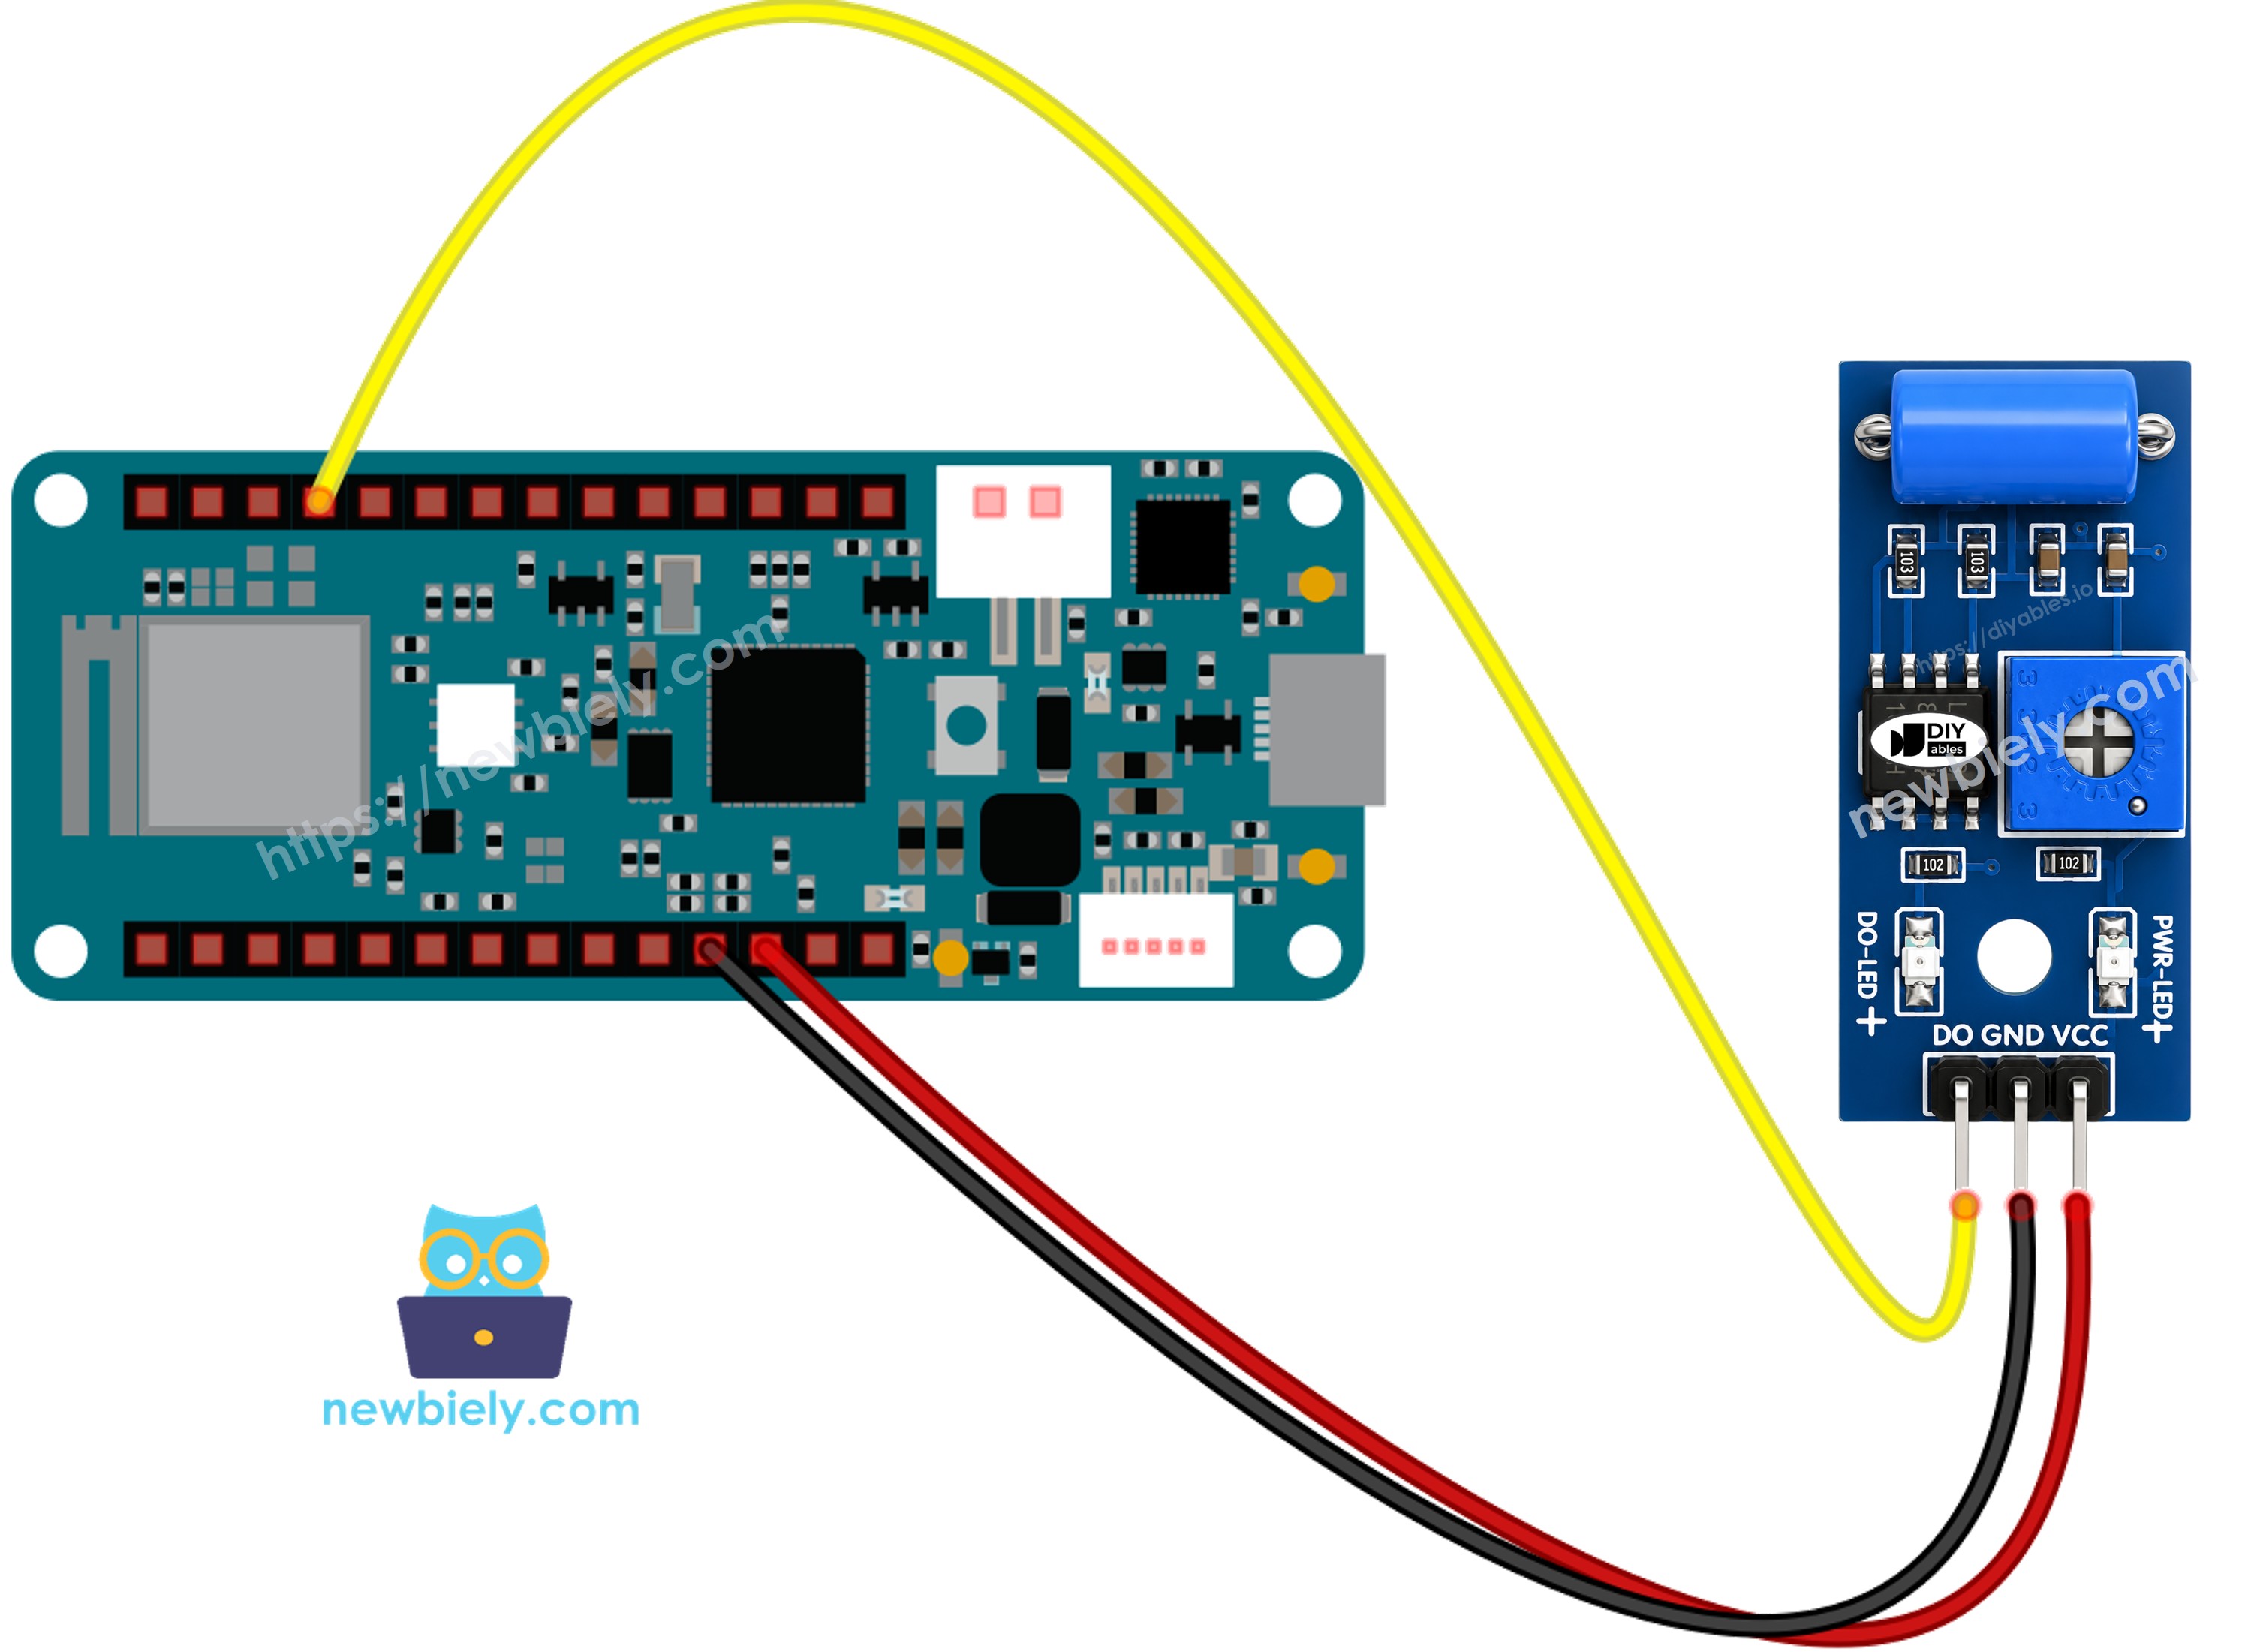
This image is created using Fritzing. Click to enlarge image
How To Program For SW-420 Vibration Sensor
- This sets the Arduino MKR WiFi 1010 pin to act as a digital input using the pinMode() function. For example, you can use pin D3.
Arduino MKR WiFi 1010 Code - Detecting the vibration
Detailed Instructions
New to Arduino MKR WiFi 1010? Complete our Getting Started with Arduino MKR WiFi 1010 tutorial first to set up your development environment.
- Connect the components to the Arduino MKR WiFi 1010 board as depicted in the diagram
- Plug your Arduino MKR WiFi 1010 into your computer's USB port
- Launch the Arduino IDE on your computer
- Select the Arduino MKR WiFi 1010 board and its COM port
- Copy the above code and open it in the Arduino IDE.
- Click the Upload button in the Arduino IDE to send the code to the Arduino MKR WiFi 1010.
- Tap or shake the SW-420 sensor a few times.
- Check the result in the Serial Monitor.
Now, we can change the code to sound a buzzer, flash an LED, or send a notification whenever vibration is detected. For more details and easy step-by-step instructions, check the tutorials at the end of this guide.
Troubleshooting
If you have any problem with the SW-420 vibration sensor, please try these steps to fix it:
- Adjust the sensitivity: Turn the onboard potentiometer with a small screwdriver. Too sensitive and it triggers on its own; not sensitive enough and light knocks go unnoticed.
- Isolate ambient vibration: Fans, motors, footsteps, or a wobbly desk can all trigger the sensor. Mount it on a stable, still surface away from unrelated sources of shaking.
- Check the wiring: Make sure the VCC, GND, and DO pins are connected correctly.
- Check the power supply: Make sure the power supply is clean and stable, since noisy power can cause false triggers.