Arduino Mega - Gas Sensor
This guide explains how to use an Arduino Mega and an MQ2 gas sensor to check air quality by measuring gases such as LPG, smoke, alcohol, propane, hydrogen, methane, and carbon monoxide, along with other flammable gases.
- How to hook up the gas sensor to Arduino Mega
- How to write code for Arduino Mega to read gas sensor data
Hardware Preparation
Or you can buy the following kits:
| 1 | × | DIYables Sensor Kit (18 sensors/displays) |
Additionally, some of these links are for products from our own brand, DIYables .
Overview of MQ2 Gas Sensor
MQ-2 gas sensor can sense LPG, smoke, alcohol, propane, hydrogen, methane, and carbon monoxide in the air. It has a digital output pin and an analog output pin to connect with other devices.
The MQ2 gas sensor does not give details for each gas separately. It only tells you if the gases are mixed together or if more than one gas is present.
We can use the MQ2 sensor to find out if there is a gas leak or if the air is bad. This helps us stay safe by triggering an alarm or starting the ventilation system.
Pinout
The MQ2 gas sensor has four pins.
- VCC pin: Connect it to +5V power.
- GND pin: Connect it to ground (0V).
- DO pin: This is a digital output pin. It shows LOW when flammable gases are detected and HIGH when no gas is detected. You can adjust the gas detection level with a small adjustable part.
- AO pin: This is an analog output pin. It gives a voltage that changes with the amount of gas. More gas means higher voltage, less gas means lower voltage.
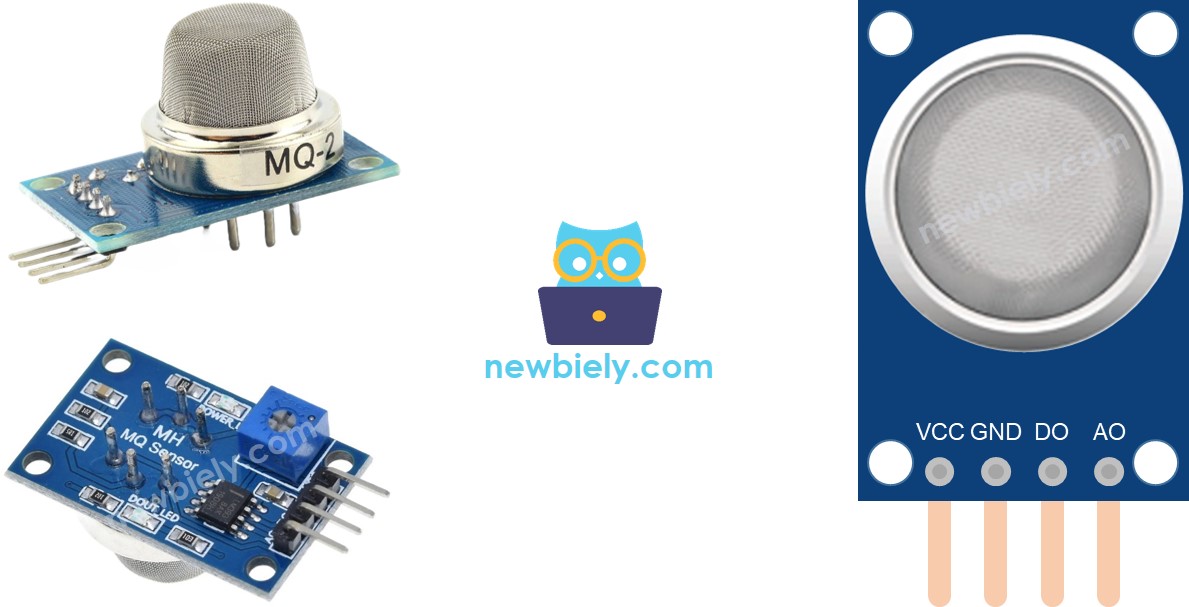
It also has two LED lights.
- One PWR-LED light shows that power is on.
- One DO-LED light shows gas presence based on the DO pin value: it lights up when there is gas and turns off when there is no gas.
How It Works
About the DO pin:
- The device has an adjustment knob to change how sensitive the gas detector is.
- If the gas level near the sensor is higher than the set limit, the sensor output goes low and the LED lights up.
- If the gas level near the sensor is lower than the set limit, the sensor output goes high and the LED turns off.
About the AO pin:
- If there is more gas, the voltage rises.
- If there is less gas, the voltage falls.
The pot does not change the AO pin's value.
The MQ2 Sensor Warm-up
Warm up the MQ2 gas sensor before using it.
- If you haven't used the sensor for a long time (more than one month), warm it up for 24 to 48 hours before using it to get accurate results.
- If you used the sensor recently, it only needs 5 to 10 minutes to warm up. At first the readings may be high, but they will go down and become steady after a short time.
To warm up the MQ2 sensor, connect its VCC and GND pins to a power source or to the VCC and GND pins on an Arduino Mega, and leave it connected for a little while.
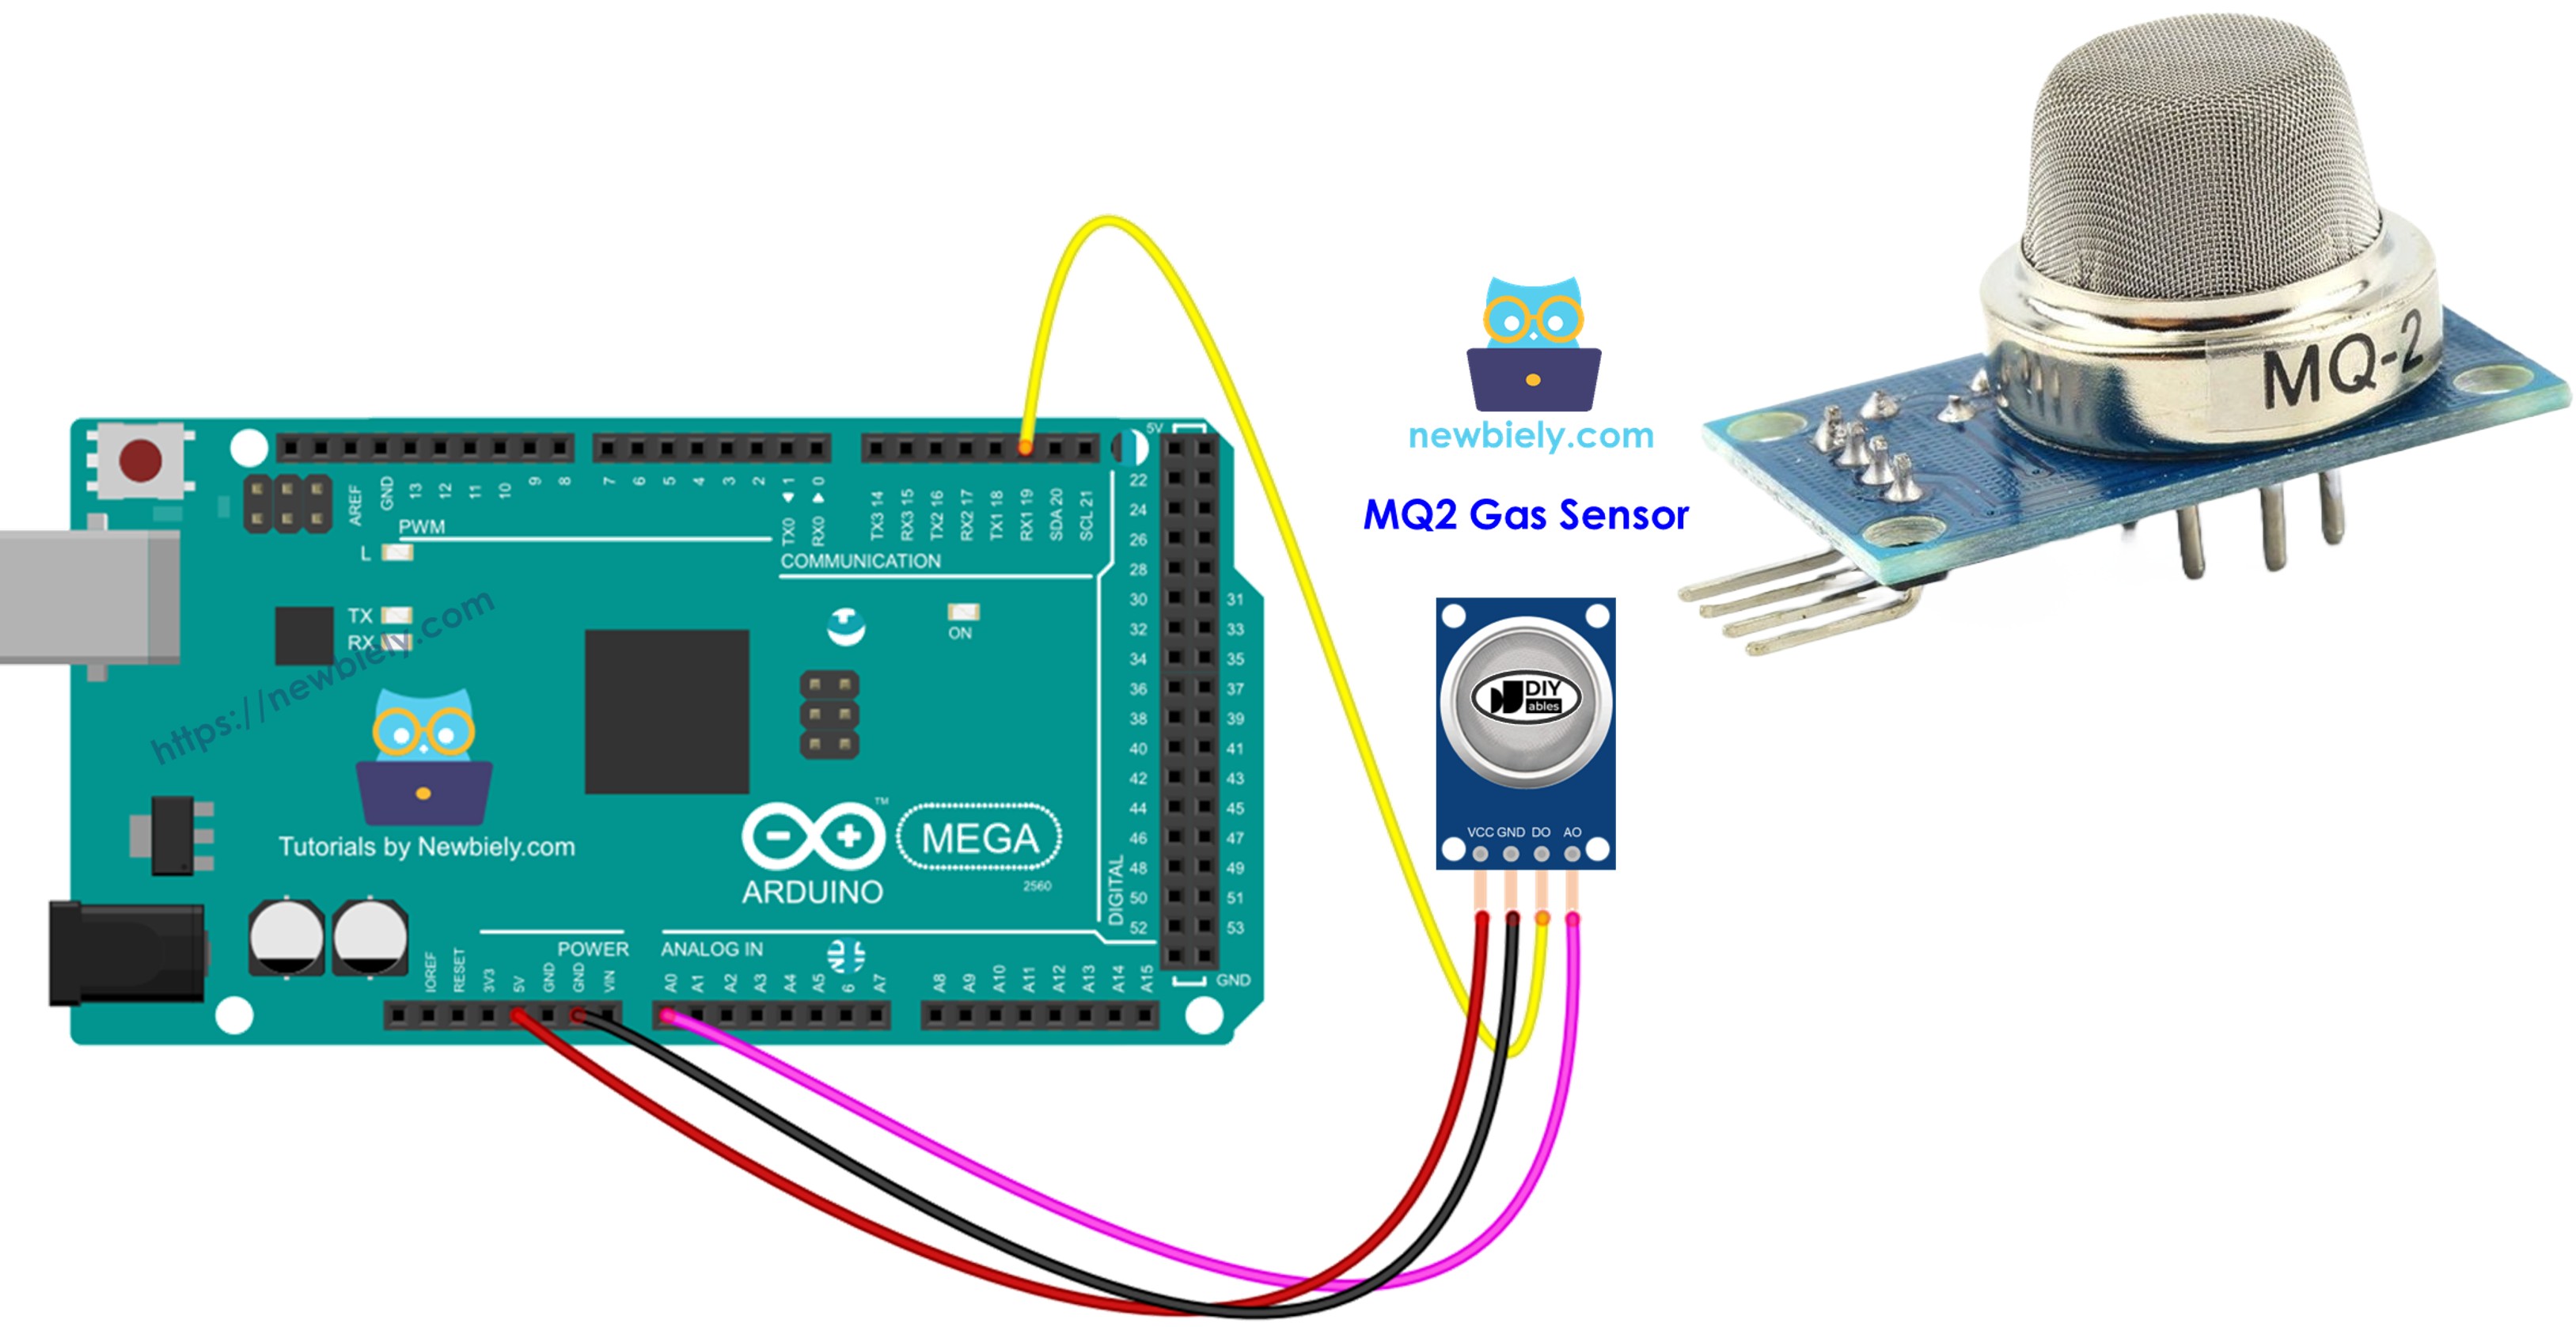
Wiring Diagram
The MQ2 gas sensor has two output pins. You can use one or both, depending on what you need.
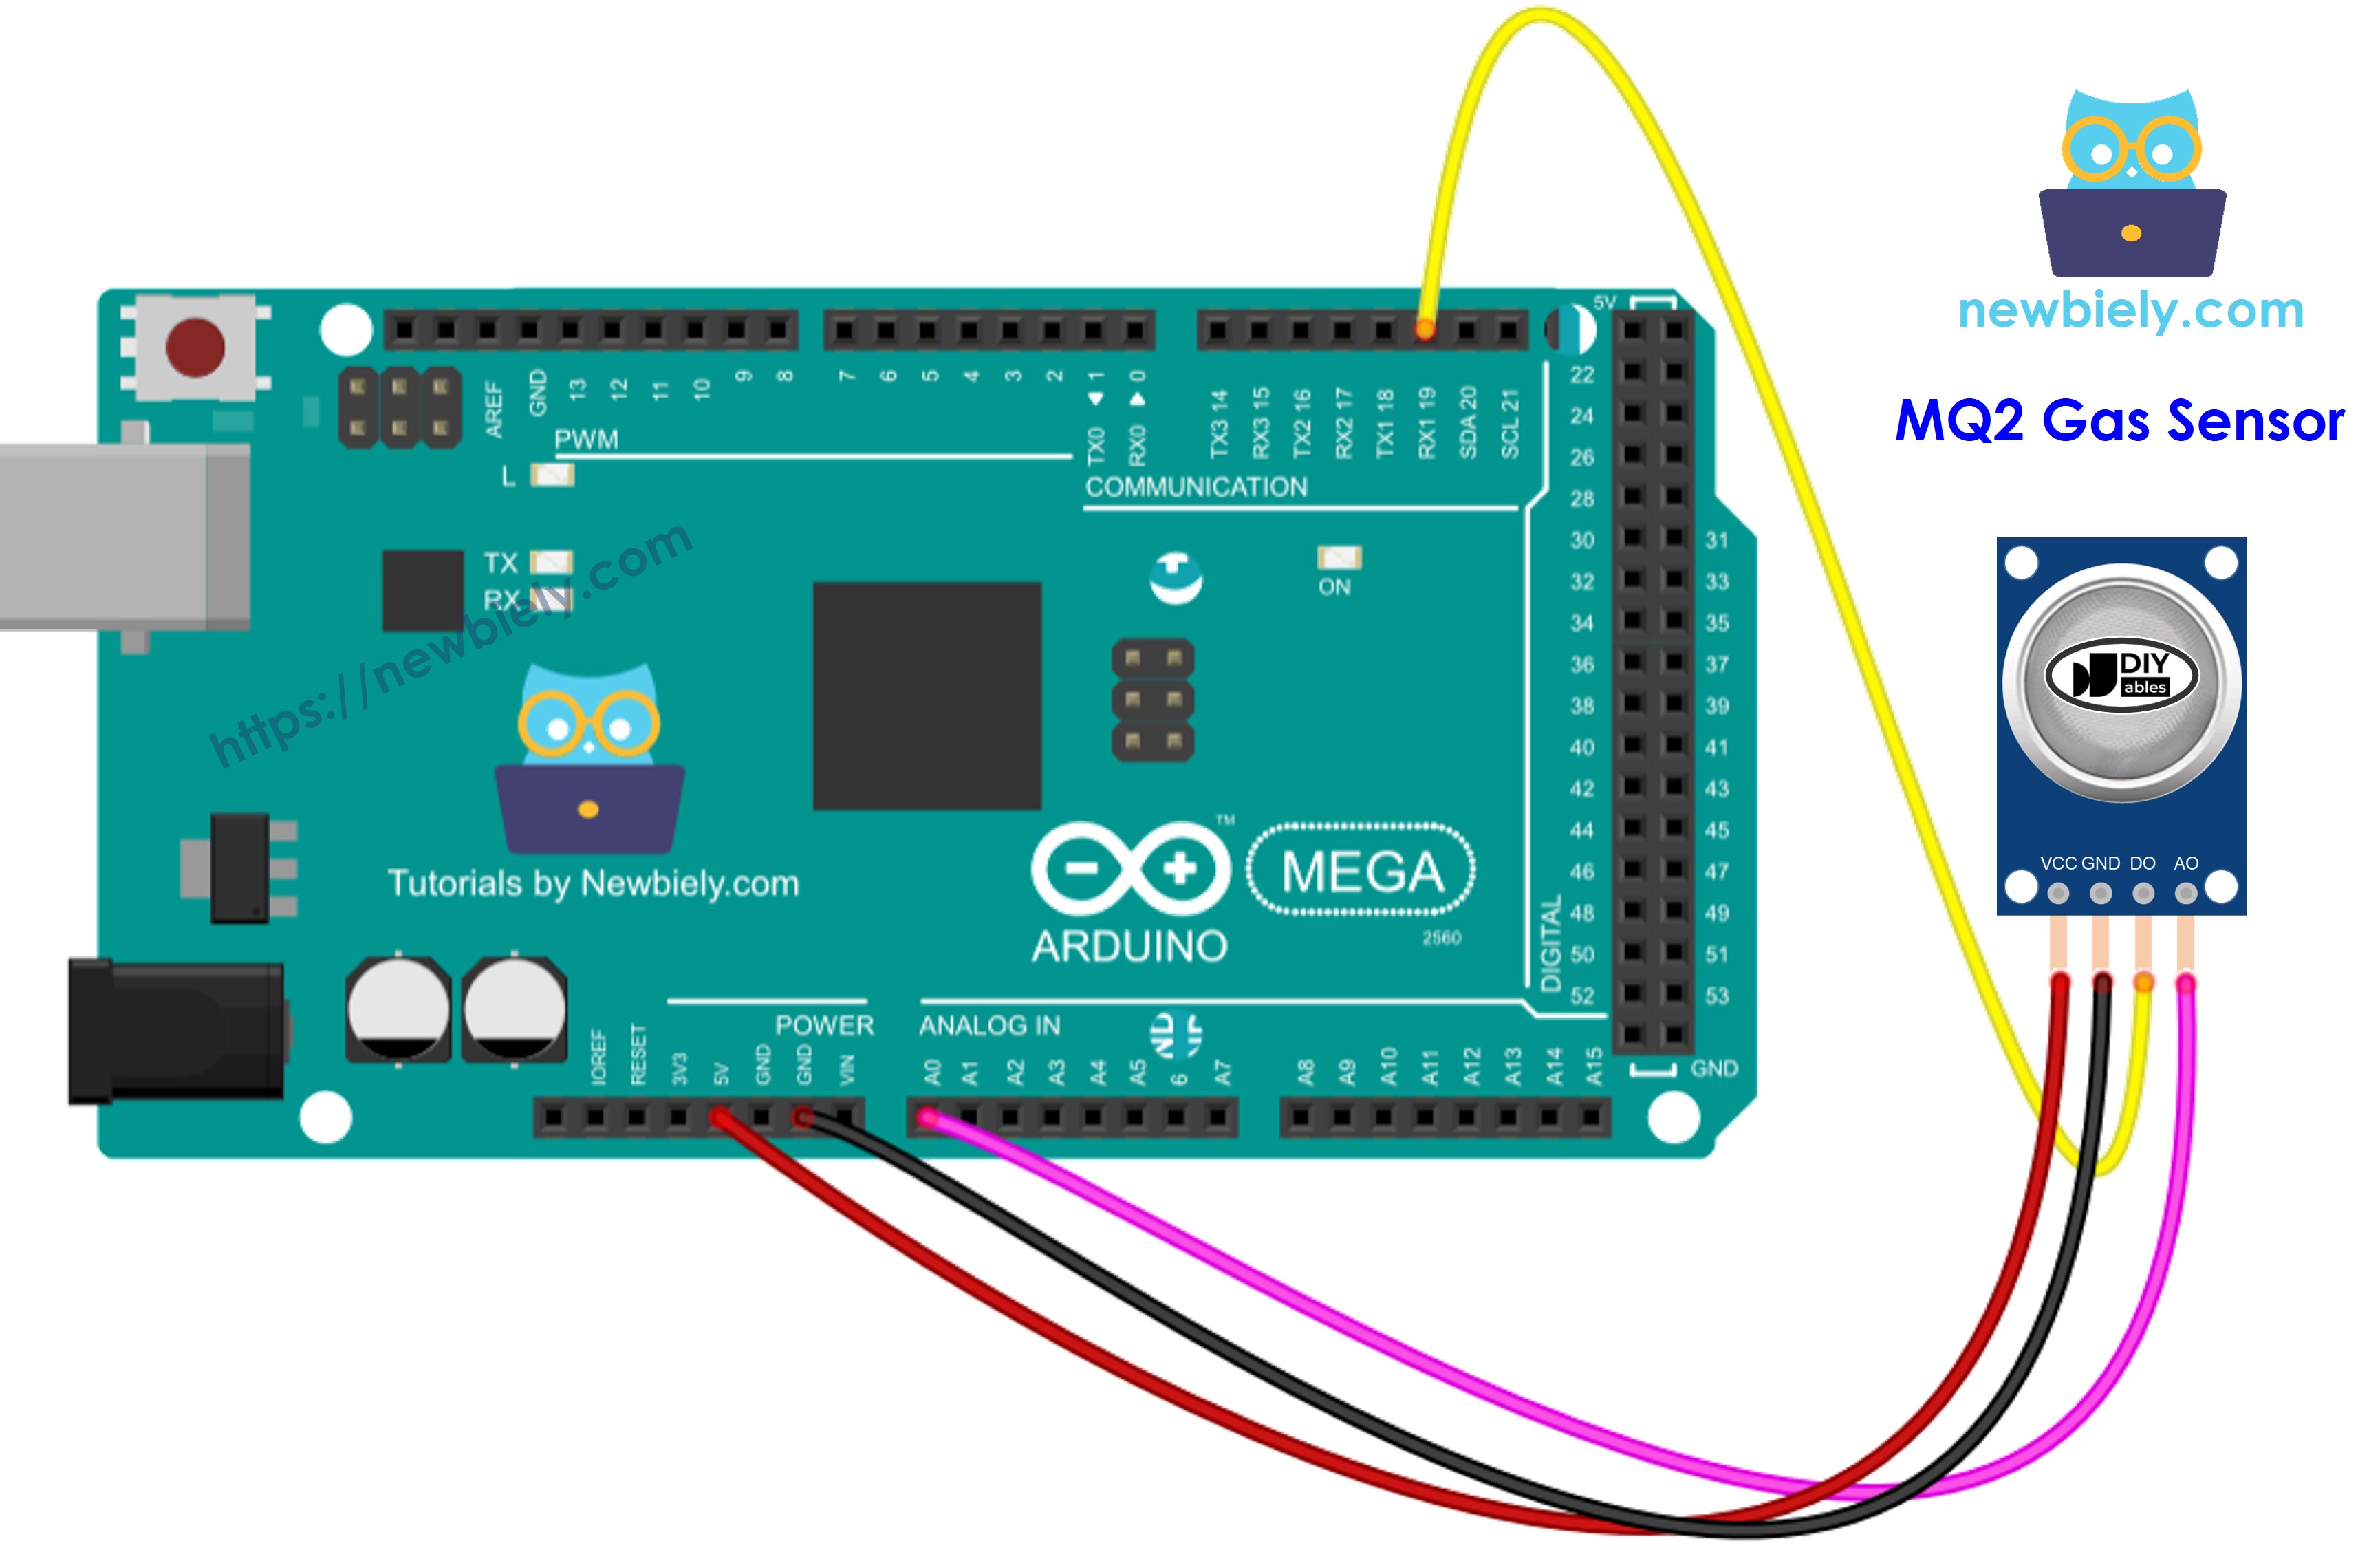
This image is created using Fritzing. Click to enlarge image
Arduino Mega Code - Read value from DO pin
Detailed Instructions
Follow these steps one by one:
- Connect the Arduino Mega board to the gas sensor using the diagram that comes with it.
- Connect the Arduino Mega board to your computer with a USB cable.
- Open the Arduino IDE on your computer.
- Choose the right board (Arduino Mega) and the correct COM port.
- Copy the code above and open it in the Arduino IDE.
- Click the Upload button in the Arduino IDE to send the code to the Arduino Mega.
- Put the MQ2 gas sensor near the smoke or gas you want to detect.
- Check the result on the Serial Monitor.
Please remember: if the LED is always on or never turns on, you can turn the small knob (potentiometer) to change how sensitive the sensor is.
Arduino Mega Code - Read value from AO pin
Detailed Instructions
- Copy the code above and open it in the Arduino software.
- Click the Upload button in the Arduino software to upload the code to the Arduino Mega.
- Place the MQ2 gas sensor near the smoke or gas you want to detect.
- Check the result in the Serial Monitor.
Using the DO or AO readings, you can judge the air quality by your own standards, or trigger an alarm or turn on the ventilation system.