Arduino Mega - TM1637 4-Digit 7-Segment Display
Got an Arduino Mega and want to add a numeric display to your project? The TM1637 4-digit 7-segment display module needs only two wires for data and works with any digital pin on the Mega. With the DIYables_4Digit7Segment_TM1637 library you can start writing code in minutes.
This step-by-step walkthrough covers:
- Wiring the TM1637 module to the Arduino Mega.
- Displaying integers, text strings, and temperature.
- Showing time in HH:MM format with a blinking colon.
- Controlling individual digits, characters, and brightness.
The Mega brings extra I/O, more SRAM, and additional hardware serial ports - handy when your project needs to talk to sensors or other peripherals alongside the display.
Hardware Preparation
Or you can buy the following kits:
| 1 | × | DIYables Sensor Kit (18 sensors/displays) |
Additionally, some of these links are for products from our own brand, DIYables .
Understanding the TM1637 Display Module
The TM1637 is a dedicated LED driver that takes care of multiplexing four 7-segment digits. It communicates over a 2-wire protocol (CLK and DIO) and stores digit data in its own internal memory. That means the display keeps showing whatever you wrote to it, even if your code moves on to do other things.
What you get with this module:
- 4 digits, each with 7 segments and a decimal point
- A colon separator between the second and third digit
- 8 brightness settings
- 2-wire interface, compatible with 3.3V and 5V
- No refresh loop required
| Function | Pin |
|---|---|
| CLK | Clock signal |
| DIO | Data I/O |
| VCC | 3.3V or 5V |
| GND | Ground |
You can hook CLK and DIO to any digital pin on the Mega. The examples use pins 2 and 3.
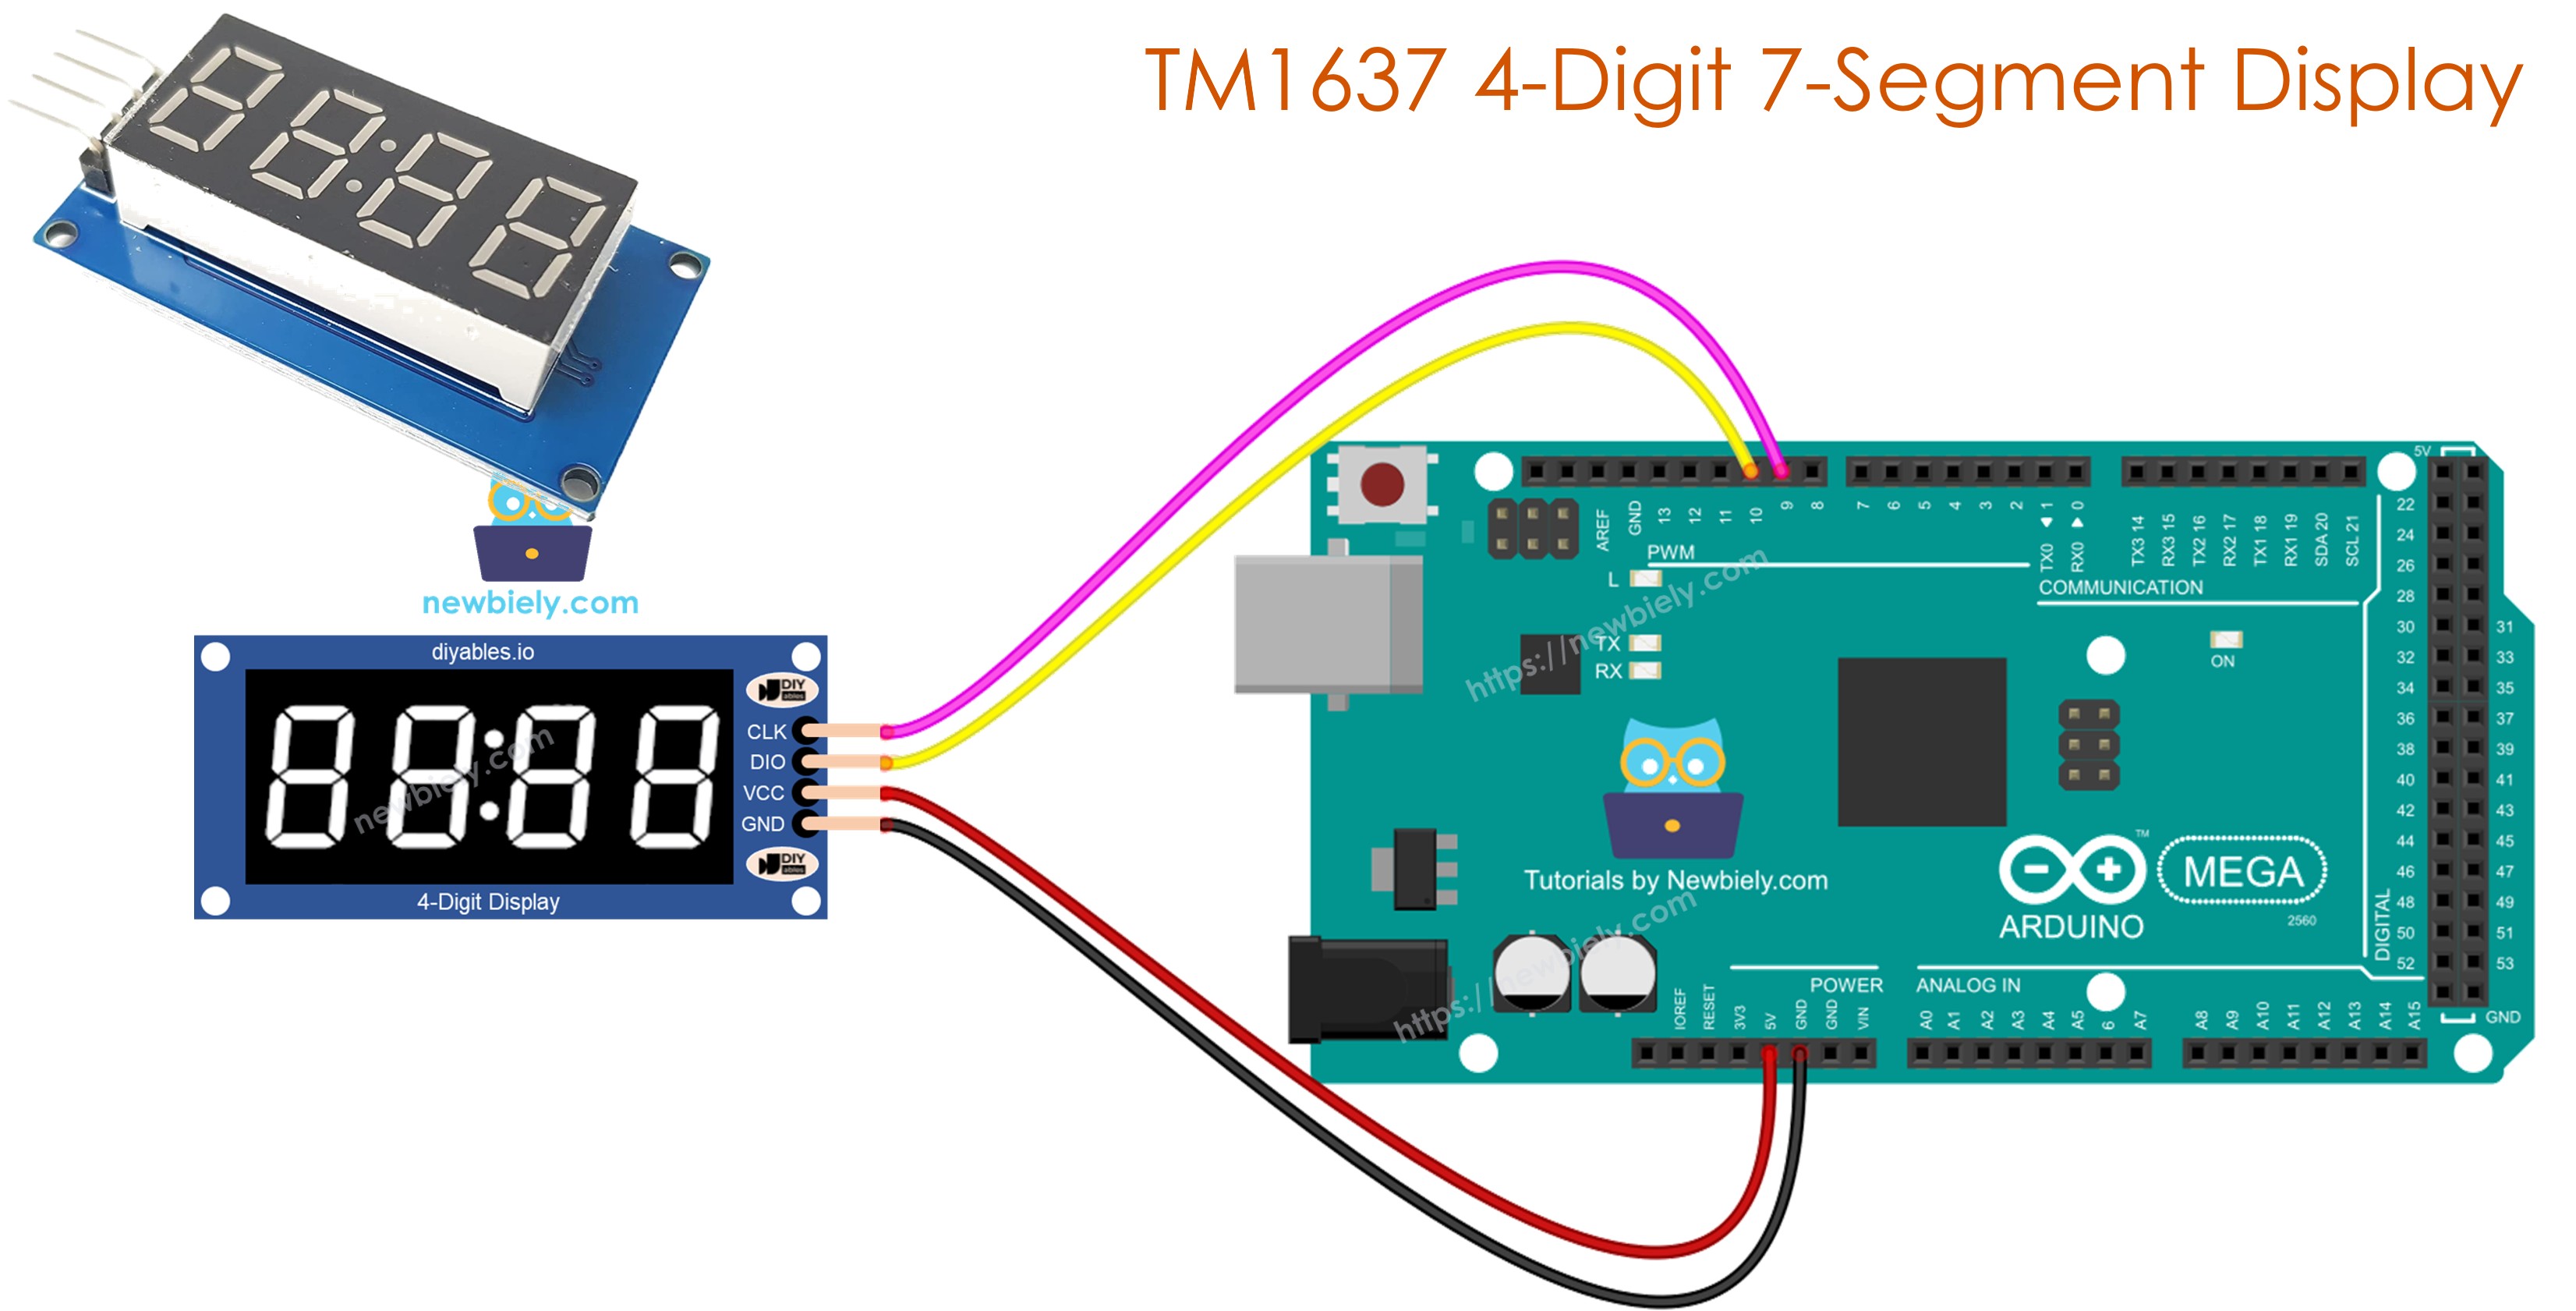
Wiring Diagram
Wire up the TM1637 module:
- CLK to Mega pin 9
- DIO to Mega pin 10
- VCC to 5V
- GND to GND
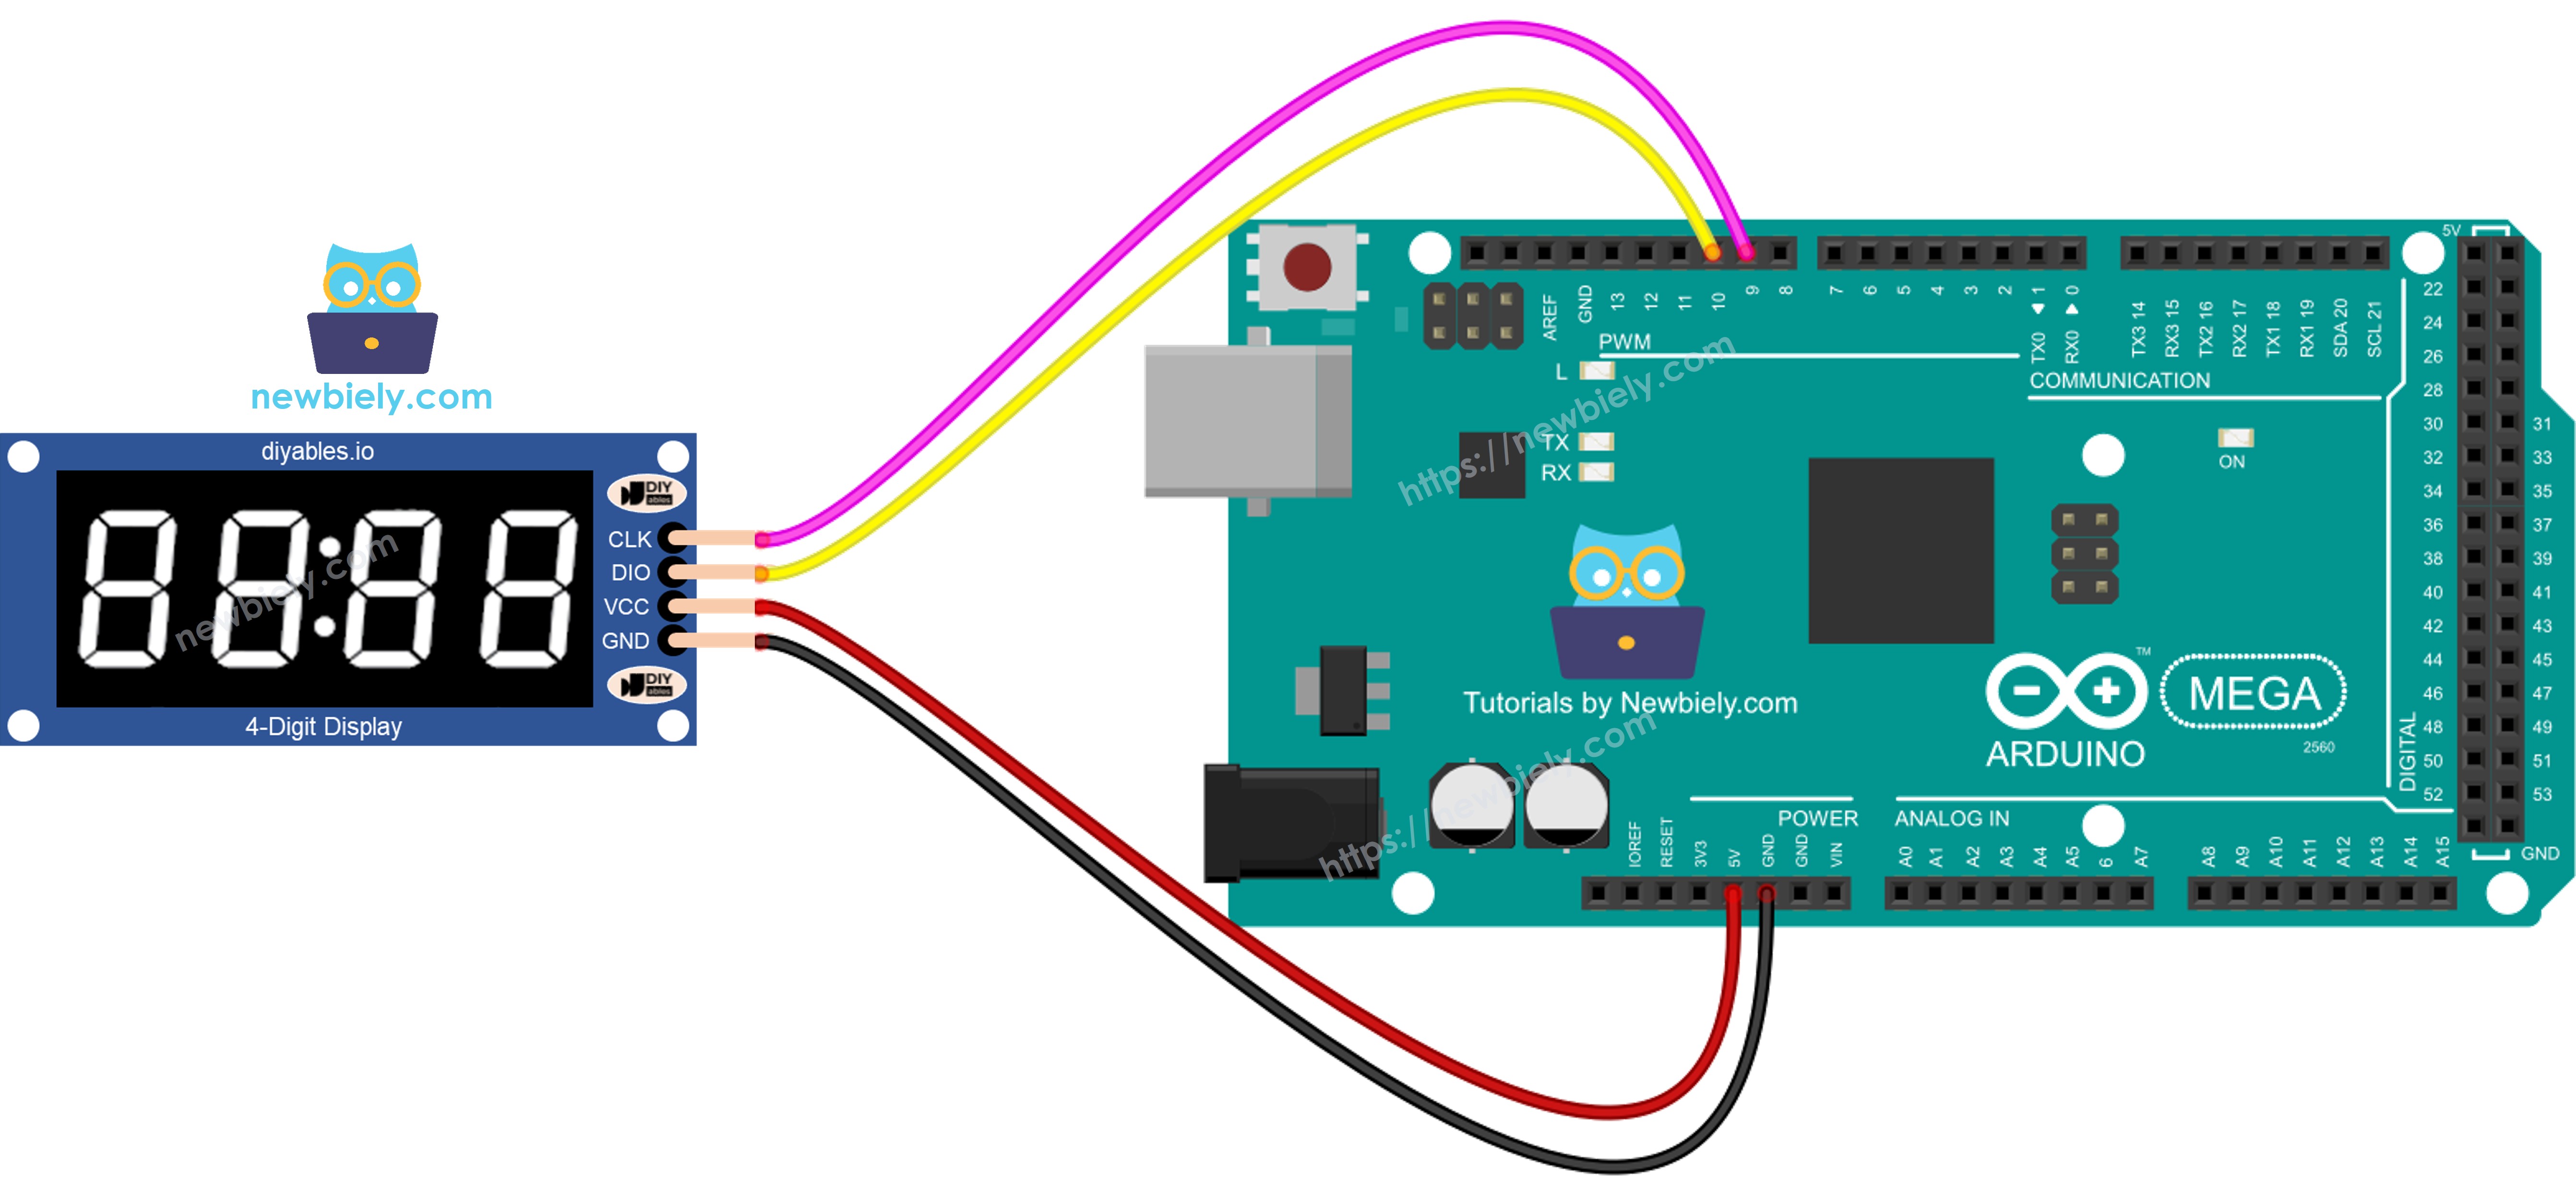
This image is created using Fritzing. Click to enlarge image
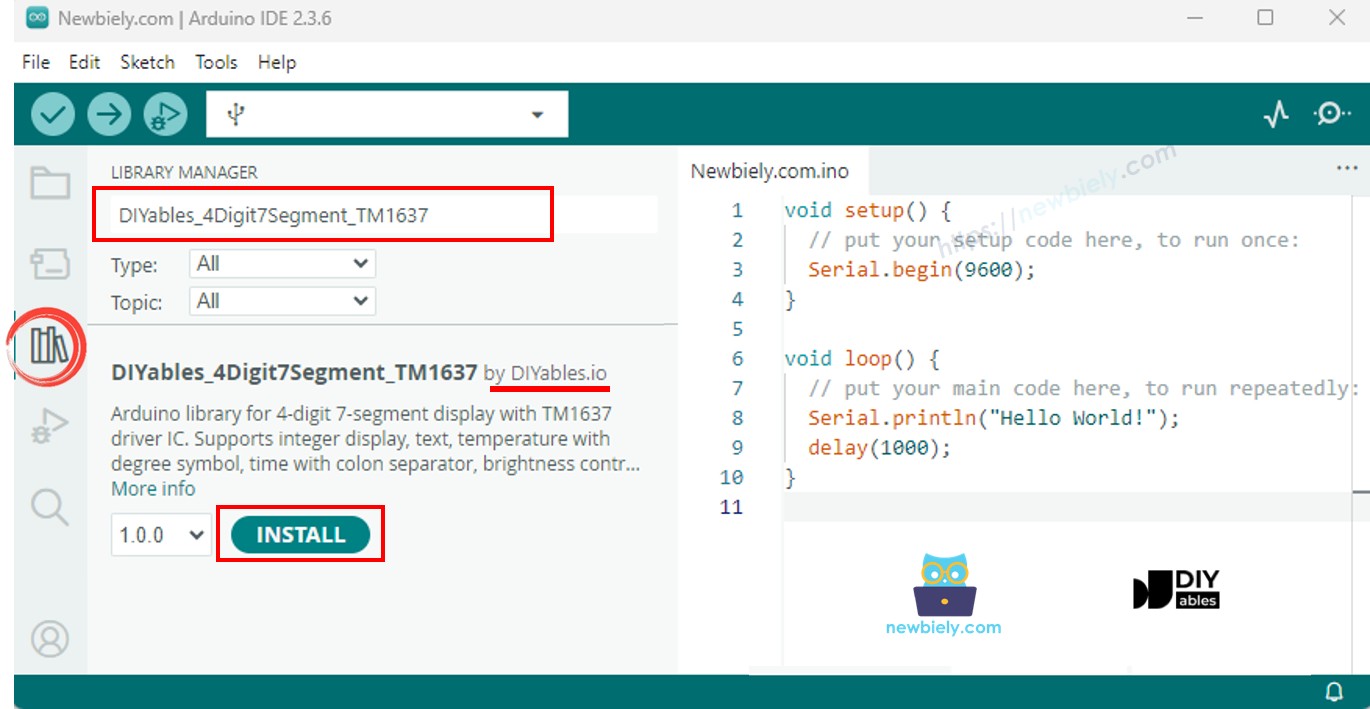
Installing the Library
- Connect your Arduino Mega to the computer via a USB cable.
- Open the Arduino IDE. Pick Arduino Mega or Mega 2560 as the board and choose the correct port.
- Go to the Libraries panel on the left side.
- Search for "DIYables_4Digit7Segment_TM1637". Find the entry from DIYables.
- Press Install.
The library has zero external dependencies.
Code Skeleton
The bare minimum to get started:
Create the display object, call begin(), and write to the display. That is all you need to see digits light up.
Example - Display Integer Numbers
Shows various integers on the display including negative numbers and zero-padded values.
Steps to Upload
- Connect the TM1637 module to the Mega as shown in the wiring diagram.
- Plug in the USB cable.
- Paste the code into Arduino IDE, select the board and port, and hit Upload.
- Open the Serial Monitor (9600 baud) to watch the output.
The display cycles through 0, 42, 1234, -5, -123, 9999, and then shows "0042" with zero-padding.
API at a Glance
| Method | Effect | Sample Call |
|---|---|---|
| print(int) | Shows an integer on the display | display.print(1234) |
| print(int, true) | Adds leading zeros | display.print(42, true) |
| clear() | Blanks all digits | display.clear() |
Example - Display Text and Temperature
Shows text strings and formatted temperature with the degree symbol.
Steps to Upload
- Wire the module as described above.
- Upload and open the Serial Monitor.
The display shows "HELP", "Hi", "COOL", "done", then "25°C" and "72°F".
API at a Glance
| Method | Effect | Sample Call |
|---|---|---|
| print(const char*) | Shows text (up to 4 characters) | display.print("HELP") |
| printTemperature(int, char) | Shows temperature with degree/unit | display.printTemperature(25, 'C') |
| DEGREE | Degree symbol for strings | display.DEGREE |
Example - Display Time with Colon
Shows time in HH:MM format with the colon blinking every 500ms.
Steps to Upload
- Wire the module and upload the sketch.
- The display shows "12:30" with a blinking colon.
API at a Glance
| Method | Effect | Sample Call | |
|---|---|---|---|
| printTime(int, int) | Displays HH | MM with colon | display.printTime(12, 30) |
| printTime(int, int, bool) | Controls colon on/off | display.printTime(12, 30, false) |
Example - Blink the Display
Uses off() and on() to blink the entire display while keeping its content.
Steps to Upload
- Upload the code. Watch "1234" blink five times, then "HELP" blinks five times.
API at a Glance
| Method | Effect | Sample Call |
|---|---|---|
| off() | Turns display off (data stays) | display.off() |
| on() | Turns display back on | display.on() |
| setBrightness(int) | Sets brightness 0-7 | display.setBrightness(4) |
Example - Individual Digit Control
Sets each digit independently with numbers, characters, and colon.
Steps to Upload
- Upload and observe the different digit combinations.
API at a Glance
| Method | Effect | Sample Call |
|---|---|---|
| setNumber(int, int) | Sets a digit 0-9 at a position | display.setNumber(0, 1) |
| setChar(int, char) | Sets a character at a position | display.setChar(0, 'H') |
| setColon(bool) | Controls the colon | display.setColon(true) |
| setSegments(int, uint8_t) | Sets raw segment bits | display.setSegments(0, 0x76) |
Common Problems and Fixes
| Symptom | Likely Cause | Fix |
|---|---|---|
| Display is blank | Wrong wiring or pins | Verify CLK/DIO connections match code |
| Wrong characters appear | CLK and DIO swapped | Swap the two wires |
| Display too dim | Low brightness setting | Call setBrightness(7) |
| Compile error | Library missing | Install DIYables_4Digit7Segment_TM1637 from Library Manager |
Platform Support
Built entirely on Arduino standard APIs - compatible with every Arduino-supported architecture.