Arduino Mega - Keypad 1x4
This guide shows how to use a 1x4 keypad with an Arduino Mega. We will cover:
- How to connect a 1x4 keypad to an Arduino Mega.
- How to set up an Arduino Mega to know which key is pressed on a 1x4 keypad.
Hardware Preparation
Or you can buy the following kits:
| 1 | × | DIYables Sensor Kit (18 sensors/displays) |
Additionally, some of these links are for products from our own brand, DIYables .
Overview of Keypad 1x4
A 1x4 keypad has four buttons in a line. You use it to type codes, move through menus, or control devices in different projects.
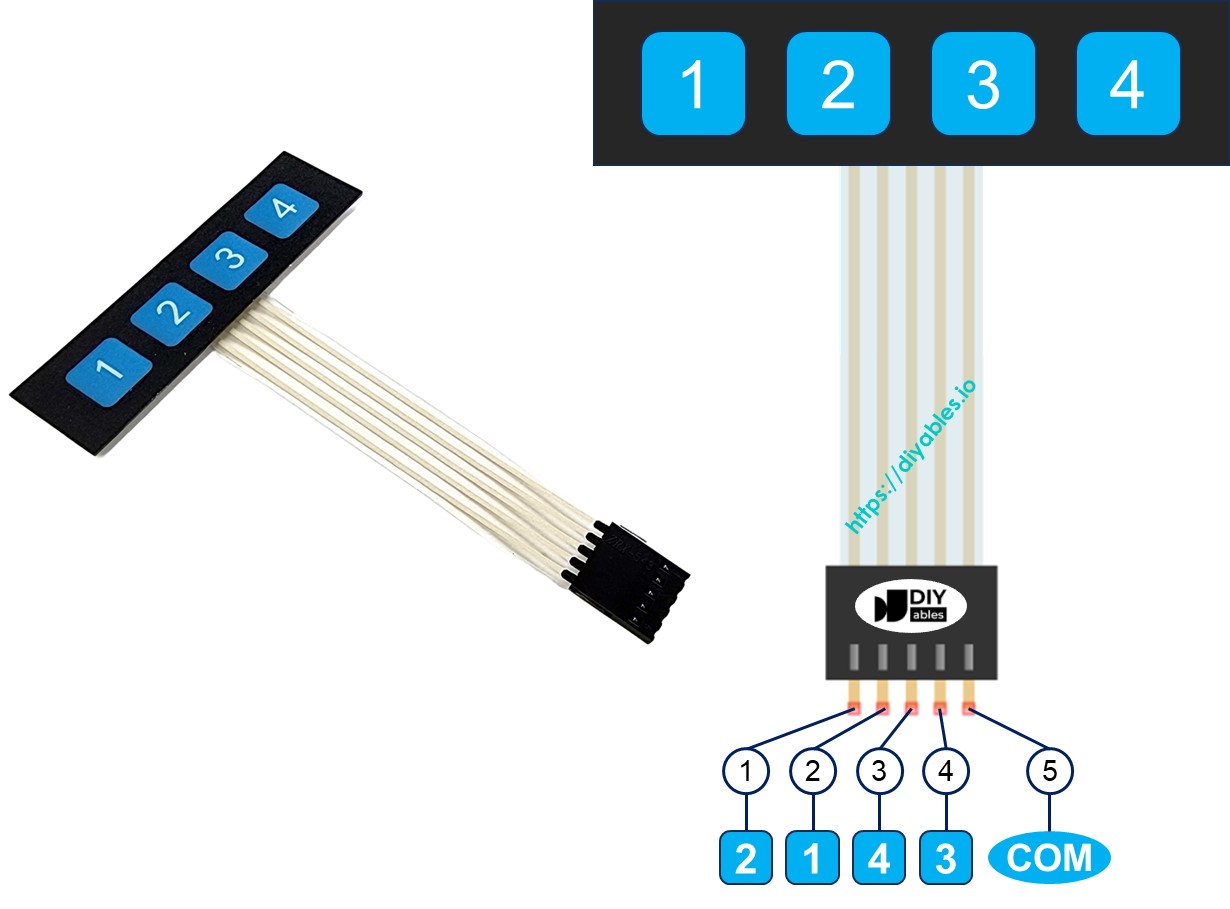
Pinout
The 1x4 keypad has five pins. The pins are not in the same order as the labels on the keys.
- Pin 1 goes to key 2.
- Pin 2 goes to key 1.
- Pin 3 goes to key 4.
- Pin 4 goes to key 3.
- Pin 5 connects to all keys.
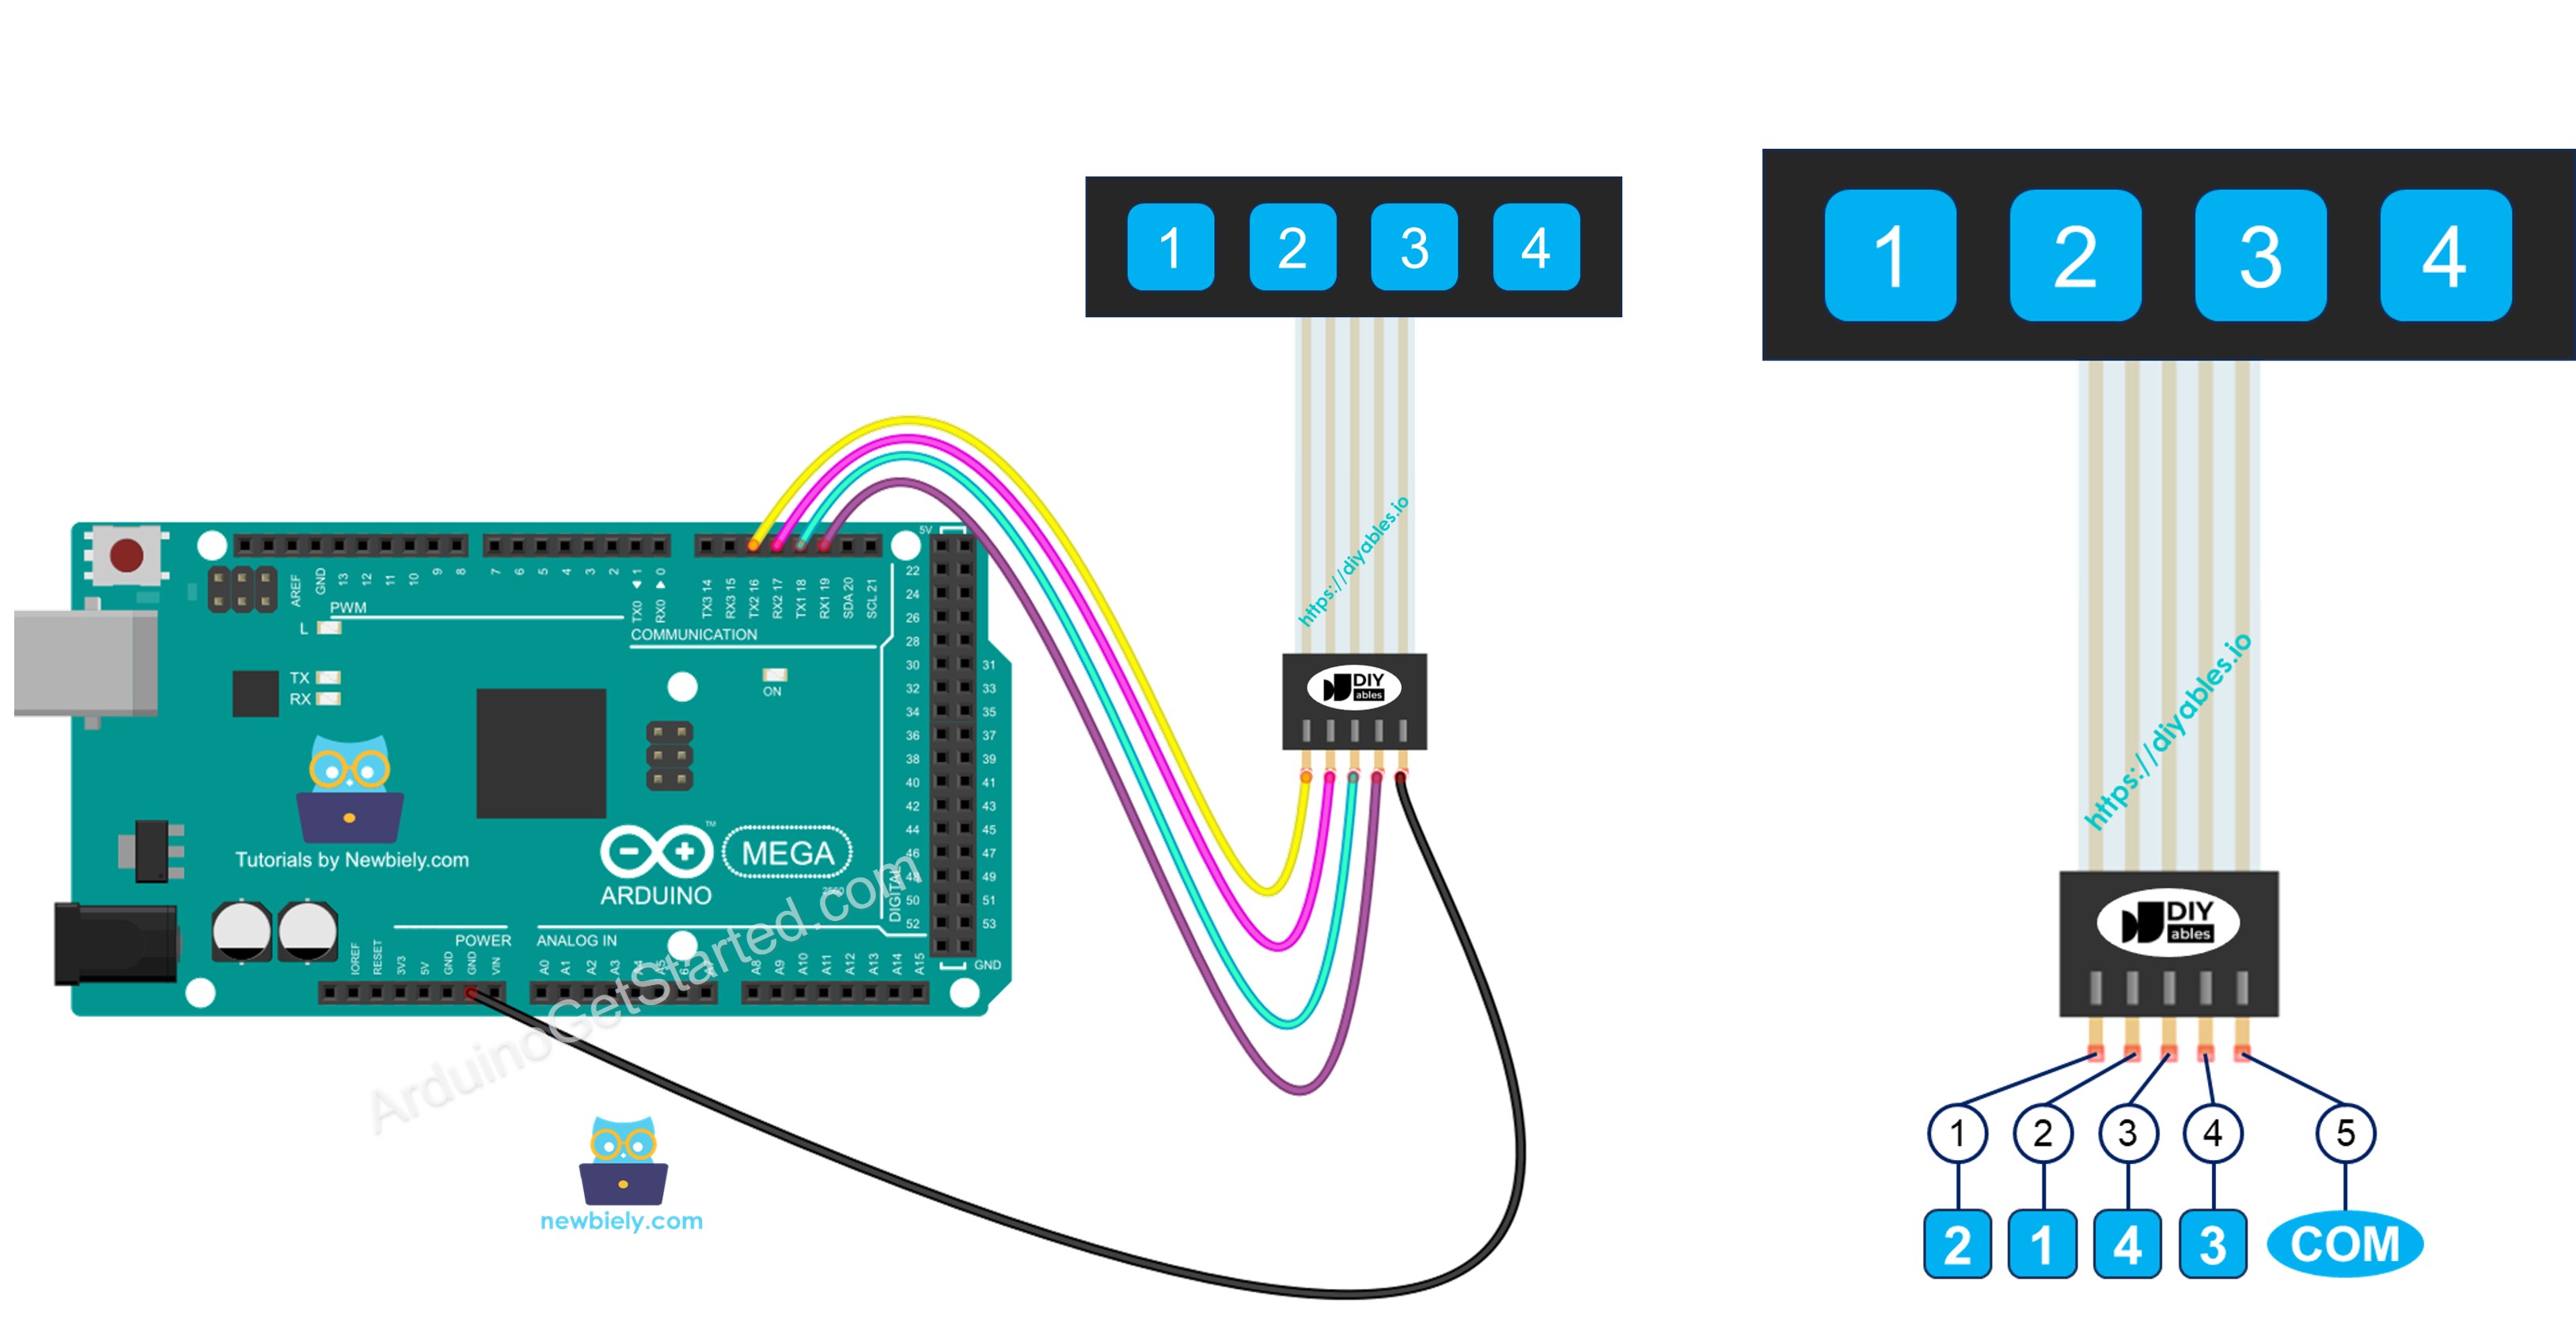
Wiring Diagram
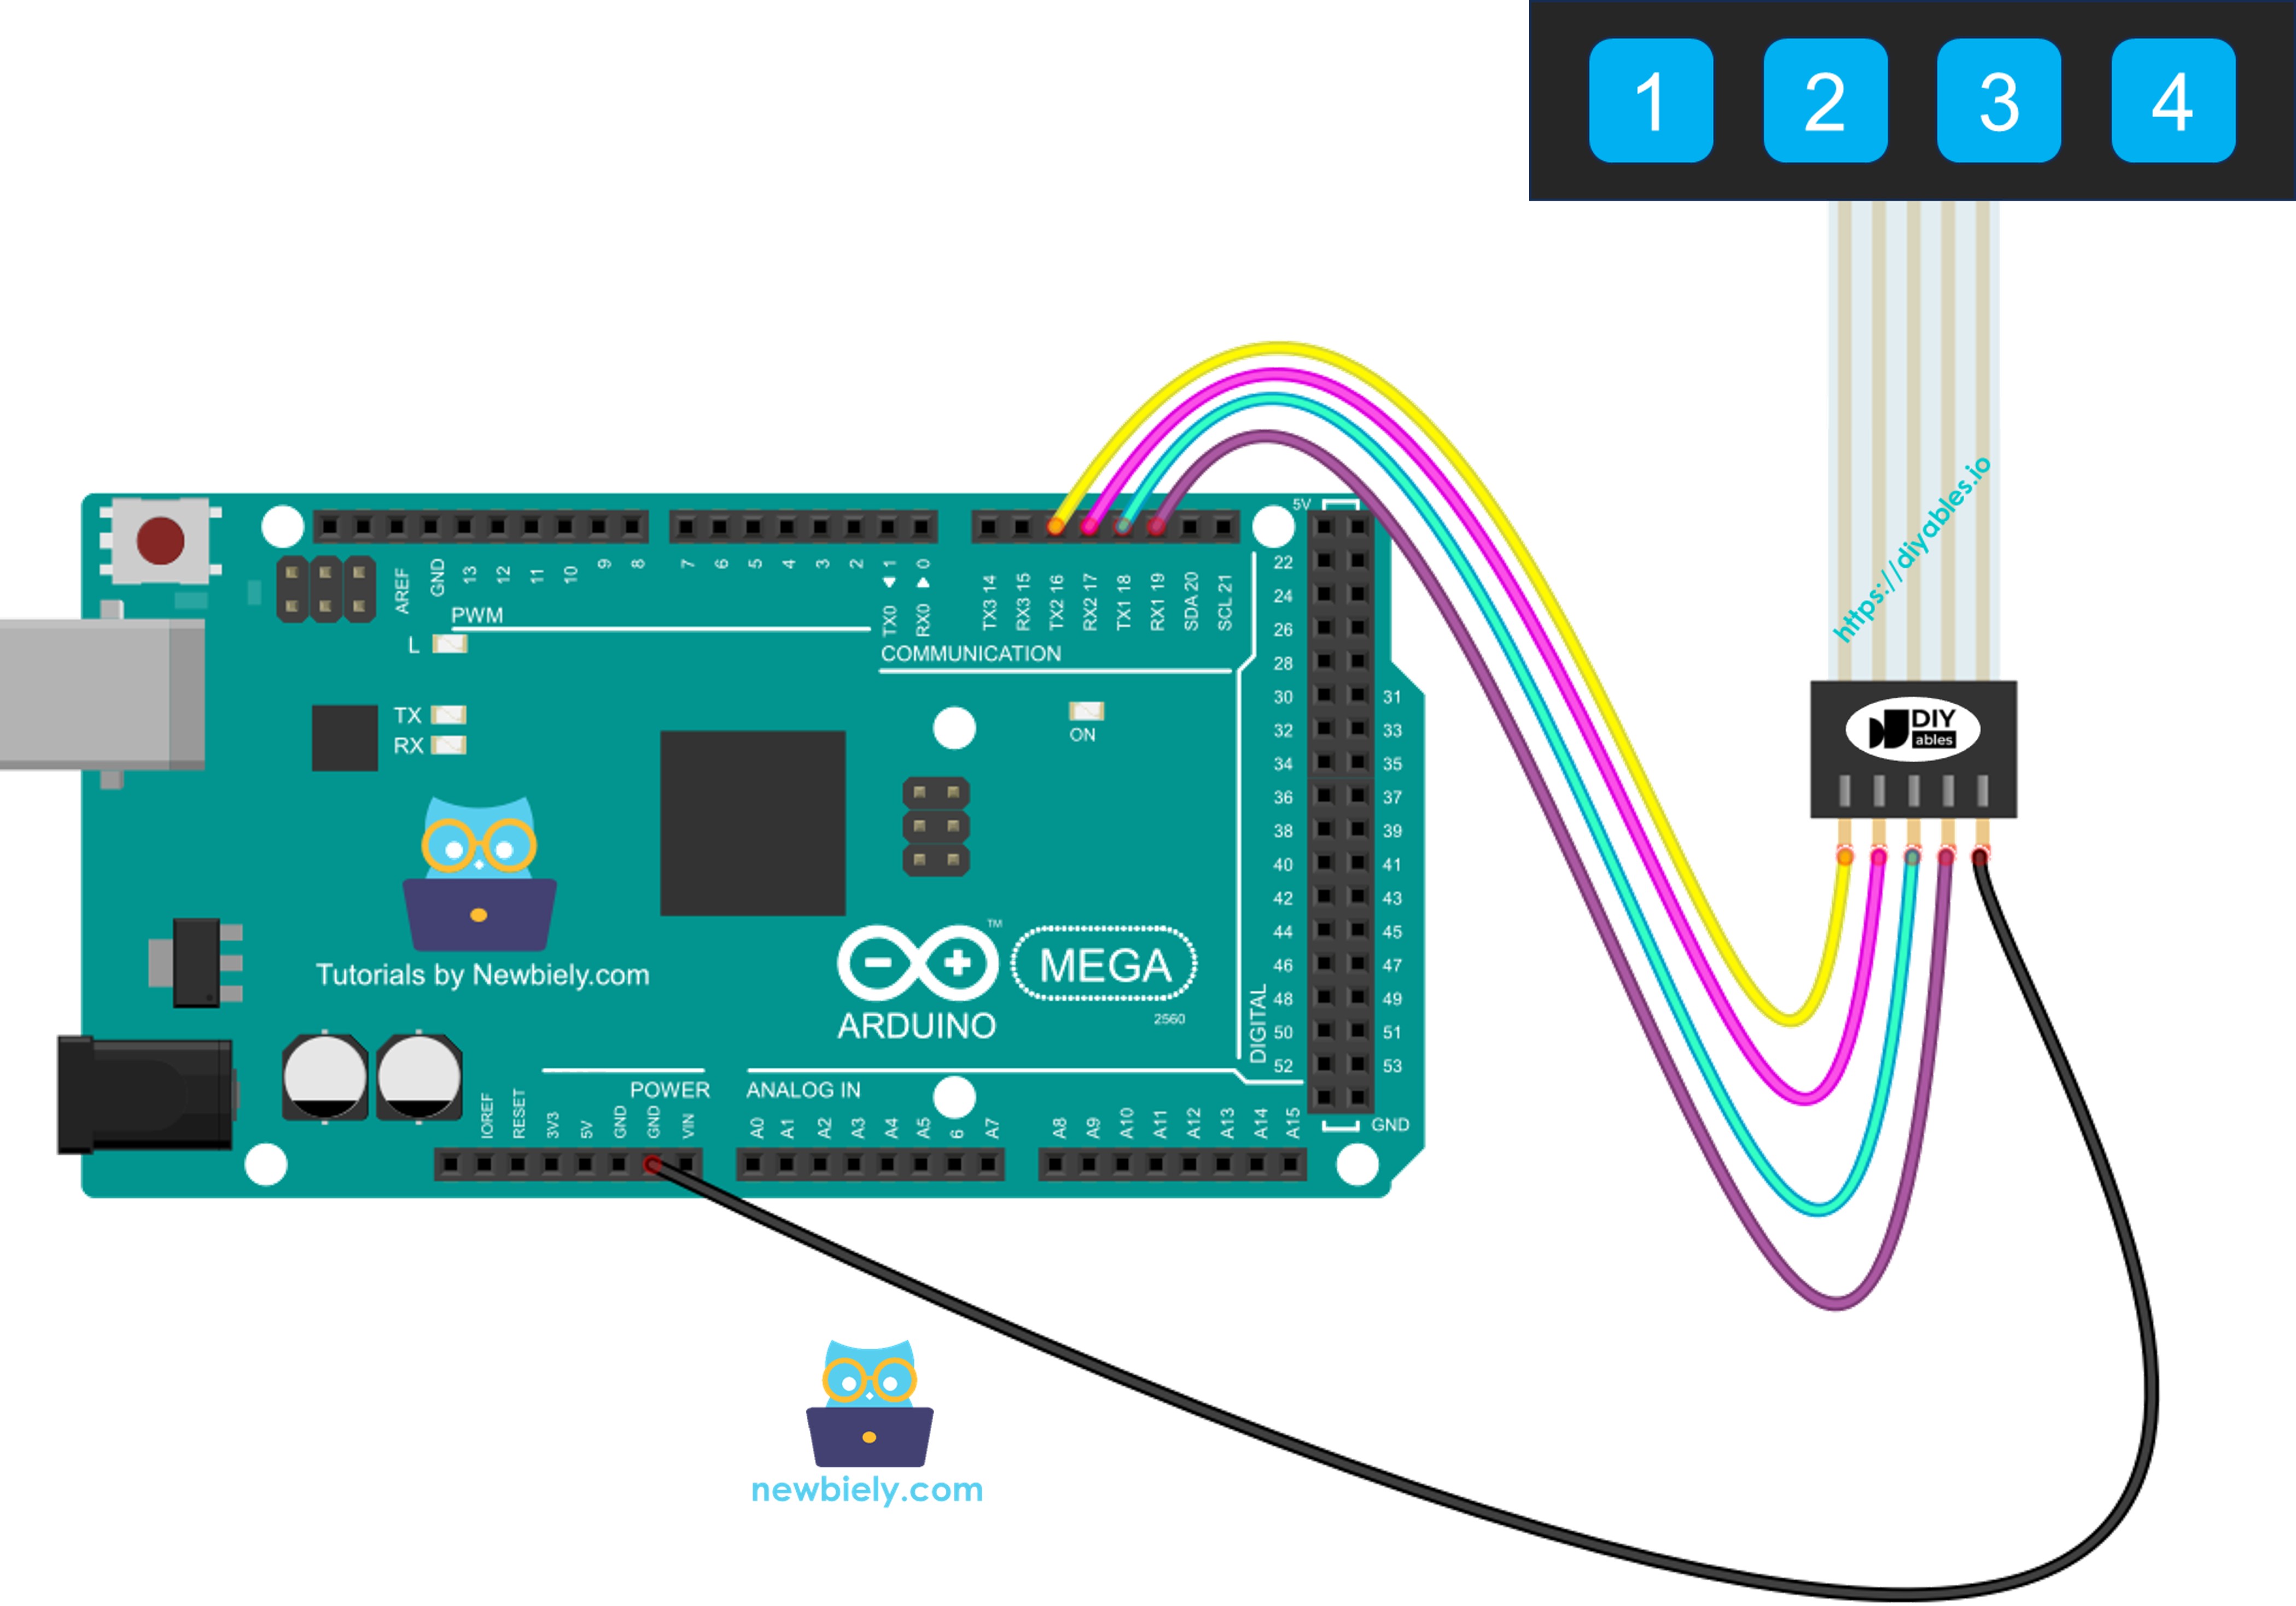
This image is created using Fritzing. Click to enlarge image
Arduino Mega Code
Each key on the 1x4 keypad acts like a button. We can use the digitalRead() function to see when a key is pressed. But like any button, it can bounce — one press may look like several presses. To fix this, we need to debounce each key. Debouncing four keys without stopping other parts of the code can be hard. Luckily, the ezLink library makes it easier.
Detailed Instructions
Follow these steps one by one.
- Connect Arduino Mega to a 1x4 keypad using the diagram.
- Connect the Arduino Mega to your computer with a USB cable.
- Open the Arduino IDE on your computer.
- Choose the correct board (Arduino Mega) and the COM port.
- Click the Libraries button on the left side of the Arduino IDE.
- In the search box, type "ezButton" and find the library from ArduinoGetStarted.com.
- Click Install to add the ezButton library.

- Copy the code and open it in the Arduino IDE.
- Click the Upload button in the Arduino IDE to send the code to the Arduino Mega.
- Open the Serial Monitor.
- Press each key on the 1 by 4 keypad.
- Check the results in the Serial Monitor.