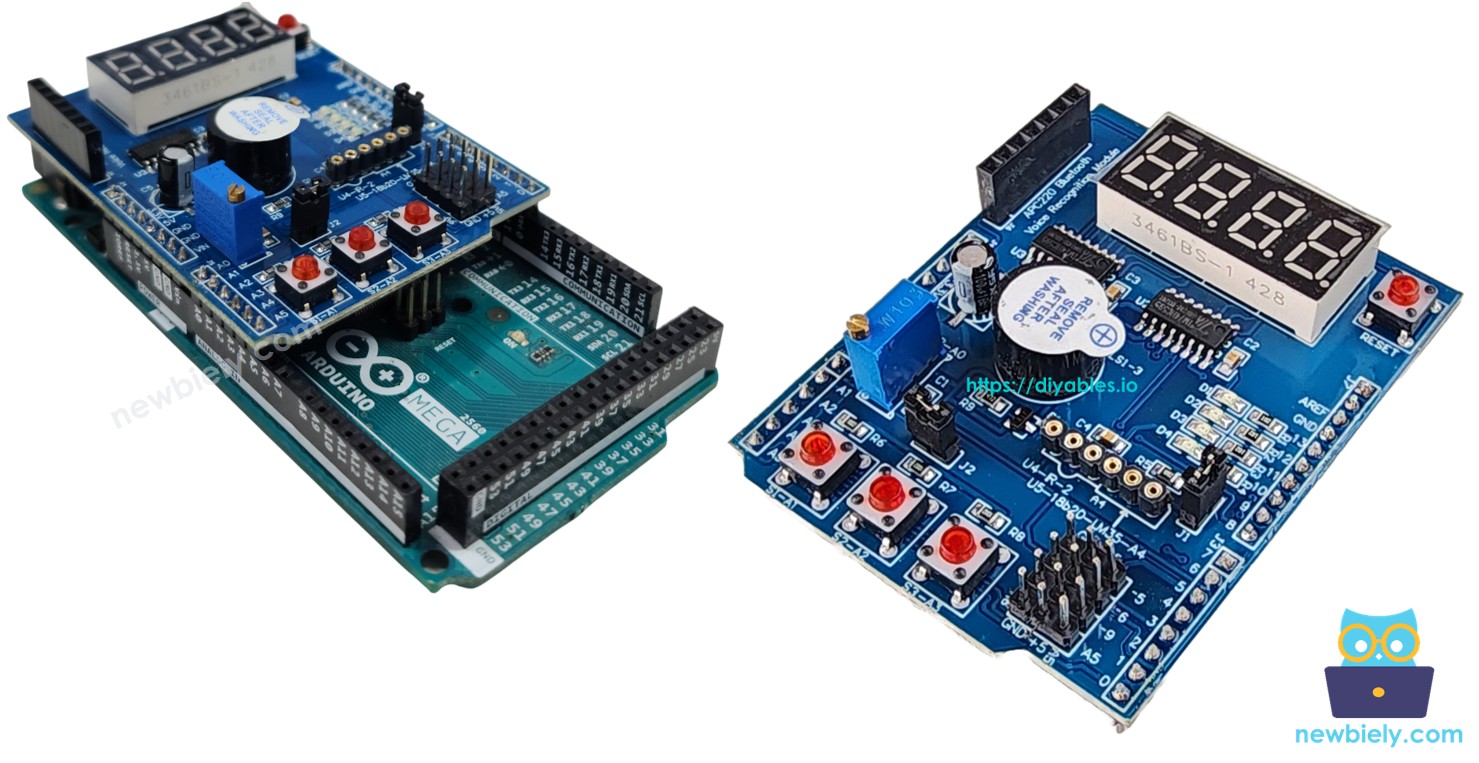
Arduino Mega - Multi-Function Shield
If you own an Arduino Mega and want a fast way to experiment with displays, buttons, LEDs, a buzzer, and sensors — the Multi-Function Shield is the easiest option. This step-by-step guide covers everything you need:
- Plugging the Multi-Function Shield into the Arduino Mega.
- Displaying integers, decimals, and text on the 4-digit 7-segment display.
- Detecting when buttons are pressed or released.
- Controlling LEDs individually or as a group — on, off, toggle, blink.
- Generating beep sounds with the buzzer.
- Reading the potentiometer to get an analog value or percentage.
- Measuring temperature in Celsius with the onboard LM35 sensor.
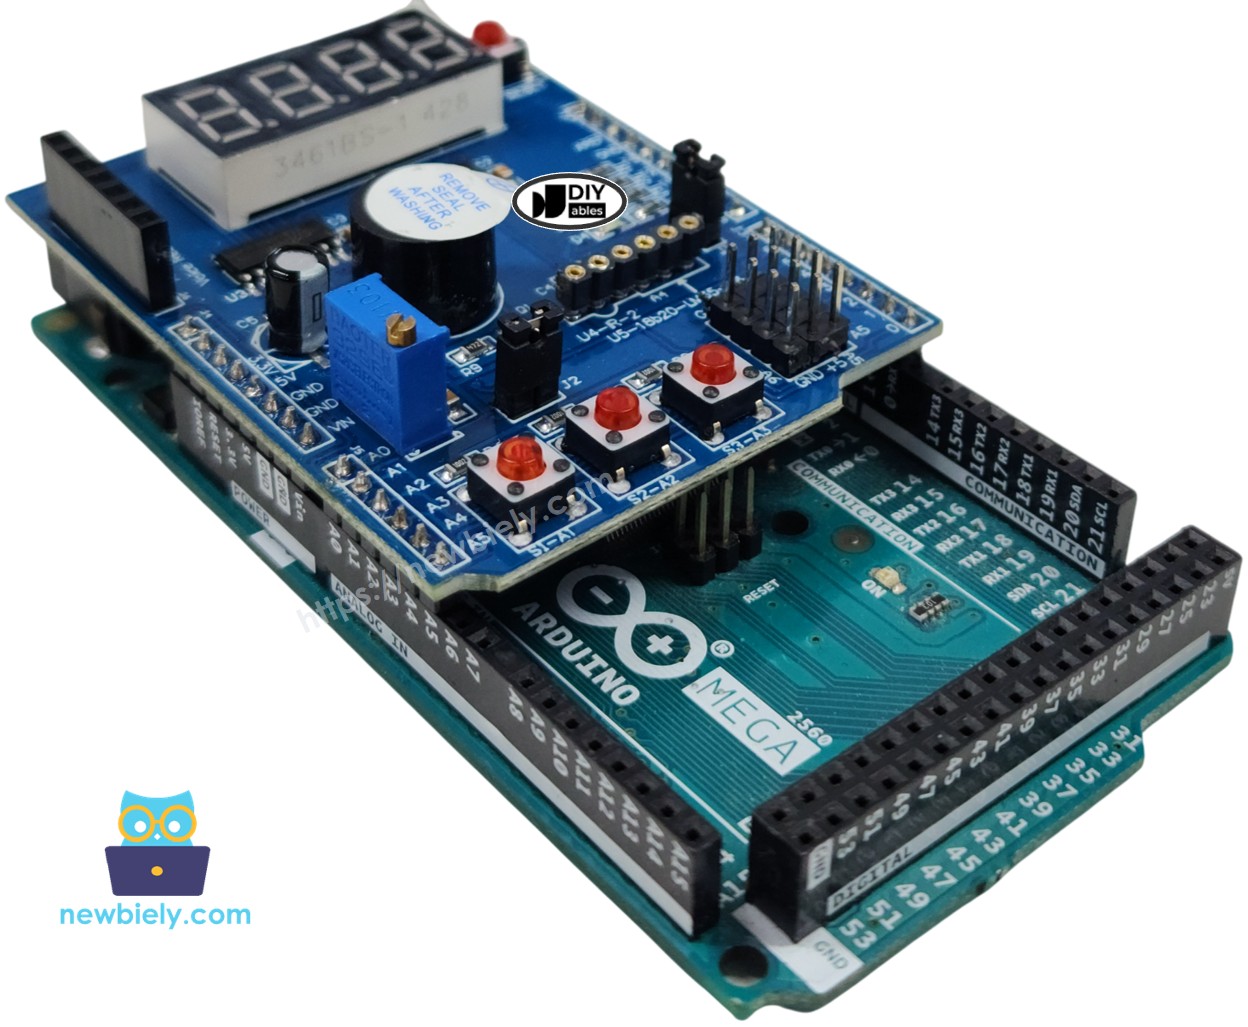
Because the Arduino Mega's header layout is backward-compatible with the standard Uno pinout, the Multi-Function Shield slides right onto the Mega without jumper wires. The Mega gives you significantly more I/O pins, more memory, and additional serial ports — all while keeping full compatibility with this shield.
Watch this step-by-step video tutorial demonstrating all examples of the Multi-Function Shield. Note that the video shows Arduino Uno R4, but it works identically for Arduino Mega:
Hardware Preparation
Or you can buy the following kits:
| 1 | × | DIYables Sensor Kit (18 sensors/displays) |
Additionally, some of these links are for products from our own brand, DIYables .
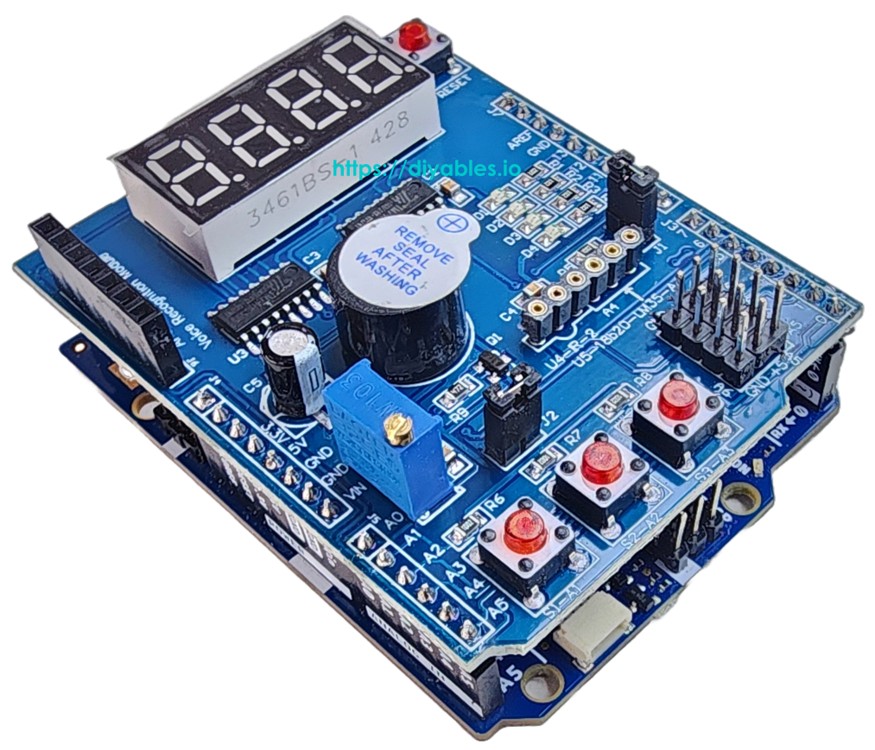
Overview of Multi-Function Shield
The Multi-Function Shield bundles six commonly used components into one plug-in board. No soldering, no breadboard, no mess. Here is what you get:
- 4-Digit 7-Segment Display — Driven by a 74HC595 shift register. Shows integers, floats, uppercase letters, and special characters (such as °).
- 3 Push Buttons (S1, S2, S3) — Active LOW inputs with internal pullups. The library debounces them automatically.
- 4 LEDs (D1, D2, D3, D4) — Active LOW outputs. Supports on, off, toggle, and two blink modes.
- Buzzer — Active LOW. Can beep for a set duration or after a programmable delay.
- Potentiometer — Analog input on pin A0. Returns a raw count or a percentage value.
- LM35 Temperature Sensor — Analog input on pin A4. Returns Celsius. Remove jumper J1 before use.
The pins used by the shield map identically on the Mega:
| Function | Pin | Function | Pin |
|---|---|---|---|
| LED D1 | 13 | Button S1 | A1 |
| LED D2 | 12 | Button S2 | A2 |
| LED D3 | 11 | Button S3 | A3 |
| LED D4 | 10 | Potentiometer | A0 |
| Buzzer | 3 | LM35 Temp Sensor | A4 |
| Display LATCH | 4 | ||
| Display CLOCK | 7 | ||
| Display DATA | 8 |
Wiring Diagram
Align the shield with the Mega's headers and push it down firmly. The shield occupies the same header rows as on the Uno, so the remaining Mega pins stay accessible for other projects.
This image is created using Fritzing. Click to enlarge image
Installing the Library
- Connect your Arduino Mega to the computer via a USB cable.
- Open the Arduino IDE. Pick Arduino Mega or Mega 2560 as the board and choose the correct port.
- Go to the Libraries panel on the left side.
- Search for "DIYables_MultiFuncShield". Find the entry from DIYables.
- Press Install.
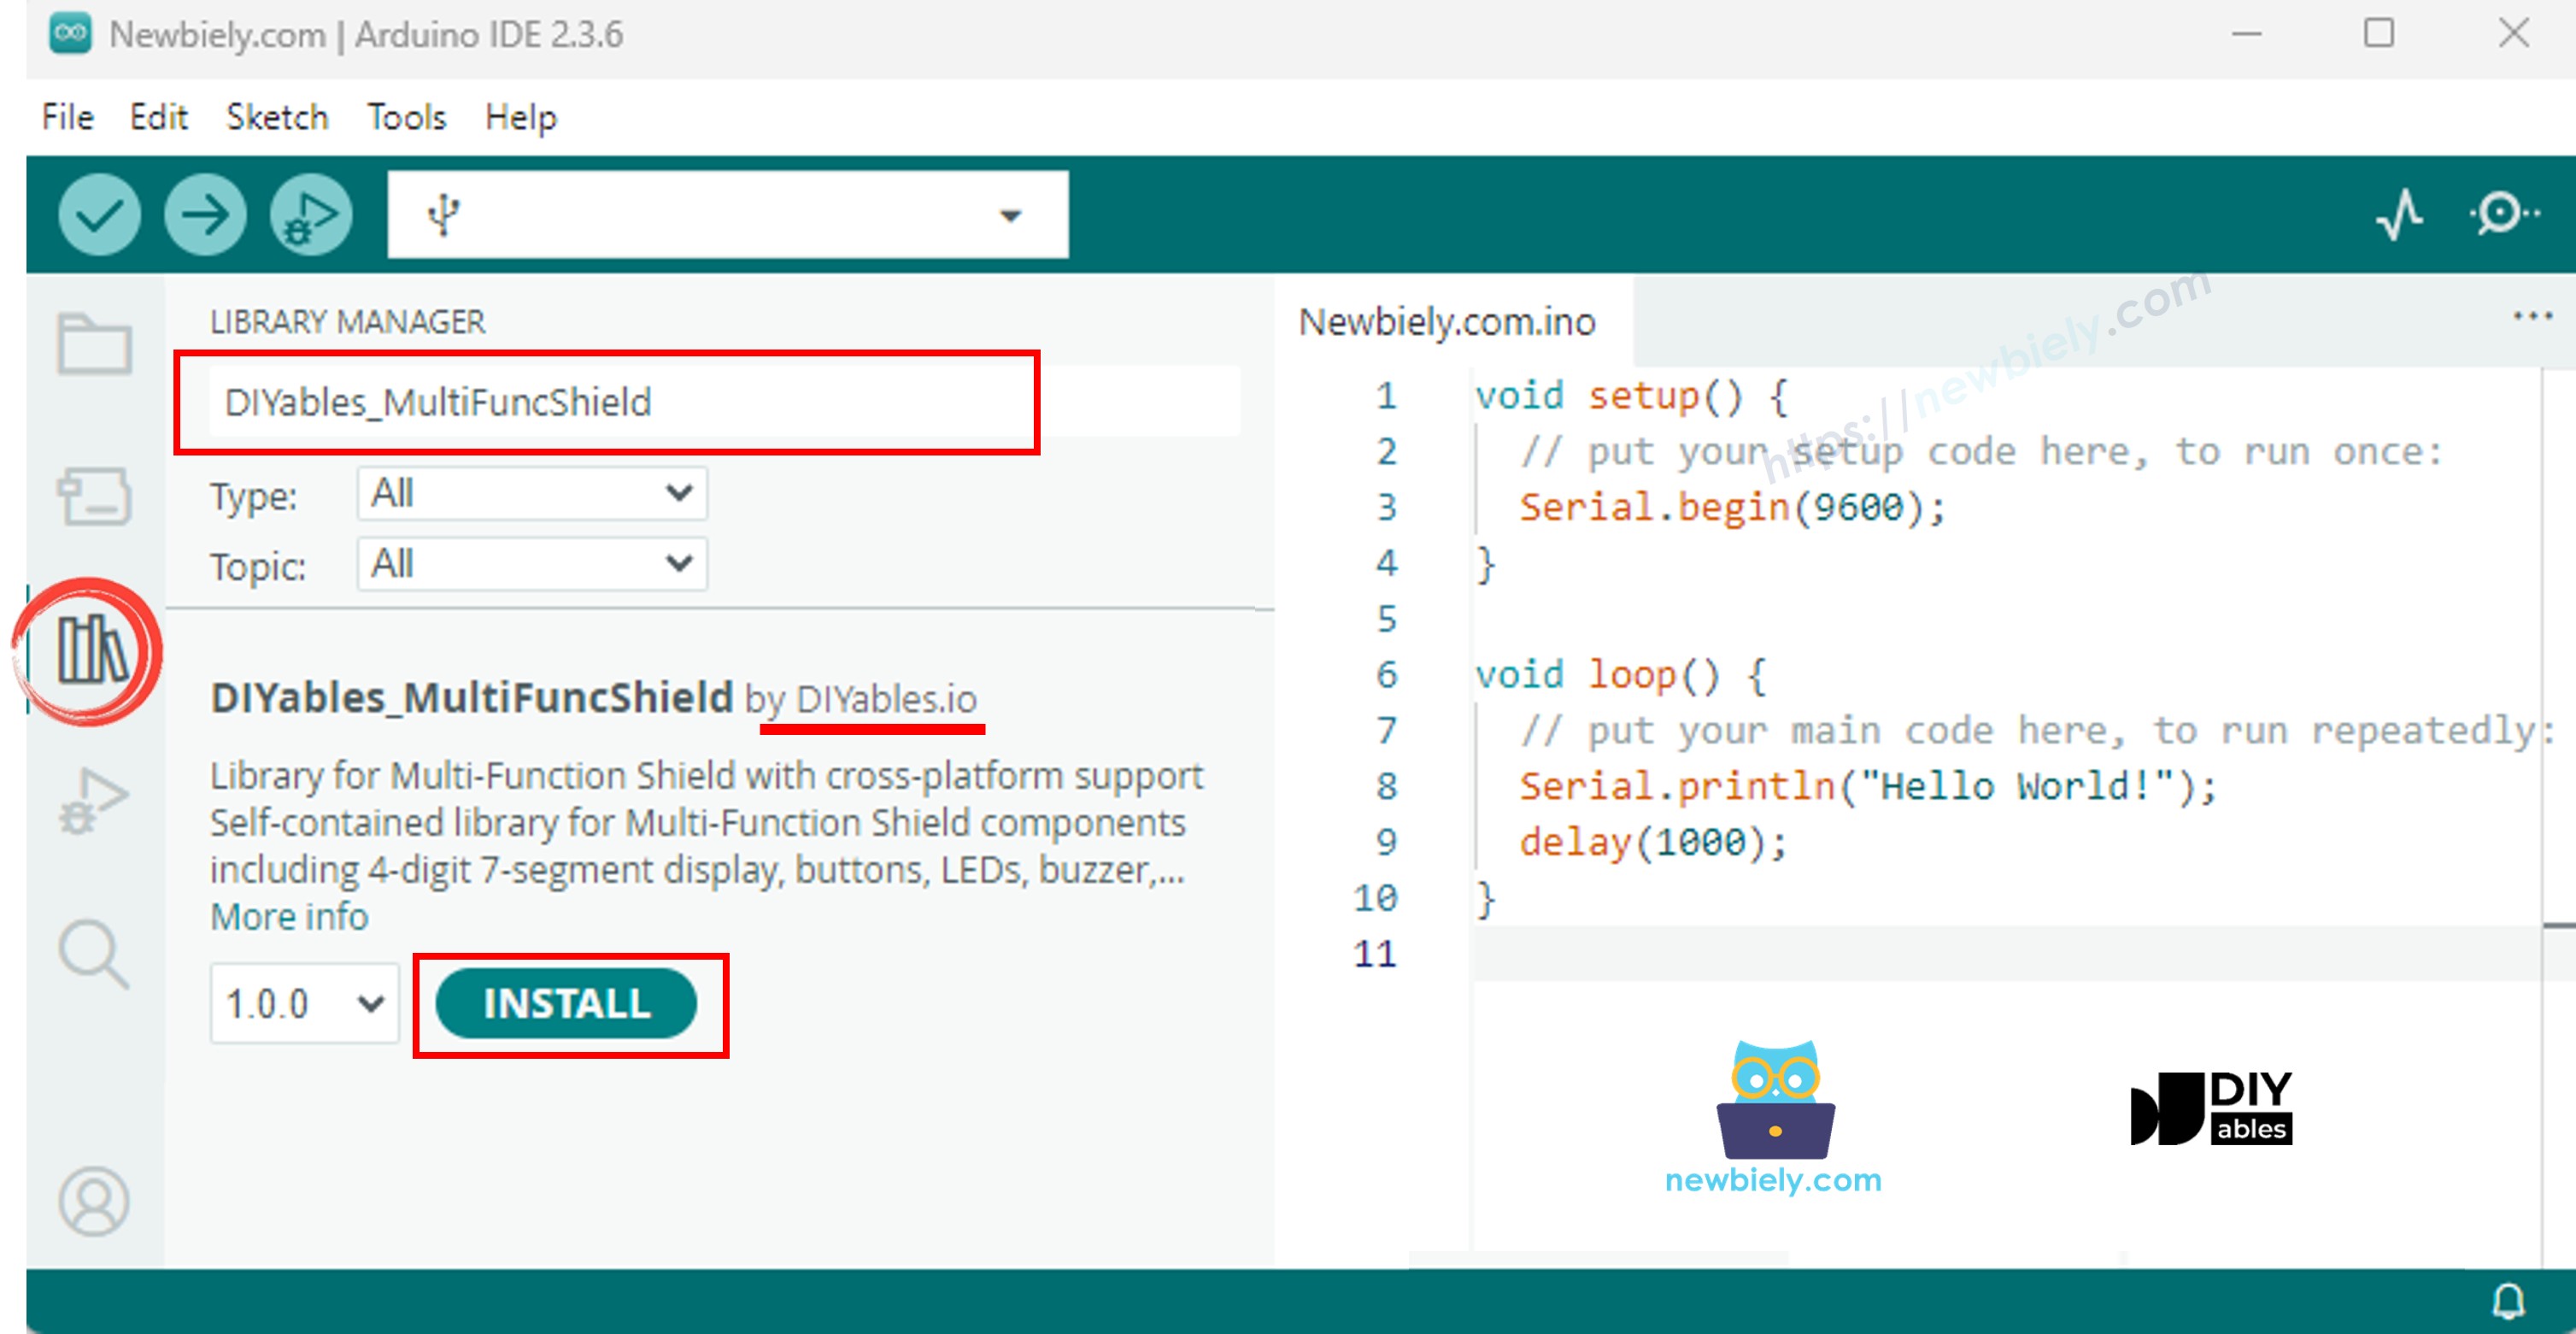
The library has zero external dependencies — it is completely self-contained.
Code Skeleton
Every Multi-Function Shield program follows the same two-function pattern:
MFS.begin() sets up every component. MFS.loop() handles display multiplexing, button polling, blink scheduling, and buzzer timing. You must call both.
Code Example — 7-Segment Display
The sketch below cycles through several display modes: integers, zero-padded numbers, floats, text, dotted text, degree symbol, and dashes.
Steps to Upload
- Mount the Multi-Function Shield on the Mega.
- Plug the Mega into your computer.
- In Arduino IDE, select the board and port, then paste the code.
- Hit Upload.
Every 3 seconds the display switches to the next mode so you can see each format in action.
Display — Method Reference
| Method | Purpose | Example | ||
|---|---|---|---|---|
| print(int) | Render an integer | MFS.display.print(42) | ||
| print(int, true) | Render with leading zeros | MFS.display.print(42, true) → 0042 | ||
| print(float, dp) | Render a float | MFS.display.print(3.14, 2) | ||
| print(text) | Render a string | MFS.display.print("HELP") | ||
| setNumber(pos, val) | Write a single digit (pos 1–4) | MFS.display.setNumber(1, 5) | ||
| setChar(pos, ch) | Write a character | MFS.display.setChar(2, 'A') | ||
| setChar(pos, SegChars) | Write a special symbol | MFS.display.setChar(3, SegChars | DEGREE) | |
| setDot(pos) | Activate the dot segment | MFS.display.setDot(2) | ||
| clear() | Wipe the display | MFS.display.clear() | ||
| show() | Apply pending changes | MFS.display.show() |
print() calls show() for you. For manual composition, use clear() → setNumber()/setChar()/setDot() → show().
Special symbols available via SegChars: DASH, UNDERSCORE, C, E, F, DEGREE.
Code Example — LEDs
Turn the LEDs on one after another, then blink all four simultaneously.
Steps to Upload
- Paste the code and click Upload.
You will see D1 through D4 light up in order, followed by a synchronized blink pattern.
LEDs — Method Reference
| Method | Purpose |
|---|---|
| turnON() | Light the LED |
| turnOFF() | Extinguish the LED |
| toggle() | Reverse the current state |
| blink(interval) | Symmetric blink |
| blink(onTime, offTime) | Asymmetric blink |
| isOn() | Check whether the LED is currently lit |
Group shortcuts on MFS:
| Method | Purpose |
|---|---|
| allLedsOn() | All four LEDs on |
| allLedsOff() | All four LEDs off |
| allLedsBlink(interval) | Synchronized blink |
| allLedsBlink(onTime, offTime) | Synchronized asymmetric blink |
LEDs are active LOW. Address them as MFS.led1–MFS.led4 or MFS.led(1)–MFS.led(4).
Code Example — Buzzer
Sound a brief beep every two seconds.
Steps to Upload
- Paste the code and click Upload.
You should hear a short beep repeated every 2 seconds.
Buzzer — Method Reference
| Method | Purpose |
|---|---|
| beep(ms) | Sound the buzzer for a given duration |
| beep(ms, delayMs) | Delay first, then beep |
| stop() | Cut the buzzer immediately |
| isBeeping() | True while the buzzer is sounding |
Code Example — Potentiometer
Read the potentiometer and print the value and percentage to Serial.
Steps to Upload
- Paste the code and click Upload.
- Open the Serial Monitor.
- Twist the knob and observe the live reading on the monitor.
Potentiometer — Method Reference
| Method | Returns | Purpose |
|---|---|---|
| readPot() | int | Raw ADC count (0–1023 on Mega) |
| readPotPercent() | float | Normalized to 0.0–100.0 % |
Code Example — Temperature Sensor (LM35)
Read the LM35 and show degrees Celsius on the display and Serial.
Note: You must remove jumper J1 before using the temperature sensor. Pin A4 doubles as the I2C SDA line, and the jumper connects it to I2C by default.
Steps to Upload
- Remove jumper J1 first.
- Paste the code, click Upload, and open the Serial Monitor.
- The temperature is displayed in real time.
A 4-sample moving average ensures stable readings. The first call pre-fills the averaging buffer so there is no cold-start glitch.
Arduino Mega Multi-Function Shield - Full Demo
The below is a step-by-step video tutorial demonstrating all examples of the Multi-Function Shield. Note that the video shows Arduino Uno R4, but it works identically for Arduino Mega:
Platform Support
The library supports all Arduino platforms (architectures=*).