
Arduino Mega - SW-420 Vibration Sensor
This project pairs an Arduino Mega with a SW-420 vibration sensor to catch shocks and shaking as they happen. Here is what we will go over:
- How to wire a SW-420 vibration sensor to an Arduino Mega
- How to write Arduino Mega code that reacts when the SW-420 sensor picks up vibration
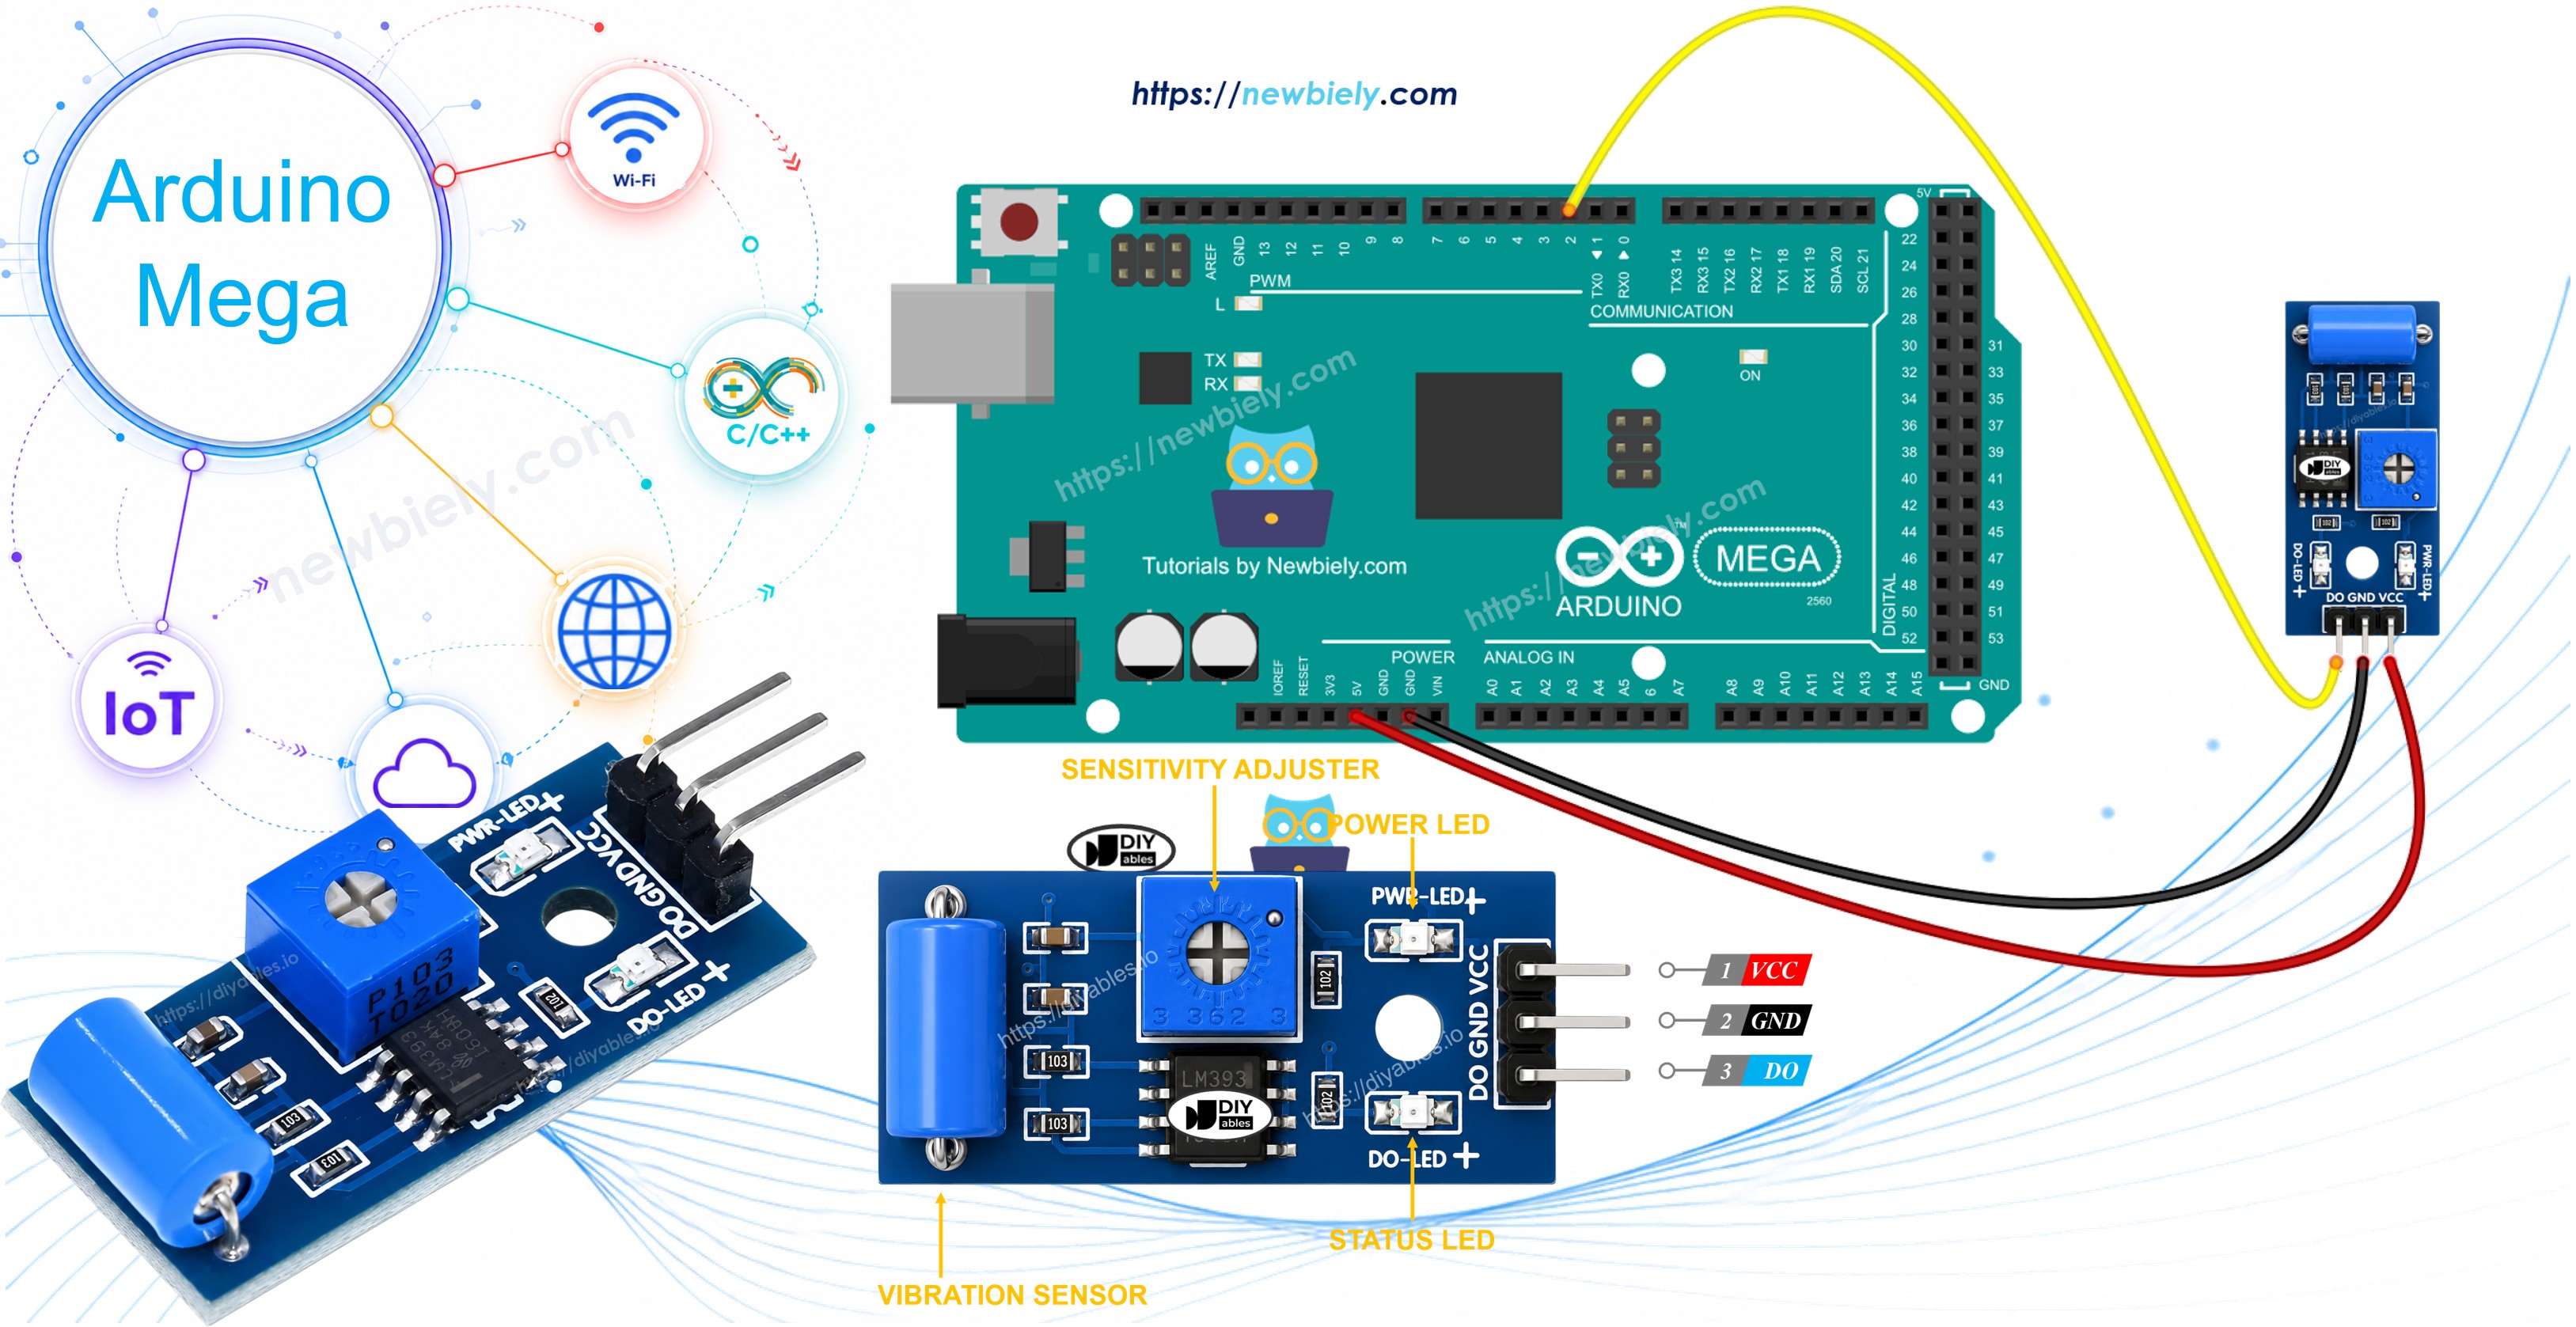
Once the basic detection works, you can extend the sketch to sound a buzzer, flash an LED, or trigger a relay whenever vibration is picked up.
Hardware Preparation
Or you can buy the following kits:
| 1 | × | DIYables Sensor Kit (18 sensors/displays) |
Additionally, some of these links are for products from our own brand, DIYables .
Overview of SW-420 Vibration Sensor
The SW-420 Vibration Sensor Module watches for shocks, knocks, and shaking. Inside the module sits a small spring-based switch positioned close to a metal contact; when vibration disturbs the spring, an onboard LM393 comparator turns that disturbance into a clean digital signal. A small potentiometer on the board lets you dial in how much shaking is needed before it reports a trigger.
The SW-420 Vibration Sensor Pinout
The module breaks out three pins.
- VCC pin: power input, accepts 3.3V to 5V.
- GND pin: ground reference (0V).
- DO pin: digital output pin. It stays LOW while the module is still, and switches HIGH the instant vibration or shock is detected. Wire this pin to a digital input on the Arduino Mega.
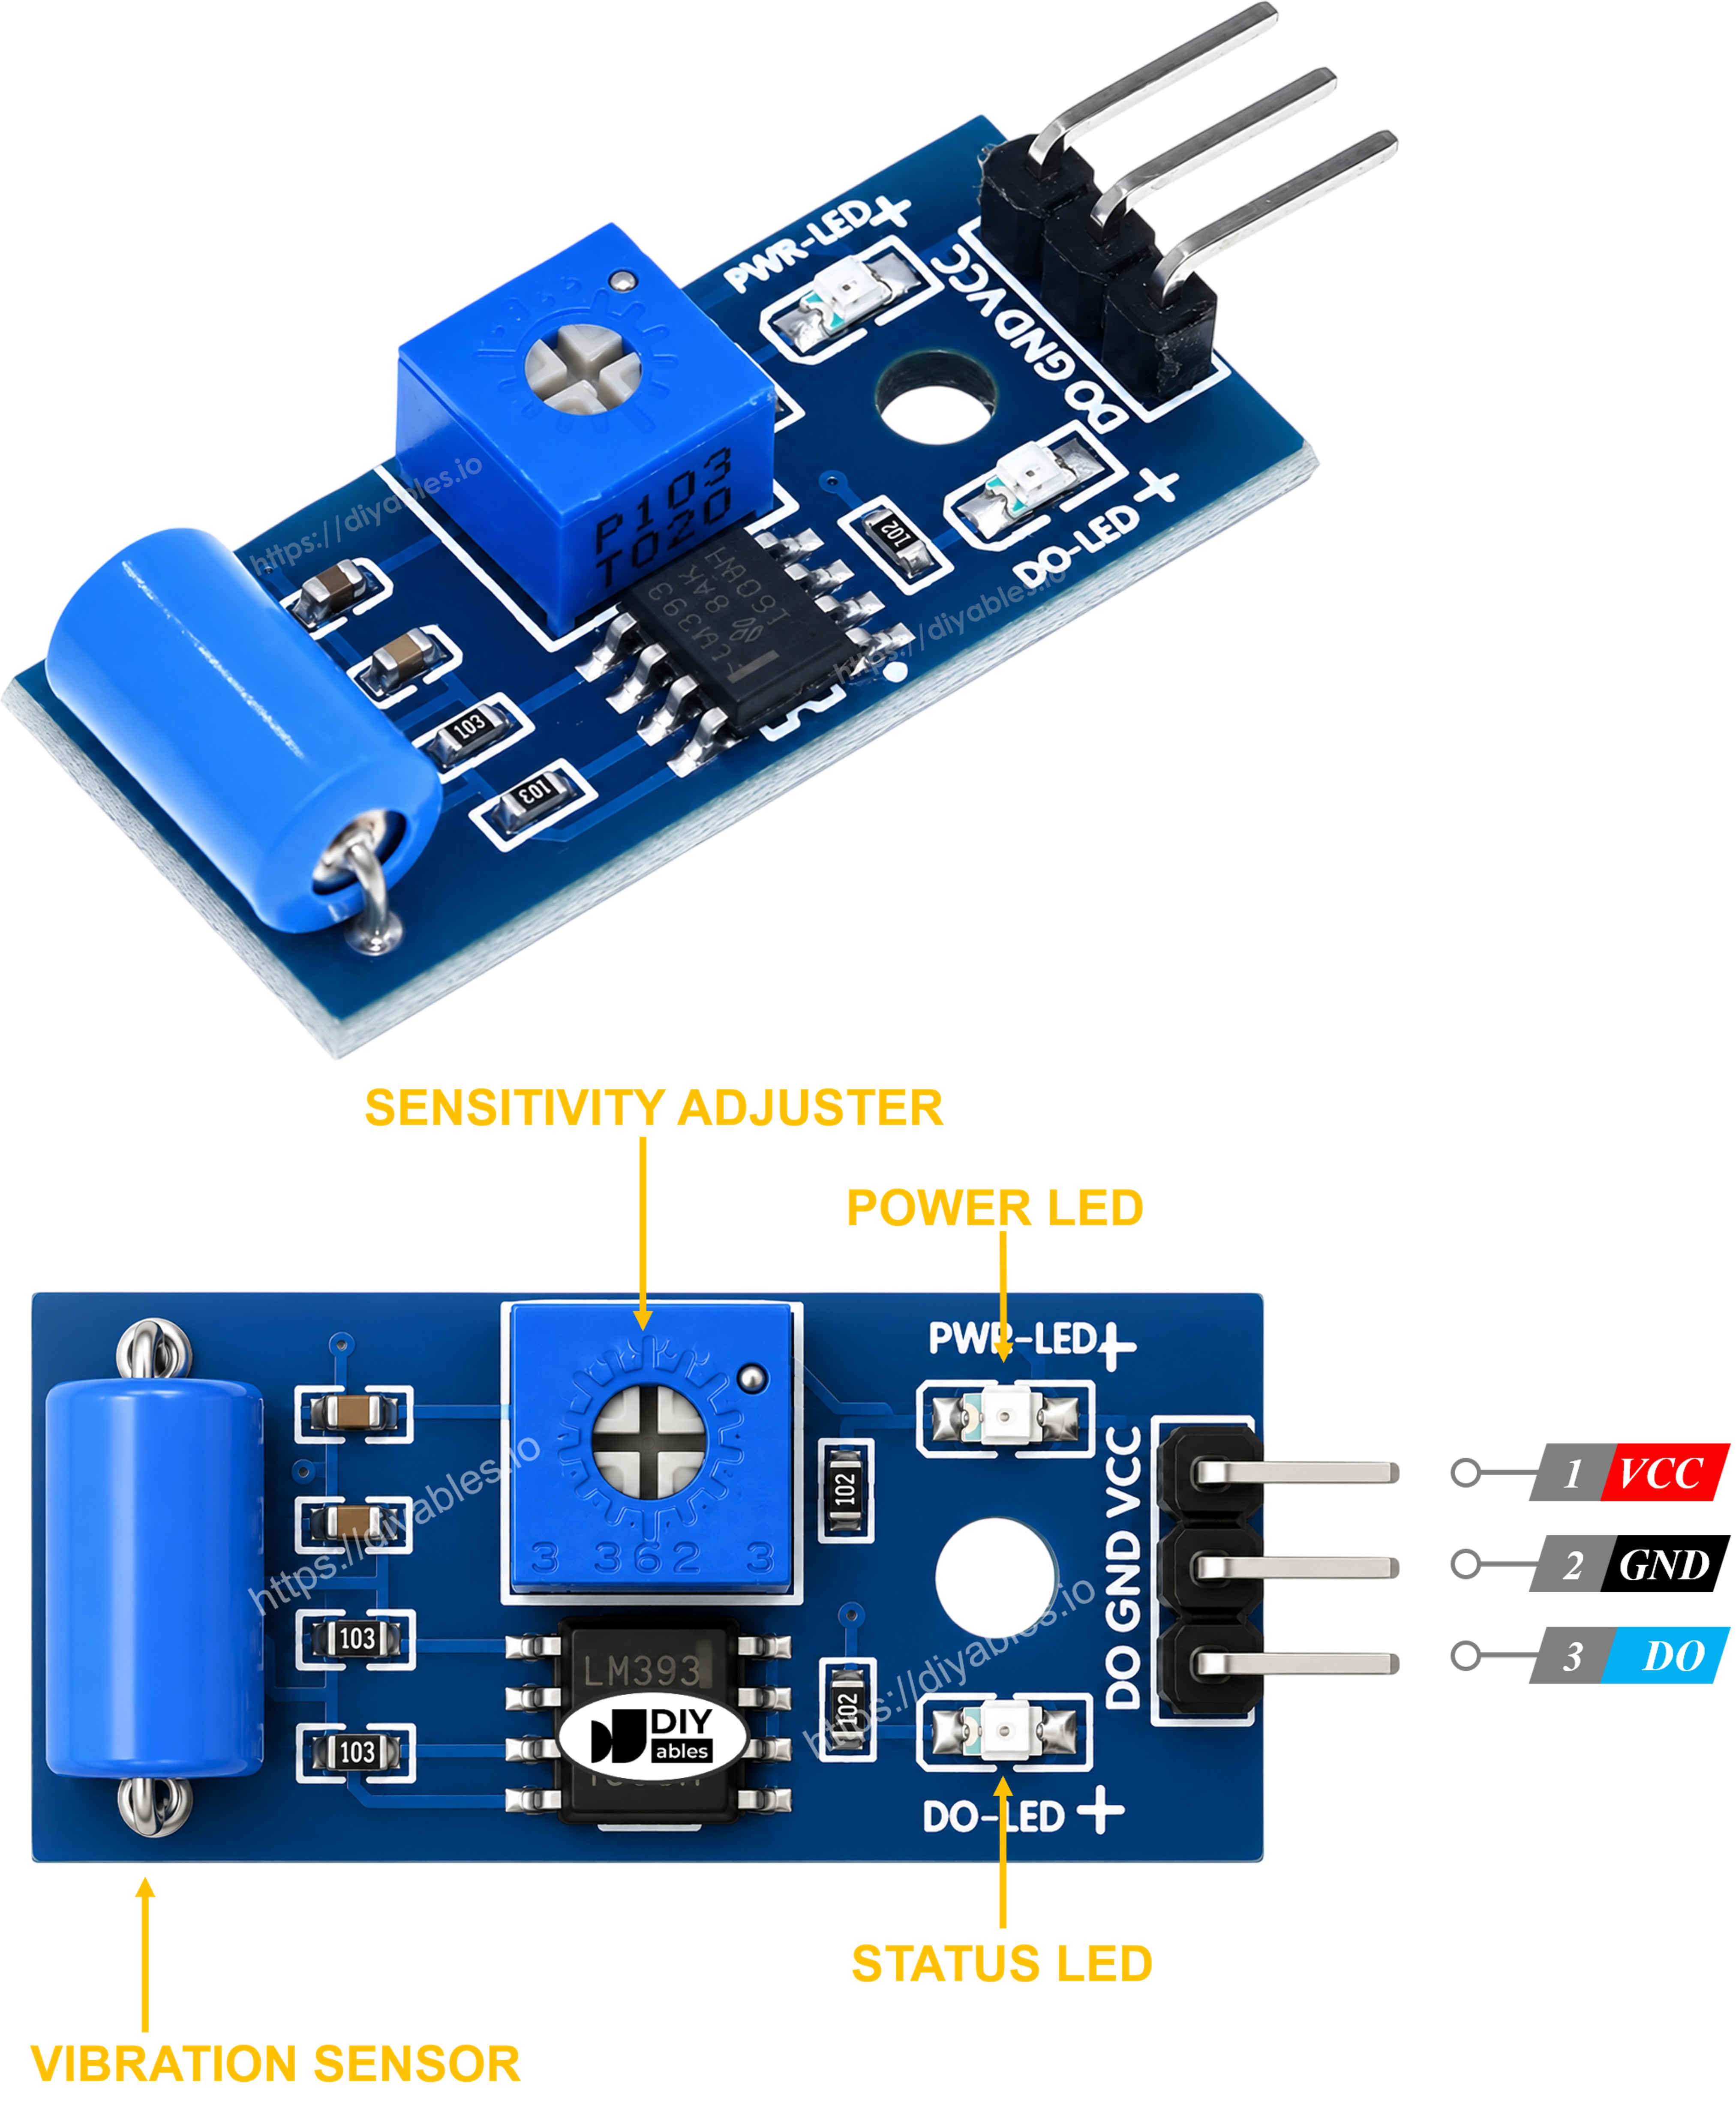
Two onboard LEDs help with debugging.
- A power indicator LED
- A trigger indicator LED that lights up whenever the DO pin goes HIGH
How It Works
- While at rest, the internal spring switch stays open, so the comparator holds the DO pin LOW.
- When vibration or a shock disturbs the spring, it briefly touches the contact, and the comparator drives the DO pin HIGH.
- Turning the onboard potentiometer changes how strong a vibration has to be before the module reports it.
Wiring Diagram
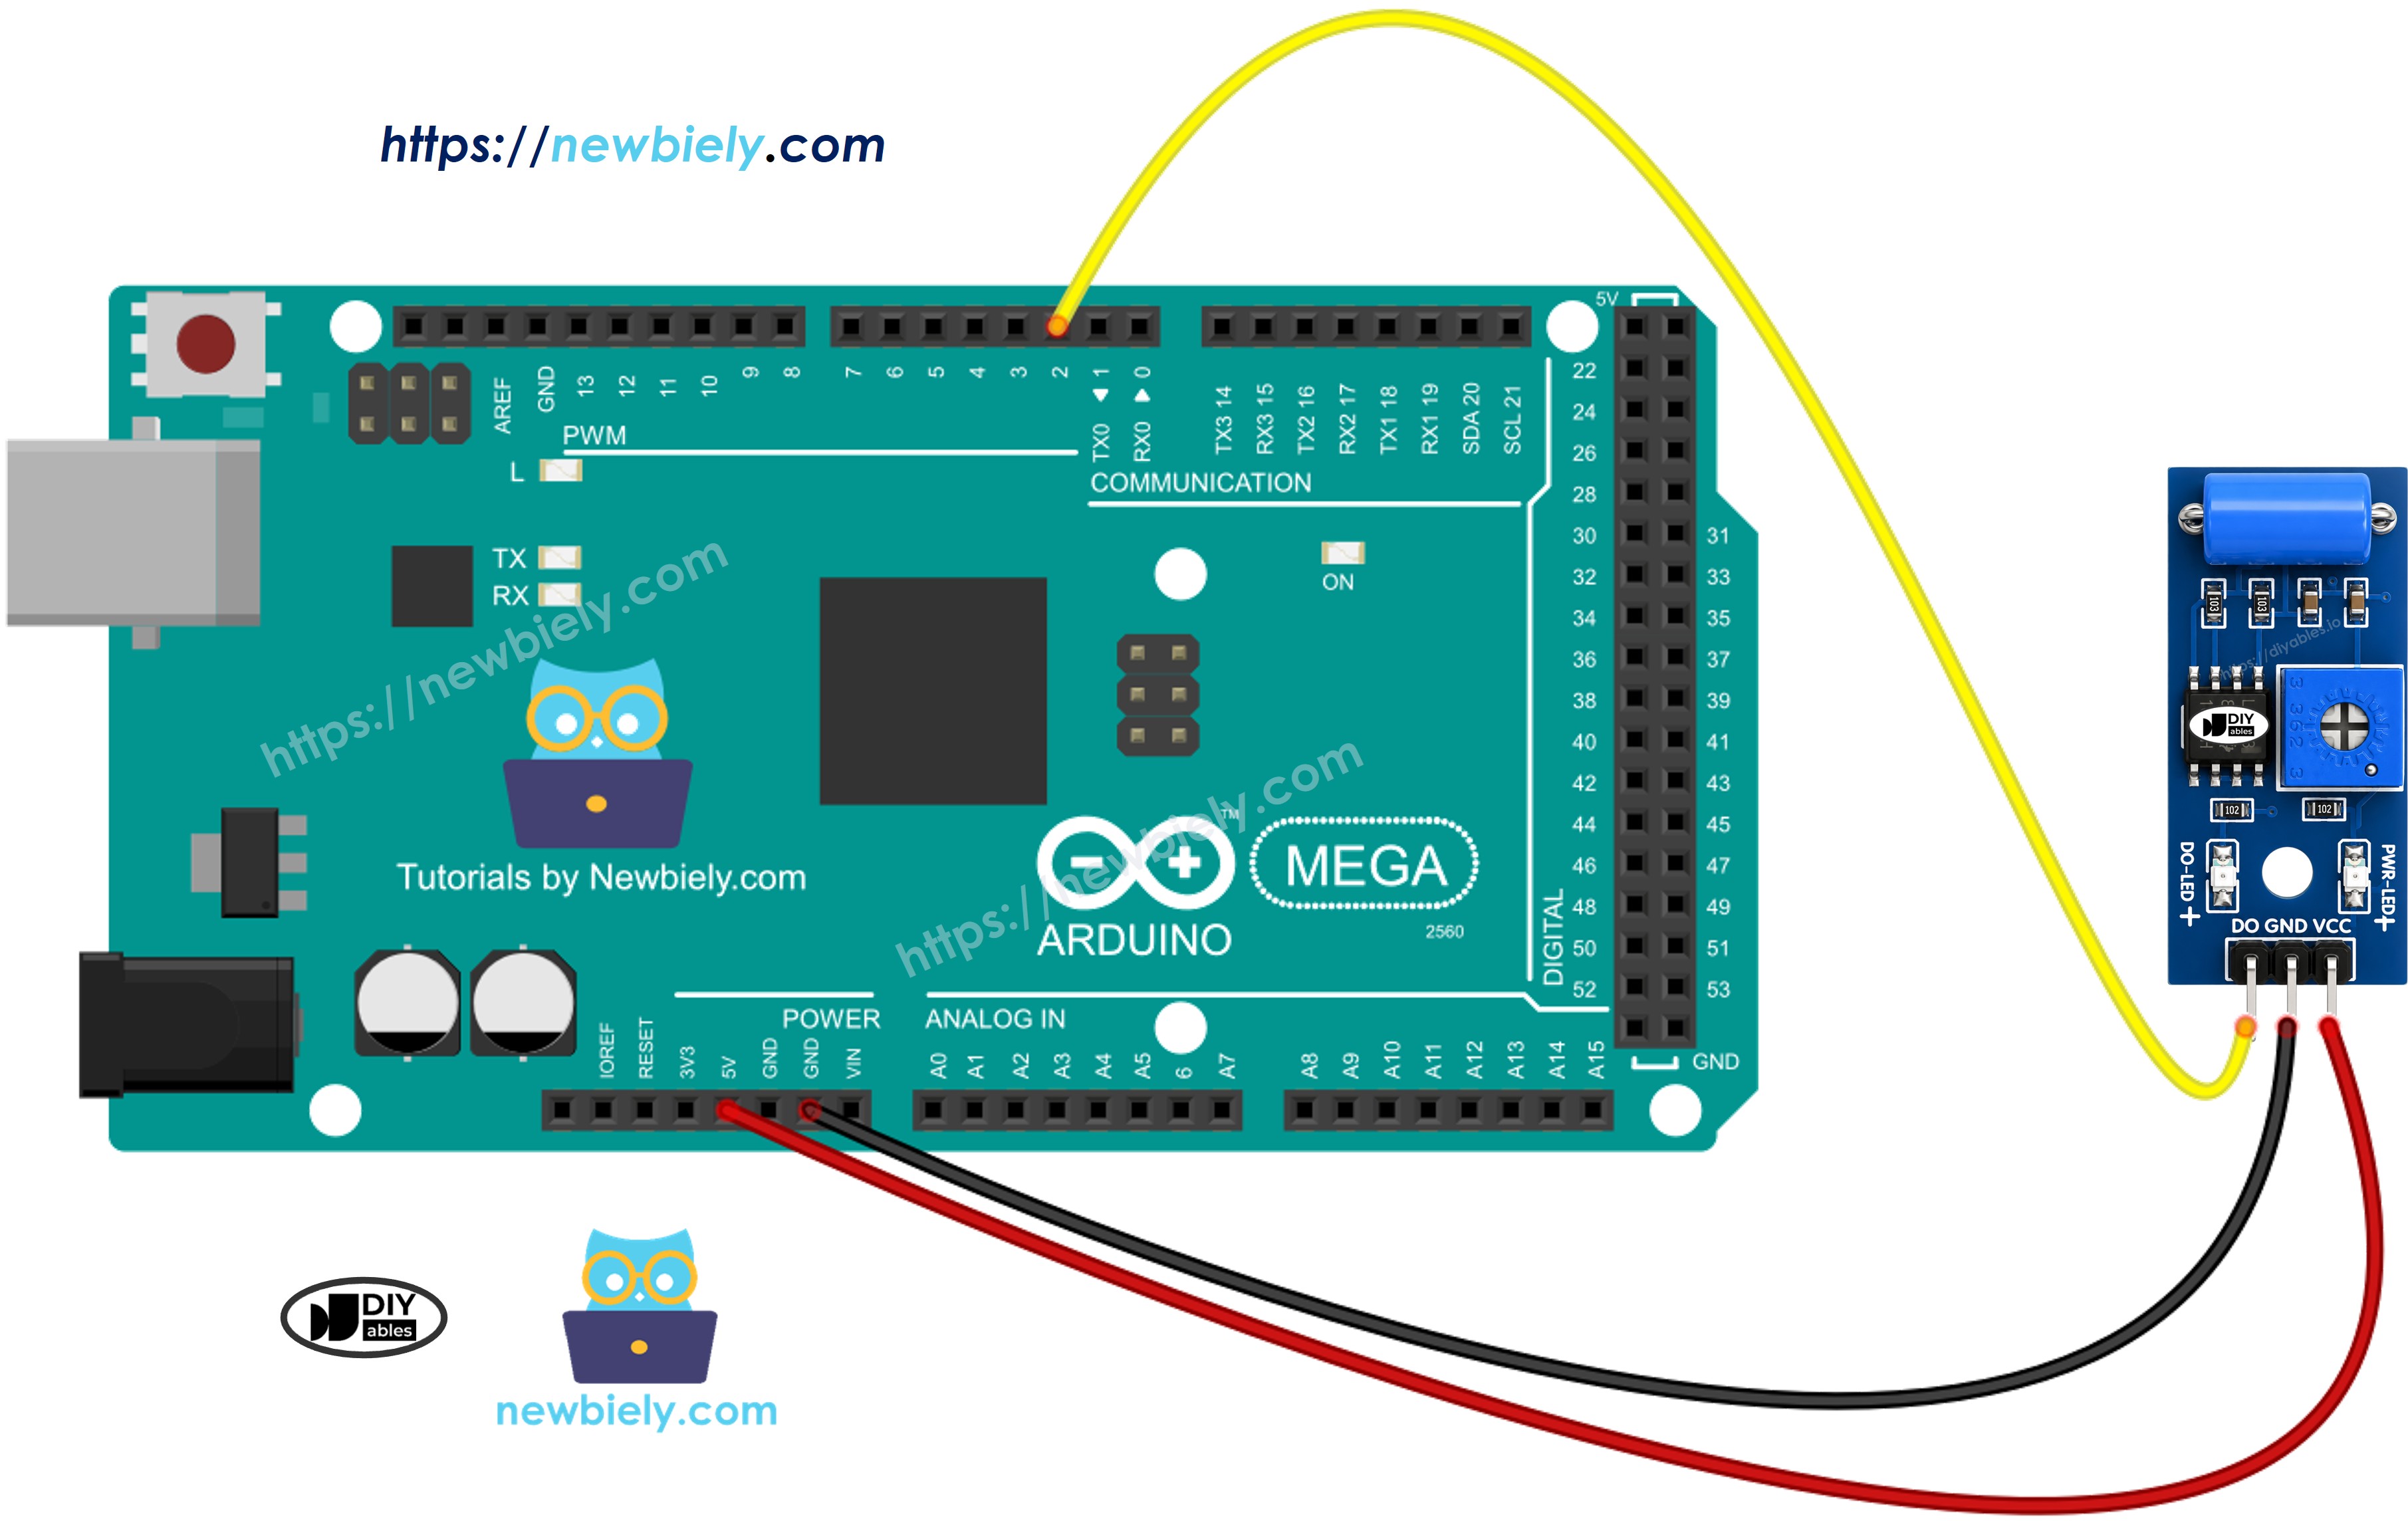
This image is created using Fritzing. Click to enlarge image
How To Program For SW-420 Vibration Sensor
- Configures a pin on the Arduino Mega as a digital input with the pinMode() function. For example, pin 8.
- Reads the current state of that pin with the digitalRead() function.
Arduino Mega Code - Detecting vibration
Detailed Instructions
Follow these steps in order.
- Wire the SW-420 vibration sensor to the Arduino Mega as shown in the diagram.
- Plug the Arduino Mega into your computer using a USB cable.
- Launch the Arduino IDE.
- Select the correct board: Arduino Mega, and the matching COM port.
- Paste the code below into a new sketch in the Arduino IDE.
- Click Upload to send the sketch to the Arduino Mega.
- Tap or shake the SW-420 sensor to trigger it.
- Watch the results in the Serial Monitor.
Troubleshooting
If the SW-420 vibration sensor is not responding the way you expect, try these steps:
- Adjust the sensitivity: Turn the onboard potentiometer to make the module more or less sensitive to shaking.
- Isolate ambient vibration: Mount the sensor away from motors, fans, or other sources of constant vibration that could cause false triggers.
- Check the wiring: Confirm that VCC, GND, and DO are all connected to the right pins.
- Check the power supply: An unstable supply can lead to inconsistent or noisy readings.