Arduino UNO R4 - GPS
This tutorial instructs you how to use Arduino Uno R4 with GPS module. In detail, we will learn how to find GPS coordinates (longitude, latitude, altitude), GPS speed (in kilometers per hour), and the current date and time from a NEO-6M GPS module. We will also learn how to calculate the distance from our current GPS location to specific coordinates, like those of London.
Hardware Preparation
Or you can buy the following kits:
| 1 | × | DIYables STEM V4 IoT Starter Kit (Arduino included) | |
| 1 | × | DIYables Sensor Kit (18 sensors/displays) |
Additionally, some of these links are for products from our own brand, DIYables .

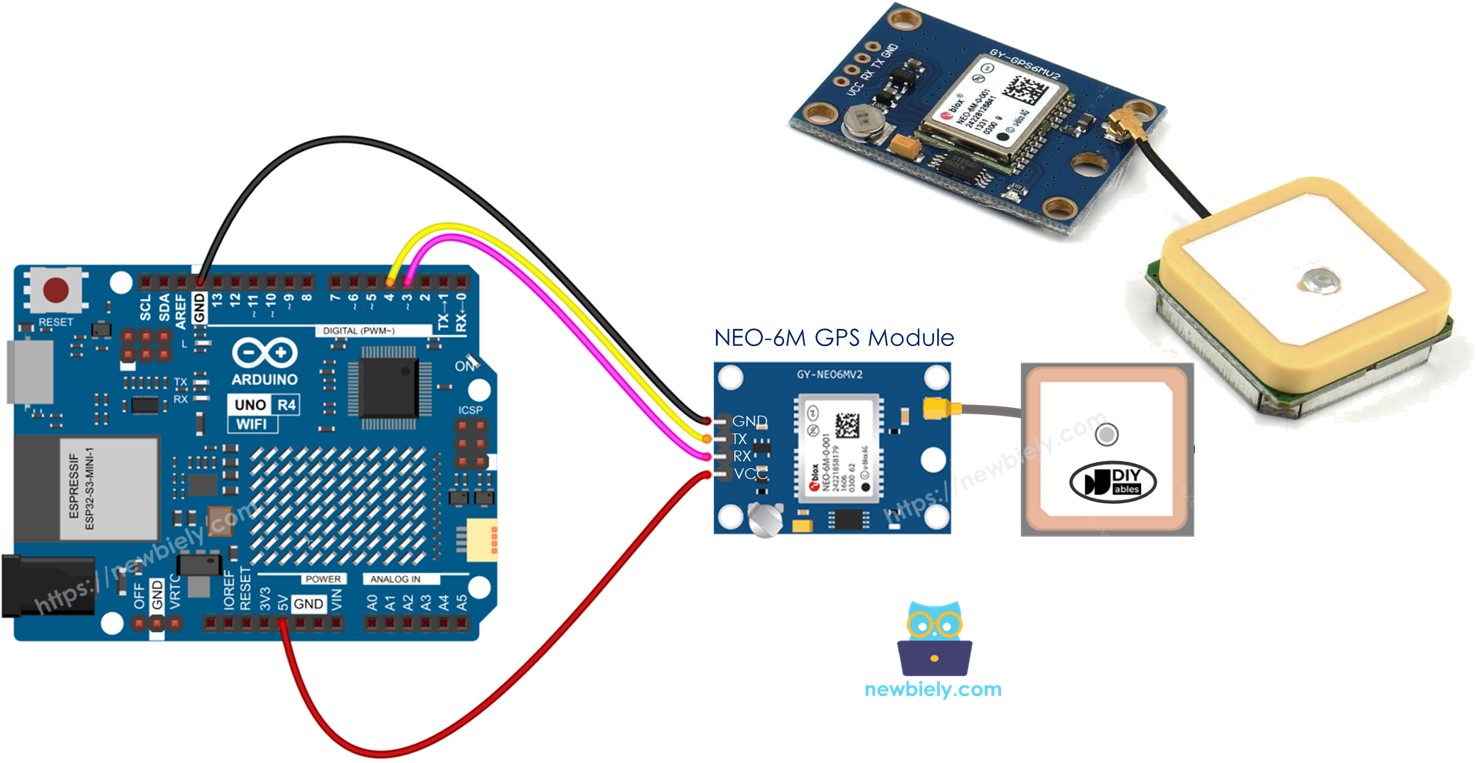
Overview of NEO-6M GPS module
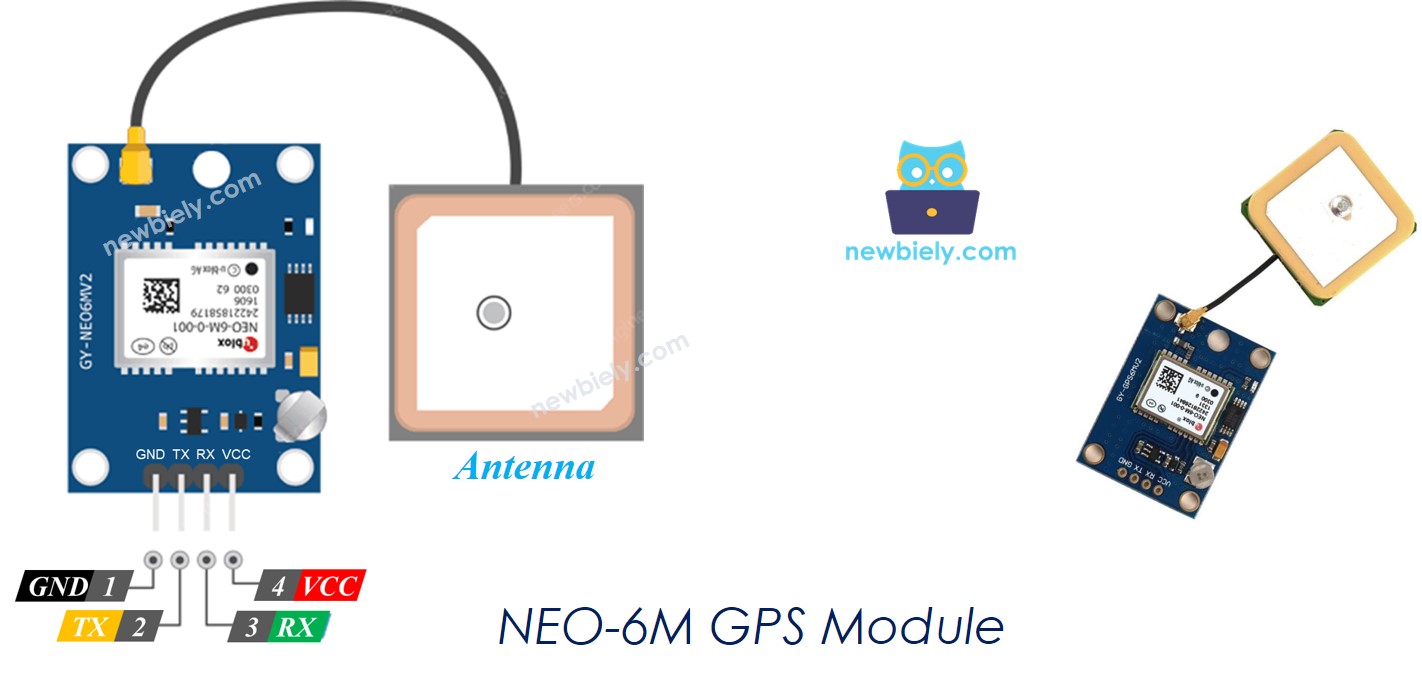
Pinout
The NEO-6M GPS module has 4 pins:
- VCC pin: Connect this pin to VCC (5V).
- GND pin: Connect this pin to GND (0V).
- TX pin: This is used for serial communication. Connect it to the RX pin of the Serial (or SoftwareSerial) on Arduino UNO R4.
- RX pin: This is used for serial communication. Connect it to the TX pin of the Serial (or SoftwareSerial) on Arduino UNO R4.
Wiring Diagram
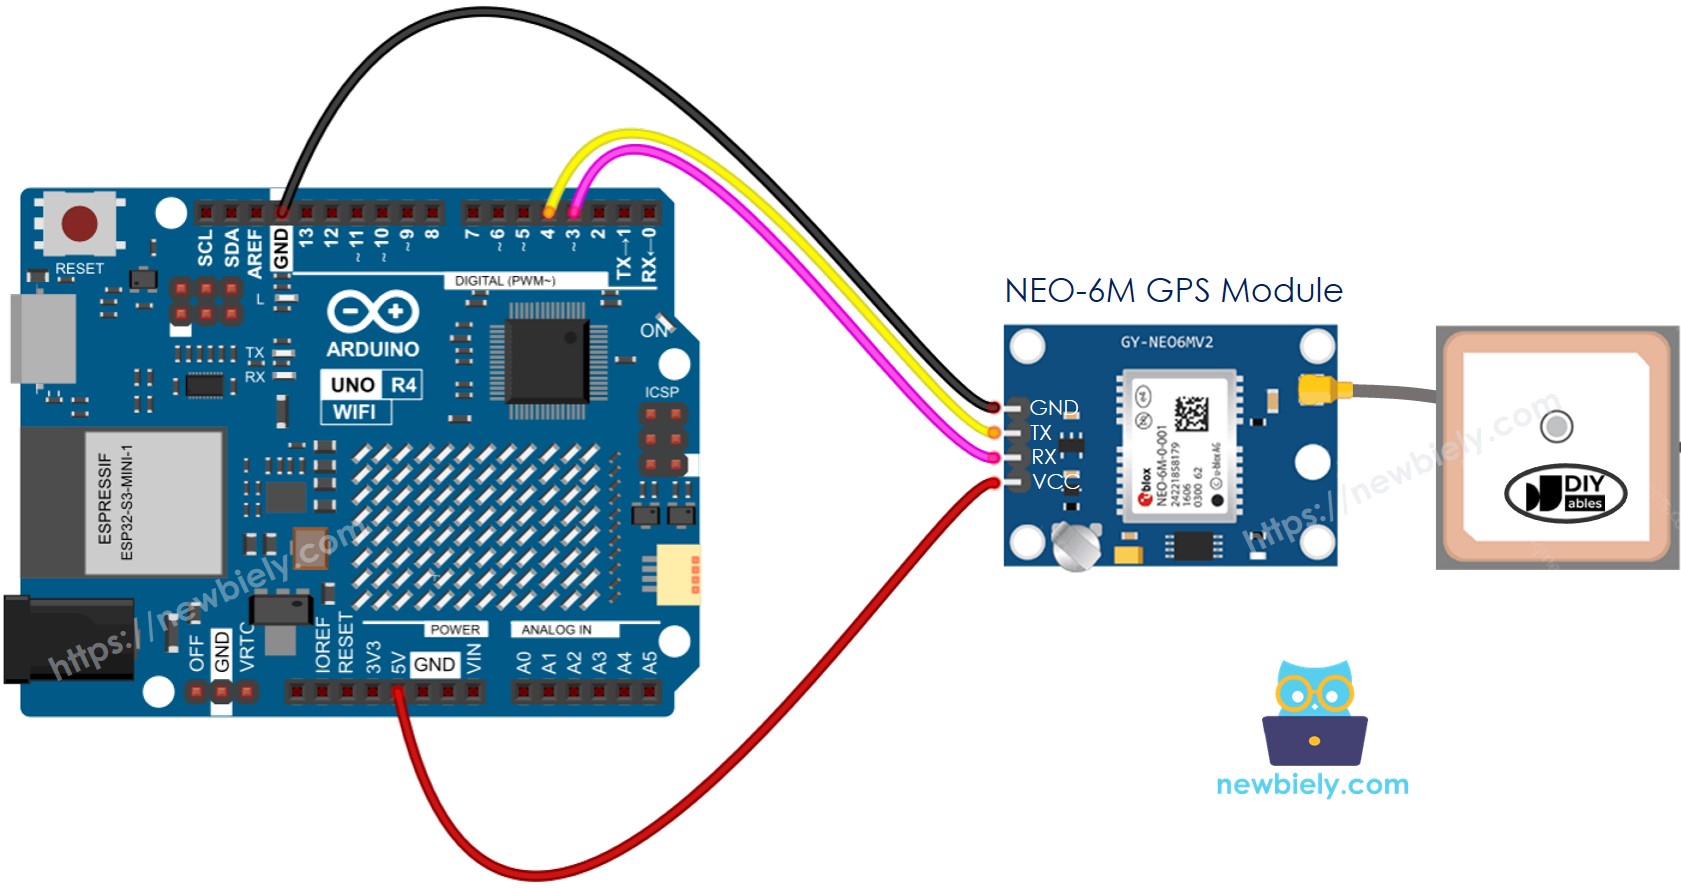
This image is created using Fritzing. Click to enlarge image
Please note that the wiring diagram shown above may function, but it is not recommended. The Arduino UNO R4's TX pin sends out a 5V signal, while the GPS module's RX pin can only handle 3.3V. For safety, you should use a voltage divider between the Arduino UNO R4's TX pin and the RX pin of the GPS module. This setup is illustrated in the diagram below.
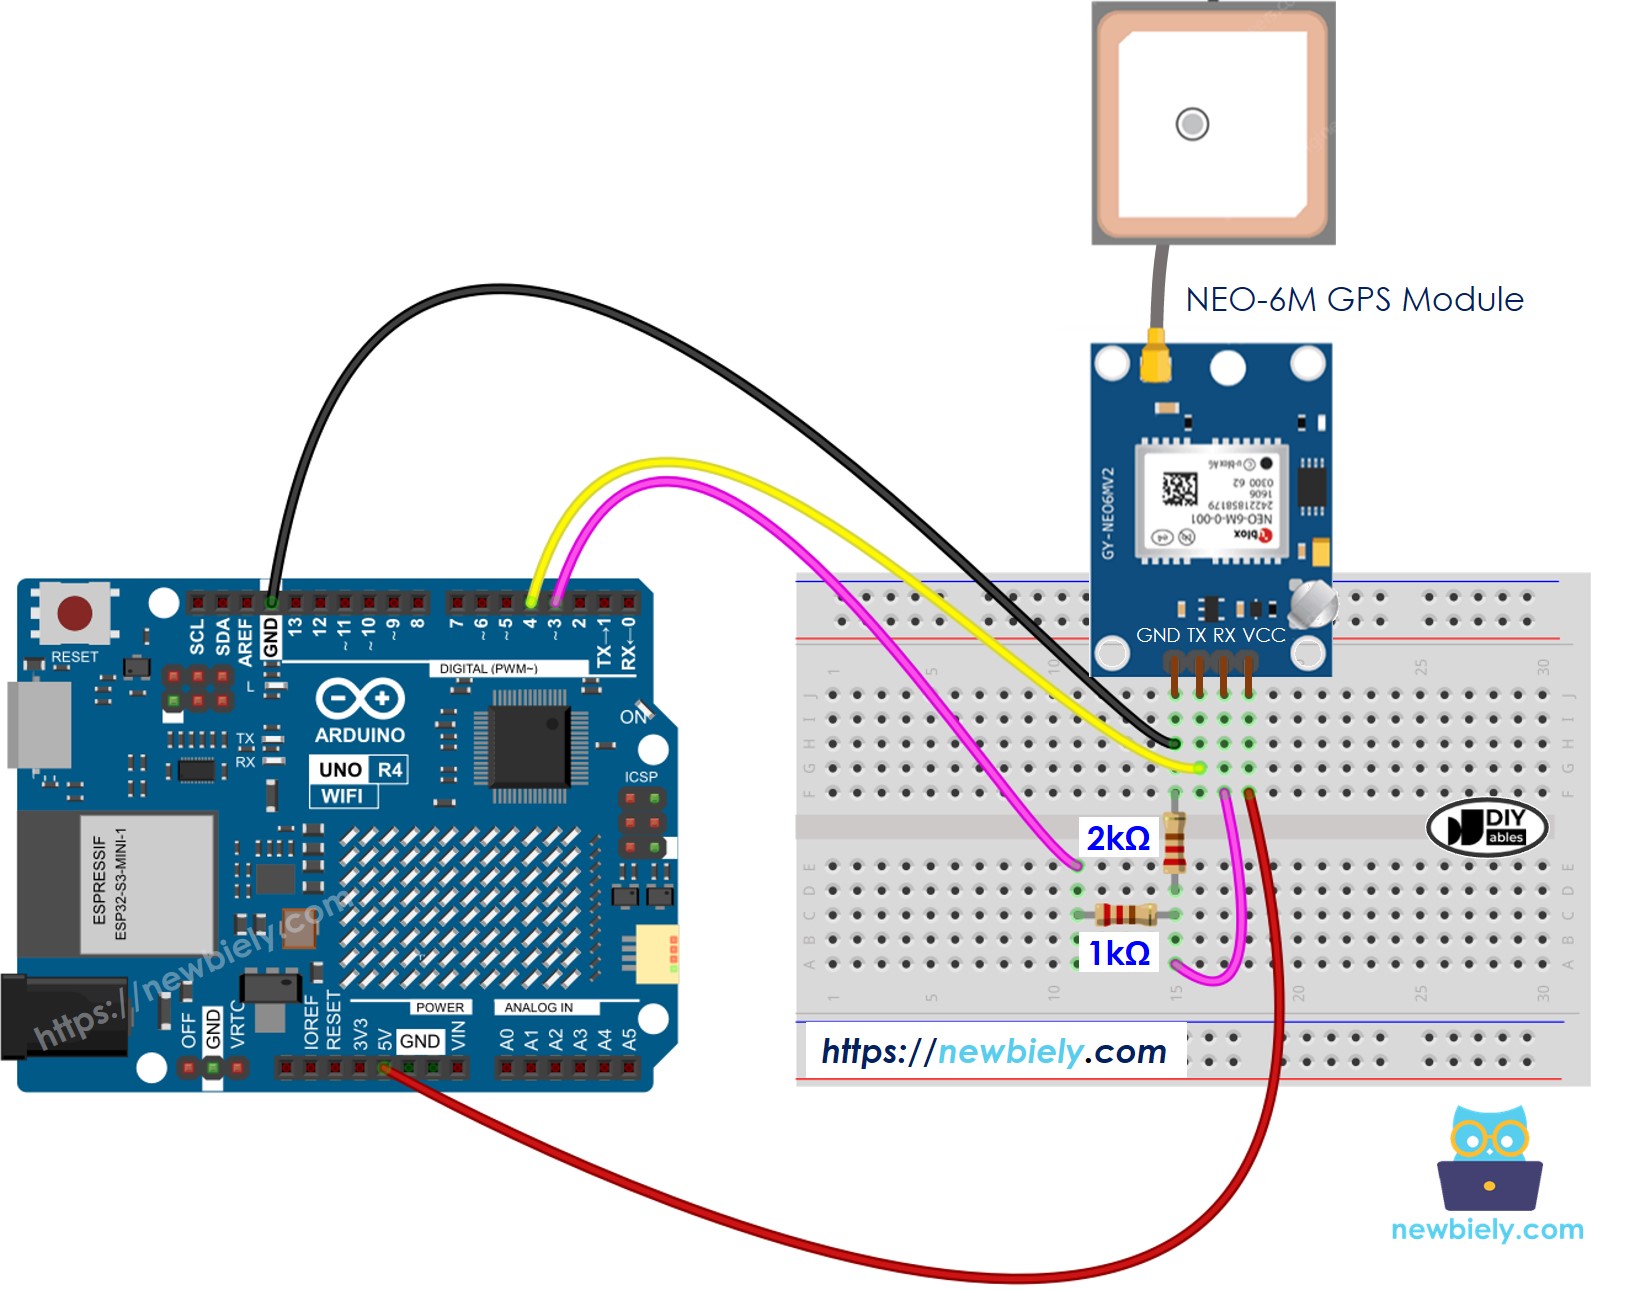
This image is created using Fritzing. Click to enlarge image
See The best way to supply power to the Arduino Uno R4 and other components.
Arduino UNO R4 Code
Reading GPS coordinates, speed (km/h), and date time
Detailed Instructions
Follow these instructions step by step:
- If this is your first time using the Arduino Uno R4 WiFi/Minima, refer to the tutorial on setting up the environment for Arduino Uno R4 WiFi/Minima in the Arduino IDE.
- Connect the Arduino Uno R4 the GPS module according to the provided diagram.
- Connect the Arduino Uno R4 board to your computer using a USB cable.
- Launch the Arduino IDE on your computer.
- Select the appropriate Arduino Uno R4 board (e.g., Arduino Uno R4 WiFi) and COM port.
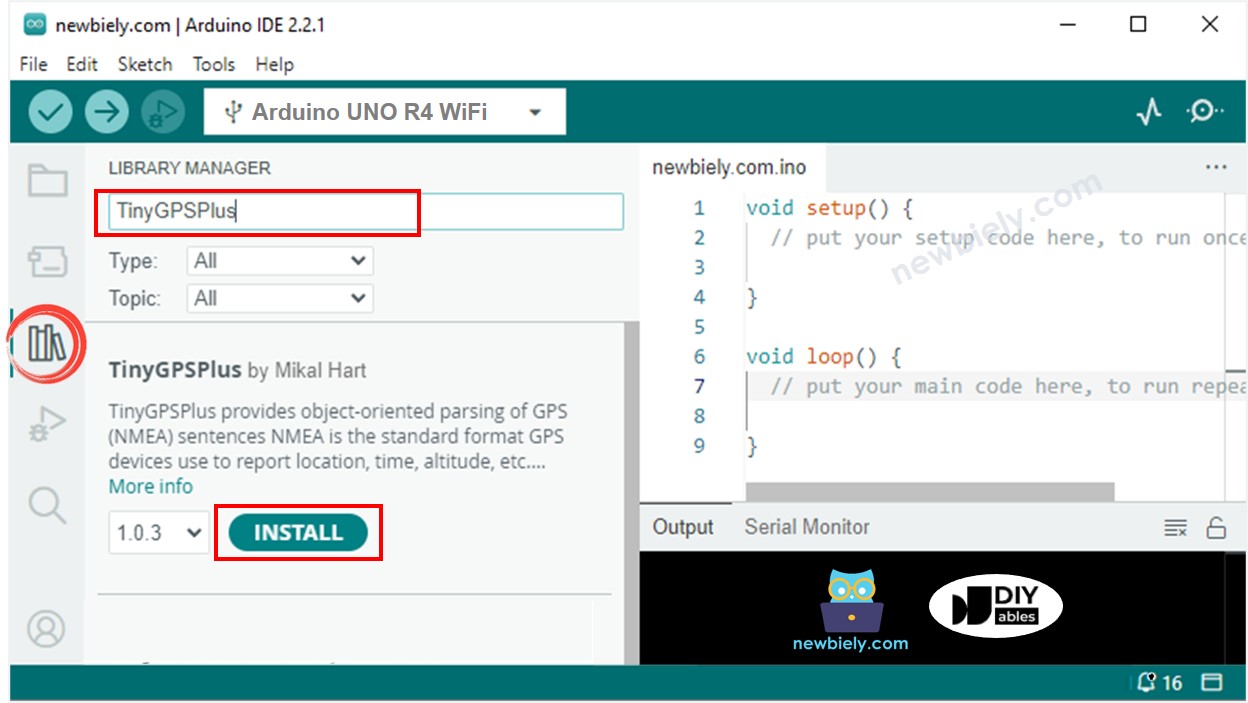
- Go to the Libraries icon on the left side of the Arduino IDE.
- Type TinyGPSPlus in the search box, then look for the TinyGPSPlus library by Mikal Hart
- Click the Install button to add the TinyGPSPlus library.
- Copy the code and open it in Arduino IDE.
- Click the Upload button in Arduino IDE to upload the code to Arduino UNO R4.
- Check the result on Serial Monitor.
Calculating the distance from current location to a predefined location
This code finds out how far you are from London (latitude: 51.508131, longitude: -0.128002).
Detailed Instructions
- Copy the code and open it in the Arduino IDE.
- Click the Upload button in the Arduino IDE to send the code to the Arduino UNO R4.
- Check the result on the Serial Monitor.