Arduino UNO R4 - 74HC595 4-Digit 7-Segment Display
The Arduino Uno R4 - available as Minima and WiFi - brings more processing power, additional memory, and a 14-bit ADC while keeping the classic Uno header layout. The 74HC595 4-digit 7-segment display module connects to the Uno R4 using the same pins as the classic Uno.
In this guide you will:
- Wire the 74HC595 display module to an Arduino Uno R4.
- Display integers and floating-point numbers.
- Show text, degree symbols, and temperature readings.
- Display time in HH.MM format with a blinking separator.
Hardware Preparation
Or you can buy the following kits:
| 1 | × | DIYables STEM V4 IoT Starter Kit (Arduino included) | |
| 1 | × | DIYables Sensor Kit (18 sensors/displays) |
Additionally, some of these links are for products from our own brand, DIYables .

74HC595 4-Digit 7-Segment Display Overview
The 74HC595-based 4-digit 7-segment display module packs four digits, each with 7 LED segments and a decimal point, behind a single shift register. This means you only need 3 pins from your microcontroller to drive the entire display.
The module handles multiplexing internally through the software library. You just call print() with a value and keep calling loop() to refresh.
| Function | Pin | Description |
|---|---|---|
| SCLK (SH_CP) | Serial Clock | Clock signal for shifting data into the register |
| RCLK (ST_CP) | Register Clock | Latch to push shifted data to the output pins |
| DIO (DS) | Data Input | Serial data fed into the shift register |
| VCC | Power | 3.3V or 5V supply |
| GND | Ground | Common ground |
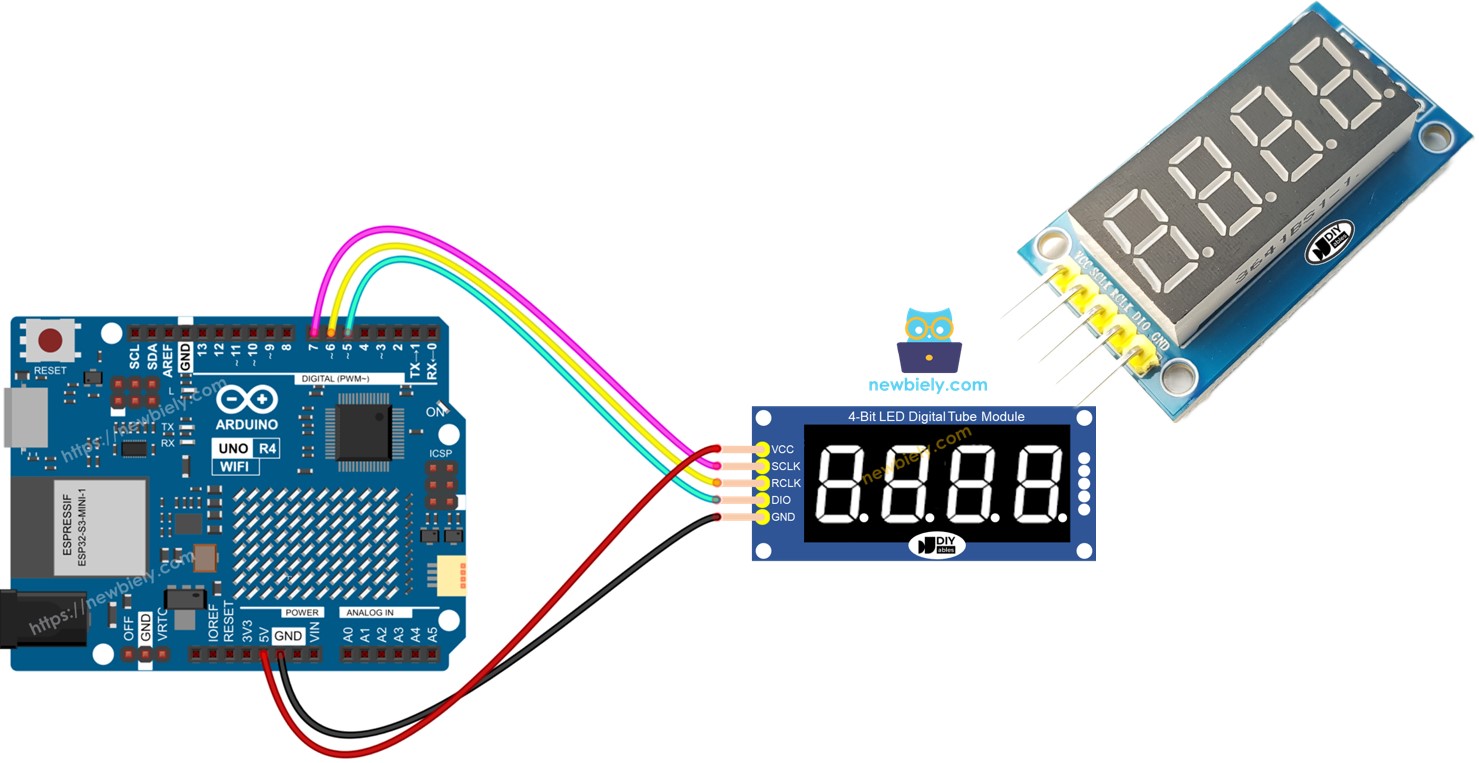
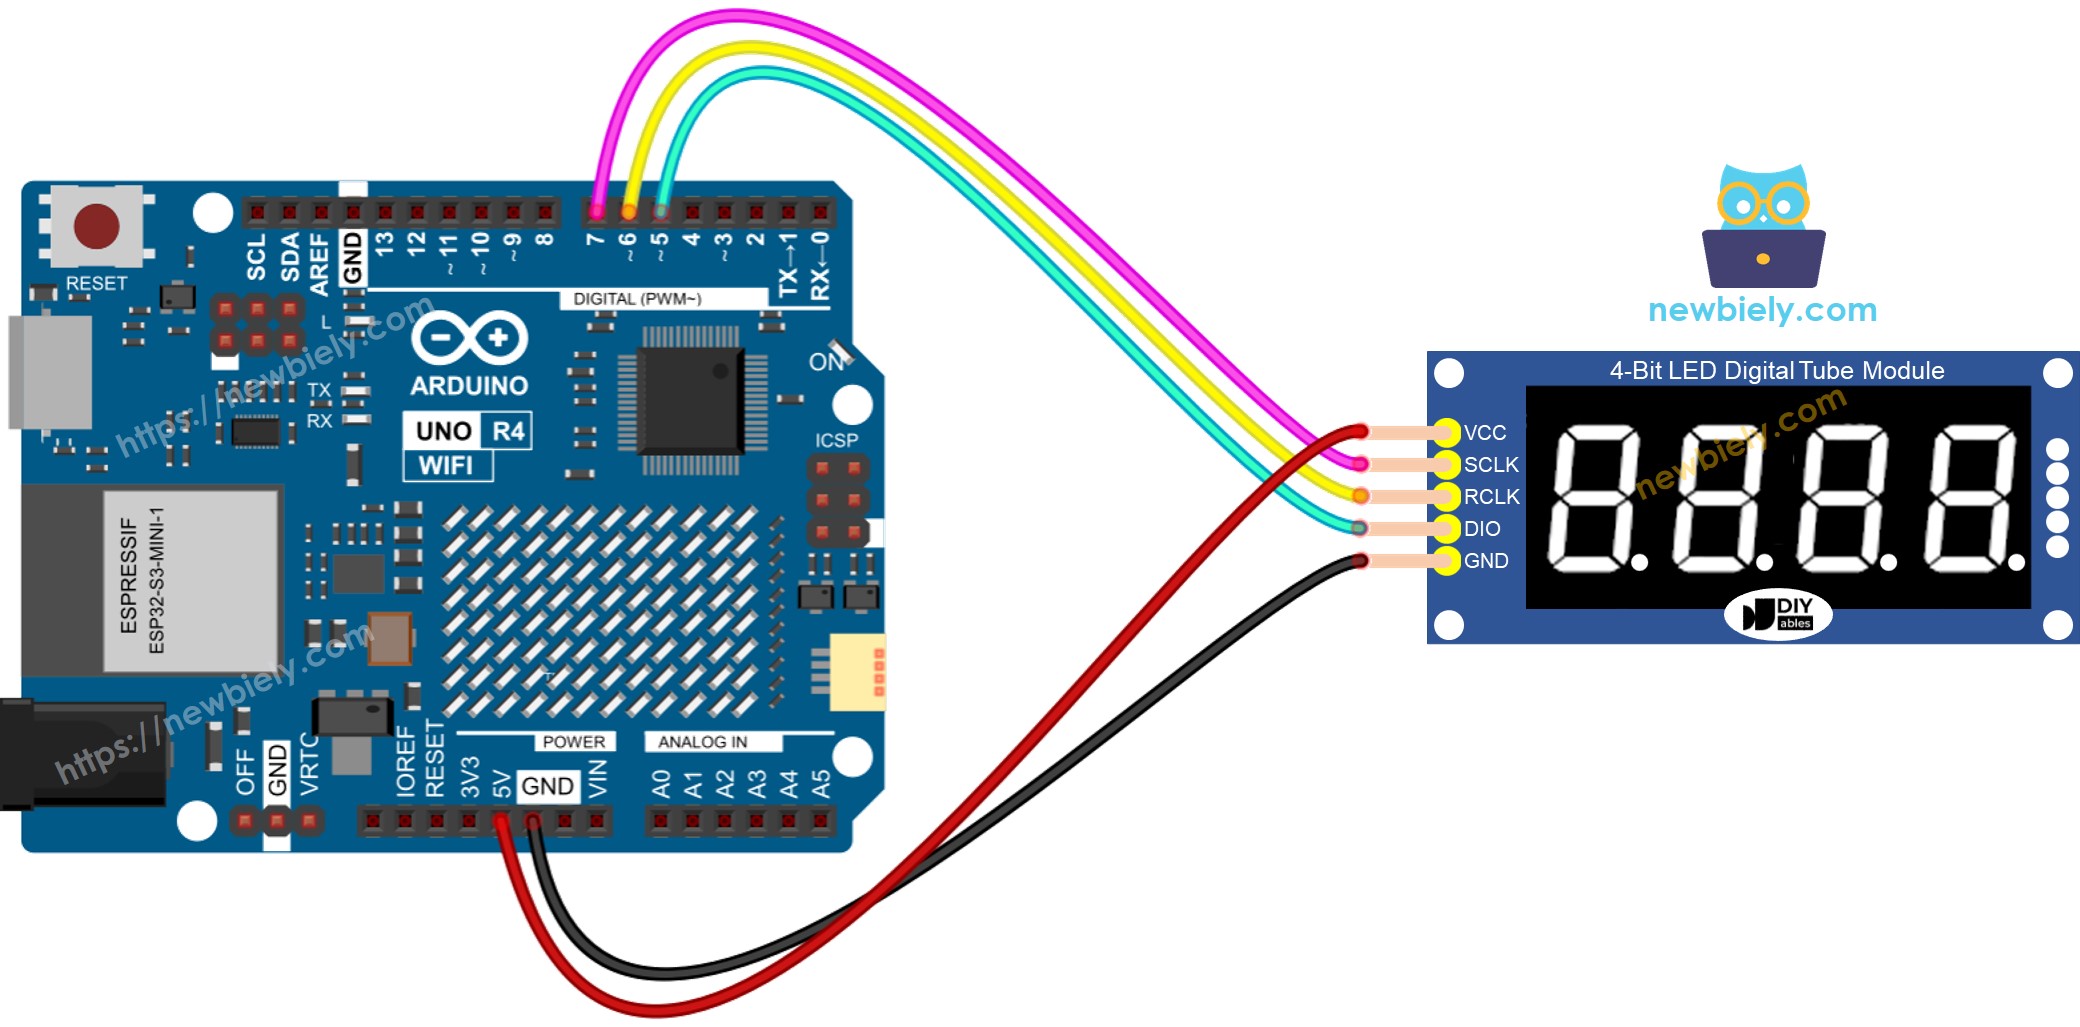
Wiring Diagram
Wire the display module to the Arduino Uno R4 as follows:
- SCLK to pin 7
- RCLK to pin 6
- DIO to pin 5
- VCC to 5V
- GND to GND
This image is created using Fritzing. Click to enlarge image
See The best way to supply power to the Arduino Uno R4 and other components.
How to Install the Library
- Plug the Arduino Uno R4 into your computer using a USB Type-C cable.
- In the Arduino IDE, verify that the correct board (Arduino Uno R4 Minima or WiFi) and serial port are selected.
- Click the Libraries icon in the left sidebar.
- Type "DIYables_4Digit7Segment_74HC595" into the search box and locate the library published by DIYables.
- Hit Install to add the library to your IDE. Select version 2.0.0 or later.
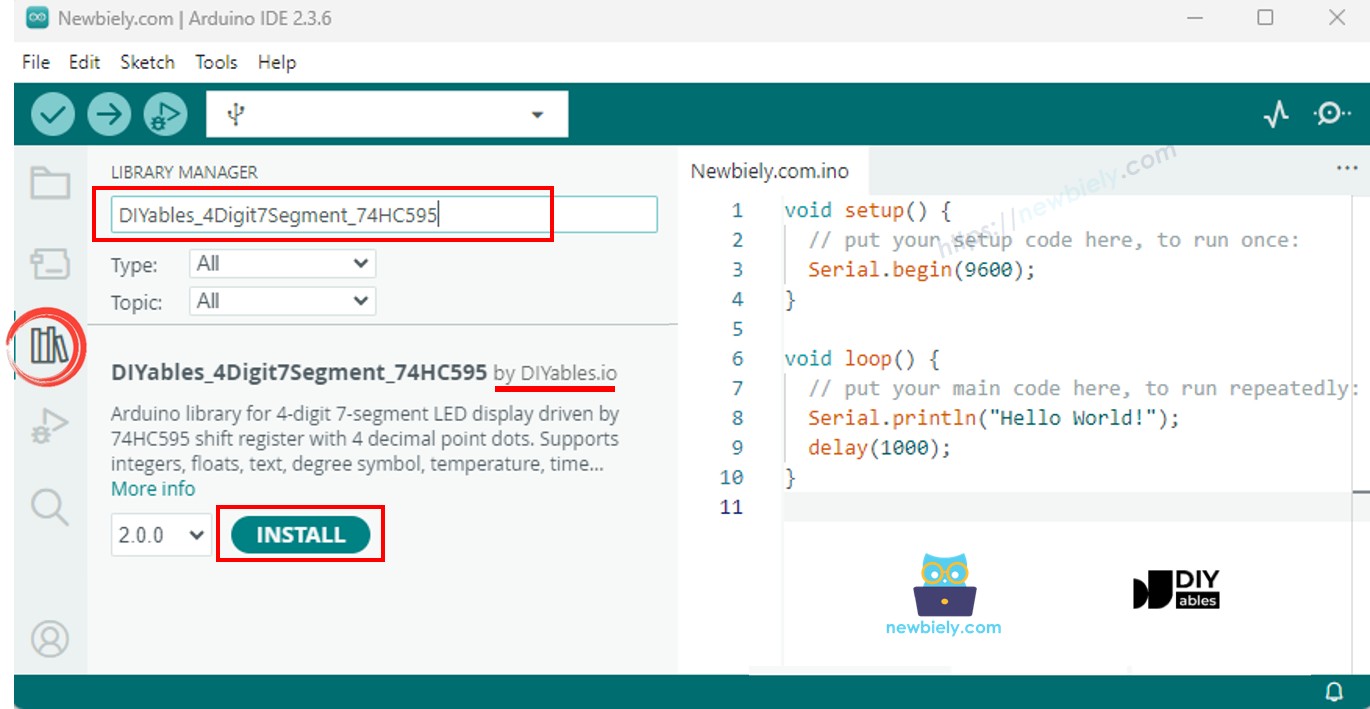
No additional dependencies are needed - the library is entirely self-contained.
Minimal Sketch Structure
All sketches using the DIYables_4Digit7Segment_74HC595 library share this skeleton:
Call display.begin() once in setup() to configure the pins. Then call display.loop() repeatedly so the library can multiplex through the 4 digits. Set the display content with print() - the value persists until you change it.
If you need a delay in your code, use display.delay(ms) so the display keeps refreshing.
Display Integers
This example shows integers on the display, cycling through several values including negative numbers and zero-padded output.
How to Run
- Wire the display to the Uno R4 as described above.
- Plug in the USB Type-C cable.
- Paste the code in Arduino IDE, choose the correct board and port, and press Upload.
- Open the Serial Monitor to see the output.
The display cycles through 0, 42, 1234, -5, -123, and 9999, then shows 0042 (zero-padded). Each value stays for 2 seconds.
Method Quick Reference
| Method | What It Does | Usage |
|---|---|---|
| print(int) | Show an integer (-999 to 9999) | display.print(1234) |
| print(int, true) | Show integer with leading zeros | display.print(42, true) |
| loop() | Refresh the display multiplexing | display.loop() |
| begin() | Initialize display pins | display.begin() |
Display Floats
This example demonstrates float display with automatic and manually specified decimal places.
How to Run
- Paste the code in Arduino IDE, choose the correct board and port, and press Upload.
- Open the Serial Monitor to see the output.
Floats are displayed with auto decimal places first, then with 1 and 2 fixed decimal places, and finally with zero-padding.
Display Text and Temperature
This example covers text strings, the degree symbol, and the temperature display method.
How to Run
- Upload the sketch and open the Serial Monitor.
The display shows text like "HELP" and "COOL", then temperature values with the degree symbol and unit letter.
Display Time
Shows a clock-style HH.MM display with a blinking dot between hours and minutes.
How to Run
- Upload the sketch and open the Serial Monitor.
The display reads 12.30 with the dot toggling every 500ms to create a blinking separator.
Blink the Display
Uses off() and on() to blink different values on the display.
How to Run
- Upload the sketch and open the Serial Monitor.
The display blinks 1234 five times, then 12.34, then "HELP", cycling through all three.
Method Quick Reference
| Method | What It Does | Usage |
|---|---|---|
| off() | Blank the display | display.off() |
| on() | Resume display output | display.on() |
| delay(ms) | Wait while keeping display alive | display.delay(2000) |
| yield() | One refresh cycle for long loops | display.yield() |
Troubleshooting
- Nothing on the display - Double-check VCC and GND connections. Confirm SCLK, RCLK, and DIO pins match the code. Make sure begin() is in setup() and loop() calls display.loop().
- Wrong or garbled characters - Verify common anode vs common cathode. Default is common anode. For common cathode, pass false: DIYables_4Digit7Segment_74HC595 display(7, 6, 5, false).
- Display goes blank or flickers - Avoid delay() in your code. Use display.delay() instead to keep the multiplexing active.
Platform Support
The library relies exclusively on Arduino standard APIs (pinMode, digitalWrite, millis) and runs on all Arduino-compatible platforms.