Arduino UNO R4 - Joystick - Servo Motor
In this guide, we'll learn how to use an Arduino UNO R4 and a joystick to control two servo motors or a pan-tilt kit.
A joystick has two controls called potentiometers, placed at right angles to each other, known as the X-axis and Y-axis. These potentiometers produce signals, called X-value and Y-value, which come out from the VRX and VRY pins of the joystick. We use these signals to control two servo motors: the X-value moves servo motor #1 and the Y-value moves servo motor #2. When you use these with a pan-tilt kit, the two servo motors work together to move in three dimensions.
There are two examples of how the application can be used:
- Use case 1: The servo motors turn based on how the joystick is moved:
- The movement angles of the servo motors match the joystick's horizontal (X) and vertical (Y) movements.
- Releasing the joystick makes it and the servo motors return to their starting position.
- Use case 2: Control the servo motors with the joystick for different directions:
- Pushing the joystick left turns servo motor #1 clockwise.
- Pushing the joystick right turns servo motor #1 counterclockwise.
- Pushing the joystick up turns servo motor #2 clockwise.
- Pushing the joystick down turns servo motor #2 counterclockwise.
- Letting go of the joystick does not reset the servo motors.
- Pressing down on the joystick button resets the servo motors to the center.
- If this is your first time using the Arduino Uno R4 WiFi/Minima, refer to the tutorial on setting up the environment for Arduino Uno R4 WiFi/Minima in the Arduino IDE.
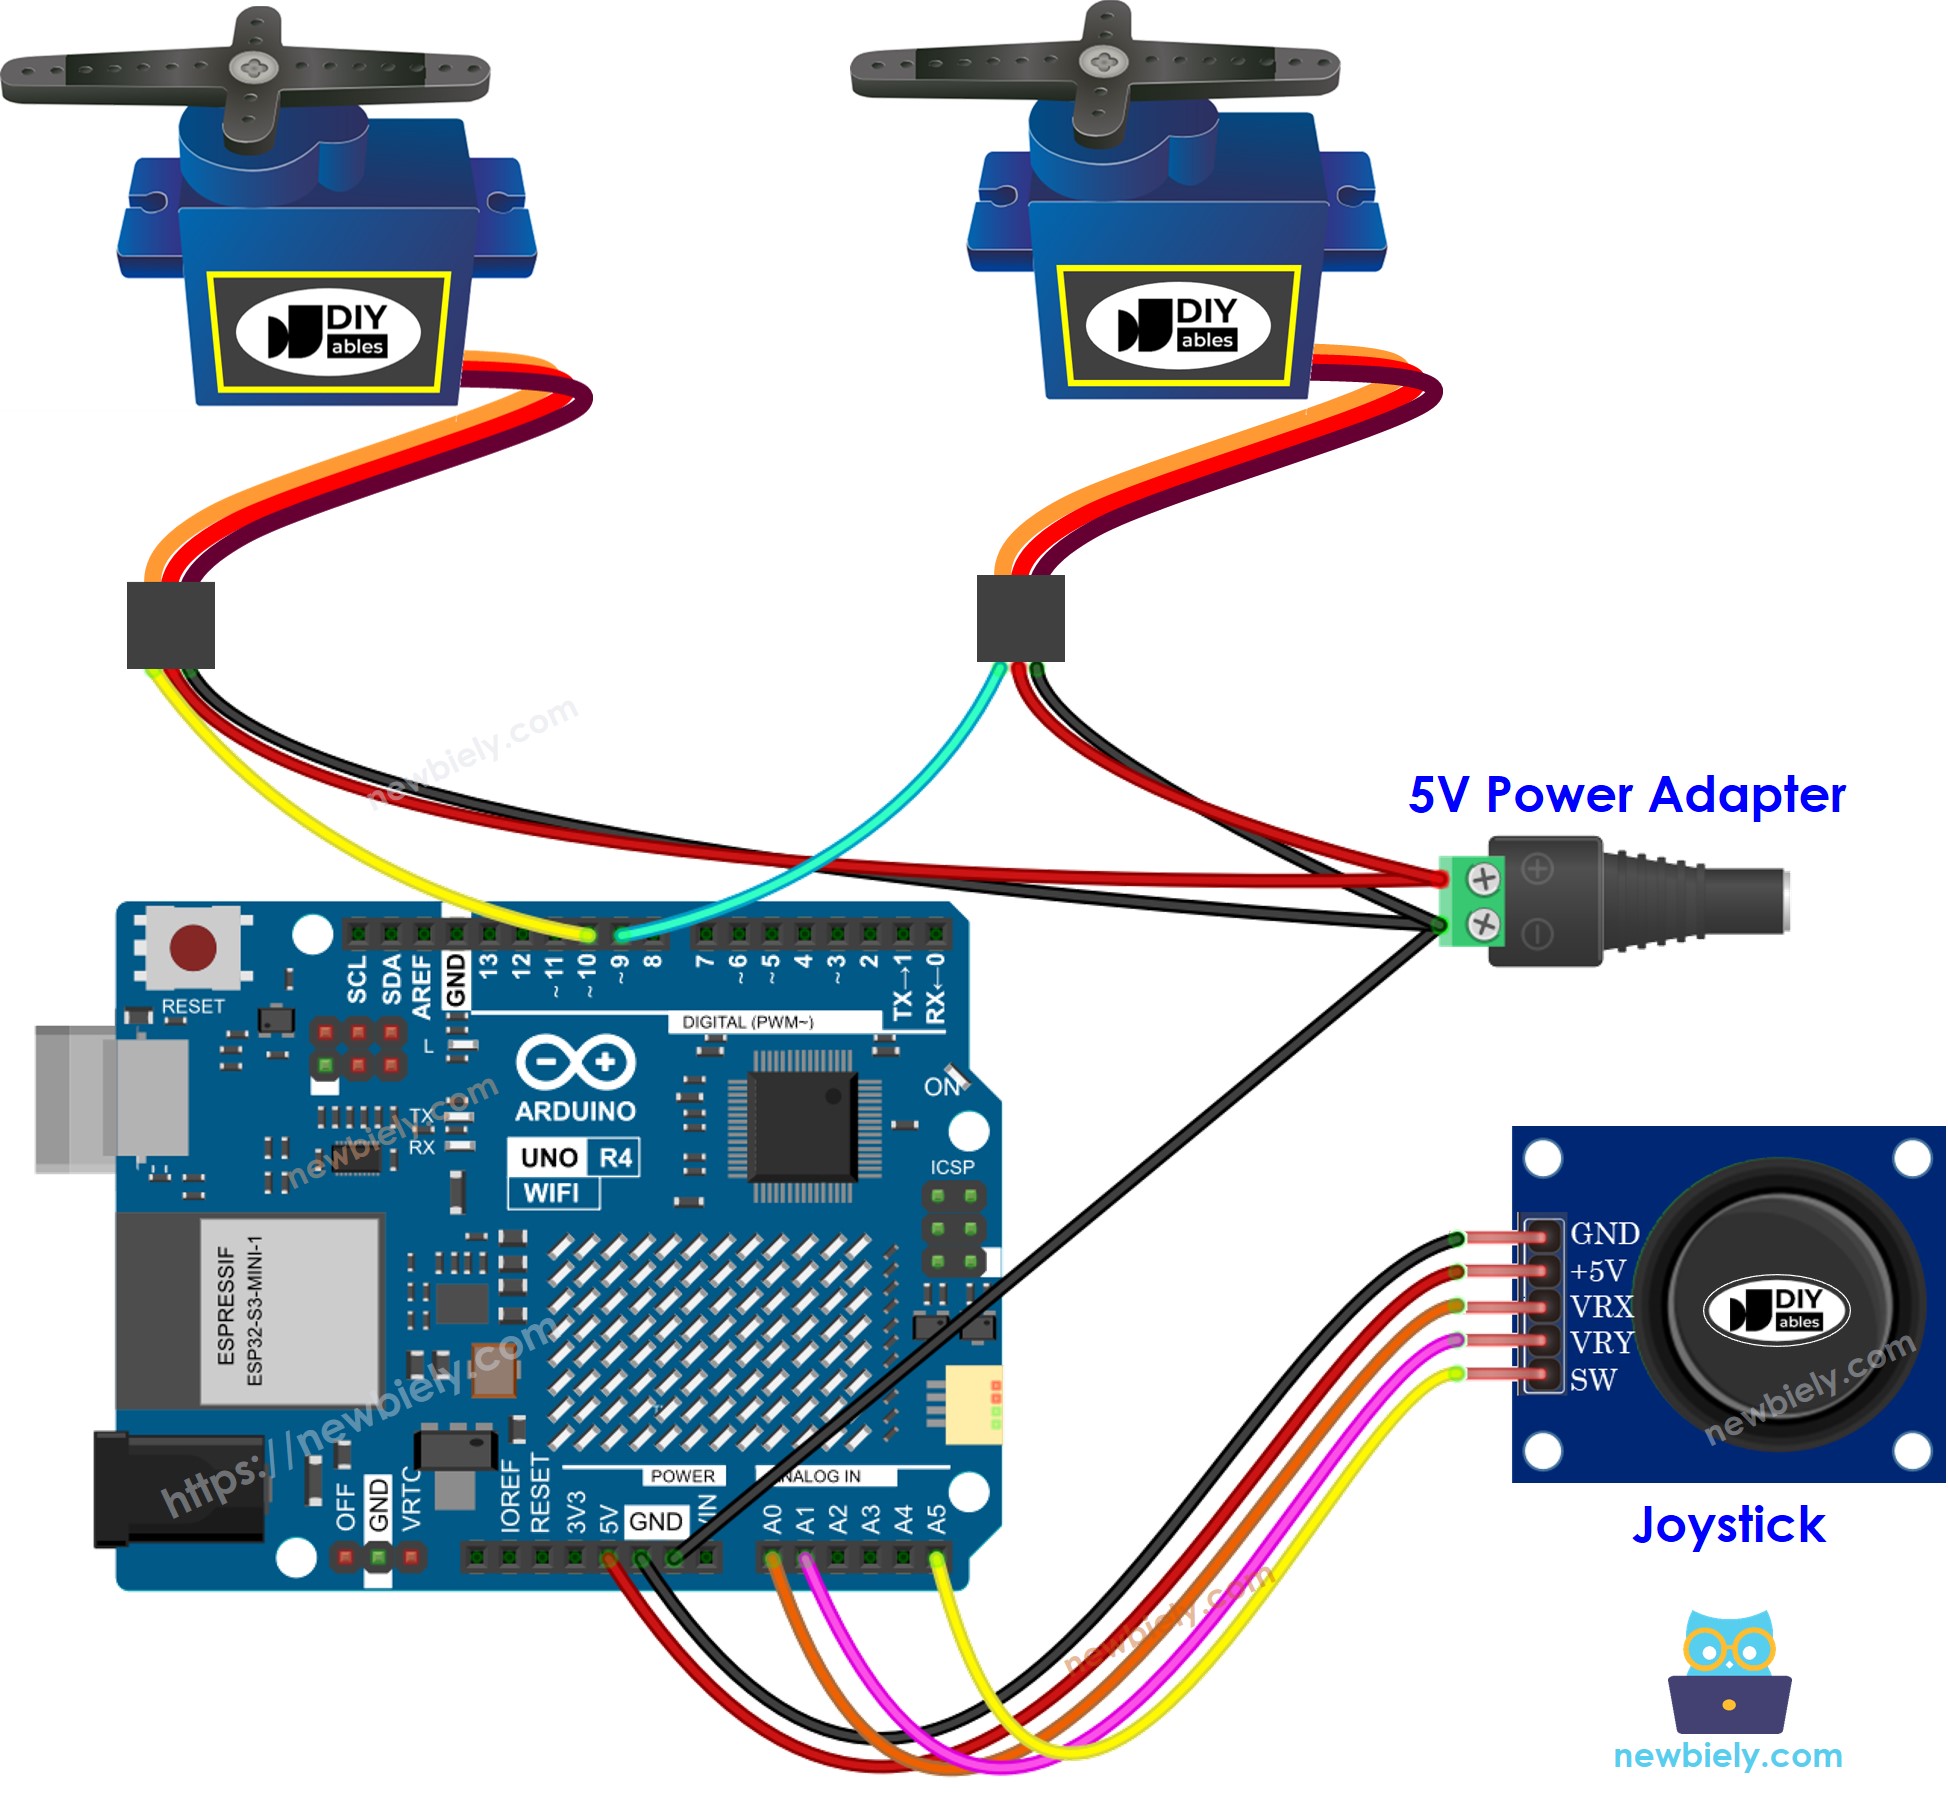
- Connect the Arduino Uno R4 to the servo motor and joystick according to the provided diagram.
- Connect the Arduino Uno R4 board to your computer using a USB cable.
- Launch the Arduino IDE on your computer.
- Select the appropriate Arduino Uno R4 board (e.g., Arduino Uno R4 WiFi) and COM port.
- Copy the provided code and open it in the Arduino IDE.
- Click the Upload button in the Arduino IDE to transfer the code to your Arduino UNO R4.
- Open the Serial Monitor.
- Move the joystick in any direction.
- Observe the rotation of the servo motor.
- Check the outcome on the Serial Monitor.
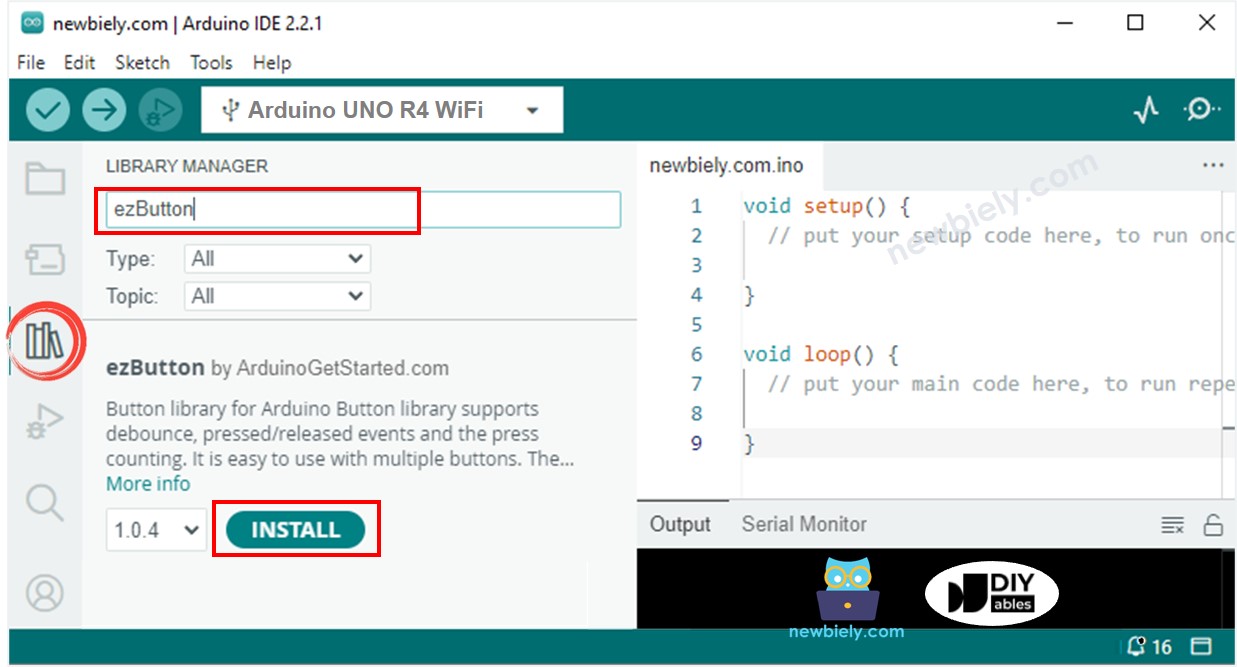
- Go to the Libraries icon on the left side of the Arduino IDE.
- Type ezButton in the search box, and look for the button library by ArduinoGetStarted.com.
- Press the Install button to add the ezButton library.
- Copy the provided code and open it in the Arduino IDE.
- Click the Upload button in the Arduino IDE to send the code to the Arduino UNO R4.
- Open the Serial Monitor.
- Move the joystick in any direction.
- Watch the servo motor rotate.
- Check the results on the Serial Radio.

Hardware Preparation
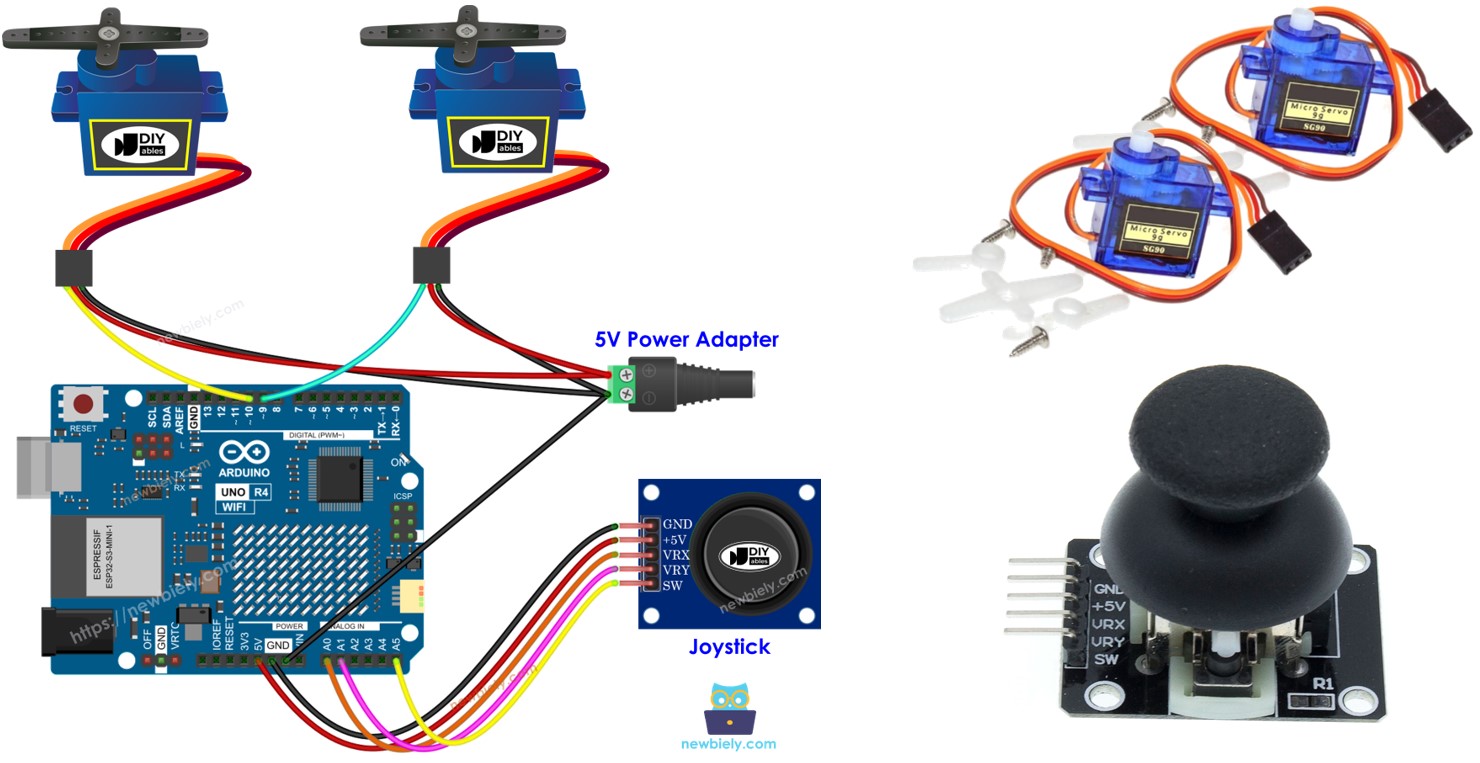
Or you can buy the following kits:
| 1 | × | DIYables STEM V4 IoT Starter Kit (Arduino included) | |
| 1 | × | DIYables Sensor Kit (30 sensors/displays) | |
| 1 | × | DIYables Sensor Kit (18 sensors/displays) |
Additionally, some of these links are for products from our own brand, DIYables .
Overview of Joystick and Servo Motor
If you are not familiar with joystick and servo motor details like pinout, functionality, and programming, please refer to the following tutorials to learn more.
Wiring Diagram

This image is created using Fritzing. Click to enlarge image
See The best way to supply power to the Arduino Uno R4 and other components.
Arduino UNO R4 Code
Arduino UNO R4 Code - The servo motors rotate according to the movement of the joystick's thump
Detailed Instructions
Follow these instructions step by step:

Arduino UNO R4 Code - Use the joystick to command servo motors
Detailed Instructions

Code Explanation
Check the explanations given in the comments within the source code!
