Arduino UNO R4 - Piezo Buzzer

In this guide, we will learn how to control a buzzer using an Arduino UNO R4. We will cover the details on how to do this.

Arduino UNO R4 piezo buzzer

Hardware Preparation

1×Arduino UNO R4 WiFi
1×Arduino UNO R4 Minima (Alternatively)
1×USB Cable Type-C
1×Piezo Buzzer
1×Breadboard
1×Jumper Wires
1×(Optional) 9V Power Adapter for Arduino UNO R4
1×(Recommended) Screw Terminal Block Shield for Arduino Uno
1×(Optional) Transparent Acrylic Enclosure For Arduino Uno

Or you can buy the following sensor kits:

1×DIYables Sensor Kit (30 sensors/displays)
1×DIYables Sensor Kit (18 sensors/displays)
Disclosure: Some of the links provided in this section are Amazon affiliate links. We may receive a commission for any purchases made through these links at no additional cost to you. We appreciate your support.

Overview of Buzzer

Buzzers create sounds like beeps or melodies. They are available in different types, each with unique features. Let's look into these types based on specific characteristics:

  • Method of Control:
    • Active Buzzers
    • Passive Buzzers
  • Mechanism for Creating Sound:
    • Piezo Buzzers
    • Standard Buzzers
  • Voltage Requirements:
    • Low Voltage (3-5V)
    • High Voltage (12V)

    Let's look at it more closely.

    Active Buzzer vs Passive Buzzer

    • Active Buzzer:
      • It makes noise when electricity is given to it.
      • It must have constant electricity to keep making noise.
      • It is simple to use with a power supply.
      • Usually found in simple alarm systems.
    • Passive Buzzer:
      • It needs a separate signal that changes to make noise.
      • It can make various sounds by adjusting the signal.
      • It needs a more complex setup to work.
      • Often used for making music or different sounds.

      Piezo Buzzer vs Regular Buzzer

      • Piezo Buzzer:
        • Operates with piezoelectric crystals.
        • Emits high-pitched, clear sounds.
        • Flexible in producing different tones and frequencies.
        • Efficient and often used in alarms and musical devices.
      • Regular Buzzer:
        • Works with electromagnetic coils.
        • Generates simple, buzzy sounds.
        • Has few variations in tone.
        • Commonly found in simple devices like doorbells and basic alarms.

        In the market, you can find a 3V-24V active buzzer. You can use it as a 3-5V active buzzer or as a high voltage buzzer (12V...).

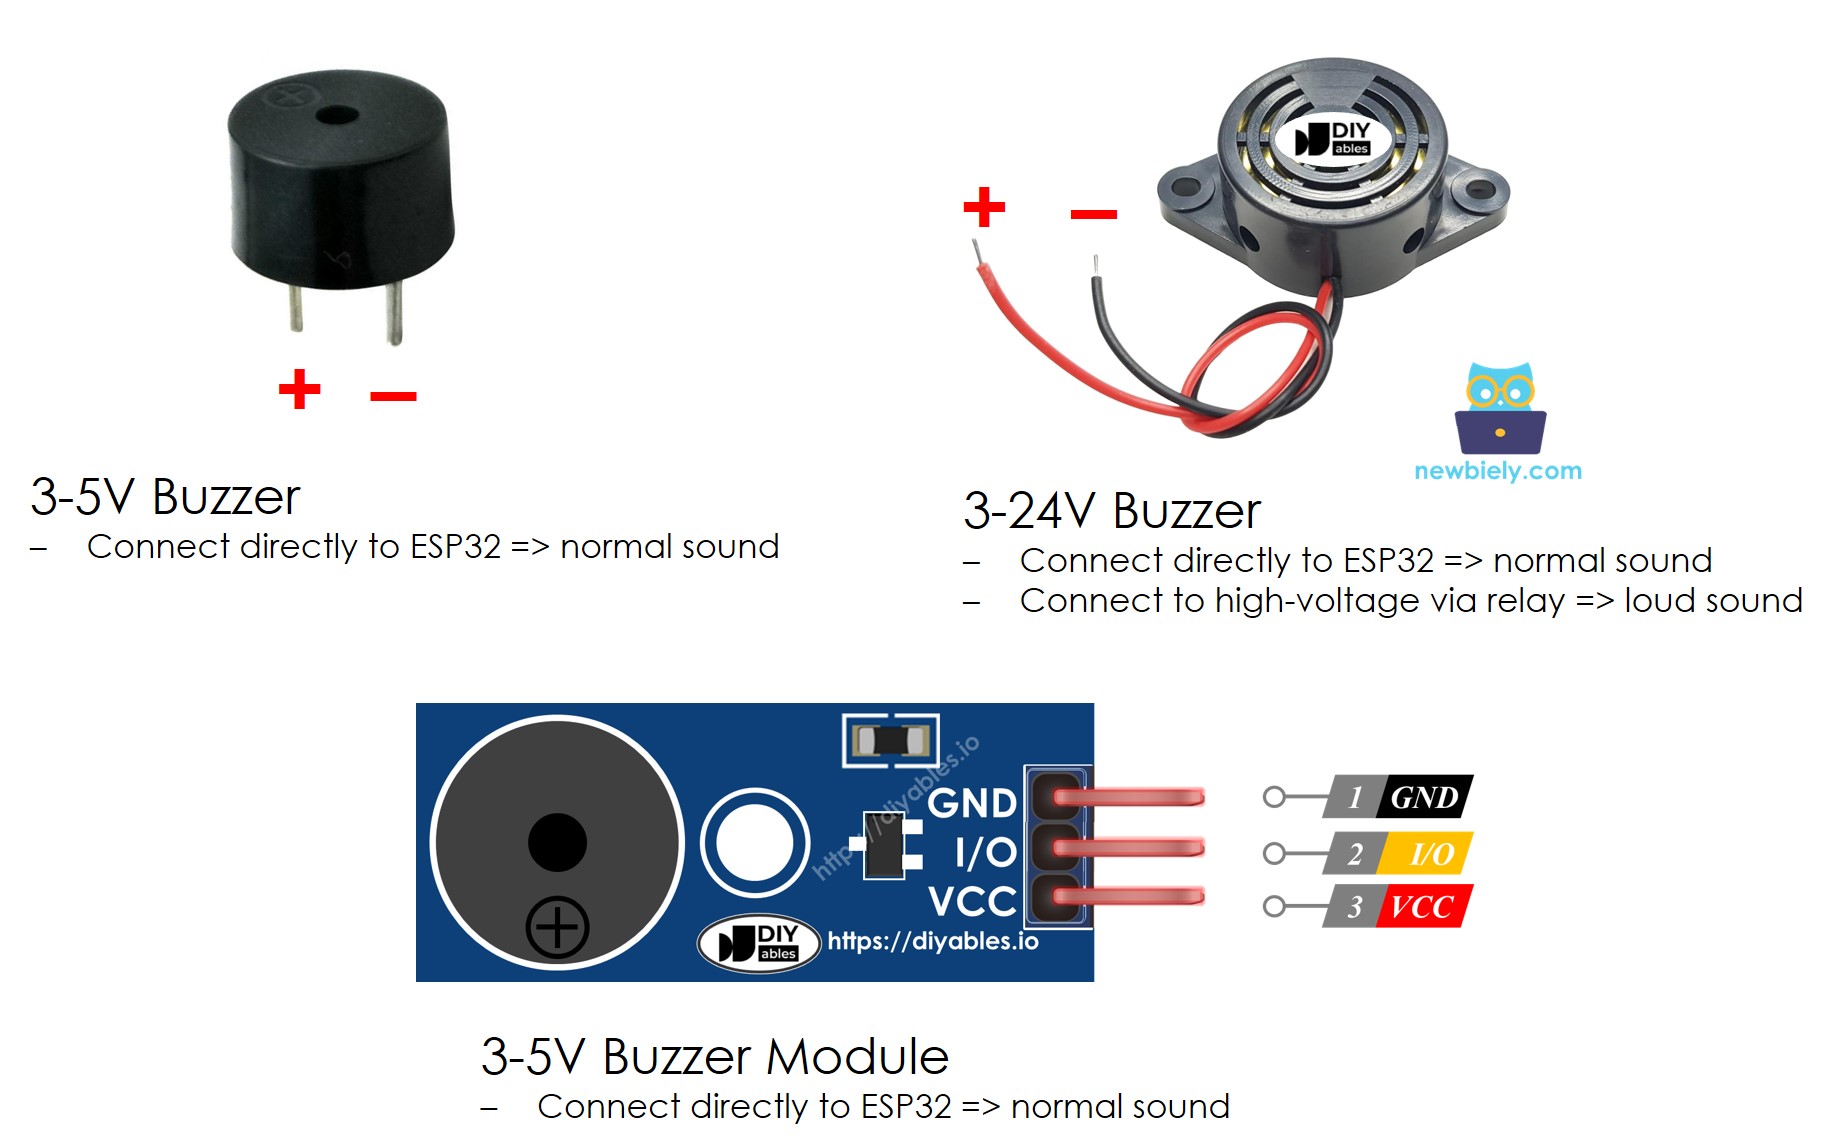
        • If you connect this buzzer to the Arduino UNO R4 pin, it makes a standard sound, good for things like keypad noises.
        • If you connect this buzzer through a relay to high-voltage, it makes a loud sound, good for alarms.

        In this guide, we will cover how to use buzzers that need 3-5V, both active and passive types. For buzzers that require 12V, see our guide on the Arduino UNO R4 - 12V buzzer by clicking here: Arduino UNO R4 - 12V buzzer tutorial

        Pinout

        A buzzer typically has two connectors.

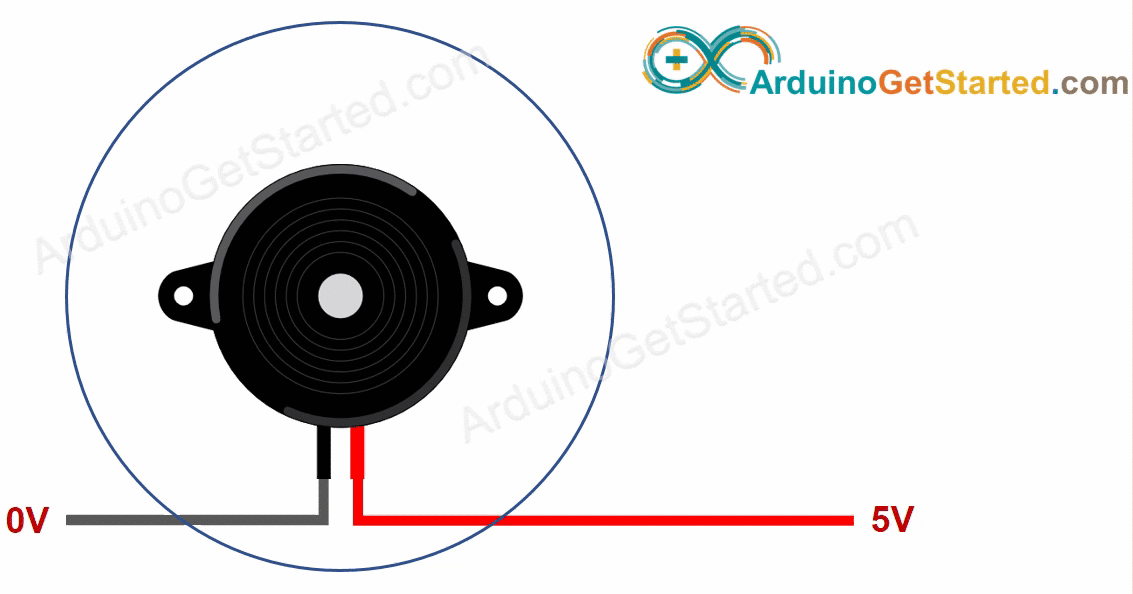
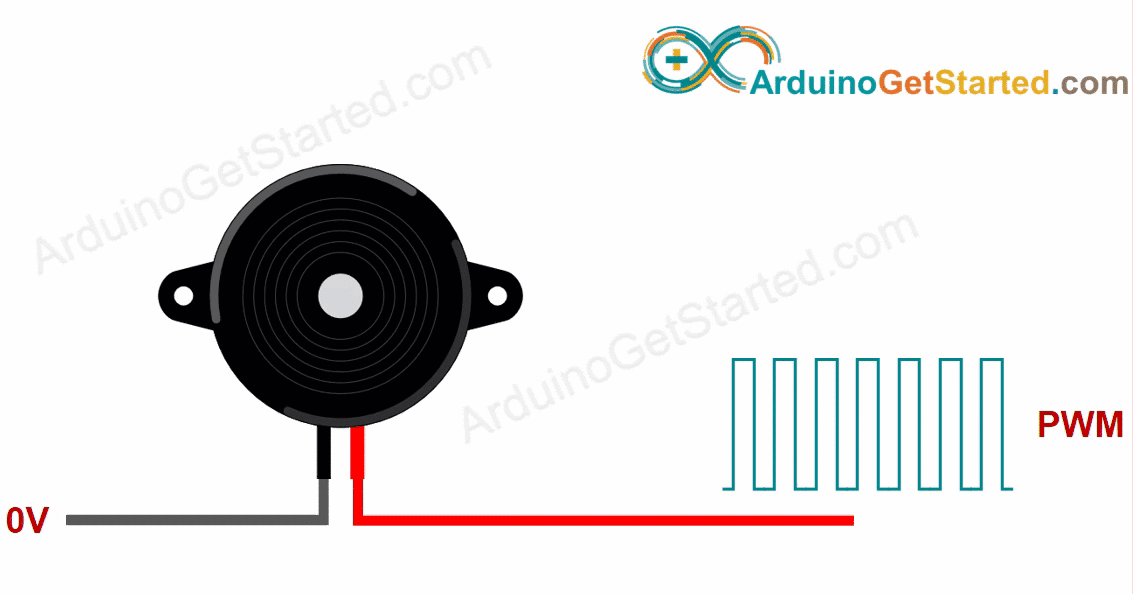
        • Negative (-) pin: connect to GND (0V)
        • Positive (+) pin: connect directly or through a relay to receive the control signal from Arduino UNO R4
        Piezo Buzzer Pinout

        How an Active Buzzer Works

        • When you connect VCC to the positive pin, the piezo buzzer makes a continuous sound.
        How Piezo Buzzer Works
        • To create different tones with a piezo buzumper, send a square wave of a specific frequency to the positive pin. Different frequencies produce different tones. To play a melody, change the frequency of the square wave.
        How Piezo Buzzer Works

        How an Passive Buzzer Works
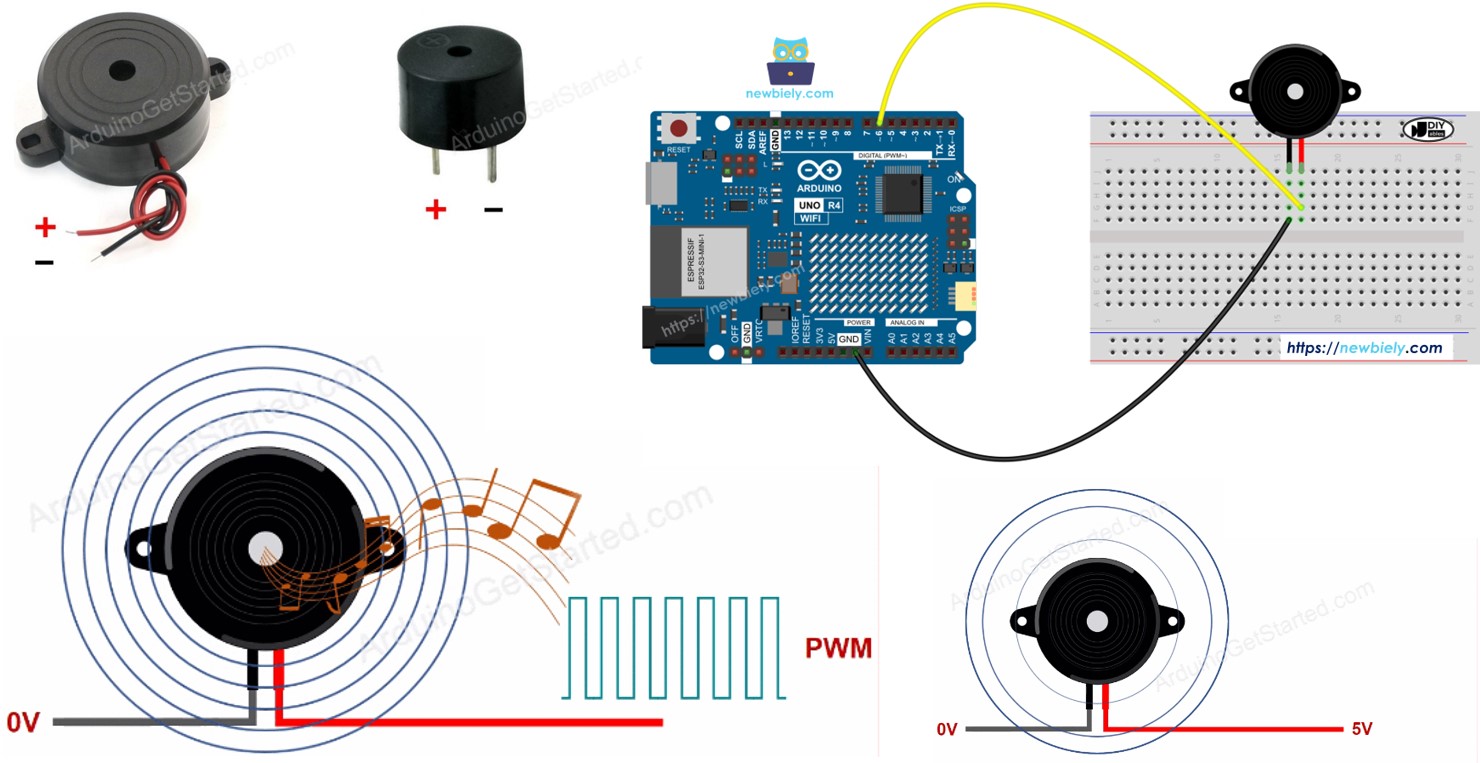
        • The passive buzzer does not make a continuous sound by just connecting VCC to the positive pin, unlike the active buzzer.
        • Similar to the active buzzer, when you apply a square wave of a certain frequency (and 50% duty cycle) to the positive pin, the piezo buzzer will produce sounds. Different frequencies result in different tones. You can form a melody by altering the frequency of the signal on the positive pin.

Wiring Diagram

The wiring diagram between Arduino UNO R4 Buzzer

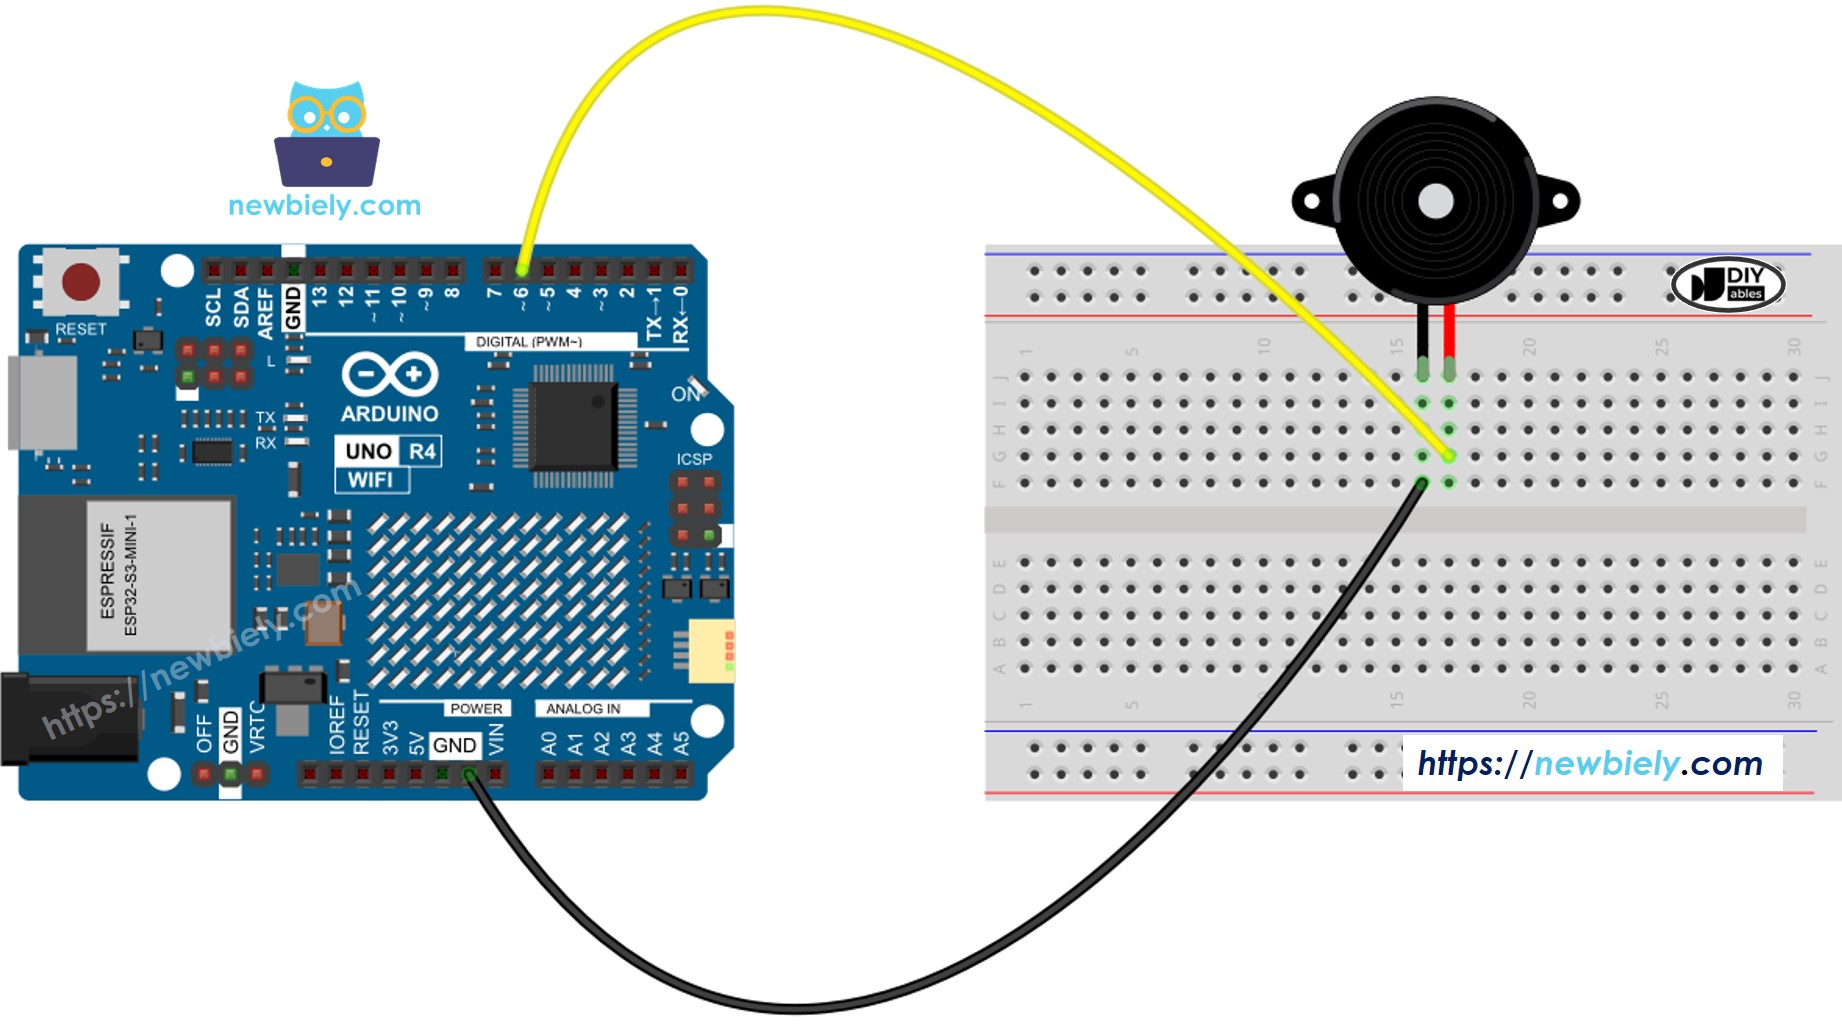
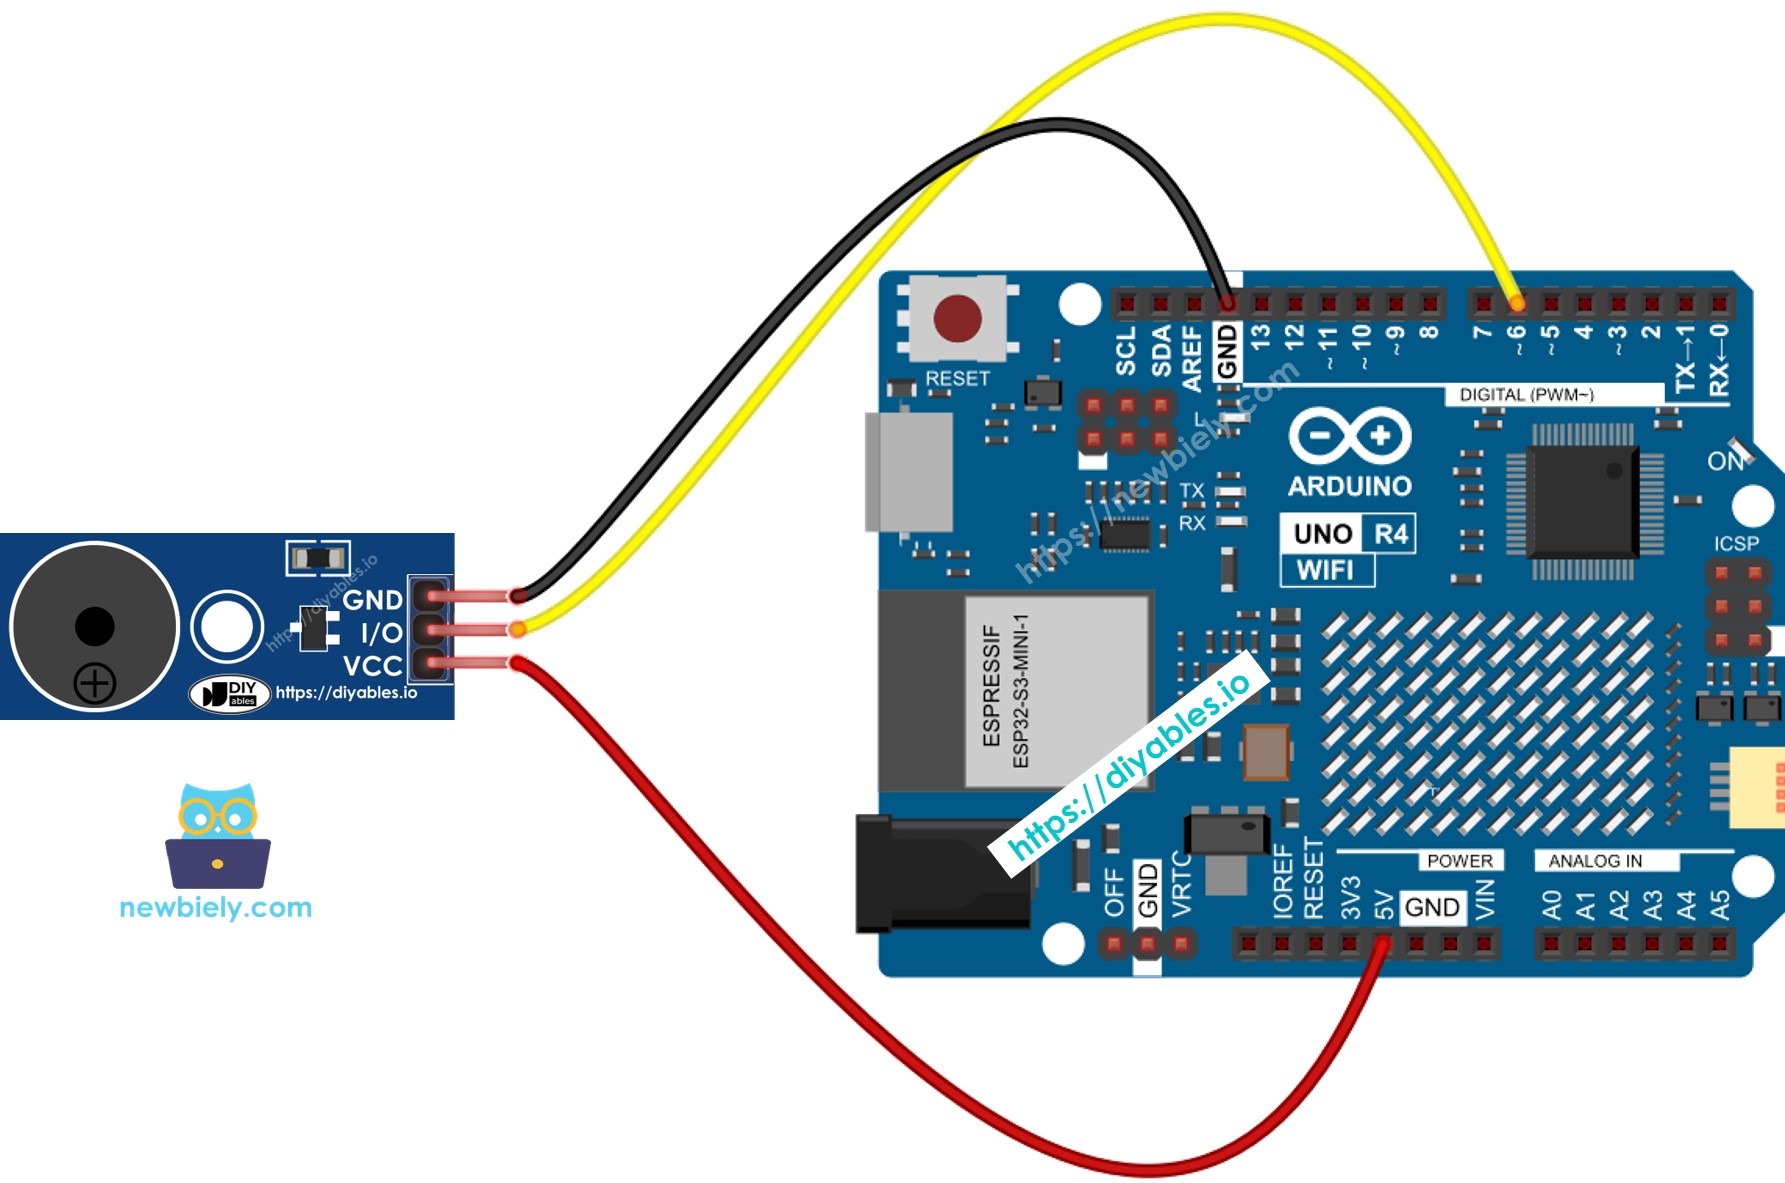
This image is created using Fritzing. Click to enlarge image

How To Program For Buzzer

Using the Arduino UNO R4 library makes playing a melody simple. You don't need to understand how to create a square wave. You only need to use two functions from the library: tone() and noTone().

Arduino UNO R4 Code

/* * This Arduino UNO R4 code was developed by newbiely.com * * This Arduino UNO R4 code is made available for public use without any restriction * * For comprehensive instructions and wiring diagrams, please visit: * https://newbiely.com/tutorials/arduino-uno-r4/arduino-uno-r4-piezo-buzzer */ #include "pitches.h" #define BUZZER_PIN 6 // The Arduino UNO R4 pin connected to the buzzer // notes in the melody: int melody[] = { NOTE_C4, NOTE_G3, NOTE_G3, NOTE_A3, NOTE_G3, 0, NOTE_B3, NOTE_C4 }; // note durations: 4 = quarter note, 8 = eighth note, etc.: int noteDurations[] = { 4, 8, 8, 4, 4, 4, 4, 4 }; void setup() { // iterate over the notes of the melody: for (int thisNote = 0; thisNote < 8; thisNote++) { // to calculate the note duration, take one second divided by the note type. //e.g. quarter note = 1000 / 4, eighth note = 1000/8, etc. int noteDuration = 1000 / noteDurations[thisNote]; tone(BUZZER_PIN, melody[thisNote], noteDuration); // to distinguish the notes, set a minimum time between them. // the note's duration + 30% seems to work well: int pauseBetweenNotes = noteDuration * 1.30; delay(pauseBetweenNotes); // stop the tone playing: noTone(BUZZER_PIN); } } void loop() { // no need to repeat the melody. }

Detailed Instructions

Follow these instructions step by step:

  • If this is your first time using the Arduino Uno R4 WiFi/Minima, refer to the tutorial on setting up the environment for Arduino Uno R4 WiFi/Minima in the Arduino IDE.
  • Connect the piezo buzzer to the Arduino Uno R4 according to the provided diagram.
  • Connect the Arduino Uno R4 board to your computer using a USB cable.
  • Launch the Arduino IDE on your computer.
  • Select the appropriate Arduino Uno R4 board (e.g., Arduino Uno R4 WiFi) and COM port.
  • Copy and paste the provided code into the Arduino IDE.
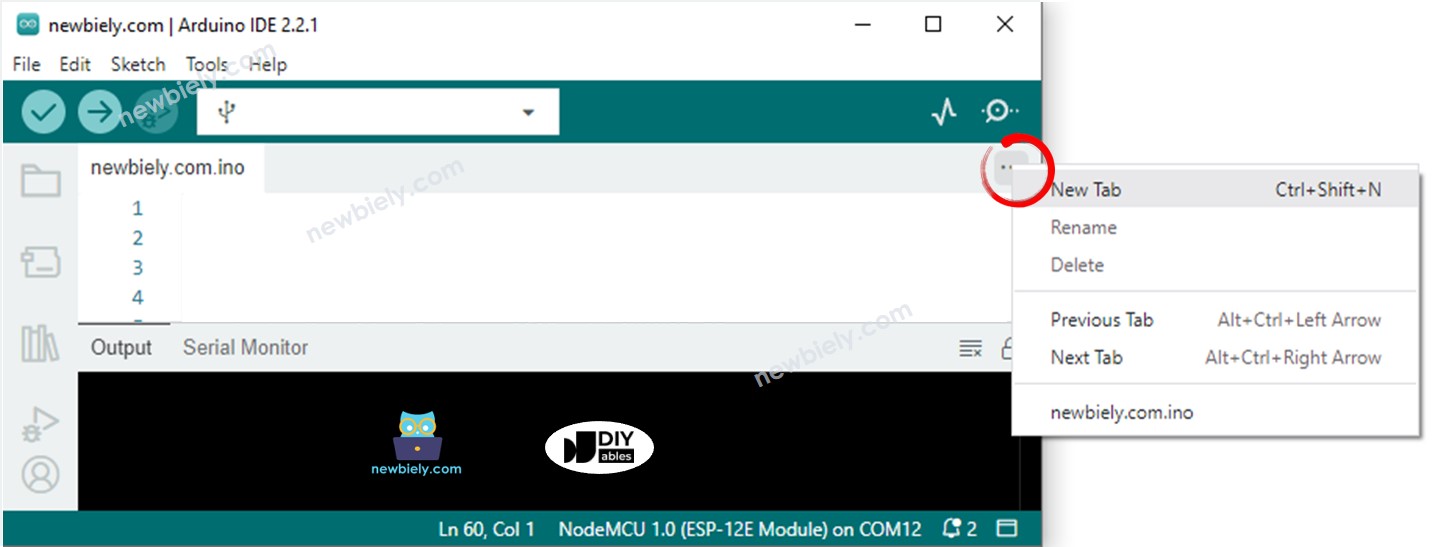
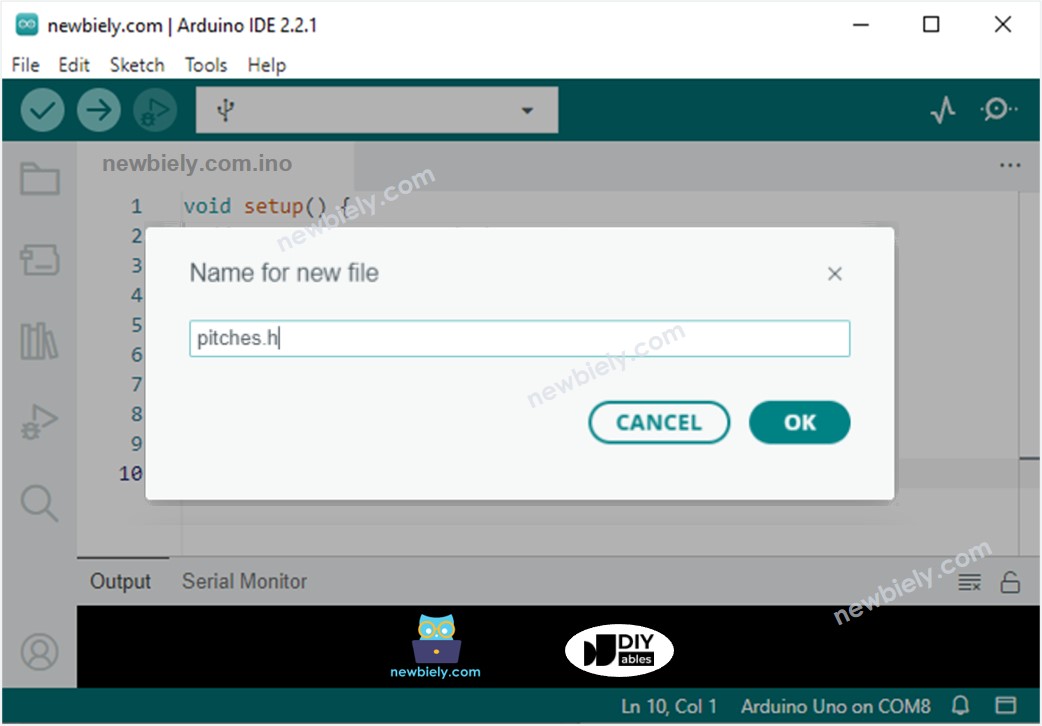
  • To make a file called pitches.h in the Arduino IDE, do one of the following:
    • Click the button below the serial monitor icon and select New Tab.
    • Alternatively, you can press Ctrl+Shift+N on your keyboard.
    Arduino IDE 2 adds file
    • Name the file as pitches.h and click the OK button.
    Arduino IDE 2 adds file pitches.h
    • Copy the code below and paste it into the file named pitches.h.
    /************************************************* * Public Constants *************************************************/ #define NOTE_B0 31 #define NOTE_C1 33 #define NOTE_CS1 35 #define NOTE_D1 37 #define NOTE_DS1 39 #define NOTE_E1 41 #define NOTE_F1 44 #define NOTE_FS1 46 #define NOTE_G1 49 #define NOTE_GS1 52 #define NOTE_A1 55 #define NOTE_AS1 58 #define NOTE_B1 62 #define NOTE_C2 65 #define NOTE_CS2 69 #define NOTE_D2 73 #define NOTE_DS2 78 #define NOTE_E2 82 #define NOTE_F2 87 #define NOTE_FS2 93 #define NOTE_G2 98 #define NOTE_GS2 104 #define NOTE_A2 110 #define NOTE_AS2 117 #define NOTE_B2 123 #define NOTE_C3 131 #define NOTE_CS3 139 #define NOTE_D3 147 #define NOTE_DS3 156 #define NOTE_E3 165 #define NOTE_F3 175 #define NOTE_FS3 185 #define NOTE_G3 196 #define NOTE_GS3 208 #define NOTE_A3 220 #define NOTE_AS3 233 #define NOTE_B3 247 #define NOTE_C4 262 #define NOTE_CS4 277 #define NOTE_D4 294 #define NOTE_DS4 311 #define NOTE_E4 330 #define NOTE_F4 349 #define NOTE_FS4 370 #define NOTE_G4 392 #define NOTE_GS4 415 #define NOTE_A4 440 #define NOTE_AS4 466 #define NOTE_B4 494 #define NOTE_C5 523 #define NOTE_CS5 554 #define NOTE_D5 587 #define NOTE_DS5 622 #define NOTE_E5 659 #define NOTE_F5 698 #define NOTE_FS5 740 #define NOTE_G5 784 #define NOTE_GS5 831 #define NOTE_A5 880 #define NOTE_AS5 932 #define NOTE_B5 988 #define NOTE_C6 1047 #define NOTE_CS6 1109 #define NOTE_D6 1175 #define NOTE_DS6 1245 #define NOTE_E6 1319 #define NOTE_F6 1397 #define NOTE_FS6 1480 #define NOTE_G6 1568 #define NOTE_GS6 1661 #define NOTE_A6 1760 #define NOTE_AS6 1865 #define NOTE_B6 1976 #define NOTE_C7 2093 #define NOTE_CS7 2217 #define NOTE_D7 2349 #define NOTE_DS7 2489 #define NOTE_E7 2637 #define NOTE_F7 2794 #define NOTE_FS7 2960 #define NOTE_G7 3136 #define NOTE_GS7 3322 #define NOTE_A7 3520 #define NOTE_AS7 3729 #define NOTE_B7 3951 #define NOTE_C8 4186 #define NOTE_CS8 4435 #define NOTE_D8 4699 #define NOTE_DS8 4978
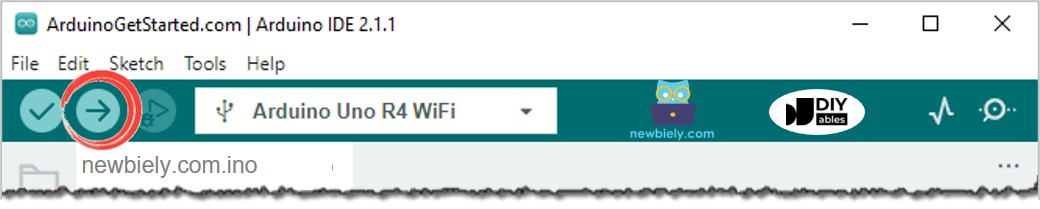
    • Click the Upload button in Arduino IDE to load the code onto Arduino UNO R4.
    Arduino IDE Upload Code
    • Listen to the music.

Modifying Arduino UNO R4 Code

Now, we will change the code to play the song "Jingle Bells".

We just need to modify two arrays: int melody[] and int noteDurations[].

/* * This Arduino UNO R4 code was developed by newbiely.com * * This Arduino UNO R4 code is made available for public use without any restriction * * For comprehensive instructions and wiring diagrams, please visit: * https://newbiely.com/tutorials/arduino-uno-r4/arduino-uno-r4-piezo-buzzer */ #include "pitches.h" #define BUZZER_PIN 6 // The Arduino UNO R4 pin connected to the buzzer // notes in the melody: int melody[] = { NOTE_E5, NOTE_E5, NOTE_E5, NOTE_E5, NOTE_E5, NOTE_E5, NOTE_E5, NOTE_G5, NOTE_C5, NOTE_D5, NOTE_E5, NOTE_F5, NOTE_F5, NOTE_F5, NOTE_F5, NOTE_F5, NOTE_E5, NOTE_E5, NOTE_E5, NOTE_E5, NOTE_E5, NOTE_D5, NOTE_D5, NOTE_E5, NOTE_D5, NOTE_G5 }; // note durations: 4 = quarter note, 8 = eighth note, etc, also called tempo: int noteDurations[] = { 8, 8, 4, 8, 8, 4, 8, 8, 8, 8, 2, 8, 8, 8, 8, 8, 8, 8, 16, 16, 8, 8, 8, 8, 4, 4 }; void setup() { // iterate over the notes of the melody: int size = sizeof(noteDurations) / sizeof(int); for (int thisNote = 0; thisNote < size; thisNote++) { // to calculate the note duration, take one second divided by the note type. //e.g. quarter note = 1000 / 4, eighth note = 1000/8, etc. int noteDuration = 1000 / noteDurations[thisNote]; tone(BUZZER_PIN, melody[thisNote], noteDuration); // to distinguish the notes, set a minimum time between them. // the note's duration + 30% seems to work well: int pauseBetweenNotes = noteDuration * 1.30; delay(pauseBetweenNotes); // stop the tone playing: noTone(BUZZER_PIN); } } void loop() { // no need to repeat the melody. }

※ NOTE THAT:

The code mentioned uses the delay() function, which stops other code from running while a melody is playing. To prevent this, you can use the ezBuzzer library. This library allows the buzzer to beep or play a melody without stopping other code.

Video Tutorial

Challenge Yourself

  • Play your favorite song with a Piezo Buzzer.
  • Set up an alarm that goes off if someone gets close to your belongings. **Hint**: See Arduino UNO R4 - Motion Sensor.

※ OUR MESSAGES

  • As freelancers, We are AVAILABLE for HIRE. See how to outsource your project to us
  • Please feel free to share the link of this tutorial. However, Please do not use our content on any other websites. We invested a lot of effort and time to create the content, please respect our work!