Arduino UNO R4 - DHT22
This tutorial instructs you how to use Arduino UNO R4 with DHT22 temperature and humidity sensor. In detail, we will learn:
- How to connect a DHT22 sensor to an Arduino UNO R4
- How to connect a DHT22 module to an Arduino UNO R4
- How to program an Arduino UNO R4 to read temperature and humidity from a DHT22 sensor and module
Hardware Preparation
Or you can buy the following kits:
| 1 | × | DIYables STEM V4 IoT Starter Kit (Arduino included) | |
| 1 | × | DIYables Sensor Kit (18 sensors/displays) |
Additionally, some of these links are for products from our own brand, DIYables .

Overview of DHT22 Temperature and Humidity Sensor
| DHT22 | |
|---|---|
| Temperature Range | -40°C to 80°CW |
| Temperature Accuracy | ± 0.5°C |
| Humidity Range | 0% to 100% |
| Humidity Accuracy | ± 2 to 5% |
| Reading Rate | 0.5Hz (once every 2 seconds) |
| Operating Voltage | 3 to 5V |
Pinout
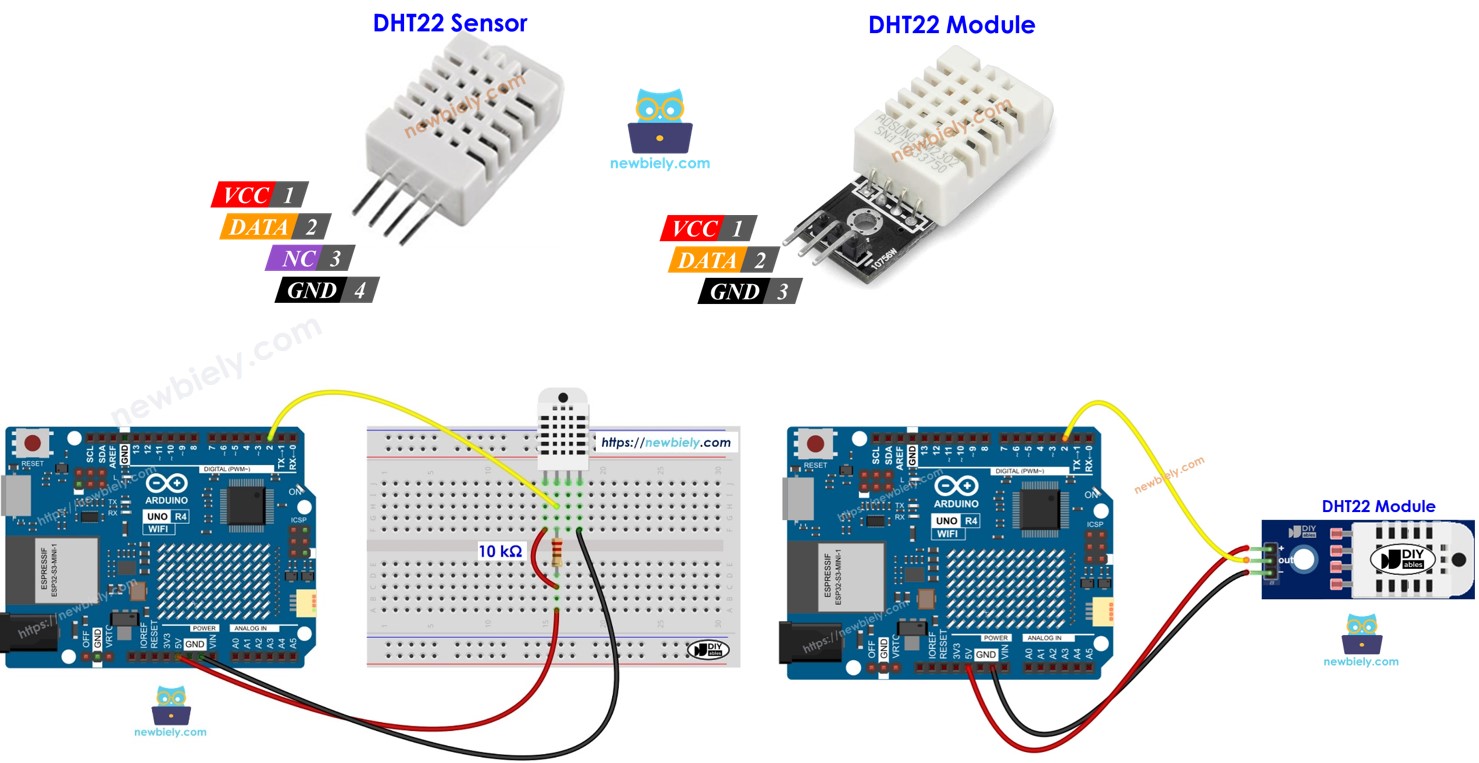
There are two types of DHT22: the sensor and the module.
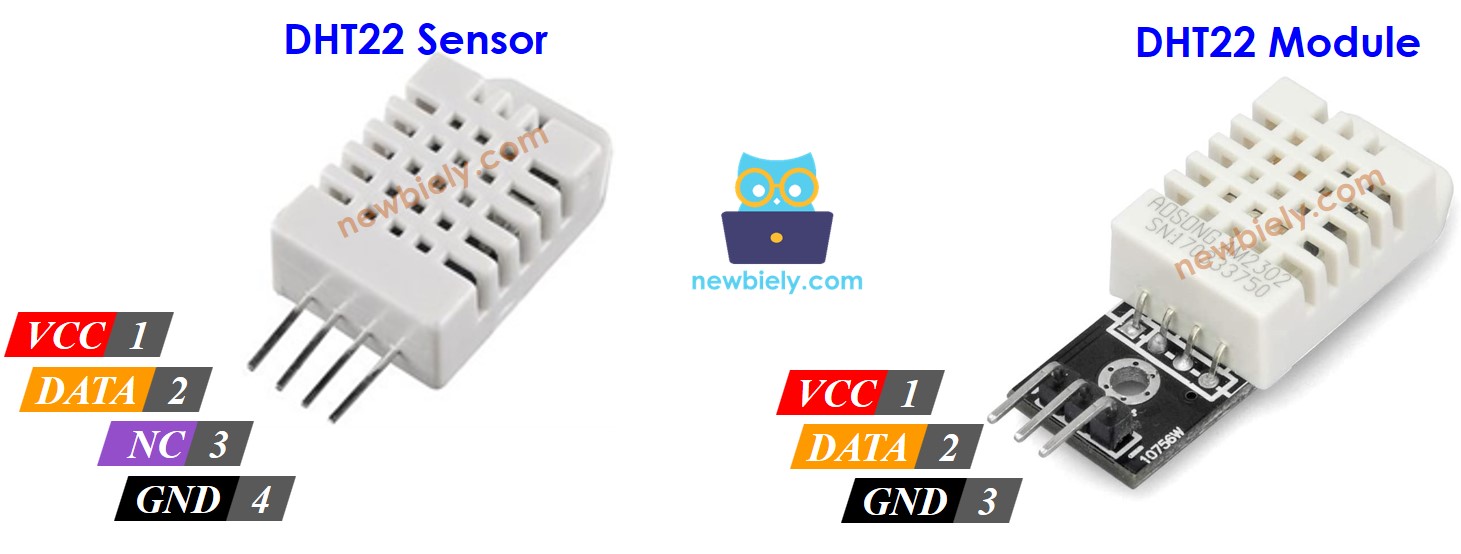
The DHT22 sensor includes four pins:
- GND pin: connect this to GND (0V).
- VCC pin: connect this to VCC (5V or 3.3V).
- DATA pin: this pin allows the sensor to communicate with the Arduino UNO R4.
- NC pin: this is not connected and can be ignored.
The DHT22 module includes three pins:
- GND pin: connect to GND (0V)
- VCC pin: connect to VCC (5V or 3.3V)
- DATA pin: used for communication between the sensor and Arduino UNO R4
Some manufacturers offer the DHT22 sensor as a module with three pins labeled GND, VCC, and DATA (or alternatively as -, +, and OUT).
Wiring Diagram
Use a resistor between 5K and 10K Ohms to maintain the high data line and allow communication between the DHT22 sensor and the Arduino UNO R4.
Arduino UNO R4 - DHT22 Sensor Wiring
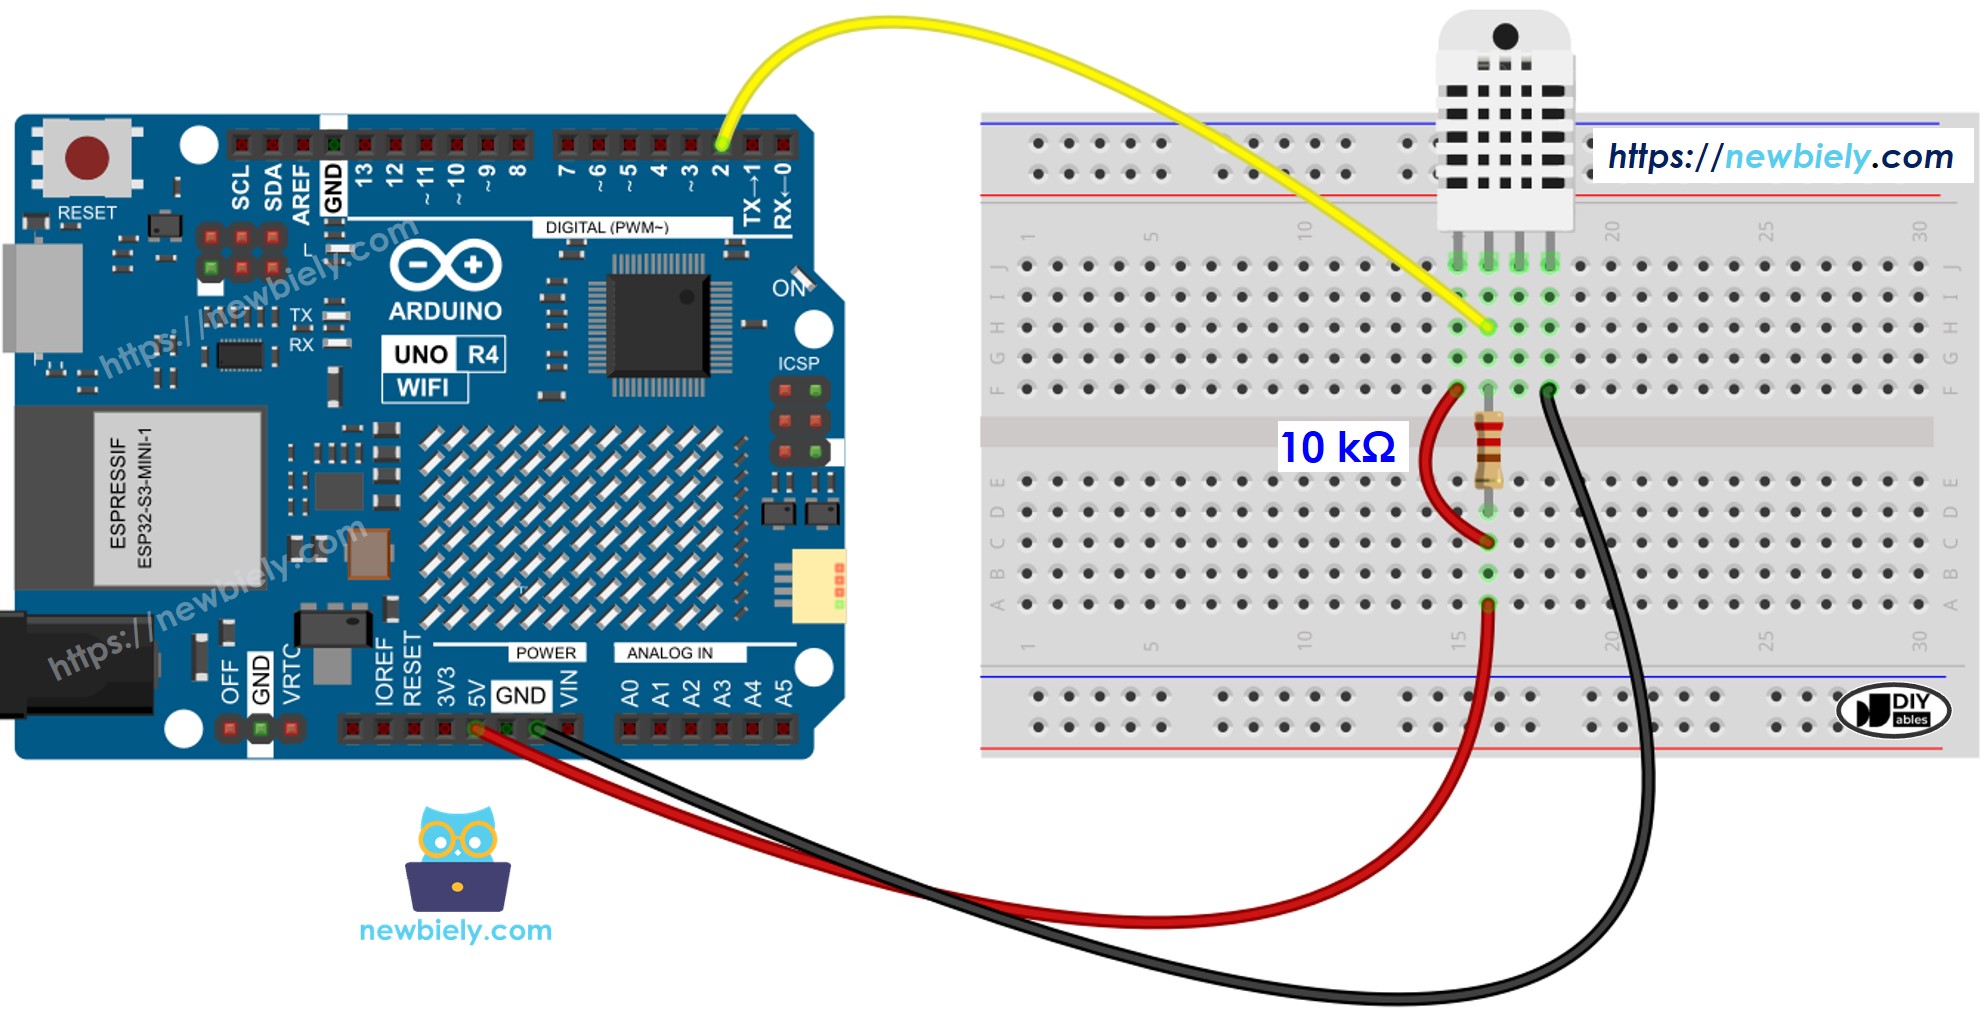
This image is created using Fritzing. Click to enlarge image
Arduino UNO R4 - DHT22 Module Wiring
Most DHT22 sensor modules come with an integrated resistor, so there is no need to add one. This saves some effort in wiring or soldering.
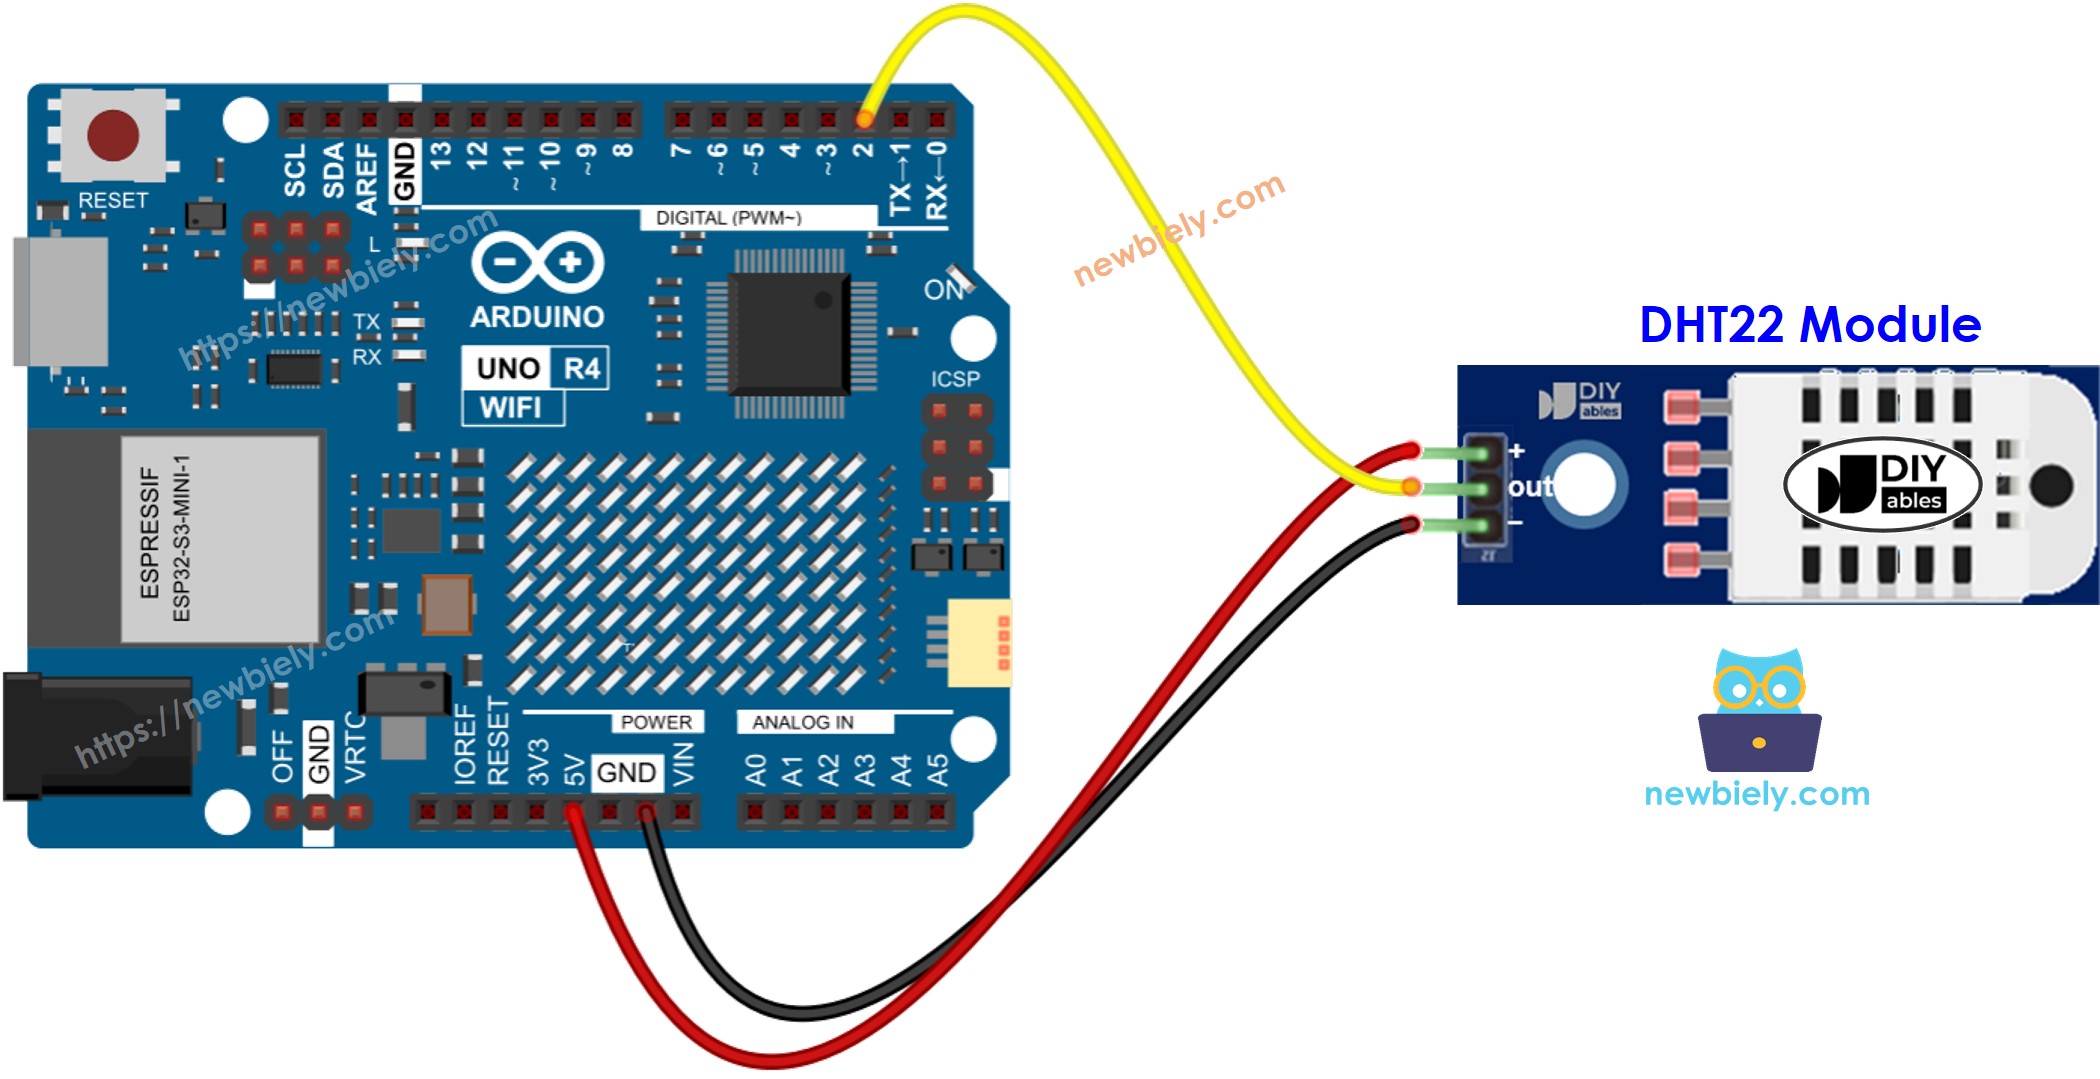
This image is created using Fritzing. Click to enlarge image
See The best way to supply power to the Arduino Uno R4 and other components.
How To Program For DHT22 Temperature Sensor
Programming for both DHT22 sensor and module is the same.
- Add the library:
- Set the Arduino UNO R4 pin that connects to the DHT sensor:
- Create a DHT22 sensor object
- Set up the sensor:
- Read humidity.
- Read the temperature in Celsius.
- Read the temperature in Fahrenheit:
Arduino UNO R4 Code - DHT22
Detailed Instructions
Follow these instructions step by step:
- If this is your first time using the Arduino Uno R4 WiFi/Minima, refer to the tutorial on setting up the environment for Arduino Uno R4 WiFi/Minima in the Arduino IDE.
- Wire the components according to the provided diagram.
- Connect the Arduino Uno R4 board to your computer using a USB cable.
- Launch the Arduino IDE on your computer.
- Select the appropriate Arduino Uno R4 board (e.g., Arduino Uno R4 WiFi) and COM port.
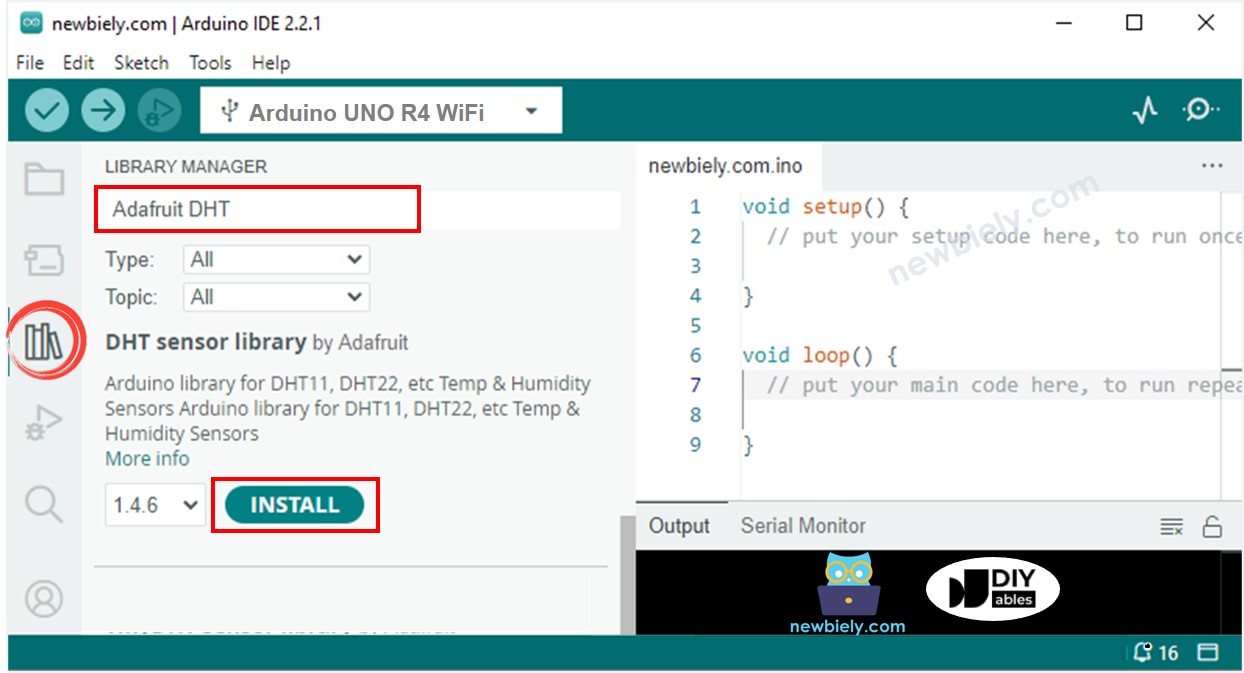
- Click on the Libraries icon on the left side of the Arduino IDE.
- Type "DHT" in the search box and look for the DHT sensor library by Adafruit.
- Click the Install button to add the library.
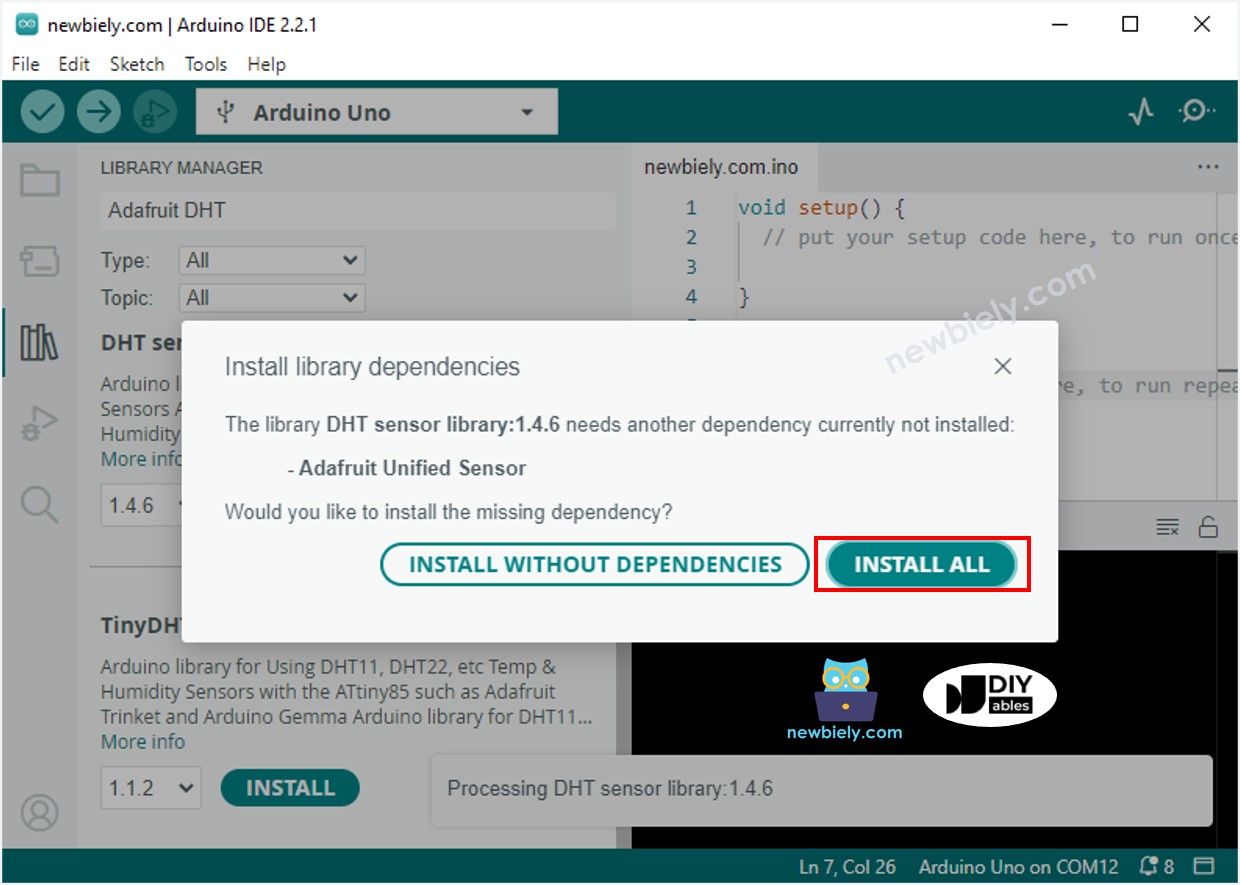
- You will need to install additional library dependencies.
- Click the Install All button to install all necessary libraries.
- Choose and copy the code for your sensor, then open it in Arduino IDE.
- Click the Upload button in Arduino IDE to upload the code to your Arduino UNO R4.
- Change the temperature around the sensor by making it hotter or colder.
- Check the results on the Serial Monitor.