Arduino UNO R4 - Control Fan
In this tutorial, we will learn how to control a 12V or 5V fan using Arduino UNO R4. In detail, we will learn:
- How to connect the 12V/5V fan to Arduino UNO R4
- How to program Arduino UNO R4 to turn the fan on/off.
Hardware Preparation
Or you can buy the following kits:
| 1 | × | DIYables STEM V4 IoT Starter Kit (Arduino included) | |
| 1 | × | DIYables Sensor Kit (18 sensors/displays) |
Additionally, some of these links are for products from our own brand, DIYables .

Overview of DC Fan
Pinout
A DC fan typically has two pins.
- Negative (-) pin (black): connect to the negative wire of the DC power supply.
- Positive (+) pin (red): connect to the positive wire of the DC power supply.
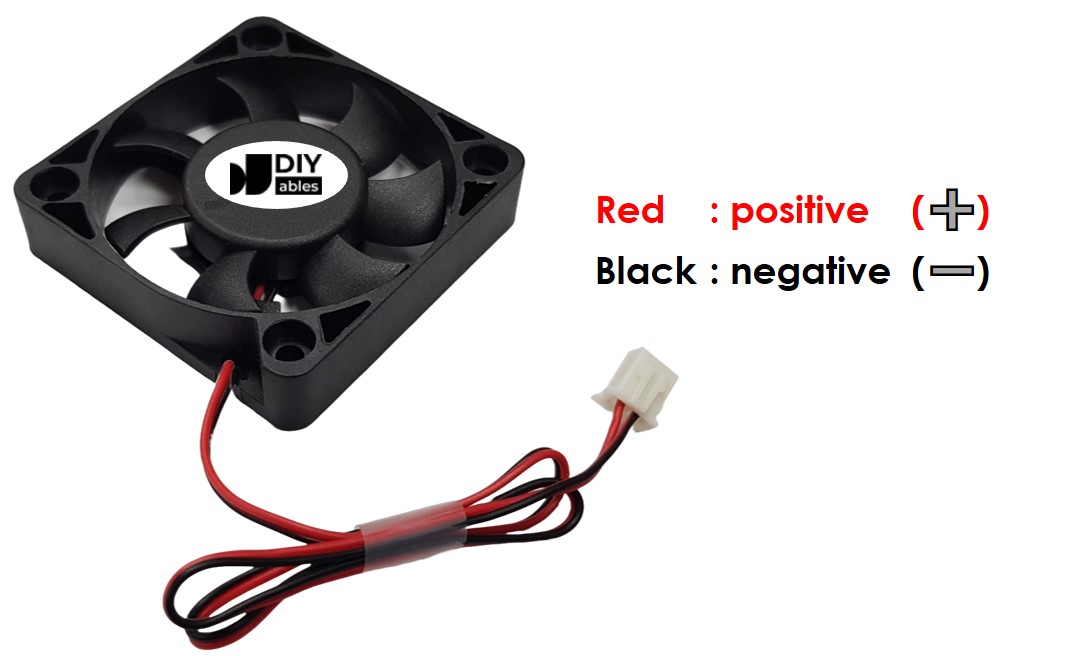
Ensure that the voltage of the DC power supply matches the voltage required by the fan. In this guide, we will use fans that need 12VDC and 5VDC.
How to Control Fan
- If a DC fan is powered by a 12V/5V power supply, it will run at full speed.
- If a DC fan is powered by a 12V/5V PWM signal, you can control the fan's speed.
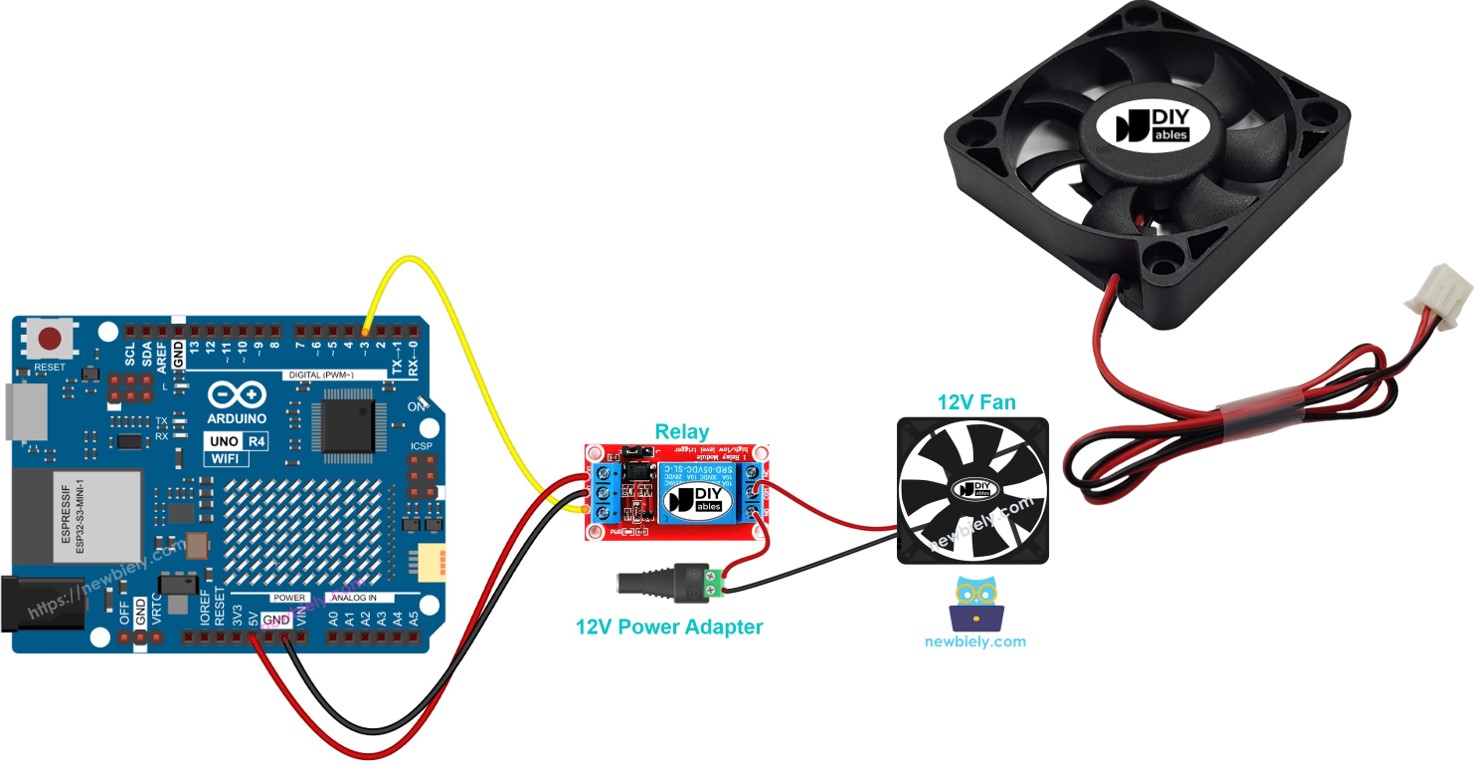
In this guide, we will learn how to switch a fan on and off using an Arduino UNO R4. We will cover how to control the fan speed in a different guide. To manage the fan, we use a relay between the Arduino UNO R4 and the fan. The Arduino UNO R4 controls the fan through the relay. If you are not familiar with relays (what they are, how they operate, how to program them), you can learn about them in the Arduino UNO R4 - Relay tutorial.
Wiring Diagram
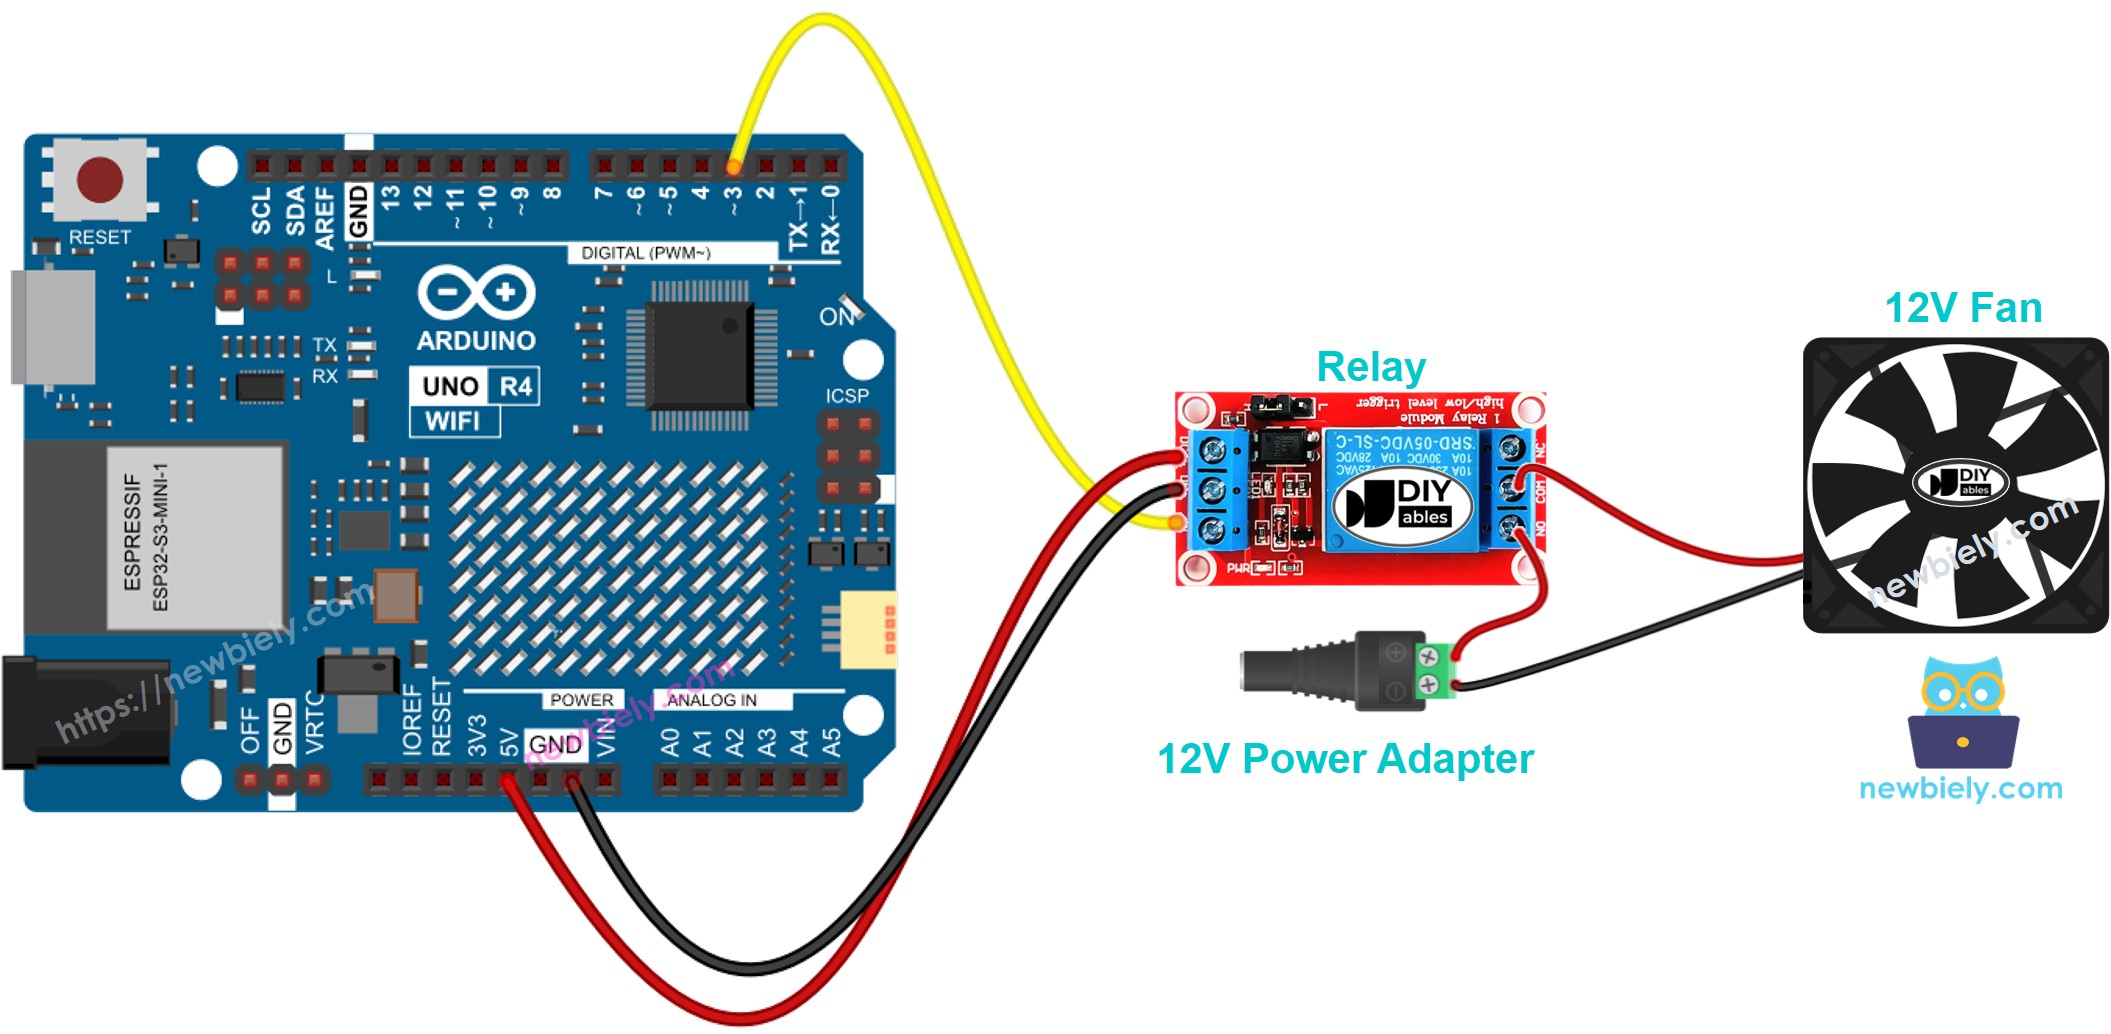
This image is created using Fritzing. Click to enlarge image
See The best way to supply power to the Arduino Uno R4 and other components.
Arduino UNO R4 Code
The following code continuously switches the fan ON for five seconds and then OFF for five resp.
Detailed Instructions
Follow these instructions step by step:
- If this is your first time using the Arduino Uno R4 WiFi/Minima, refer to the tutorial on setting up the environment for Arduino Uno R4 WiFi/Minima in the Arduino IDE.
- Connect the Arduino Uno R4 to the fan according to the provided diagram.
- Connect the Arduino Uno R4 to your computer using a USB cable.
- Launch the Arduino IDE on your computer.
- Select the appropriate Arduino Uno R4 board (e.g., Arduino Uno R4 WiFi) and COM port.
- Copy and paste the provided code into the Arduino IDE.
- Press the Upload button in the Arduino IDE to transfer the code to the Arduino UNO R4.
- Observe the state of the fan.
Code Explanation
The explanation is in the comments of the above Arduino code.