Arduino UNO R4 - Door Sensor
This tutorial instructs you on how to use an Arduino UNO R4 and a door sensor to monitor the open or closed state of your door or window. We will learn how to install the door sensor and connect it to the Arduino, and then how to program the Arduino to read the state from the door sensor.
Hardware Preparation
Or you can buy the following kits:
| 1 | × | DIYables STEM V4 IoT Starter Kit (Arduino included) | |
| 1 | × | DIYables Sensor Kit (18 sensors/displays) |
Additionally, some of these links are for products from our own brand, DIYables .

Overview of Door Sensor
Pinout
The door sensor has two parts.
- One reed switch with two metal connectors
- One magnet
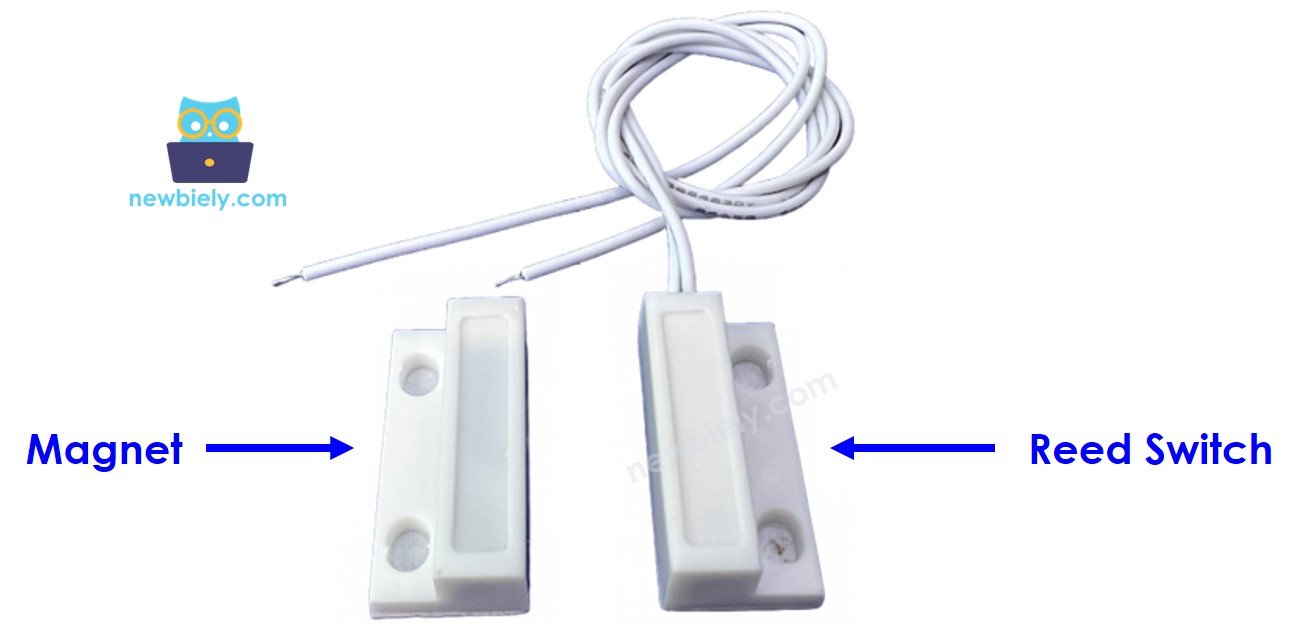
Like a regular switch or button, we do NOT need to distinguish between the two pins of the reed switch.
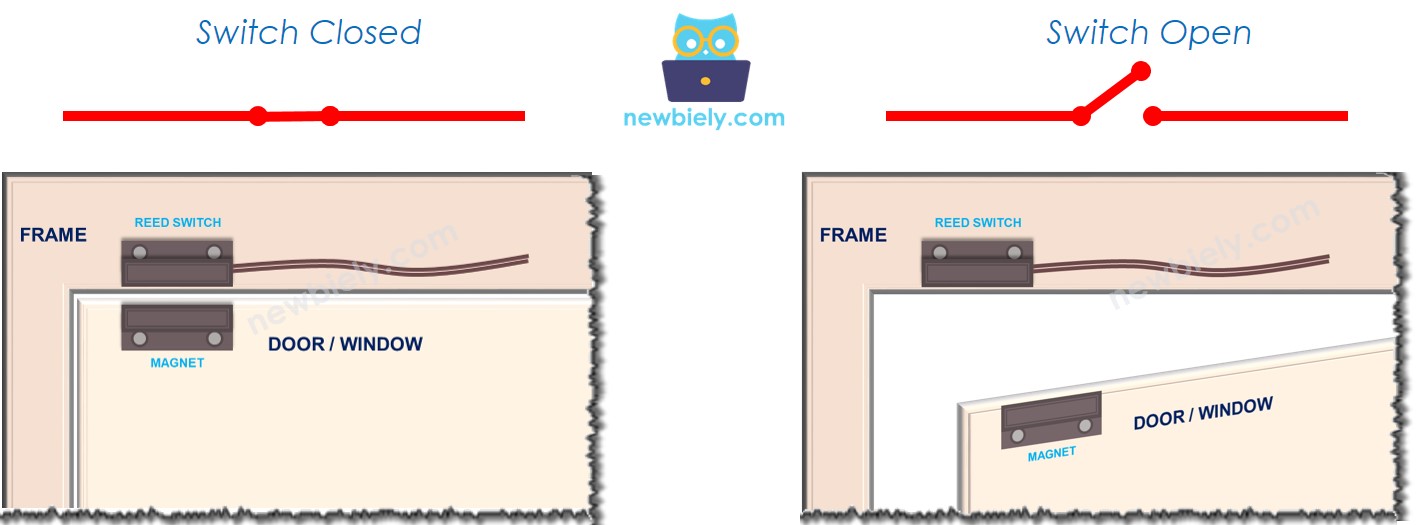
How It Works
The magnet is fixed to the door or window, which moves, and the reed switch is fixed to the door frame, which doesn't move. When the door is closed, these two parts is closed to each other.
- When the magnet is near the reed switch, the reed switch circuit closes.
- When the magnet is away from the reed switch, the reed switch circuit opens.
※ NOTE THAT:
The reed switch does NOT give LOW or HIGH signals directly. It only shows open or closed states. How we connect it to the Arduino UNO R4 affects whether the pin reads as LOW, HIGH, or has a floating value (which is unpredictable). To prevent this floating value, we need to connect a pull-up or pull-down resistor to the pin on the Arduino UNO R4.
If we connect one pin of the reed switch to GND, and the other pin to an input pin on the Arduino UNO R4 with a pull-up resistor (it can be built-in or added separately):
- When the magnet is near the reed switch, the Arduino UNO R4's input pin reads LOW.
- When the magnet is away from the reed switch, the Arduino UNO R4's input led reads HIGH.
Thus:
- To find out if the door is open or closed, look at the input pin of the Arduino UNO R4:
- If the pin shows LOW, the door is closed.
- If the pin shows HIGH, the door is open.
- To know when the door opens or closes, watch for changes in the state of the Arduino UNO R4 input pin:
- A change from LOW to HIGH means the door is opening.
- A change from HIGH to LOW means the door is closing.
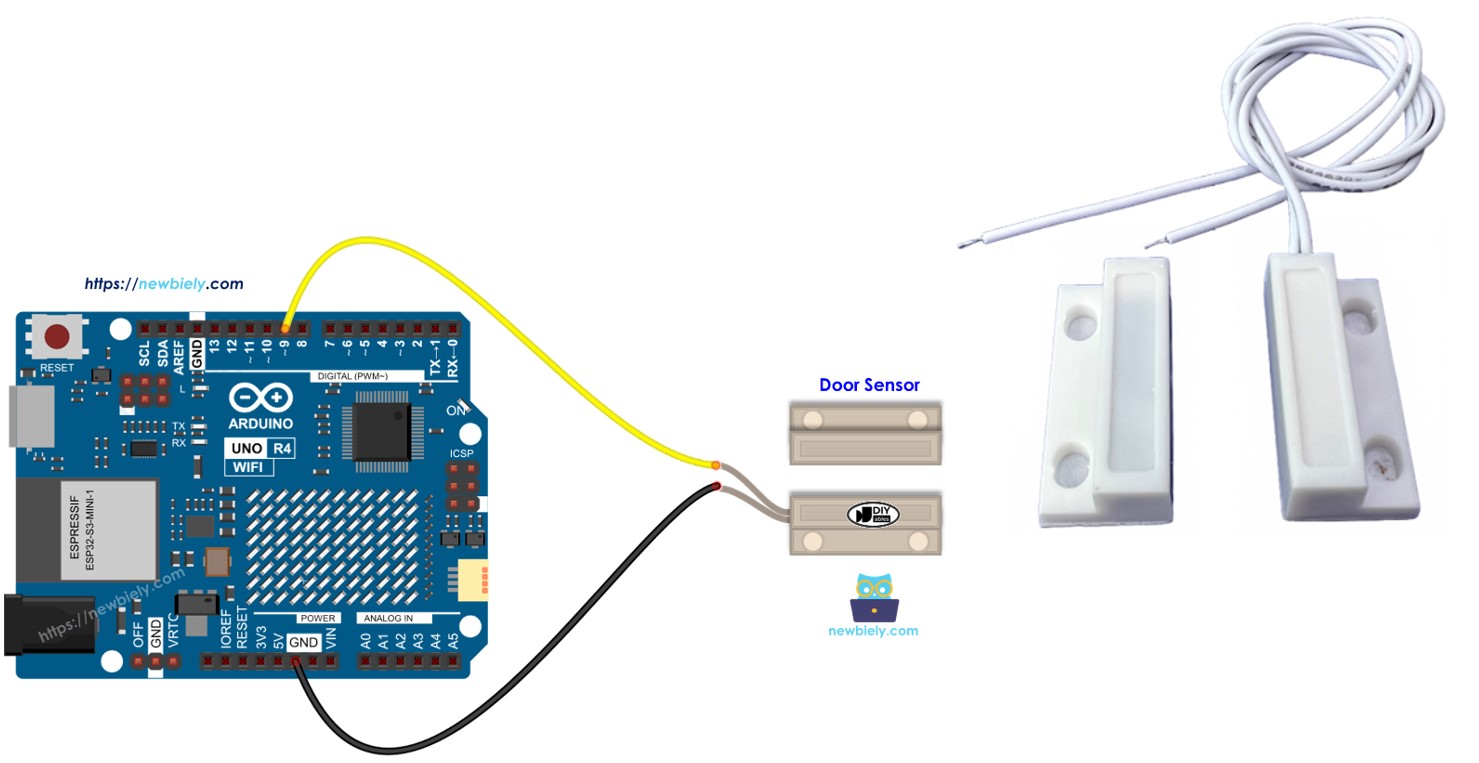
Wiring Diagram
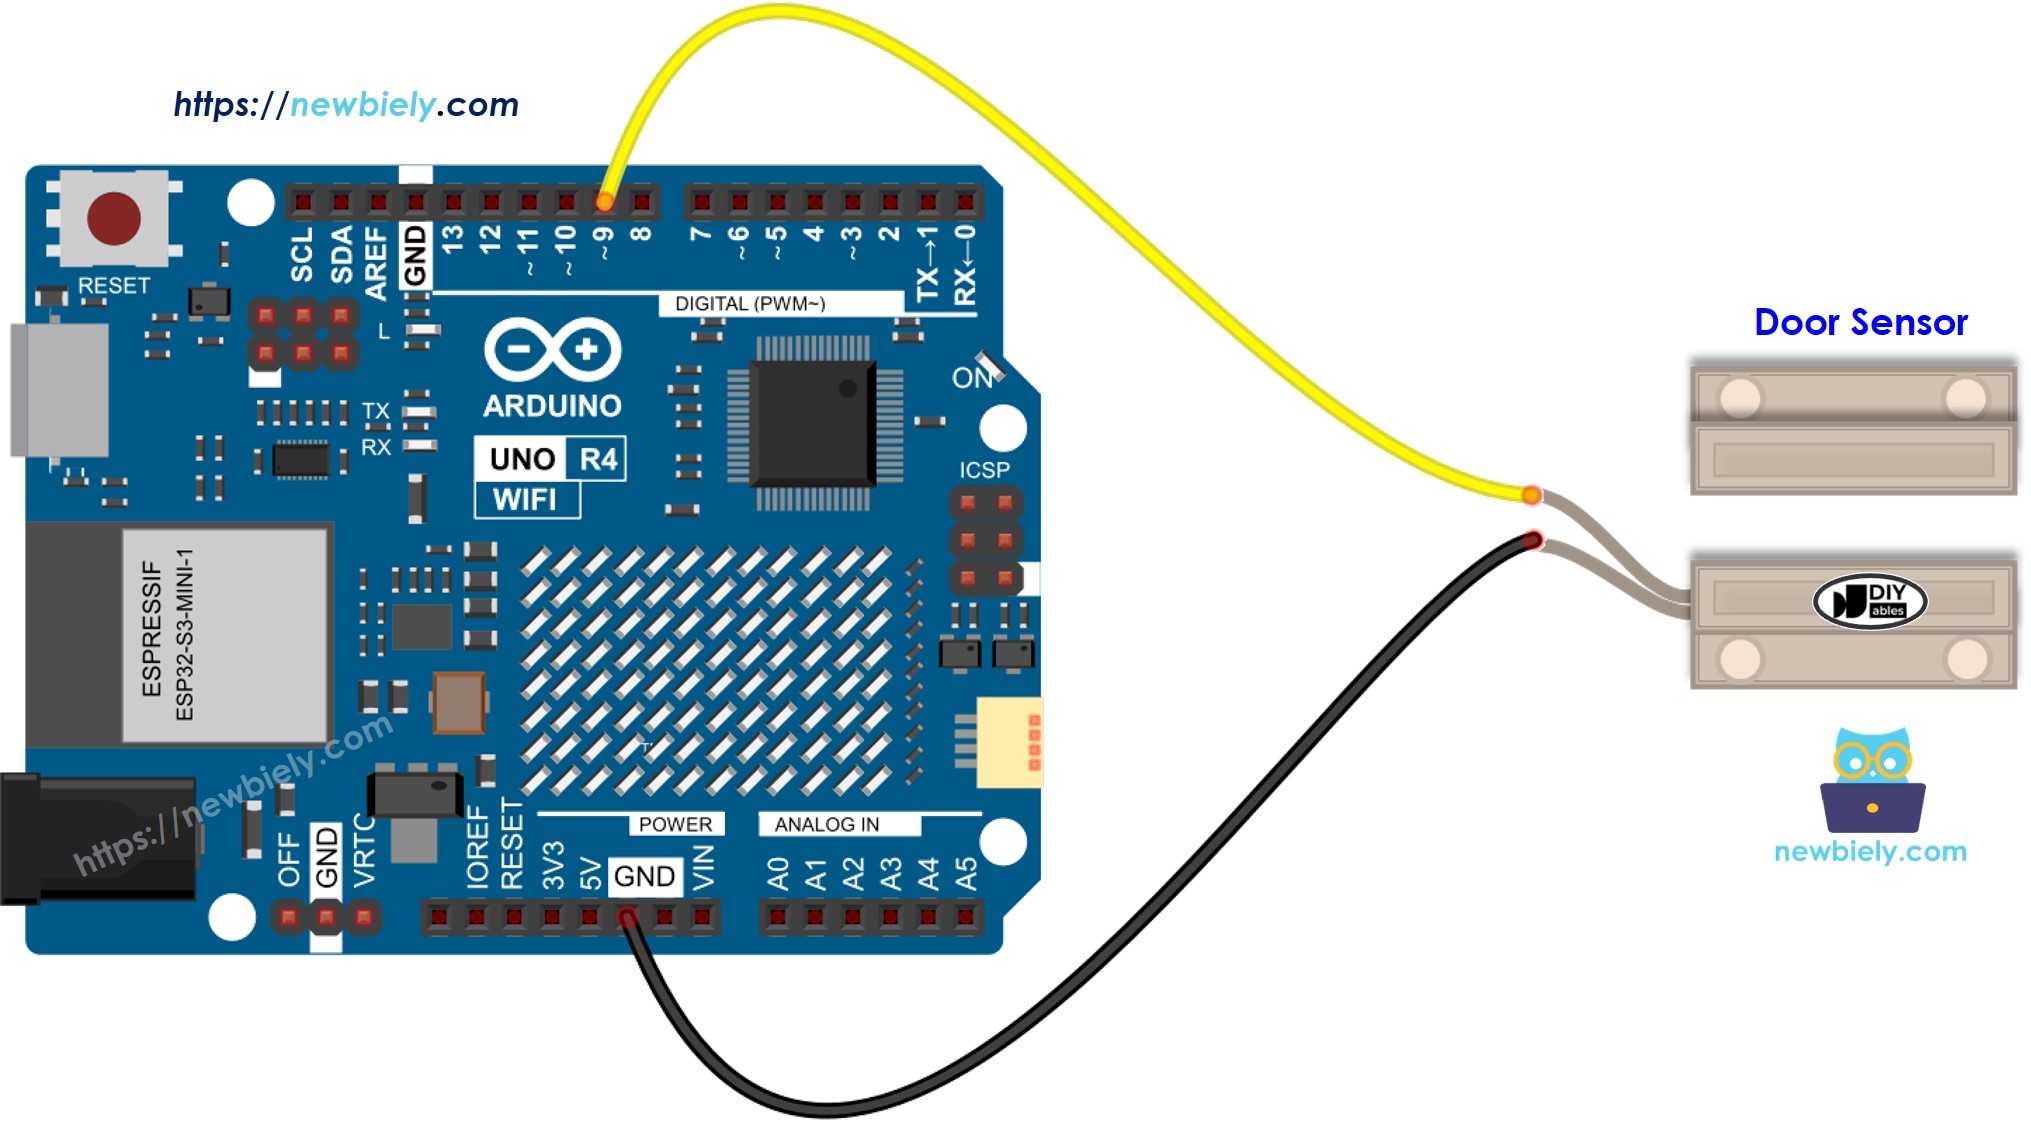
This image is created using Fritzing. Click to enlarge image
See The best way to supply power to the Arduino Uno R4 and other components.
How To Program For Door Sensor
- The Arduino UNO R4 pin gets set to digital input mode using the function called pinMode(). For instance, pin 9.
- Reads the state of the Arduino UNO R4 pin using the digitalRead() function.
Arduino UNO R4 Code - Check Door Open and Close State
Detailed Instructions
Follow these instructions step by step:
- If this is your first time using the Arduino Uno R4 WiFi/Minima, refer to the tutorial on setting up the environment for Arduino Uno R4 WiFi/Minima in the Arduino IDE.
- Wire the components according to the provided diagram.
- Connect the Arduino Uno R4 board to your computer using a USB cable.
- Launch the Arduino IDE on your computer.
- Select the appropriate Arduino Uno R4 board (e.g., Arduino Uno R4 WiFi) and COM port.
- Copy the code above and open it in Arduino IDE.
- Click the Upload button in Arduino IDE to upload the code to the Arduino UNO R4.
- Bring the magnet near the reed switch and then move it away from the reed switch.
- Check the results on the Serial Monitor.
Arduino UNO R4 Code - Detect Door-opening and Door-closing Events
- Copy the code and open it in the Arduino IDE.
- Click the Upload button in the Arduino IDE to transfer the code to your Arduino UNO R4.
- Bring a magnet near the reed switch, then move it away from the reed switch.
- Check the results on the Serial Monitor.