Arduino UNO R4 - Servo Motor
This tutorial instructs you how to control a servo motor using an Arduino UNO R4. Specifically, we will learn:
- Programming Arduino UNO R4 to control a servo motor
- Programming Arduino UNO R4 for controlling the speed of servo motor
- Using external power for the servo motors
Hardware Preparation
Or you can buy the following kits:
| 1 | × | DIYables STEM V4 IoT Starter Kit (Arduino included) | |
| 1 | × | DIYables Sensor Kit (18 sensors/displays) |
Additionally, some of these links are for products from our own brand, DIYables .
Buy Note: For controlling multiple servo motors, use the PCA9685 16 Channel PWM Servo Driver Module to save MCU pins and simplify wiring.

Overview of Servo Motor
A servo motor is a component that can turn its handle, usually from 0 degrees to 180 degrees. It is used to control the angle of an object.
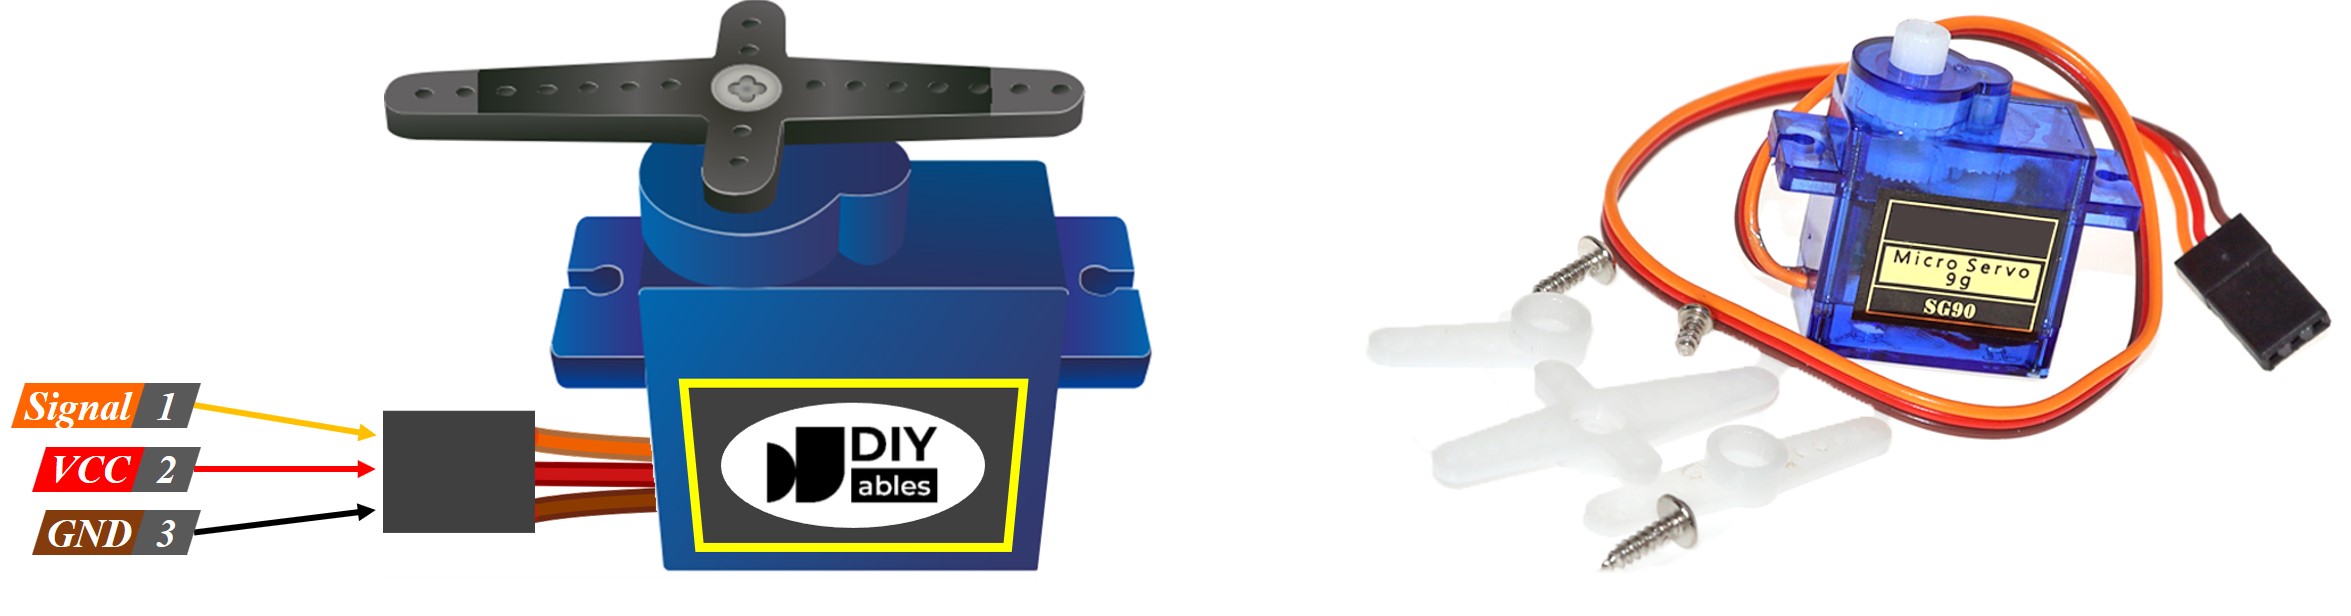
Pinout
This example uses a servo motor with three pins:
- VCC pin: Connect the red wire to VCC (5 volts).
- GND pin: Connect the black or brown wire to GND (0 volts).
- Signal pin: Connect the yellow or orange wire to receive the PWM control signal from an Arduino UNO R4 pin.
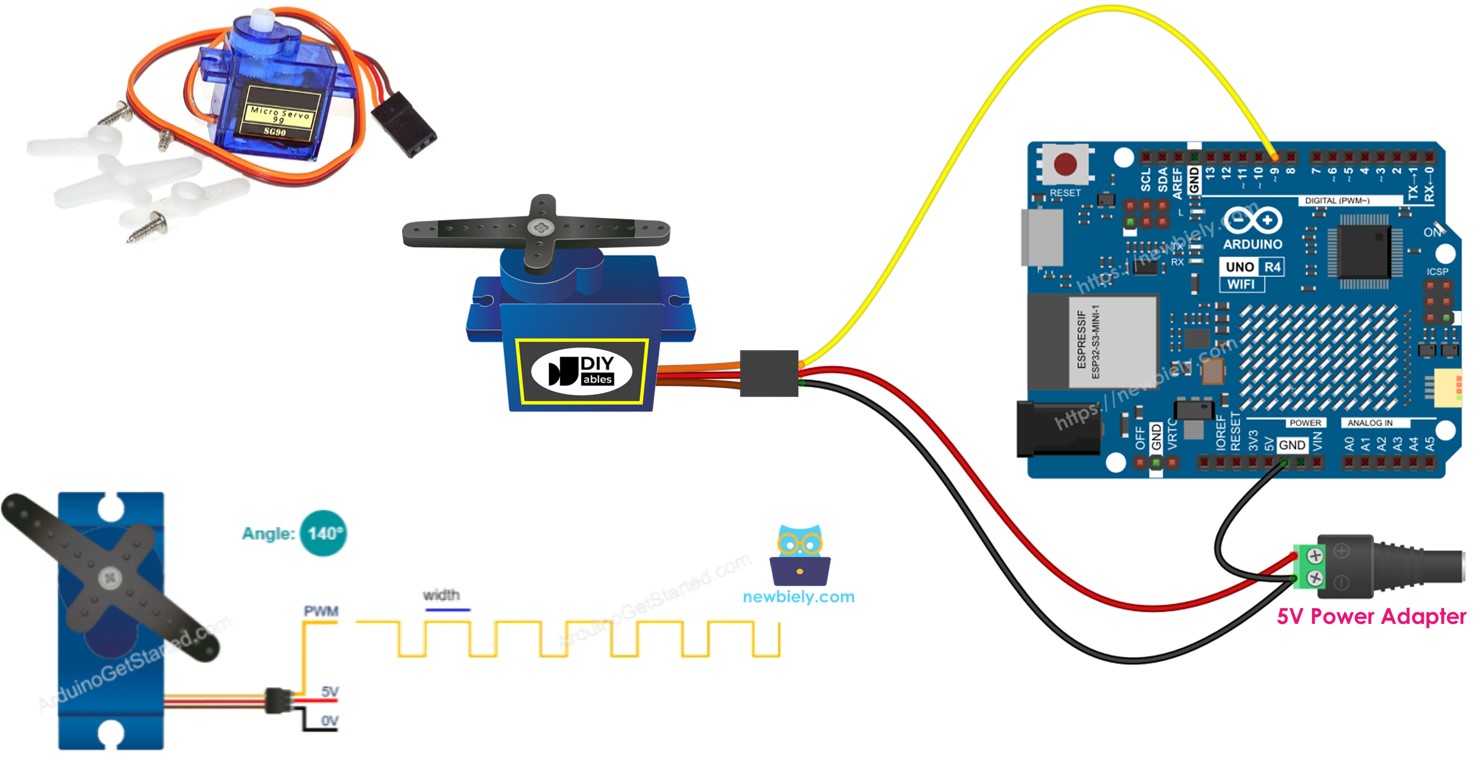
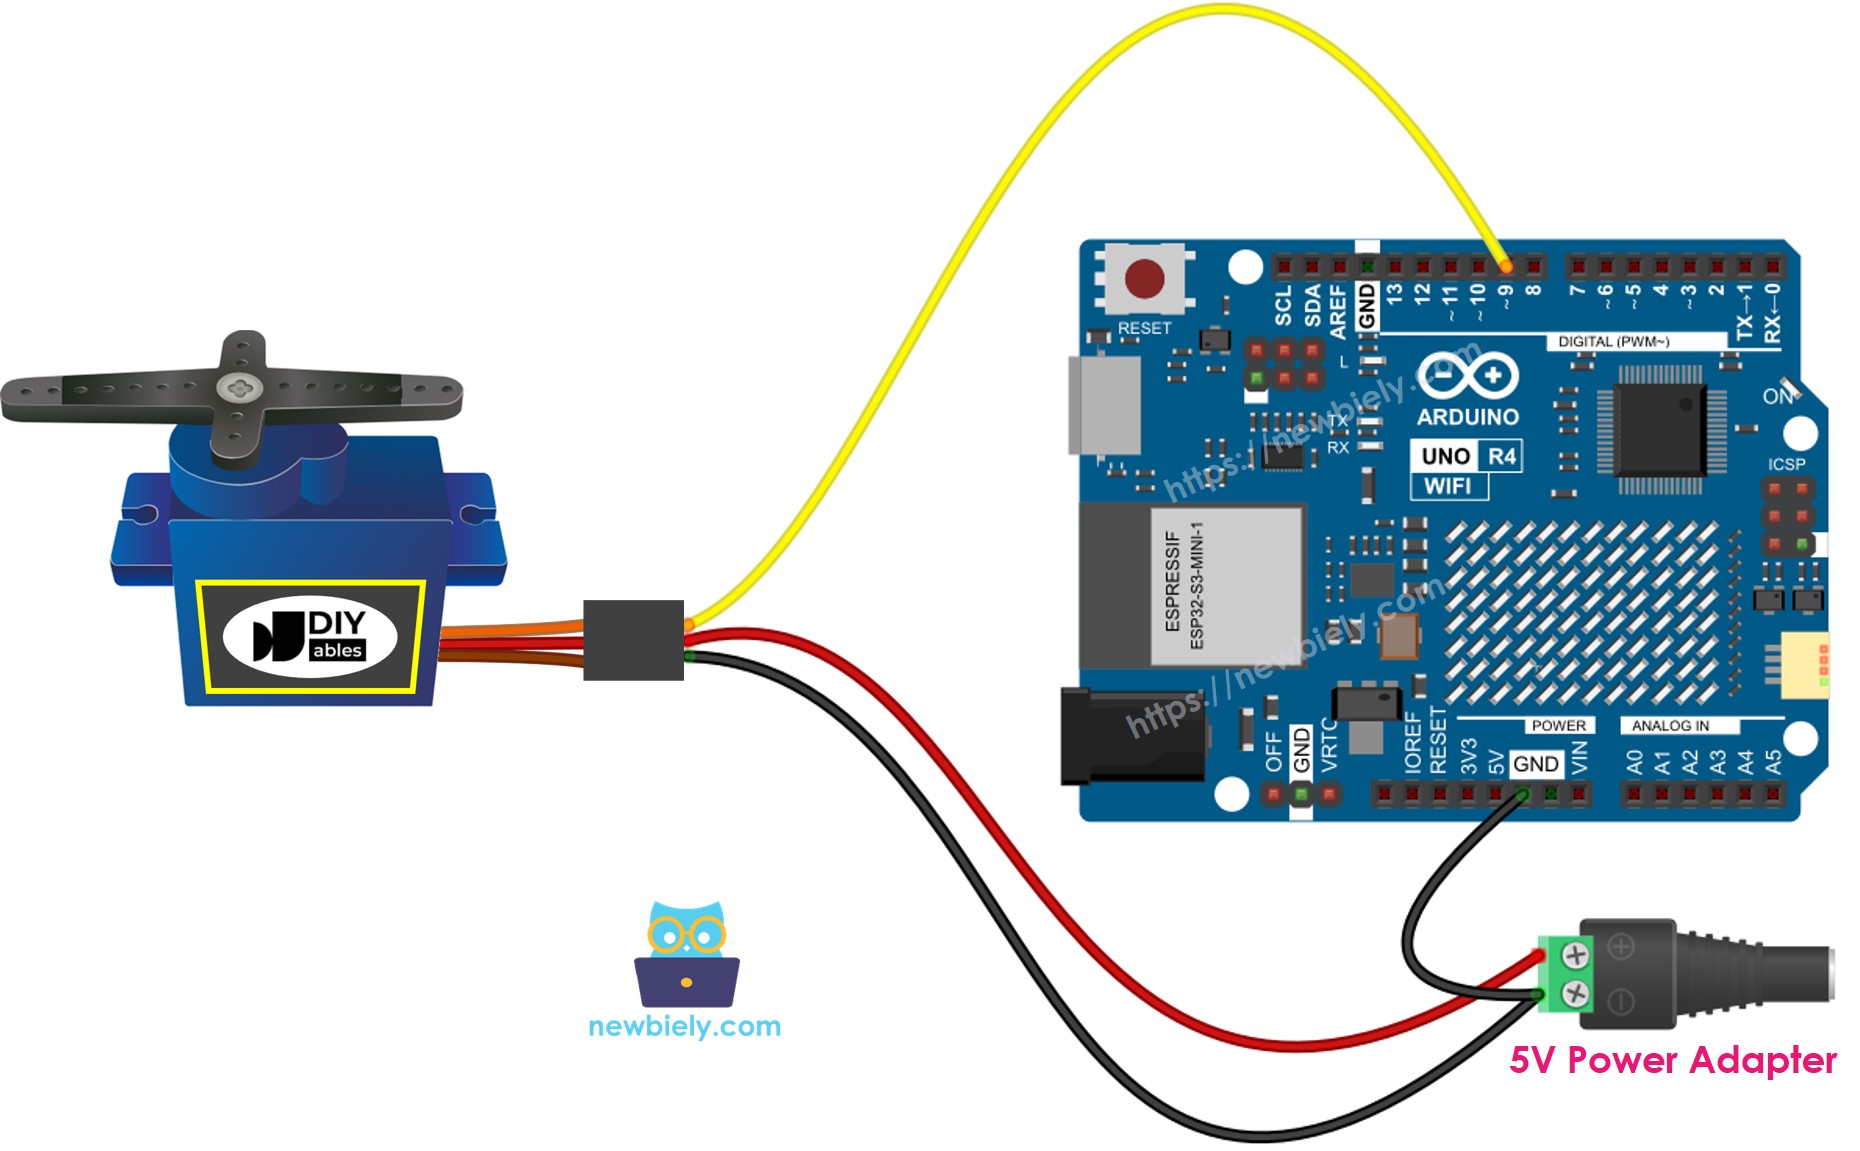
Wiring Diagram
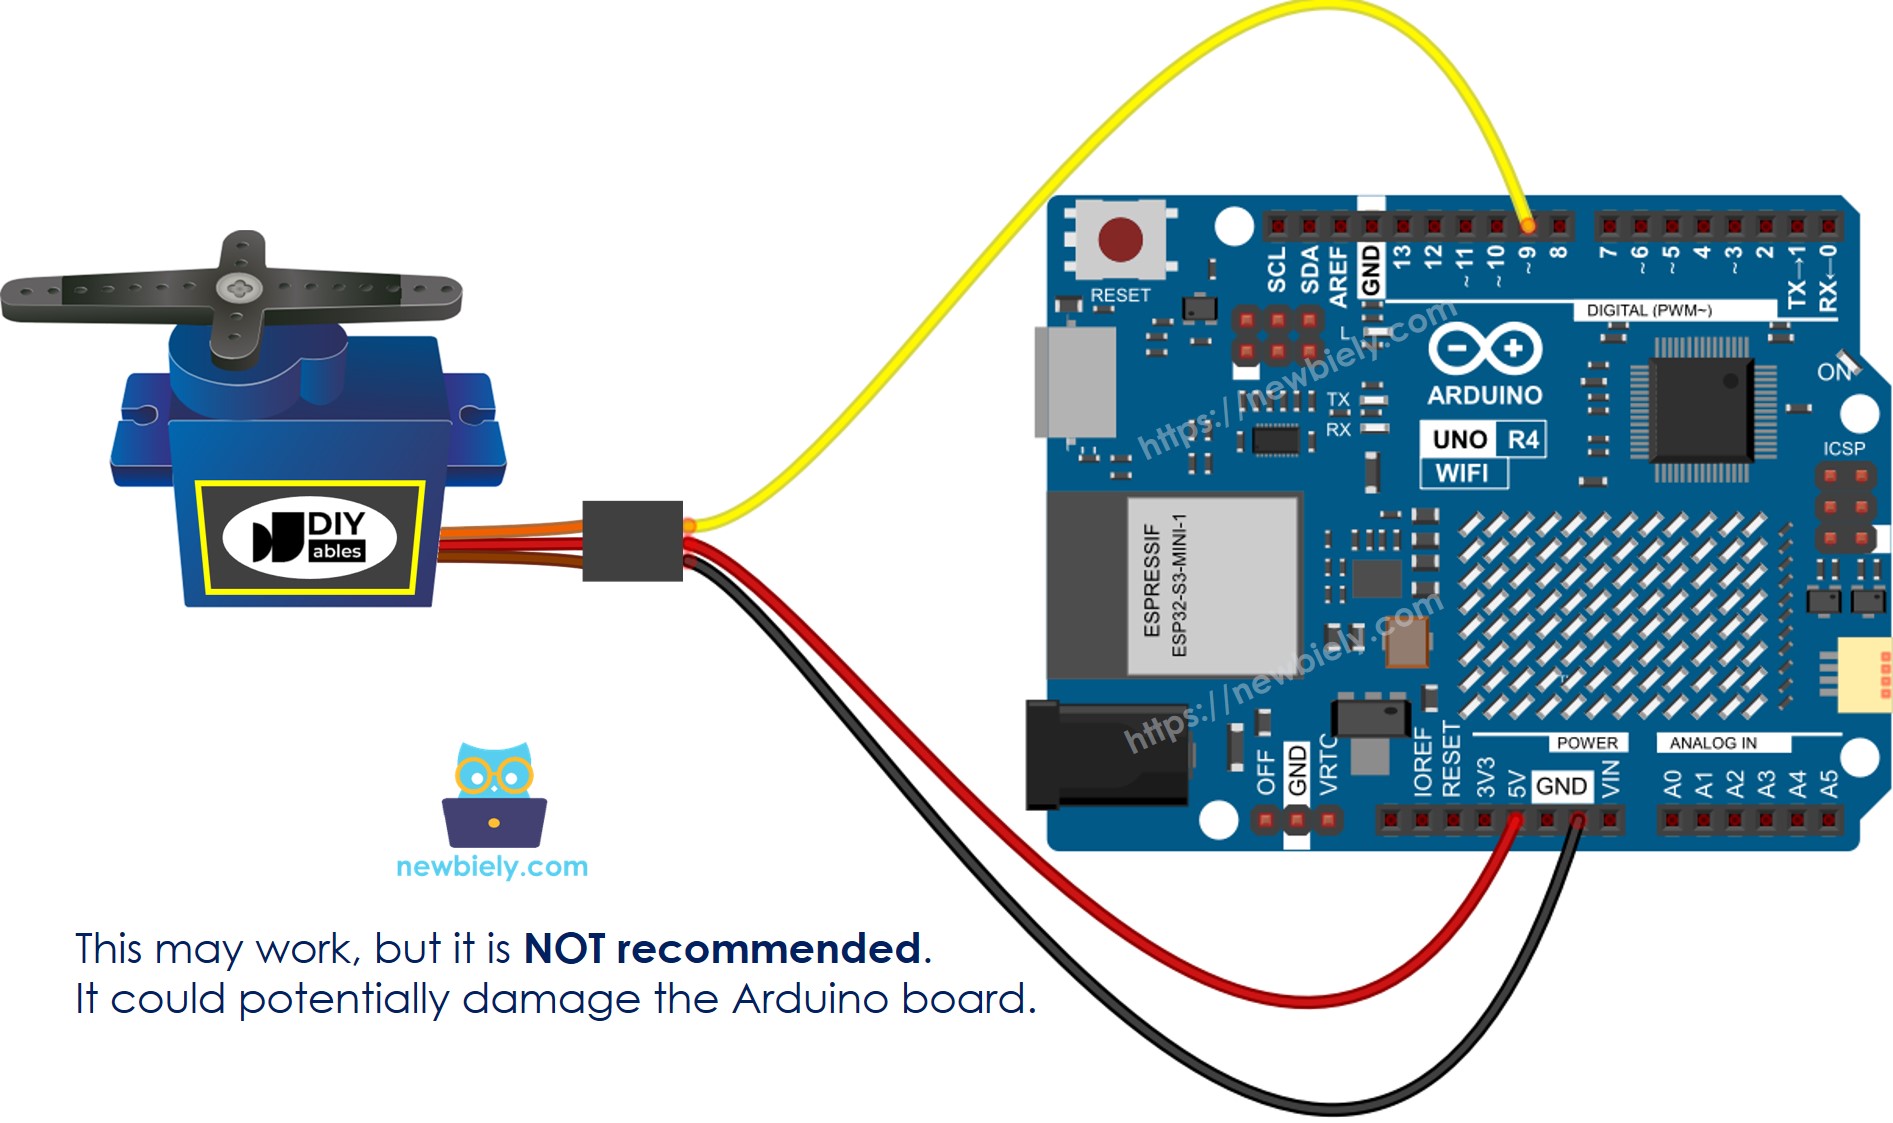
Sometimes, you may see online wiring diagrams showing a connection between the VCC pin of a servo motor and the 5V pin on the Arduino UNO R4 board. It is best to avoid this method because it could harm the Arduino UNO R4 board.
This image is created using Fritzing. Click to enlarge image
To protect your Arduino UNO R4 board, it is best to use an external power supply for the servo motor. The wiring diagram below shows how to connect the servo motor to an external power source.
This image is created using Fritzing. Click to enlarge image
See The best way to supply power to the Arduino Uno R4 and other components.
Make sure to connect the GND (ground) of the external power supply to the GND of the Arduino UNO R4 board. This step is very important for it to work correctly.
How To Program For Servo Motor
- Include the library:
- Create a Servo object:
If you manage multiple servo motors, simply declare additional Servo objects.
- Connect the control pin of the Arduino UNO R4 to the signal pin of the servo motor, such as pin 9.
- Finally, turn the servo motor to the angle you need, like 90 degrees.
Arduino UNO R4 Code
Detailed Instructions
Follow these instructions step by step:
- If this is your first time using the Arduino Uno R4 WiFi/Minima, refer to the tutorial on setting up the environment for Arduino Uno R4 WiFi/Minima in the Arduino IDE.
- Wire the components according to the provided diagram.
- Connect the Arduino Uno R4 board to your computer using a USB cable.
- Launch the Arduino IDE on your computer.
- Select the appropriate Arduino Uno R4 board (e.g., Arduino Uno R4 WiFi) and COM port.
- Paste the above code into Arduino IDE.
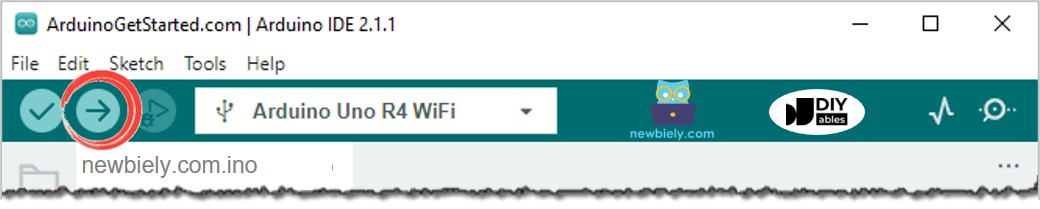
- Press the Upload button in Arduino IDE to send code to Arduino UNO R4.
- Watch what happens: The servo motor turns slowly from 0 to 180 degrees and then slowly turns back from 180 to 0 degrees.
Code Explanation
You can see the explanation in the comments section of the Arduino code above.
How to Control Speed of Servo Motor
Using the map() and millis() functions allows us to smoothly adjust the speed of a servo motor while letting other code run without interruptions.