Arduino UNO R4 - Ultrasonic Sensor - LCD
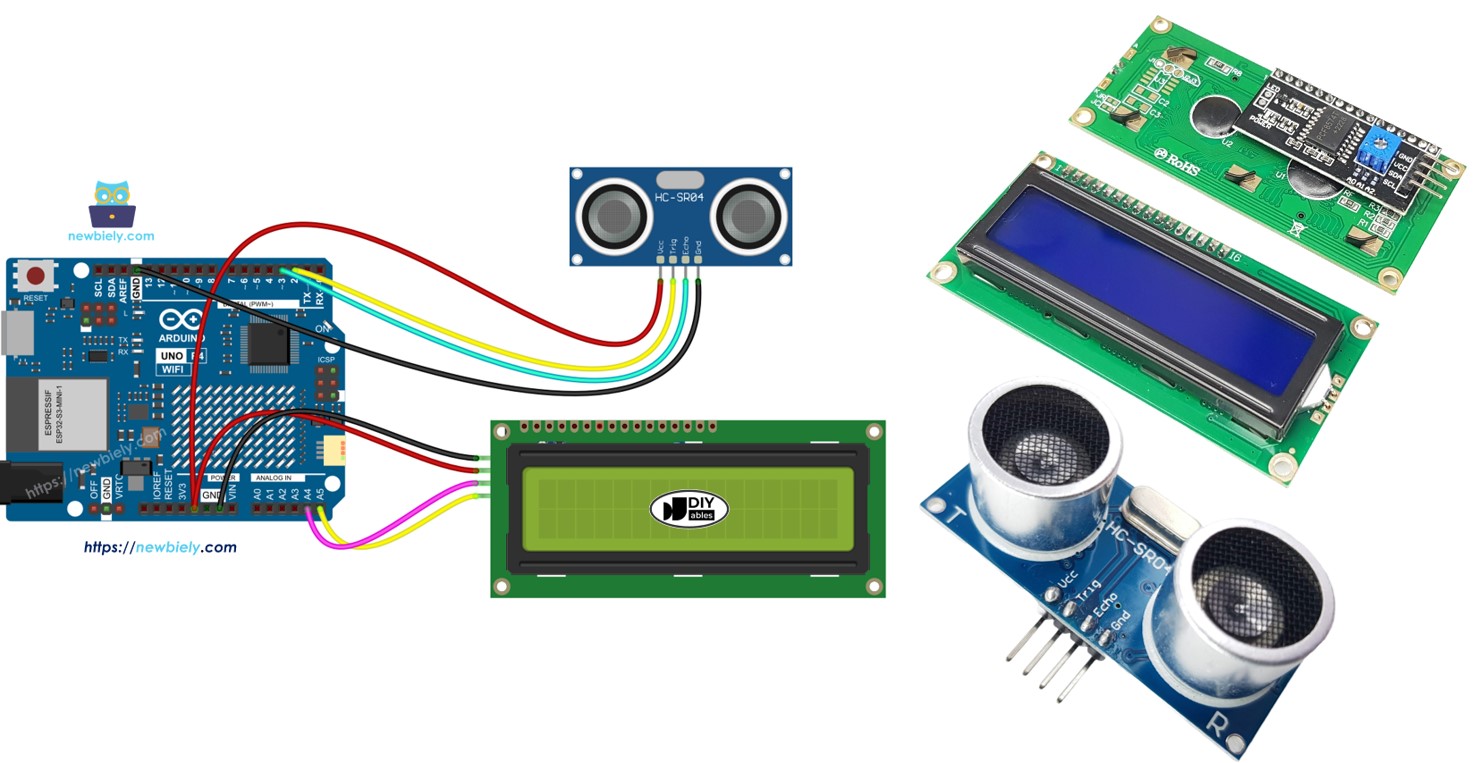
This tutorial instructs you how to use Arduino UNO R4 to measure distance by using the ultrasonic sensor and display the distance on LCD I2C.

Hardware Preparation
Or you can buy the following kits:
| 1 | × | DIYables STEM V4 IoT Starter Kit (Arduino included) | |
| 1 | × | DIYables Sensor Kit (30 sensors/displays) | |
| 1 | × | DIYables Sensor Kit (18 sensors/displays) |
Additionally, some of these links are for products from our own brand, DIYables .
Overview of Ultrasonic Sensor and LCD
Learn about the Ultrasonic sensor and LCD, including their pinout, functioning, and programming, in these tutorials:
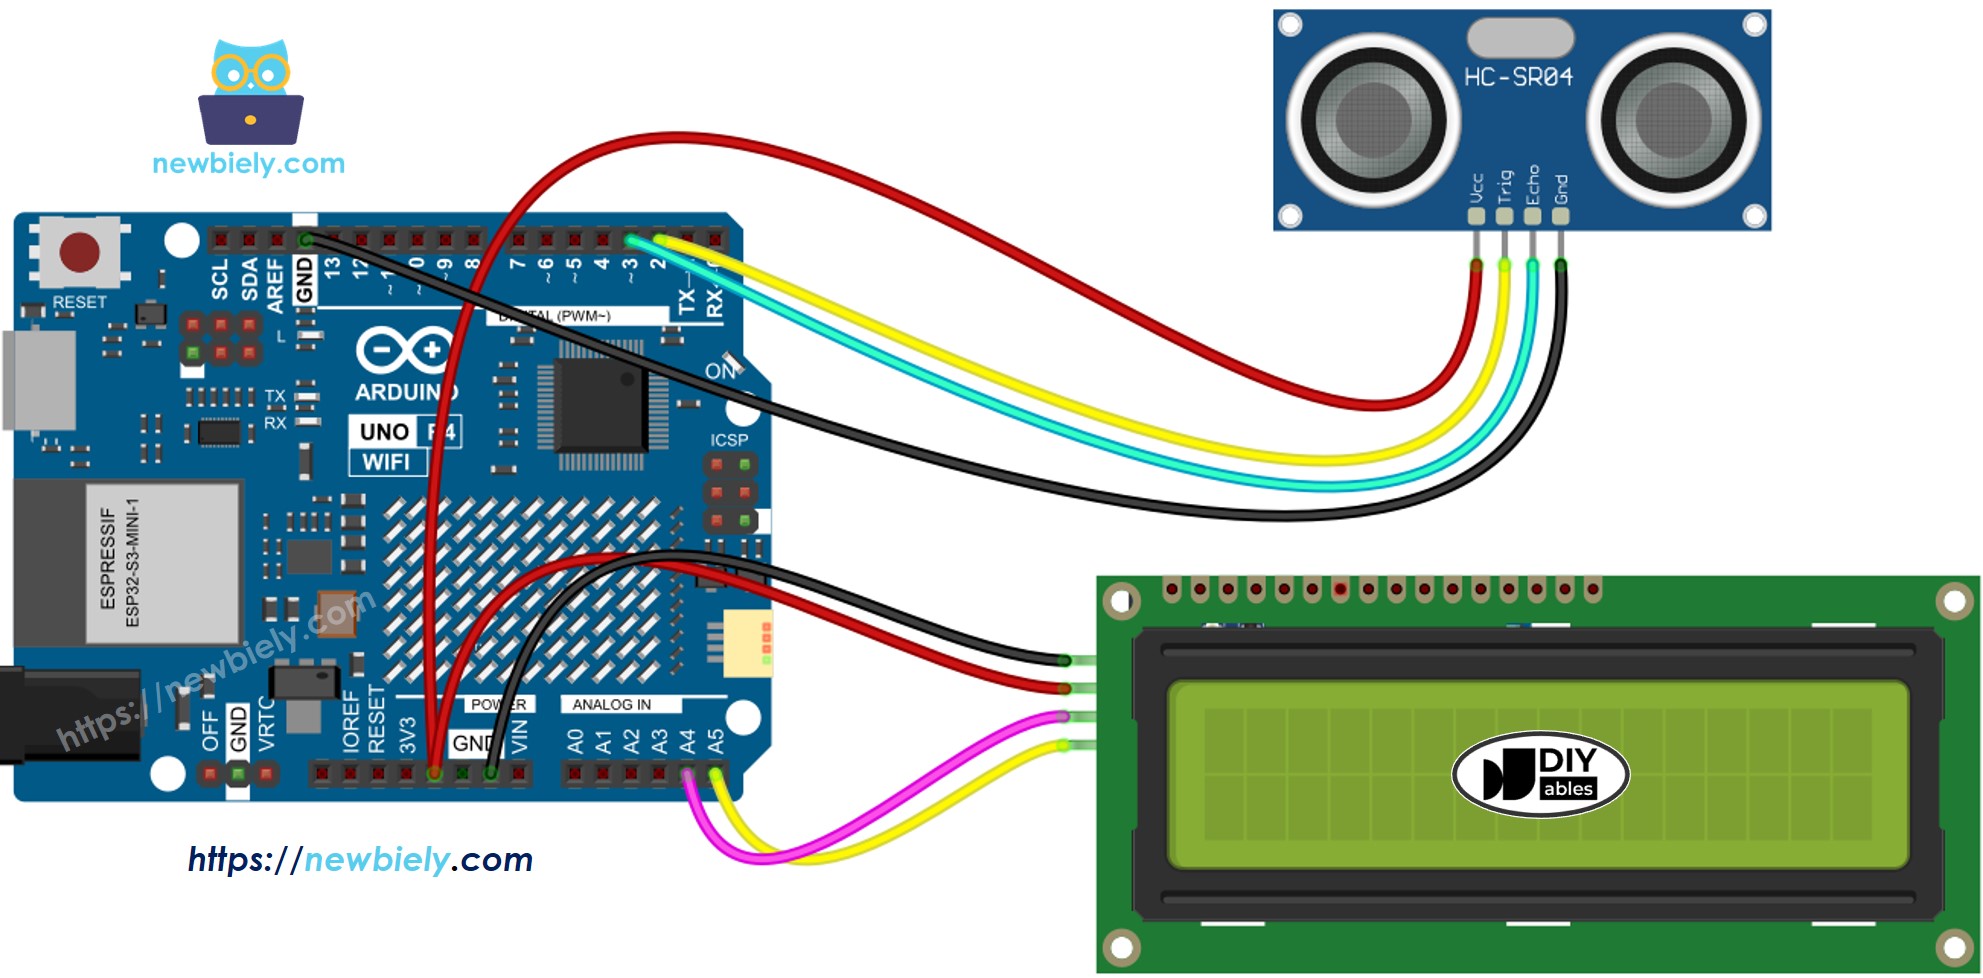
Wiring Diagram

This image is created using Fritzing. Click to enlarge image
See The best way to supply power to the Arduino Uno R4 and other components.
Arduino UNO R4 Code
※ NOTE THAT:
The I2C address for the LCD might differ from one manufacturer to another. In our example, we used the address 0x27, as recommended by the manufacturer DIYables.
Detailed Instructions
Follow these instructions step by step:
- If this is your first time using the Arduino Uno R4 WiFi/Minima, refer to the tutorial on setting up the environment for Arduino Uno R4 WiFi/Minima in the Arduino IDE.
- Connect the Arduino Uno R4 to the ultrasonic sensor and LCD I2C according to the provided diagram.
- Connect the Arduino Uno R4 to your computer using a USB cable.
- Launch the Arduino IDE on your computer.
- Select the appropriate Arduino Uno R4 board (e.g., Arduino Uno R4 WiFi) and COM port.
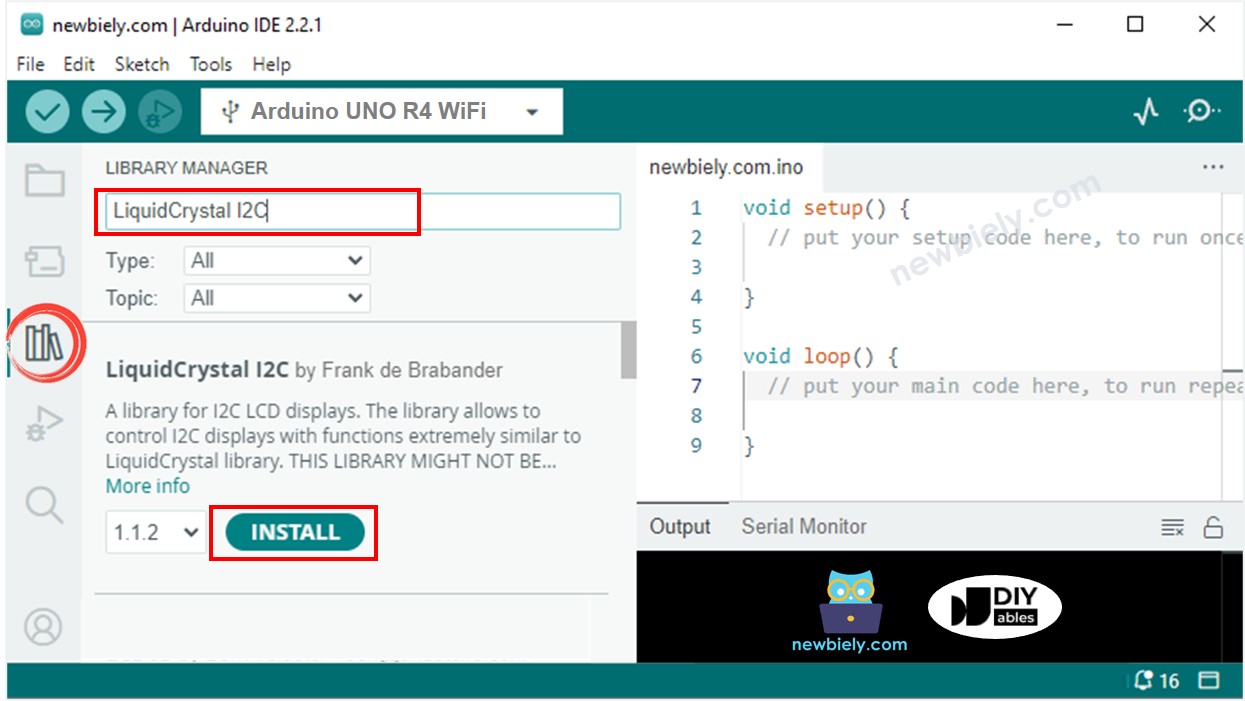
- Click on the Libraries icon on the left side of the Arduino IDE
- Search for LiquidCrystal I2C and find the LiquidCrystal_I2C library by Frank de Brabander
- Click the Install button to add the LiquidCrystal_I2C library.

- Copy the above code and open it in the Arduino IDE
- Click the Upload button in the Arduino IDE to upload the code to the Arduino UNO R4

- Place the sensor in hot or cold water, or hold it in your hand.
- Check the LCD for the result.
Code Explanation
Check the explanation in the comments within the code for each line.
※ NOTE THAT:
- If nothing shows on the LCD, check here: Troubleshooting LCD I2C
- The code provided is for educational use. The ultrasonic sensor can pick up a lot of unwanted signals. If you want to use this sensor effectively, you need to reduce this extra noise. Learn more here: Reducing Noise for Ultrasonic Sensor
