Arduino UNO R4 - Limit Switch
This tutorial instructs you how to use the limit switch with Arduino UNO R4. In detail, we will learn:
- How to connect the limit switch to the Arduino UNO R4.
- How to program the Arduino UNO R4 to read state of the limit switch.
- How to program the Arduino UNO R4 to detect events occurring from the limit switch.
Hardware Preparation
Or you can buy the following kits:
| 1 | × | DIYables STEM V4 IoT Starter Kit (Arduino included) | |
| 1 | × | DIYables Sensor Kit (18 sensors/displays) |
Additionally, some of these links are for products from our own brand, DIYables .

Overview of Limit Switch
It is named Limit Switch because it mainly functions to detect when a moving object reaches a limit. It is also called travel switch.
Pinout
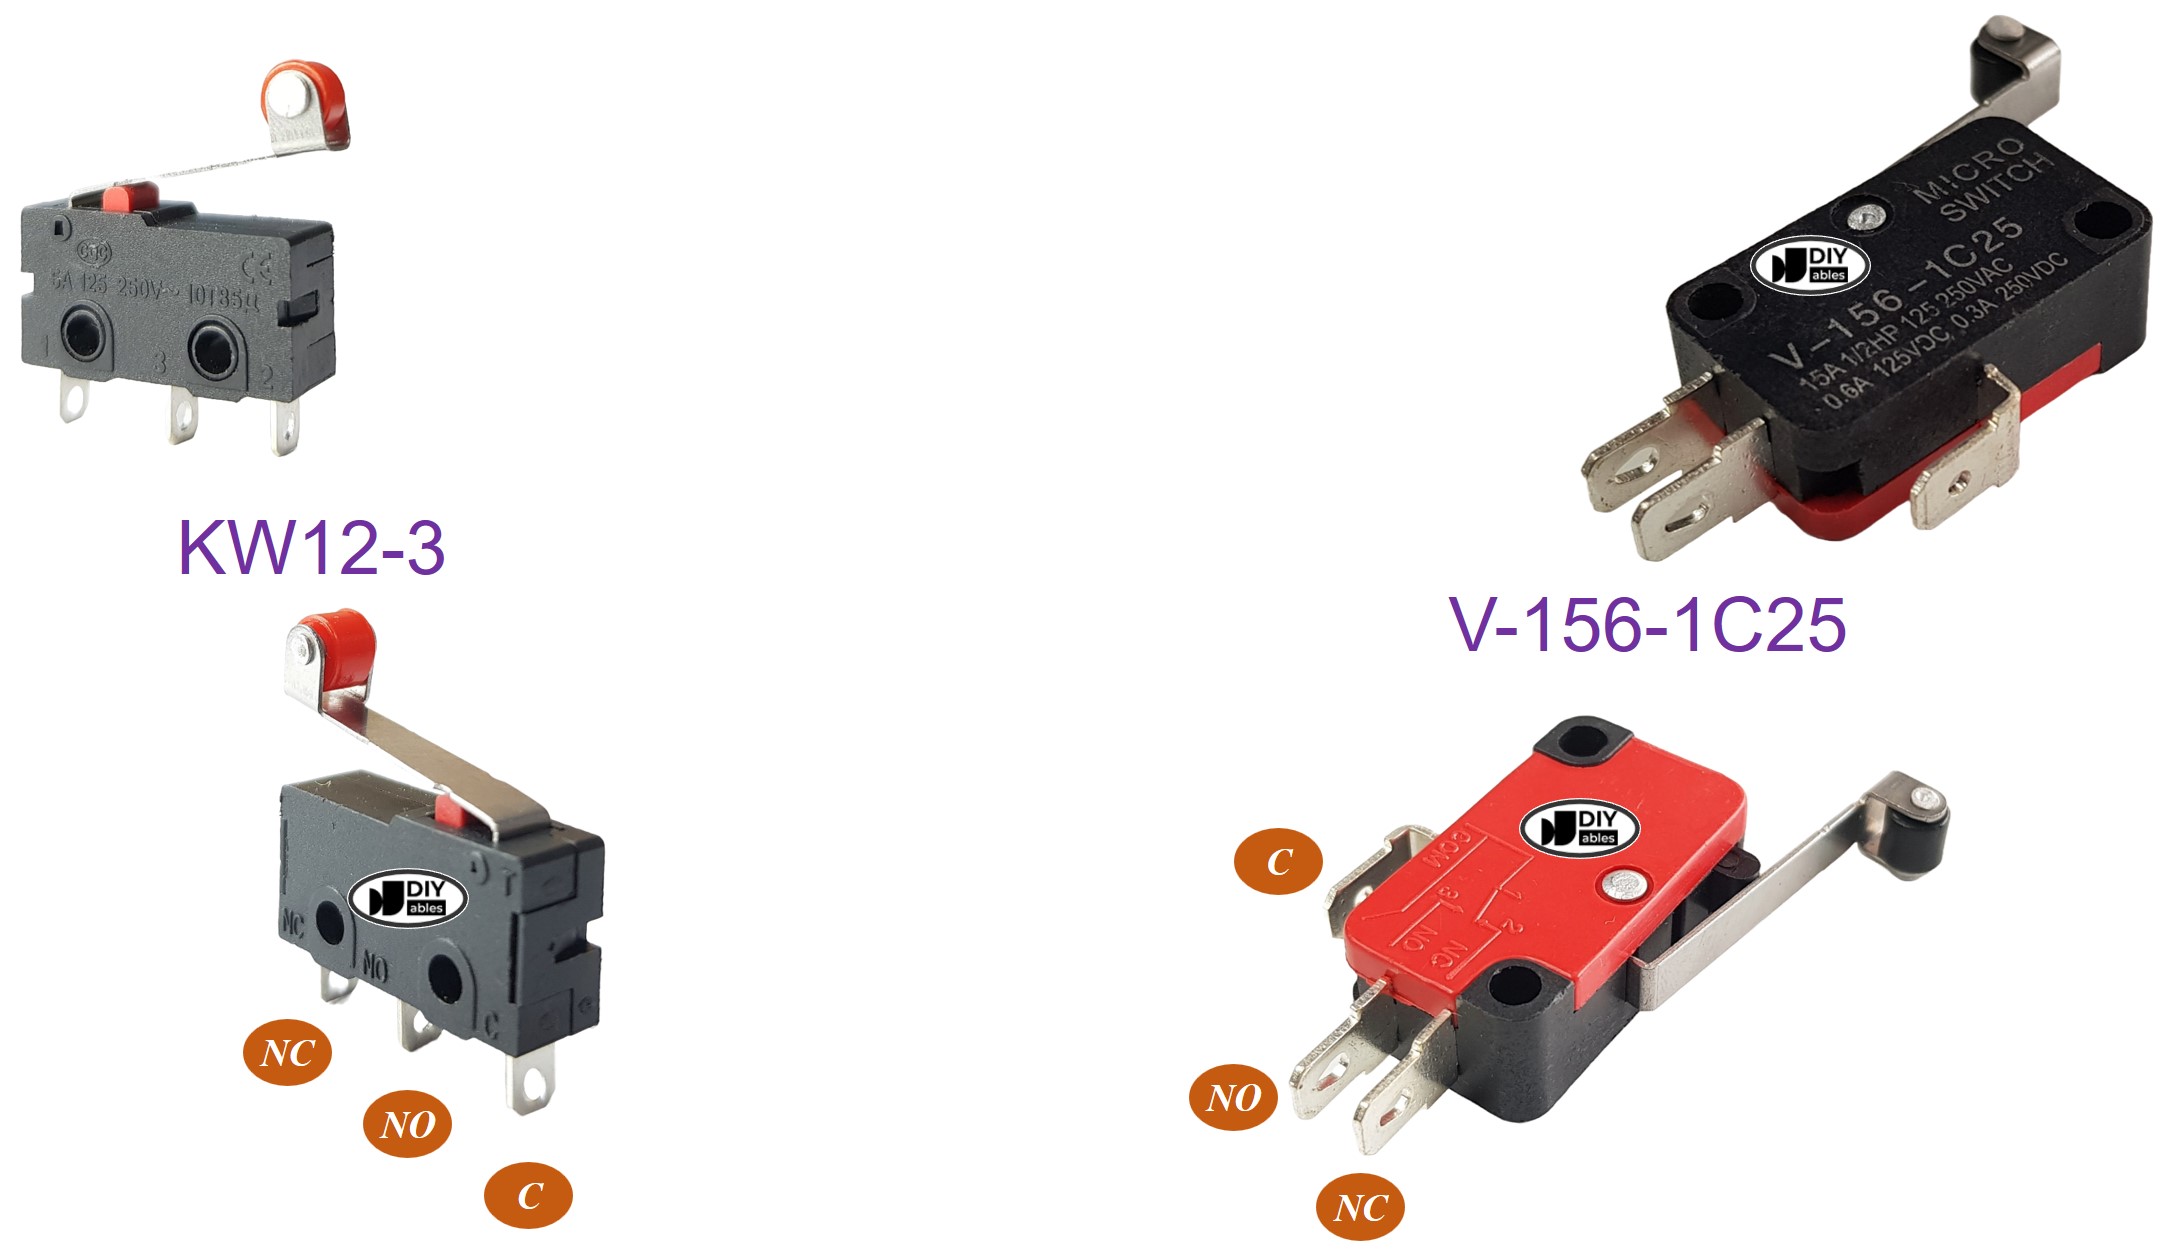
Several kinds of limit switches are used frequently, including the KW12-3 and V-156-1C25. Both models have 3 pins.
- C pin: This is the common pin. It is used in both the normally open mode and the normally closed mode.
- NO pin: This stands for Normally Open pin. It is used in the normally open mode.
- NC pin: This stands for Normally Closed pin. It is used in the normally closed mode.
How It Works
The limit switch has three pins, but typically only two pins are used: the C pin and one of the other two pins. There are four different ways to connect the limit switch. Here is a table showing how to wire the limit switch and how it reads on the Arduino UNO R4 for all four methods:
| C pin | NO pin | NC pin | Arduino UNO R4 Input Pin's State | |
|---|---|---|---|---|
| 1 | GND | Arduino UNO R4 Input Pin (with pull-up) | NOT connected | HIGH when untouched, LOW when touched |
| 2 | GND | NOT connected | Arduino UNO R4 Input Pin (with pull-up) | LOW when untouched, HIGH when touched |
| 3 | VCC | Arduino UNO R4 Input Pin (with pull-down) | NOT connected | LOW when untouched, HIGH when touched |
| 4 | VCC | NOT connected | Arduino UNO R4 Input Pin (with pull-down) | HIGH when untouched, LOW when touched |
We can swap between the GND pin and the Arduino UNO R4 input pin for each method. This gives us 8 ways to connect the Arduino UNO R4 to a limit switch.
We just need to pick one from the four methods mentioned above. We will use the first method for the rest of this tutorial.
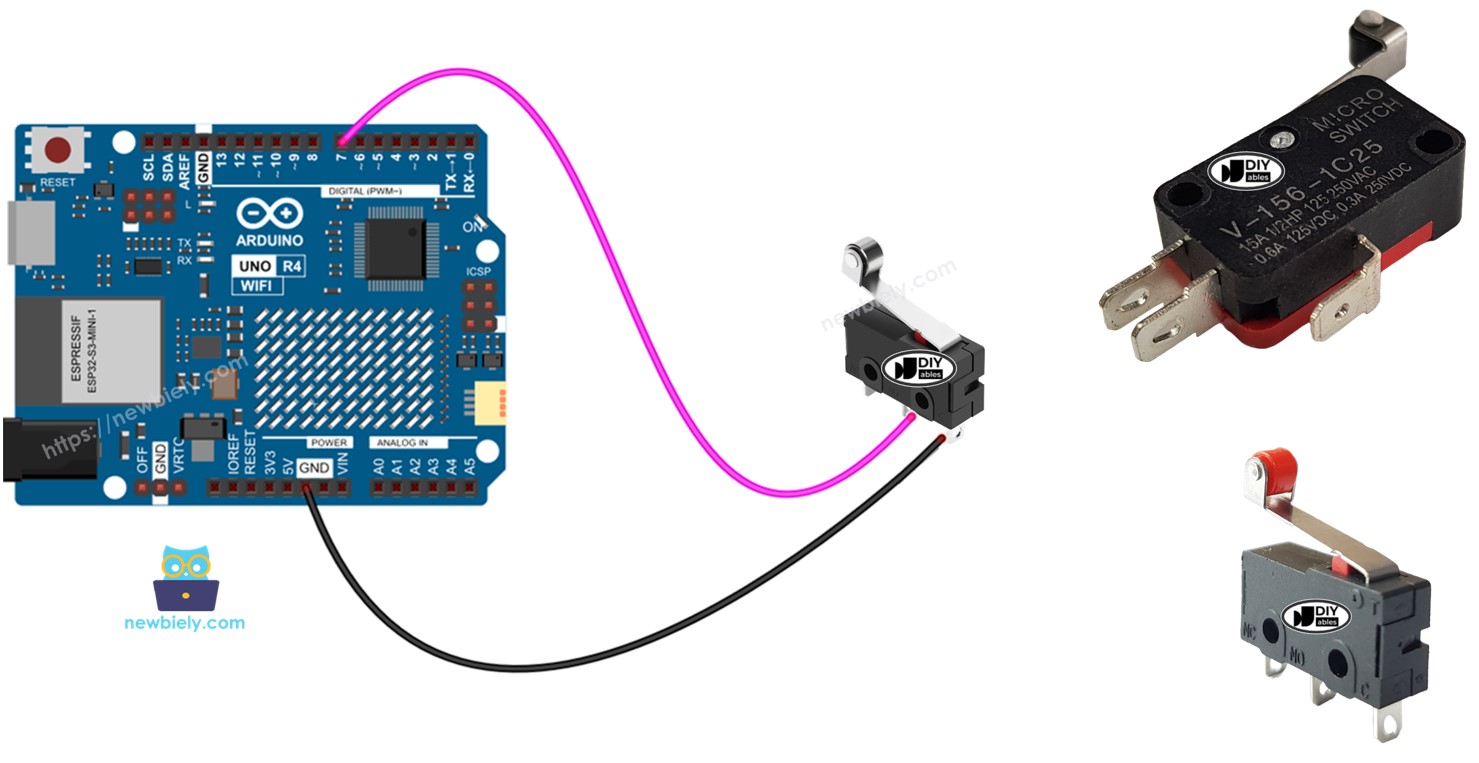
Wiring Diagram
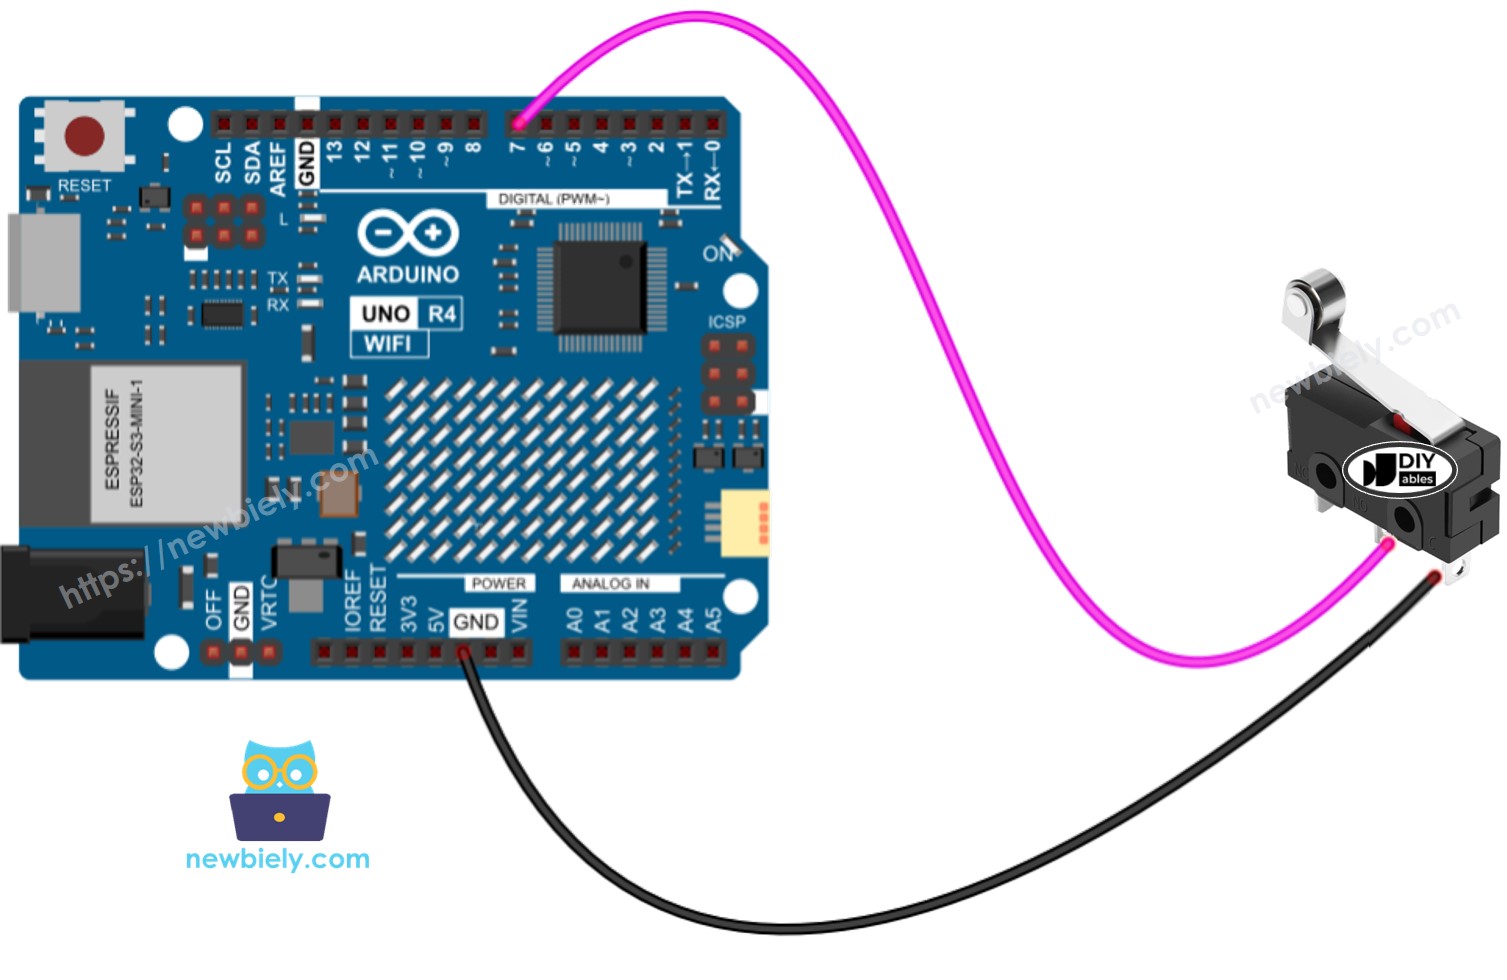
This image is created using Fritzing. Click to enlarge image
See The best way to supply power to the Arduino Uno R4 and other components.
Arduino UNO R4 Code - Limit Switch
Just like a button, a limit switch also needs debouncing (Learn more at Why debouncing is needed for the button/limit switch?). Debouncing can complicate the code. Luckily, the ezButton library includes a debouncing feature and uses an internal pull-up resistor, making programming simpler for us.
※ NOTE THAT:
Here are two common scenarios:
- The first: When the switch is in the TOUCHED state, perform an action. When it is in the UNTOUCHED state, do the opposite action.
- The second: When the switch changes state from UNTOUCHED to TOUCHED or from TOUCHED to UNTOUCHED, perform an action.
Detailed Instructions
Follow these instructions step by step:
- If this is your first time using the Arduino Uno R4 WiFi/Minima, refer to the tutorial on setting up the environment for Arduino Uno R4 WiFi/Minima in the Arduino IDE.
- Connect the limit switch to the Arduino Uno R4 according to the provided diagram.
- Connect the Arduino Uno R4 board to your computer using a USB cable.
- Launch the Arduino IDE on your computer.
- Select the appropriate Arduino Uno R4 board (e.g., Arduino Uno R4 WiFi) and COM port.
- Install the ezButton library using this guide: See ezButton Library Guide.
- Press the Upload button in the Arduino IDE to transfer the code to the Arduino UNO R4.
- Press and release the limit switch.
- Check the results on the Serial Monitor.