Arduino UNO R4 - Switch
In this tutorial, we will learn how to use the ON/OFF switch with an Arduino UNO R4. In detail, we will learn:
- How to connect the ON/OFF switch to the Arduino UNO R4.
- How to program the Arduino UNO R4 to read state of the ON/OFF switch.
- How to program the Arduino UNO R4 to detect events occurring from the ON/OFF switch.
Hardware Preparation
Or you can buy the following kits:
| 1 | × | DIYables STEM V4 IoT Starter Kit (Arduino included) | |
| 1 | × | DIYables Sensor Kit (18 sensors/displays) |
Additionally, some of these links are for products from our own brand, DIYables .

Overview of ON/OFF Switch
A switch labeled ON/OFF changes from ON to OFF, or from OFF to ON, when toggled. It stays in the new state when you let go. Press it again to change the state back.
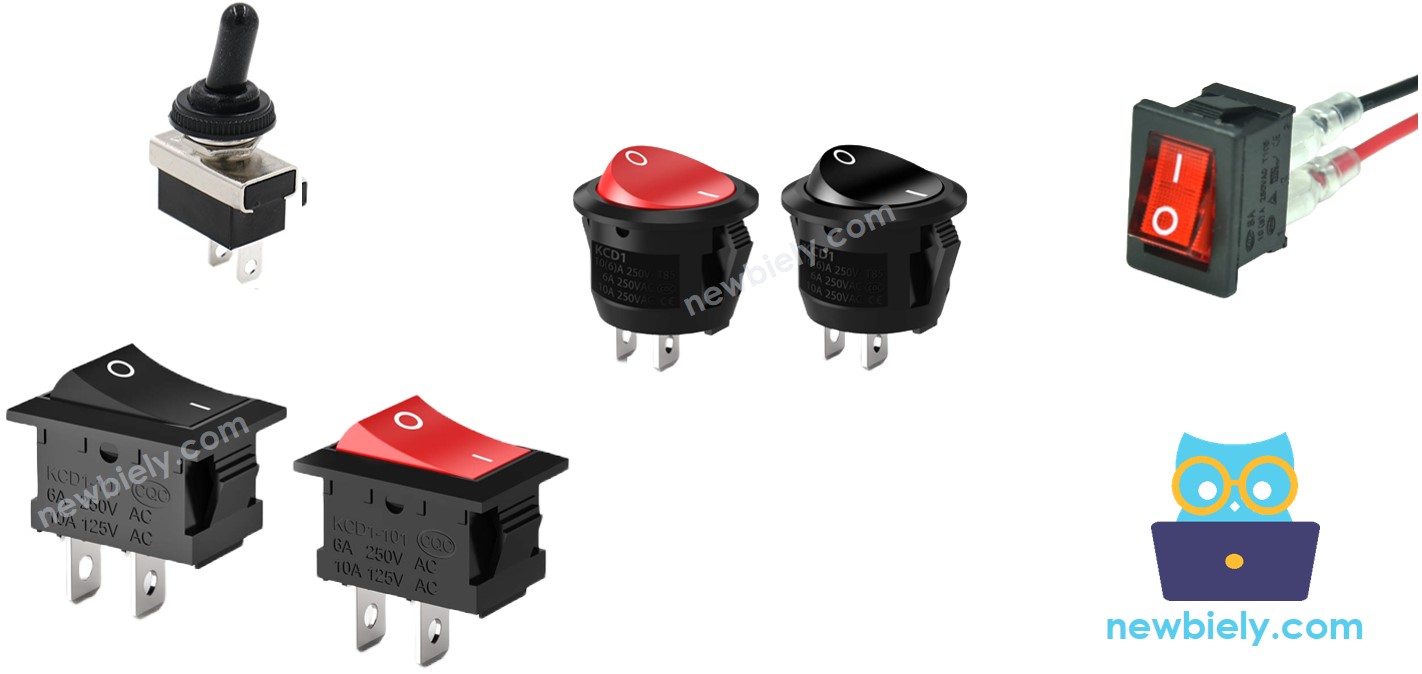
Pinout
There are two main types of ON/OFF switches: the two-pin switch and the three-pin switch.
In this guide, we will use a two-pin switch. For this switch, it is not necessary to differentiate between the two pins.
How It Works
Here are two methods to operate an ON/OFF switch. Below is the wiring guide for the ON/OFF switch and the corresponding status readings on the Arduino UNO R4 for each method:
| pin 1 | pin 2 | Arduino UNO R4 Input Pin's State | |
|---|---|---|---|
| 1 | GND | Arduino UNO R4 Input Pin (with pull-up) | HIGH ⇒ OFF, LOW ⇒ ON |
| 2 | VCC | Arduino UNO R4 Input Pin (with pull-down) | HIGH ⇒ ON, LOW ⇒ OFF |
We just need to pick one of the two methods. The rest of the guide will follow the first method.
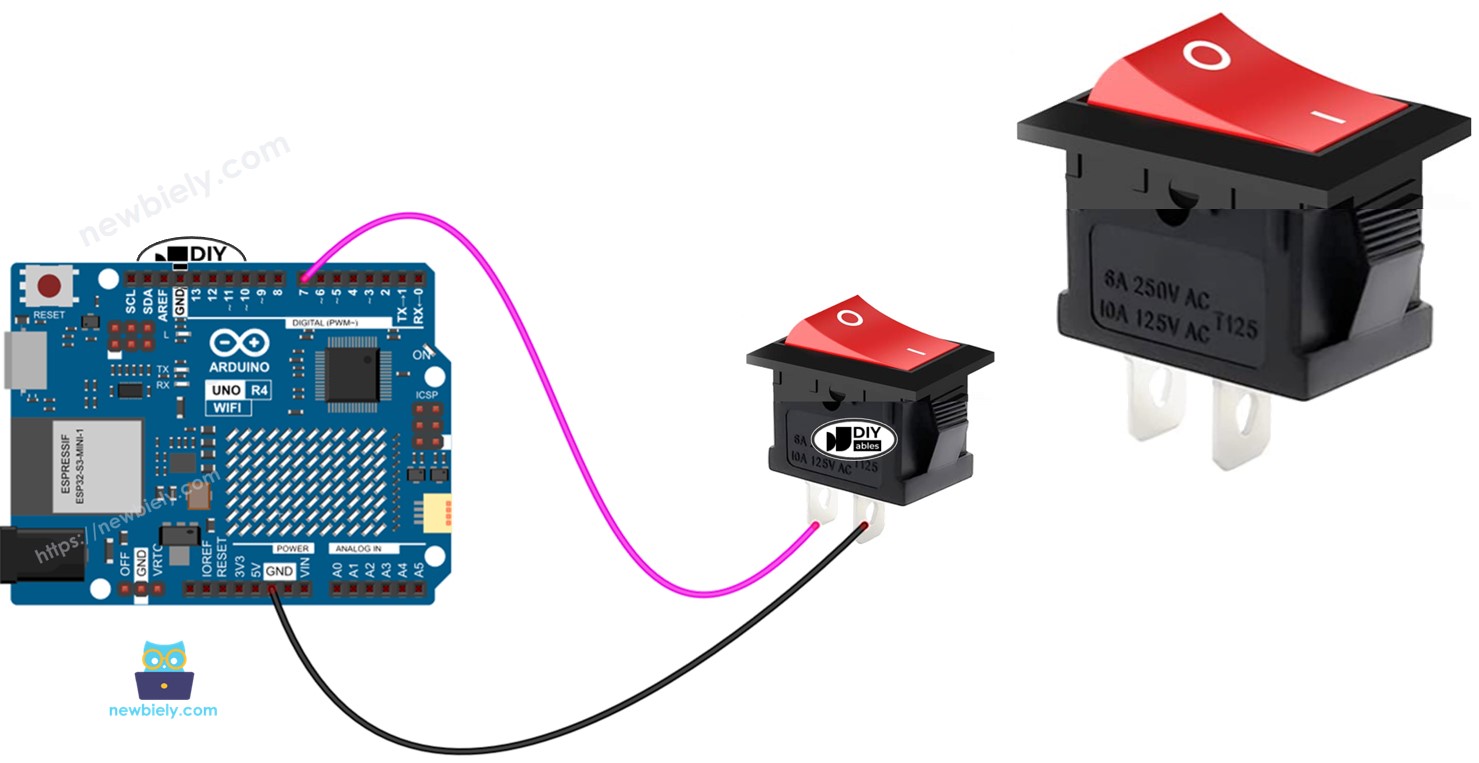
Wiring Diagram
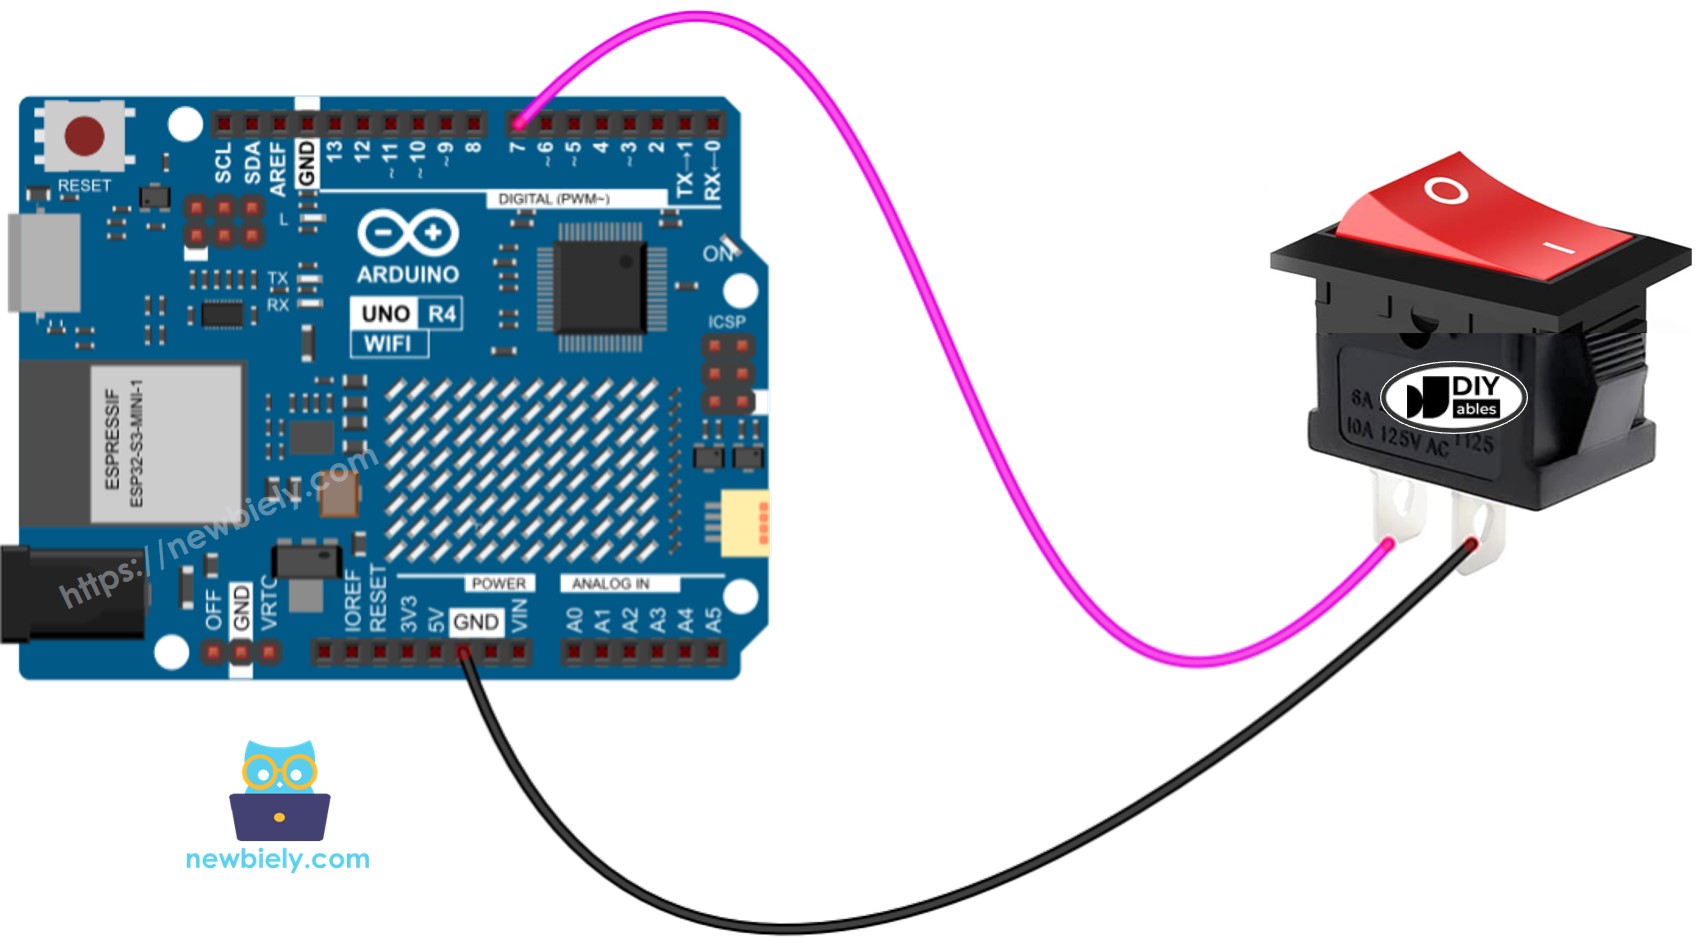
This image is created using Fritzing. Click to enlarge image
See The best way to supply power to the Arduino Uno R4 and other components.
We suggest using a Soldering Iron to solder the wires and the ON/OFF switch pin securely. Then, cover them with Heat Shrink Tube for safety.
Arduino UNO R4 Code - ON/OFF Switch
Like a button, an ON/OFF switch also needs debouncing (Learn more at Why do buttons and ON/OFF switches need debouncing?). Debouncing can complicate the code. Thankfully, the ezButton library includes a debouncing feature and uses an internal pull-up resistor, simplifying the programming process.
※ NOTE THAT:
There are two common scenarios:
- First: If the switch is ON, perform an action. If the switch is OFF, do the opposite action.
- Second: If the switch changes from ON to OFF (or OFF to ON), perform an action.
Detailed Instructions
Follow these instructions step by step:
- If this is your first time using the Arduino Uno R4 WiFi/Minima, refer to the tutorial on setting up the environment for Arduino Uno R4 WiFi/Minima in the Arduino IDE.
- Connect the ON/OFF switch to the Arduino Uno R4 according to the provided diagram.
- Connect the Arduino Uno R4 board to your computer using a USB cable.
- Launch the Arduino IDE on your computer.
- Select the appropriate Arduino Uno R4 board (e.g., Arduino Uno R4 WiFi) and COM port.
- Install the ezButton library. Follow the guide here.
- Choose the correct board and port in the IDE.
- Press the Upload button in the Arduino IDE to transfer the code to your Arduino UNO R4.
- Turn the switch to the ON position.
- Check the Serial Monitor for the output.
- Then turn the switch to the OFF position.
- Check the Serial Monitor again for the output.