Arduino UNO R4 - MP3 Player
This tutorial instructs you how to create an MP3 player using an Arduino UNO R4, an MP3 player module, a Micro SD Card, and a speaker. The MP3 player loads music or audio recordings from the Micro SD Card. The Arduino UNO R4 controls the MP3 player module to pick and play a song from the card, turn it into an audio signal, and send this signal to the speaker. We will cover these steps in detail.
- How to connect a speaker and MP3 player modules to Arduino UNO R4
- How to program Arduino UNO R4 to play a song from the micro SD Card
- How to add play, pause, next, and previous buttons
Then, you can change the code to include a potentiometer or rotary encoder to adjust the volume.
Hardware Preparation
Or you can buy the following kits:
| 1 | × | DIYables STEM V4 IoT Starter Kit (Arduino included) | |
| 1 | × | DIYables Sensor Kit (18 sensors/displays) |
Additionally, some of these links are for products from our own brand, DIYables .

Overview of Serial MP3 Player Module and Speaker
Serial MP3 Player Module Pinout
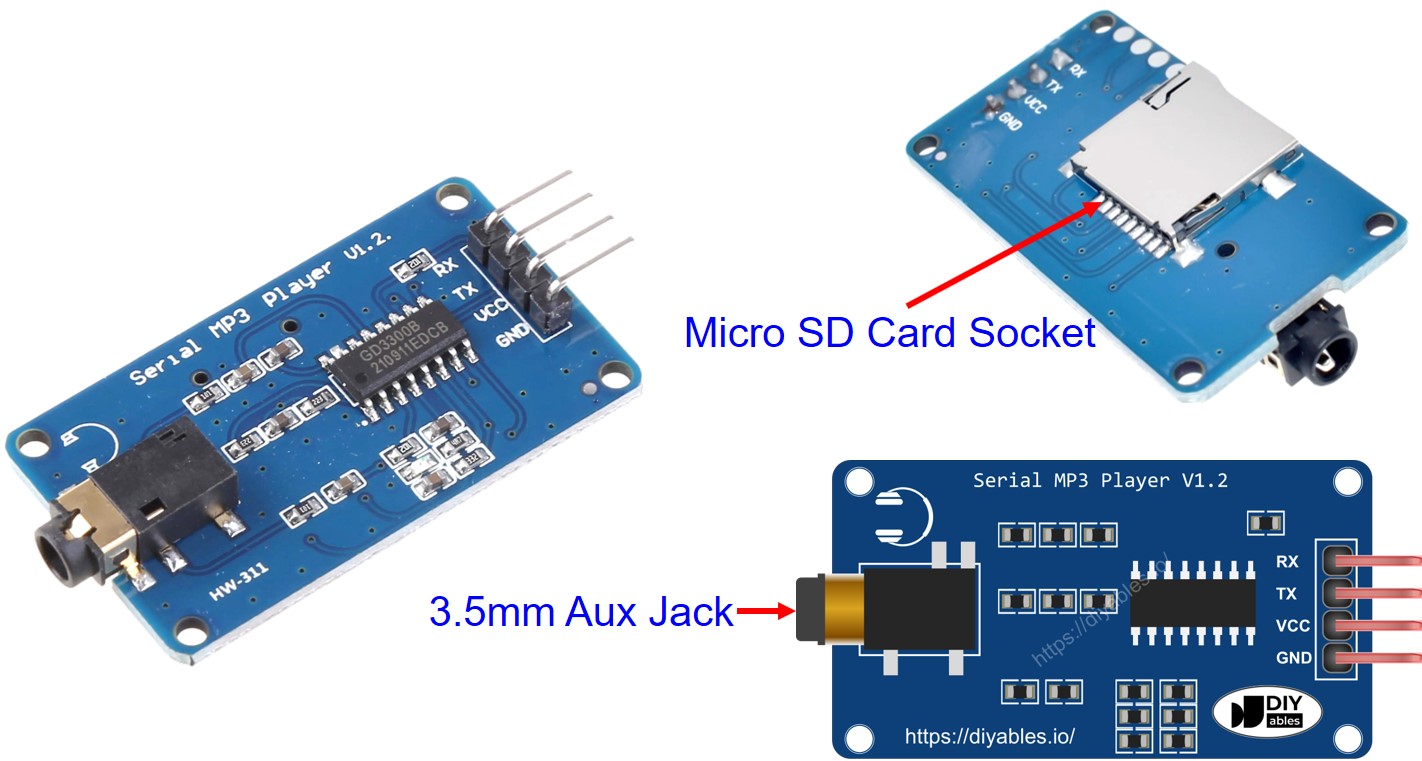
A serial MP3 player module includes three interfaces:
- The interface to the Arduino UNO R4: has four pins:
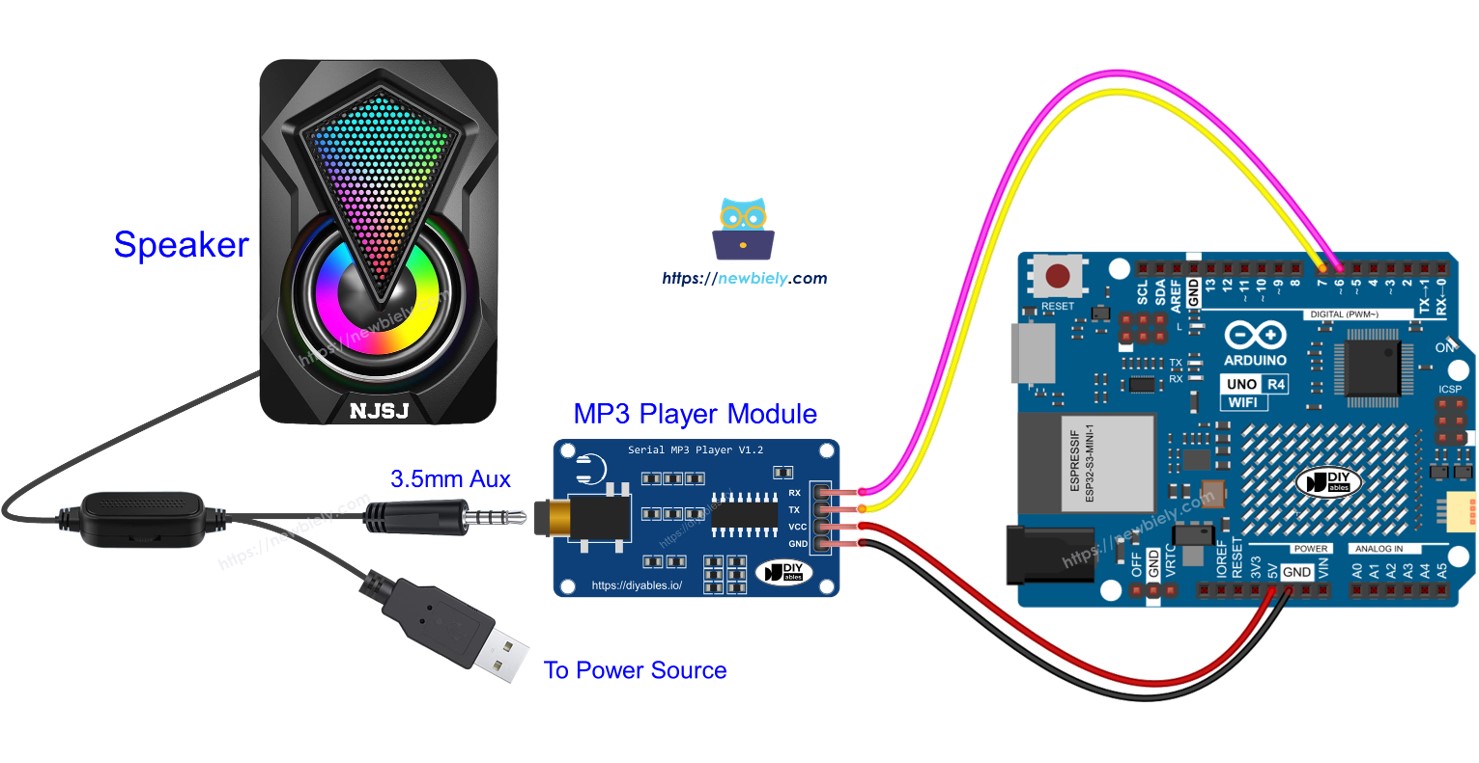
- RX pin: This is for data and should connect to the TX pin on the Arduino UNO R4, using either Hardware or Software Serial.
- TX pin: This is also for data and should connect to the RX pin on the Arduino UNO R4, through Hardware or Software Serial.
- VCC pin: This is for power and should be connected to VCC (5V).
- GND pin: This is a ground pin and should be connected to GND (0V).
- The interface to the speaker: a 3.5mm Aux output female jack.
- The interface to the Micro SD Card: The Micro SD Card socket located at the back of the module.
Speaker Pinout
A speaker generally has two connection points:
- Audio connection: It uses a 3.5mm Aux male connector to connect to the MP3 player.
- Power connection: It can use a USB, a 5V power adapter, or other types of power connections.
How It Works
What we need to get ready:
- Save a list of songs or recordings on a micro SD card.
- Place the micro SD card into the MP3 player module.
- Connect the MP3 player module to the Arduino UNO R4.
- Connect the MP3 player module to a speaker.
- Connect the speaker to a power source.
Every MP3 file on the Micro SD Card has a number starting from 0 that shows the order of the songs.
We can then set up the Arduino UNO R4 to send commands to the MP3 player module. It can handle these commands:
- Start Playing
- Stop
- Play Next
- Play Previous
- Adjust Volume
The MP3 player module plays the MP3 file stored on the micro SD card, transforms it into an audio signal, and sends this signal to the speaker through the 3.5mm Aux interface.
Wiring Diagram
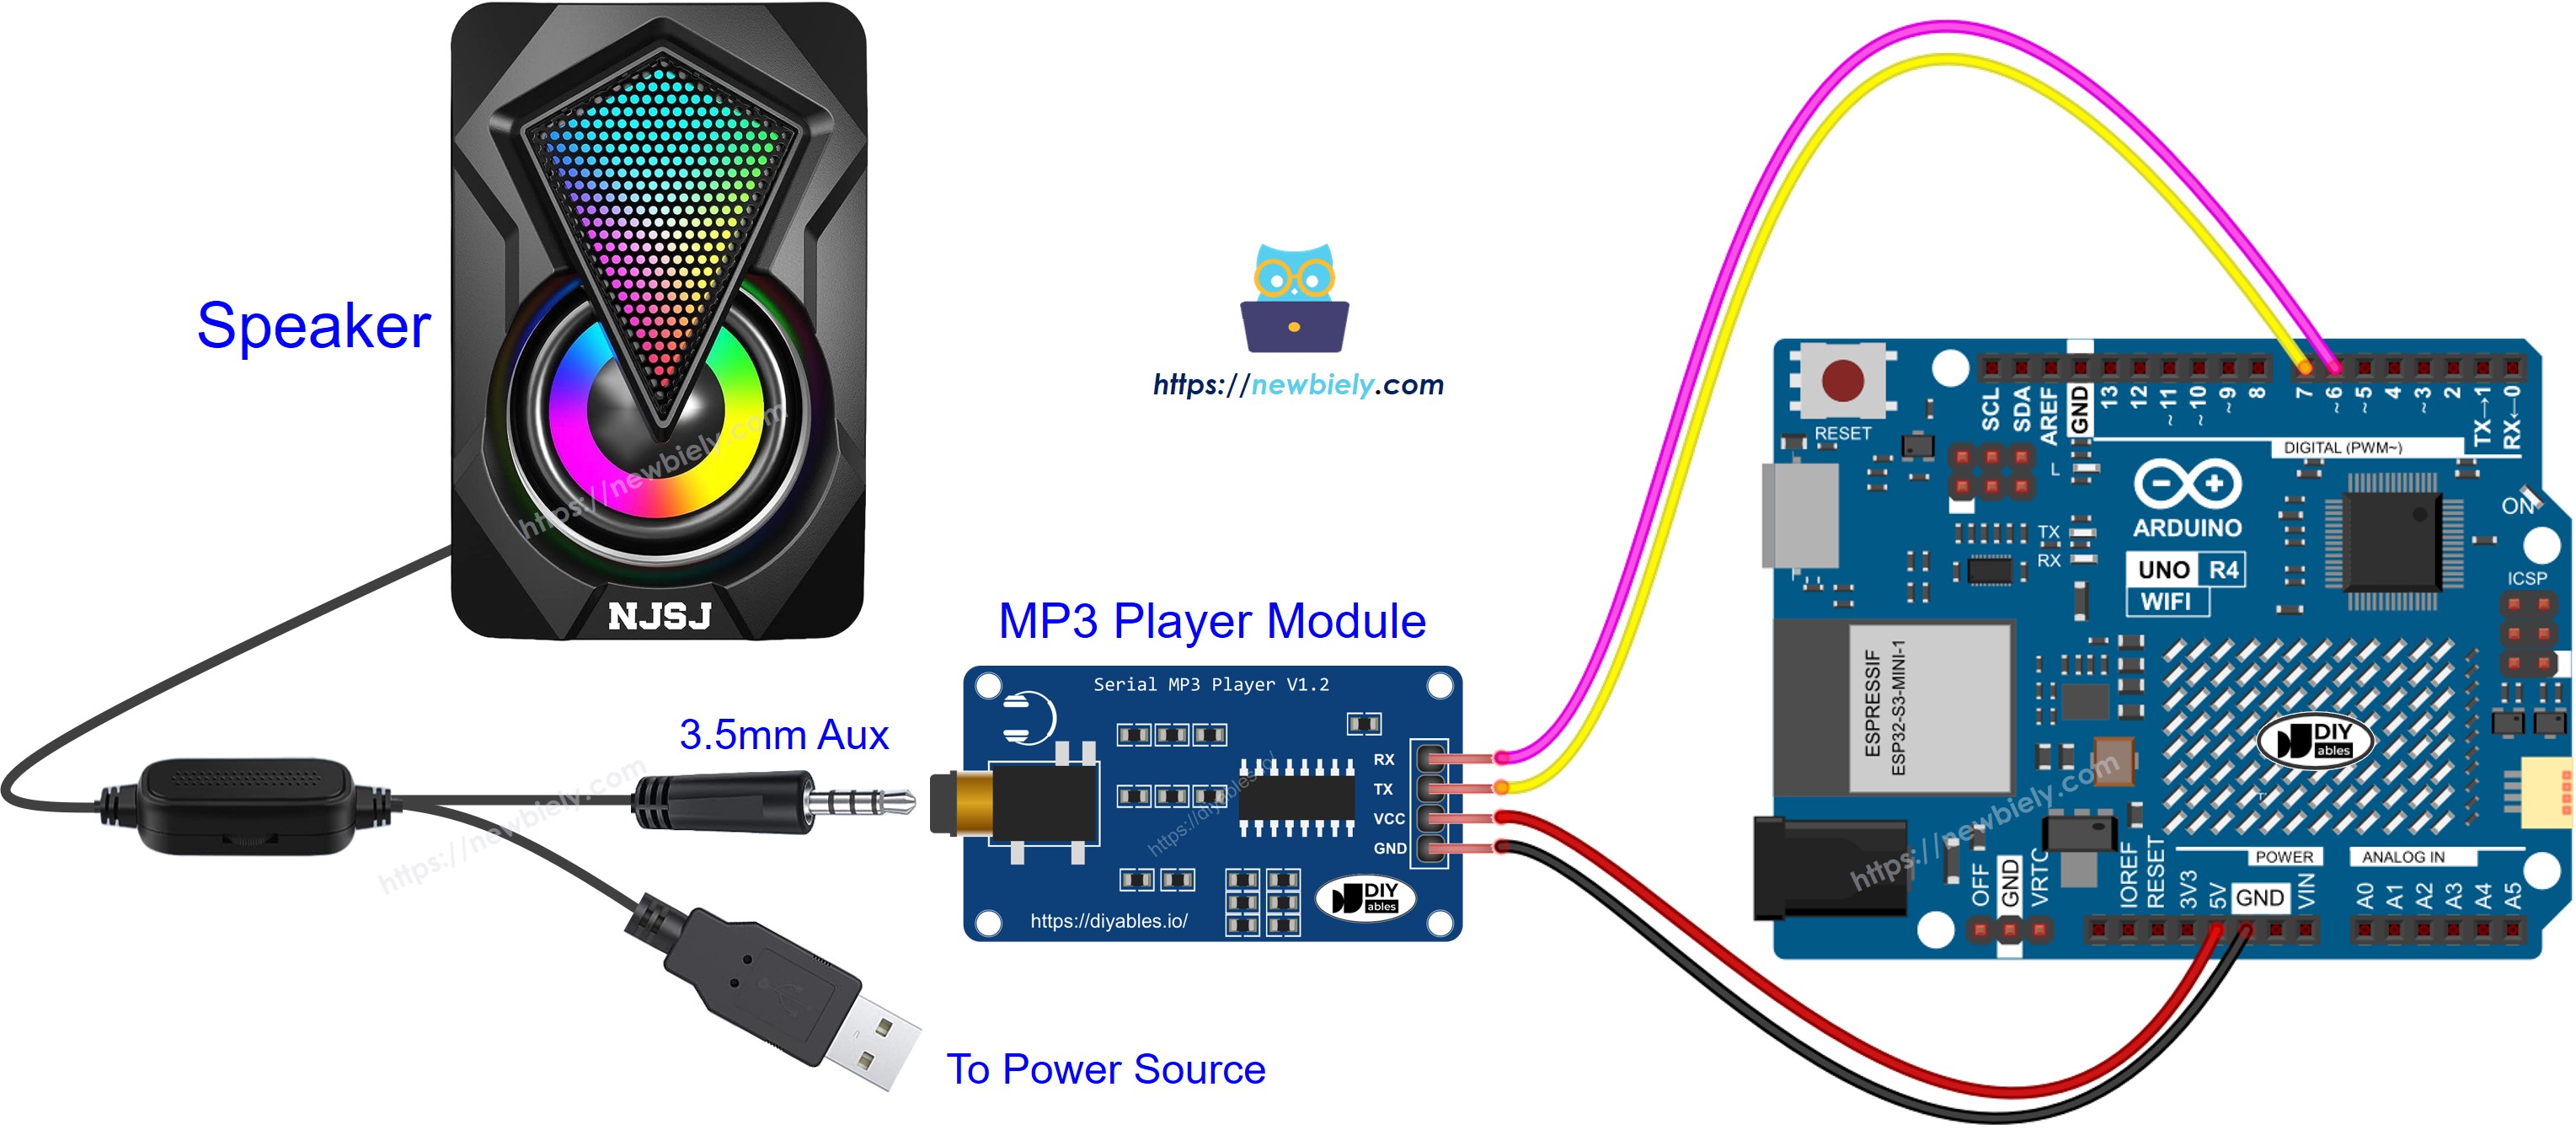
This image is created using Fritzing. Click to enlarge image
Arduino UNO R4 Code - Play Music
The code below starts playing the first song saved on the Micro SD Card.
Detailed Instructions
Follow these instructions step by step:
- If this is your first time using the Arduino Uno R4 WiFi/Minima, refer to the tutorial on setting up the environment for Arduino Uno R4 WiFi/Minima in the Arduino IDE.
- Wire the components according to the provided diagram.
- Connect the Arduino Uno R4 board to your computer using a USB cable.
- Launch the Arduino IDE on your computer.
- Select the appropriate Arduino Uno R4 board (e.g., Arduino Uno R4 WiFi) and COM port.
- Follow the steps in the section How It Works
- Copy the code provided and use it in Arduino IDE
- Press the Upload button in Arduino IDE to send the code to Arduino UNO R4
- Have fun with the music
Arduino UNO R4 Code - Play Music with control buttons
The code below is an improved version of the earlier code. It includes four buttons that allow you to control the MP3 player.
The wiring connections for the mentioned code:
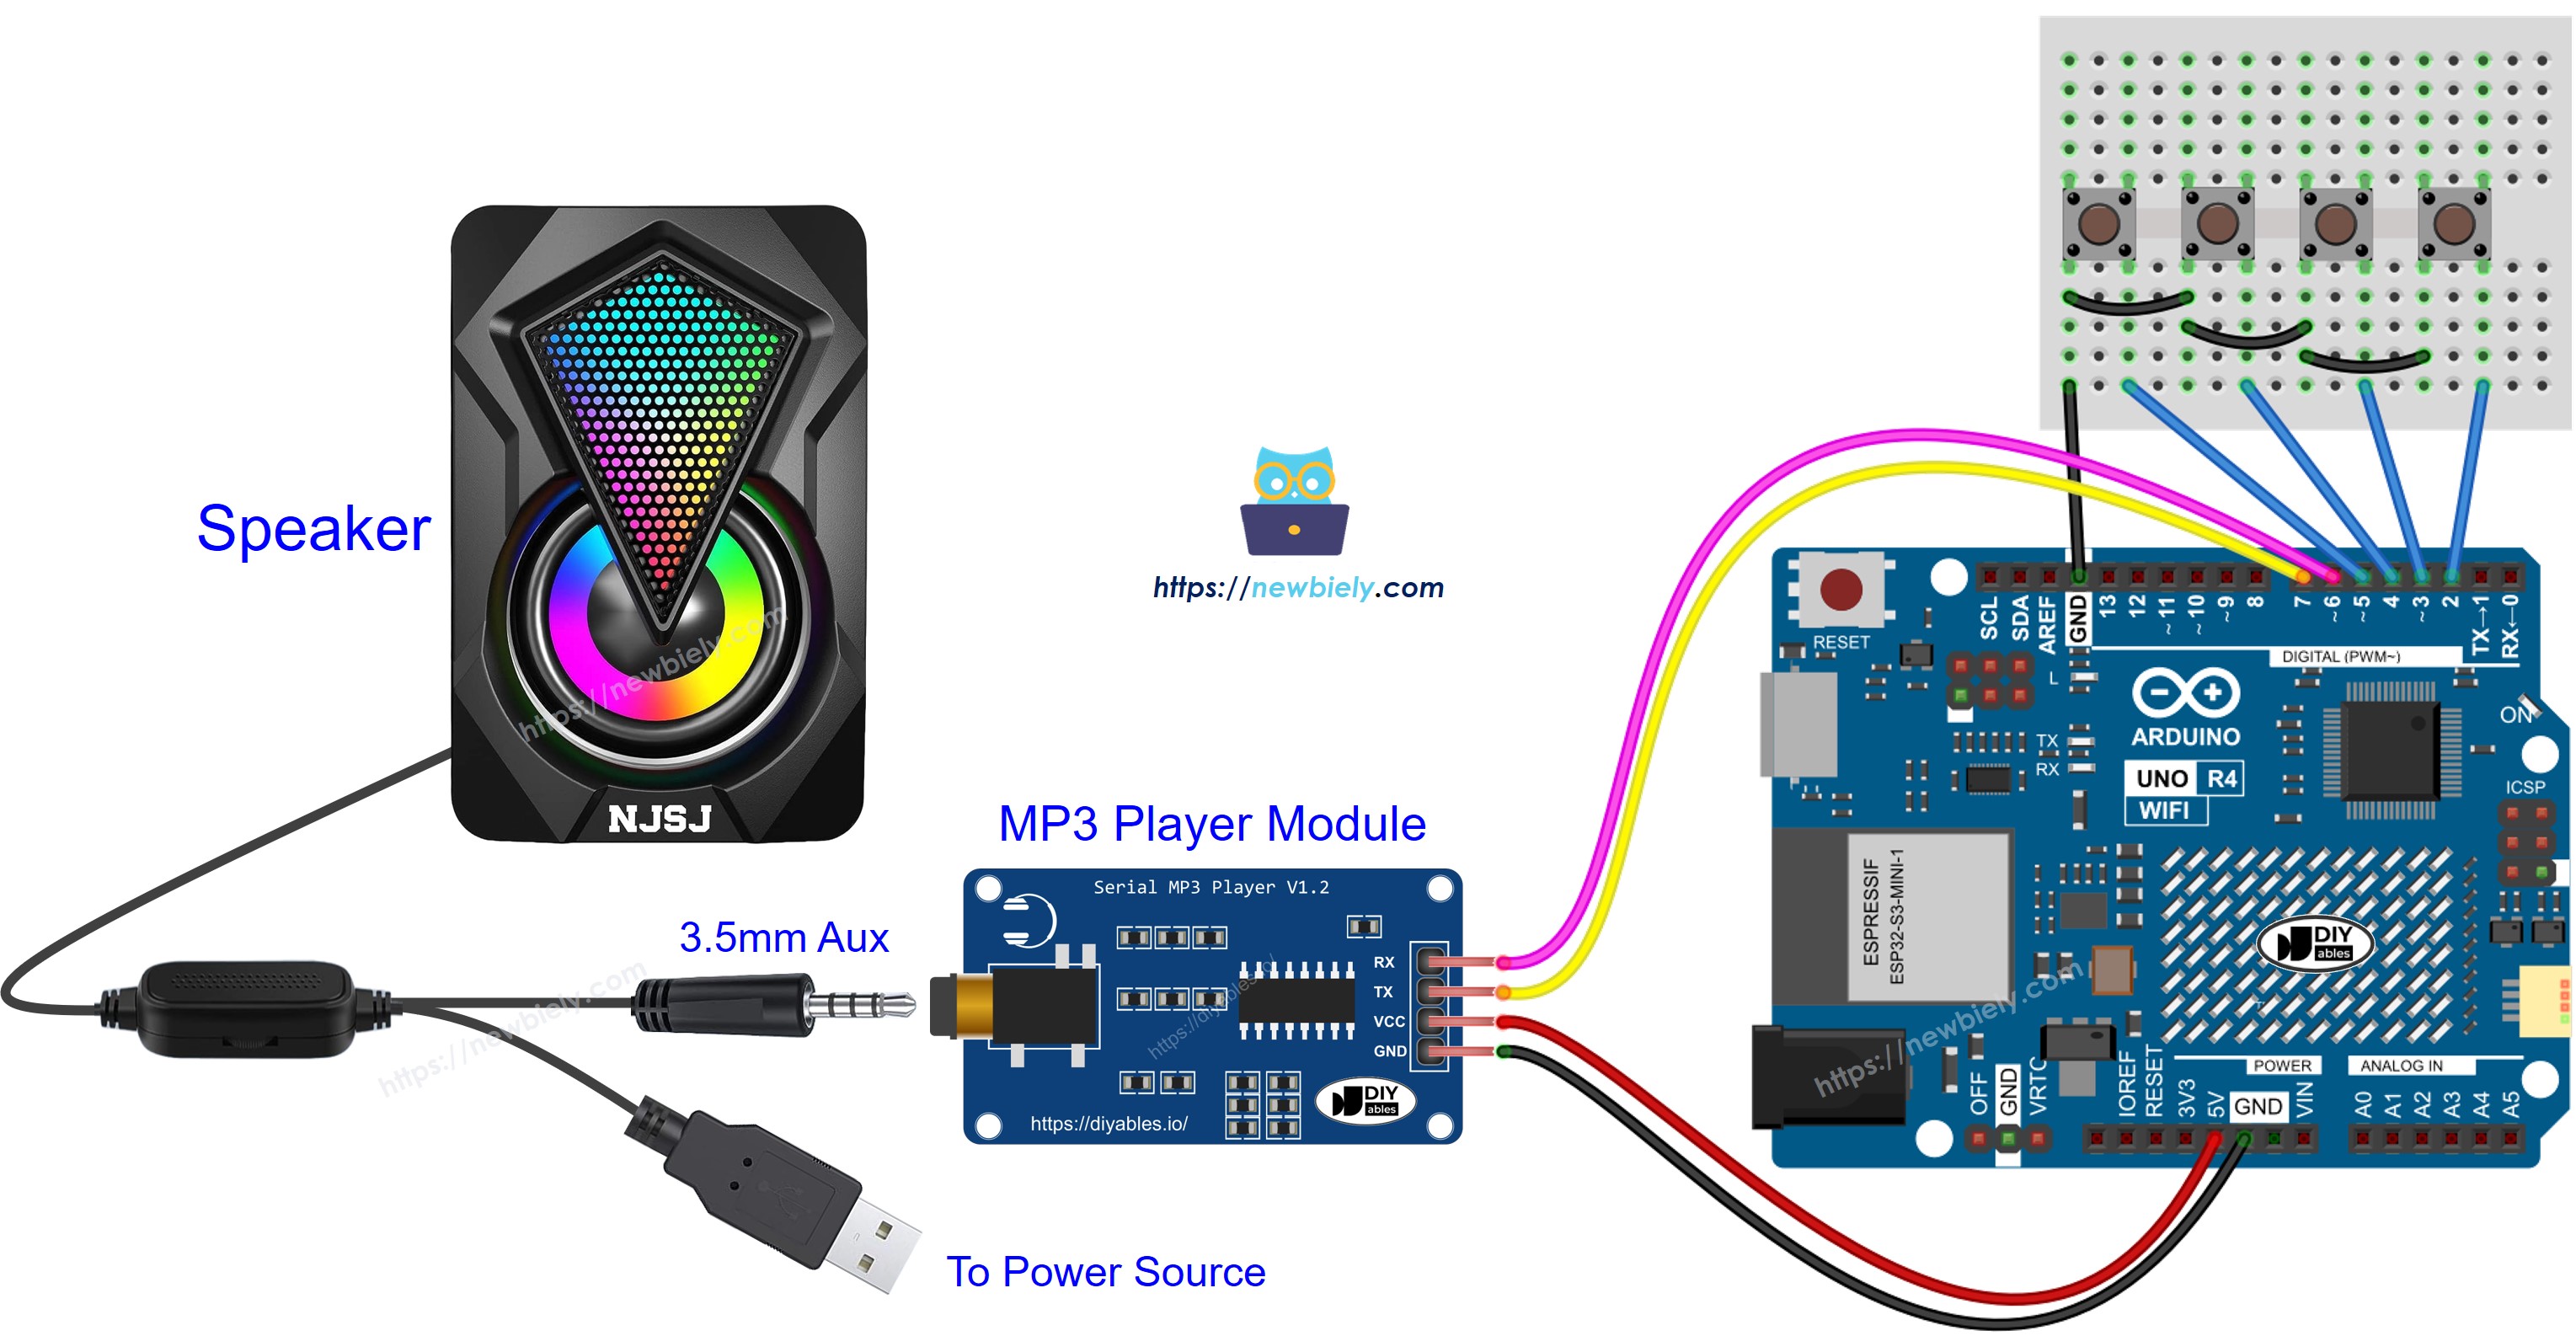
This image is created using Fritzing. Click to enlarge image
See The best way to supply power to the Arduino Uno R4 and other components.
Now, you can change the projects to include more features, for example:
- Include a potentiometer to adjust the volume. For instructions, refer to the Arduino UNO R4 Potentiometer tutorial.
- Incorporate an IR remote controller by following the Arduino UNO R4 IR Remote Controller tutorial.
- Add a RFID reader and card to create an RFID MP3 player. For more details, visit the Arduino UNO R4 RFID tutorial.