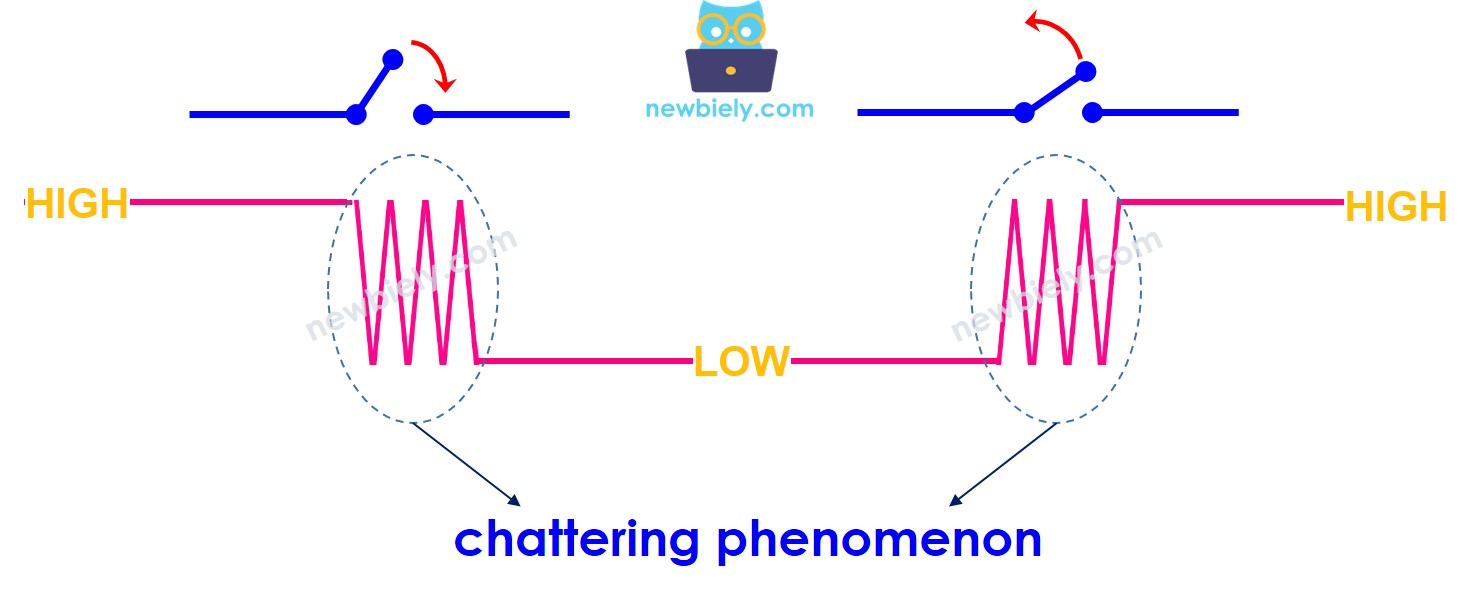
When programming the Arduino Uno R4 to detect a button press event, you may find that a single press is detected multiple times. This happens because, due to mechanical factors, the button or switch can quickly switch between LOW and HIGH several times. This is called "chattering." Chattering can cause one button press to be detected as multiple presses, which can cause errors in some applications. This tutorial explains how to fix this issue, a process known as debouncing the button.
Disclosure: Some of the links provided in this section are Amazon affiliate links. We may receive a commission for any purchases made through these links at no additional cost to you. Additionally, some of these links are for products from our own brand, DIYables .
Overview of Button
Learn about buttons (pinout, operation, programming) in the following tutorials if you're not familiar with them:
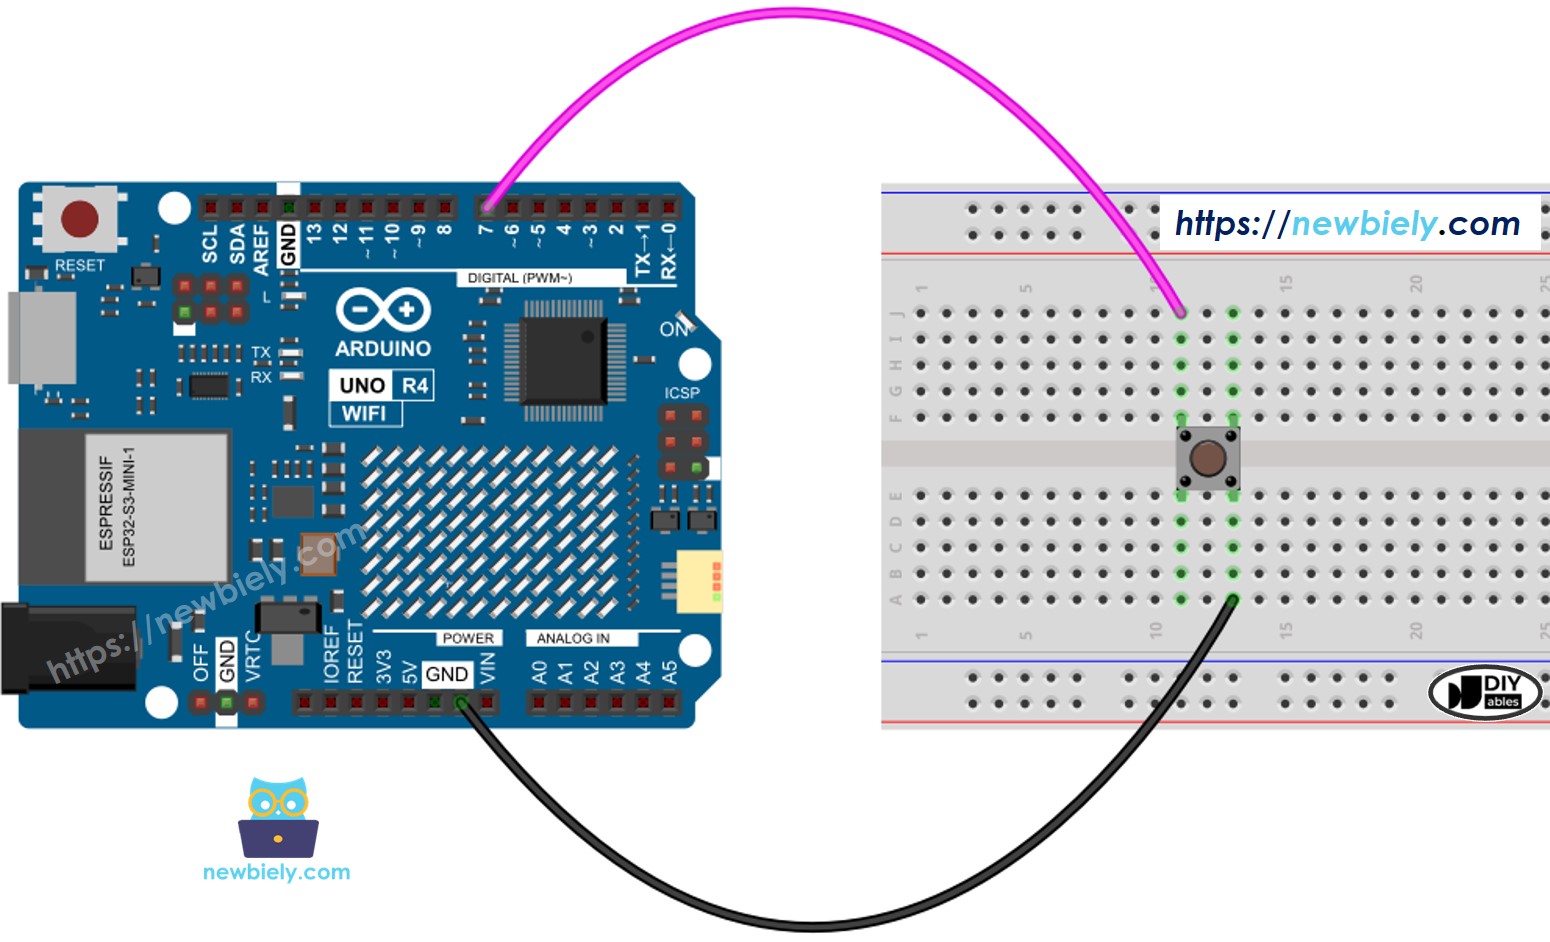
This image is created using Fritzing. Click to enlarge image
Let's examine and compare the Arduino UNO R4 code without and with debounce, and observe their behaviors.
Arduino Uno R4 - Button without Debounce
Before we learn about debouncing, let's look at the code without it and see how it behaves.
/* * This Arduino UNO R4 code was developed by newbiely.com * * This Arduino UNO R4 code is made available for public use without any restriction * * For comprehensive instructions and wiring diagrams, please visit: * https://newbiely.com/tutorials/arduino-uno-r4/arduino-uno-r4-button-debounce */#define BUTTON_PIN 7 // The Arduino UNO R4 pin connected to the buttonint button_state; // the current state of buttonint prev_button_state = LOW; // the previous state of buttonvoidsetup() {// initialize serial communication at 9600 bits per second:Serial.begin(9600);// initialize the pushbutton pin as a pull-up inputpinMode(BUTTON_PIN, INPUT_PULLUP);}voidloop() {// read the state of the switch/button: button_state = digitalRead(BUTTON_PIN);if (prev_button_state == HIGH && button_state == LOW)Serial.println("The button is pressed");elseif (prev_button_state == LOW && button_state == HIGH)Serial.println("The button is released");// save the last state prev_button_state = button_state;}
Wire the components according to the provided diagram.
Connect the Arduino Uno R4 board to your computer using a USB cable.
Launch the Arduino IDE on your computer.
Select the appropriate Arduino Uno R4 board (e.g., Arduino Uno R4 WiFi) and COM port.
Copy the above code and open it in the Arduino IDE.
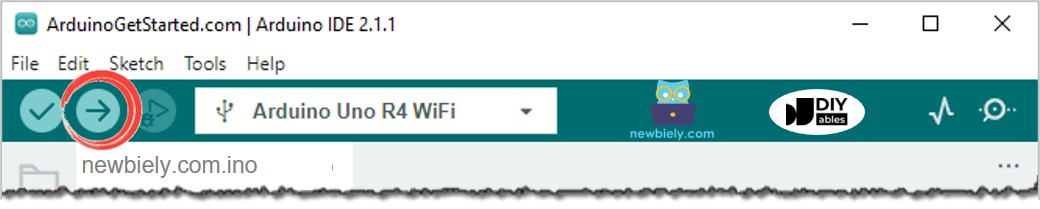
Click the Upload button in Arduino IDE to send code to Arduino UNO R4.
Open the Serial Monitor.
Press and hold the button for a few seconds, then release it.
Check the Serial Monitor for the result.
Newbiely | Arduino IDE 2.3.8
──
☐
✕
File
Edit
Sketch
Tools
Help
Arduino Uno R4 WiFi
Newbiely.ino
···
8Serial.println("Hello World!");
Output
Serial Monitor
Message (Enter to send message to 'Arduino Uno R4 WiFi' on 'COM15')
New Line
9600 baud
The button is pressed
The button is pressed
The button is pressed
The button is released
The button is released
Ln 11, Col 1
Arduino Uno R4 WiFi on COM15
2
As you can see, you pressed and released the button only once. However, the Arduino recognizes it as multiple presses and releases.
※ NOTE THAT:
The value of DEBOUNCE_TIME varies with different applications. Each application might use a unique value.
Arduino Uno R4 - Button with Debounce
/* * This Arduino UNO R4 code was developed by newbiely.com * * This Arduino UNO R4 code is made available for public use without any restriction * * For comprehensive instructions and wiring diagrams, please visit: * https://newbiely.com/tutorials/arduino-uno-r4/arduino-uno-r4-button-debounce */#define BUTTON_PIN 7 // The Arduino UNO R4 pin connected to the button#define DEBOUNCE_TIME 50 // The debounce time; increase if the output flickersint last_steady_state = LOW; // the previous steady state from the input pinint last_flickerable_state = LOW; // the previous flickerable state from the input pinint current_state; // the current reading from the input pinunsignedlong last_debounce_time = 0; // the last time the output pin was toggledvoidsetup() {// initialize serial communication at 9600 bits per second:Serial.begin(9600);// initialize the pushbutton pin as a pull-up inputpinMode(BUTTON_PIN, INPUT_PULLUP);}voidloop() {// read the state of the switch/button: current_state = digitalRead(BUTTON_PIN);// If the switch/button changed, due to noise or pressing:if (current_state != last_flickerable_state) {// reset the debouncing timer last_debounce_time = millis();// save the the last flickerable state last_flickerable_state = current_state; }if ((millis() - last_debounce_time) > DEBOUNCE_TIME) {// if the button state has changed:if (last_steady_state == HIGH && current_state == LOW)Serial.println("The button is pressed");elseif (last_steady_state == LOW && current_state == HIGH)Serial.println("The button is released");// save the the last steady state last_steady_state = current_state; }}
Detailed Instructions
Copy the above code and open it with Arduino IDE.
Press the Upload button in the Arduino IDE to send the code to the Arduino UNO R4.
Open the Serial Monitor.
Hold down the button for a few seconds before letting go.
Check out the Serial Monitor.
Newbiely | Arduino IDE 2.3.8
──
☐
✕
File
Edit
Sketch
Tools
Help
Arduino Uno R4 WiFi
Newbiely.ino
···
8Serial.println("Hello World!");
Output
Serial Monitor
Message (Enter to send message to 'Arduino Uno R4 WiFi' on 'COM15')
New Line
9600 baud
The button is pressed
The button is released
Ln 11, Col 1
Arduino Uno R4 WiFi on COM15
2
As you can see, you pressed and released the button once. The Arduino correctly detects it as a single press and release, eliminating any chattering.
We Made It Simple: Arduino UNO R4 Button Debounce Code Using a Library
Arduino UNO R4 Button Debounce Code for A Single Button
/* * Created by ArduinoGetStarted.com * * This example code is in the public domain * * Tutorial page: https://arduinogetstarted.com/tutorials/arduino-button-library * * This example reads the state of a button with debounce and print it to Serial Monitor. */#include <ezButton.h>ezButtonbutton(7); // create ezButton object that attach to pin 7;voidsetup() {Serial.begin(9600);button.setDebounceTime(50); // set debounce time to 50 milliseconds}voidloop() {button.loop(); // MUST call the loop() function firstif(button.isPressed())Serial.println("The button is pressed");if(button.isReleased())Serial.println("The button is released");}
Arduino UNO R4 Button Debounce Code for A Multiple Buttons
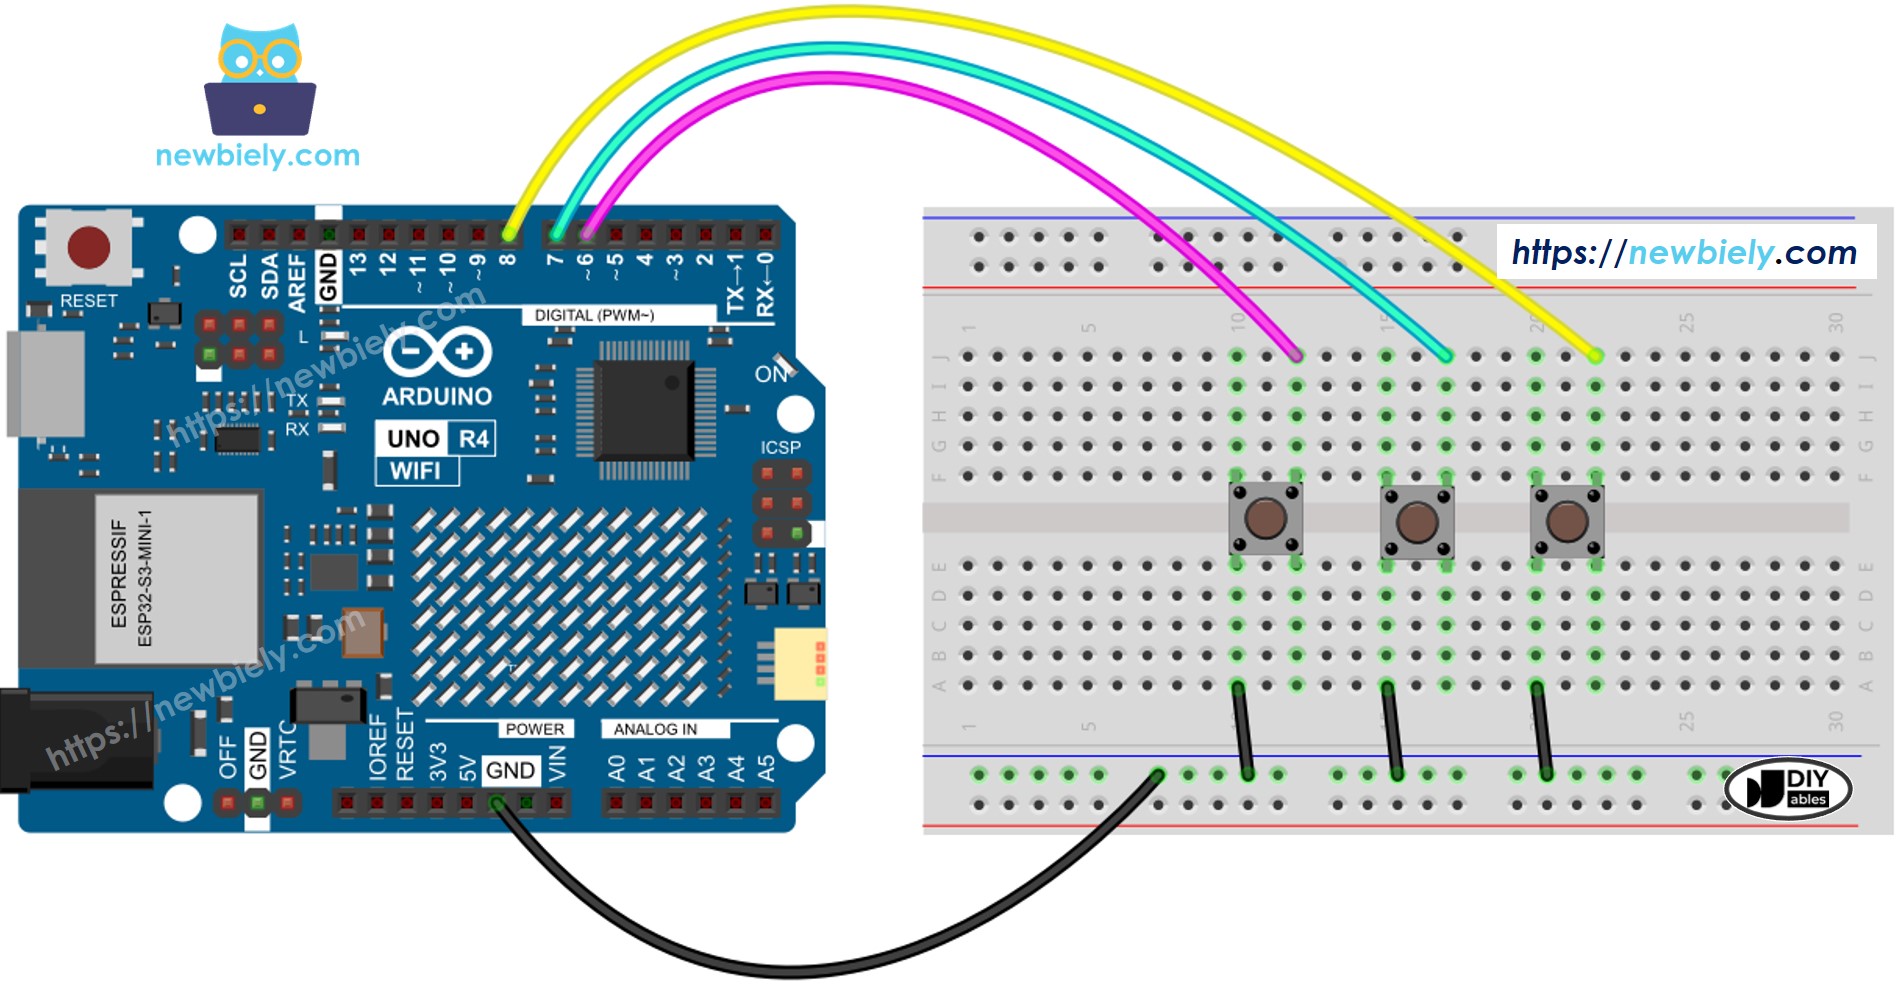
Let's debouce for 3 buttons. Here is the wiring diagram between Arduino UNO R4 and three buttons:
This image is created using Fritzing. Click to enlarge image
/* * This Arduino UNO R4 code was developed by newbiely.com * * This Arduino UNO R4 code is made available for public use without any restriction * * For comprehensive instructions and wiring diagrams, please visit: * https://newbiely.com/tutorials/arduino-uno-r4/arduino-uno-r4-button-debounce */#include <ezButton.h>ezButton button_1(6); // initialize ezButton object connected to pin 6ezButton button_2(7); // initialize ezButton object connected to pin 7ezButton button_3(8); // initialize ezButton object connected to pin 8voidsetup() {Serial.begin(9600); button_1.setDebounceTime(50); // configure debounce time for button_1 to 50ms button_2.setDebounceTime(50); // configure debounce time for button_2 to 50ms button_3.setDebounceTime(50); // configure debounce time for button_3 to 50ms}voidloop() { button_1.loop(); // update button_1 state button_2.loop(); // update button_2 state button_3.loop(); // update button_3 stateif(button_1.isPressed())Serial.println("The button 1 is pressed");if(button_1.isReleased())Serial.println("The button 1 is released");if(button_2.isPressed())Serial.println("The button 2 is pressed");if(button_2.isReleased())Serial.println("The button 2 is released");if(button_3.isPressed())Serial.println("The button 3 is pressed");if(button_3.isReleased())Serial.println("The button 3 is released");}
Please feel free to share the link of this tutorial. However, Please do not use our content on any other websites. We invested a lot of effort and time to create the content, please respect our work!