Arduino UNO R4 - Blink multiple LED
This guide shows you how to program an Arduino UNO R4 to make multiple LEDs blink at different frequency without using the delay() function. It offers the code in two ways:
- Arduino UNO R4 blink multiple LEDs
- Arduino UNO R4 blink multiple LEDs using array
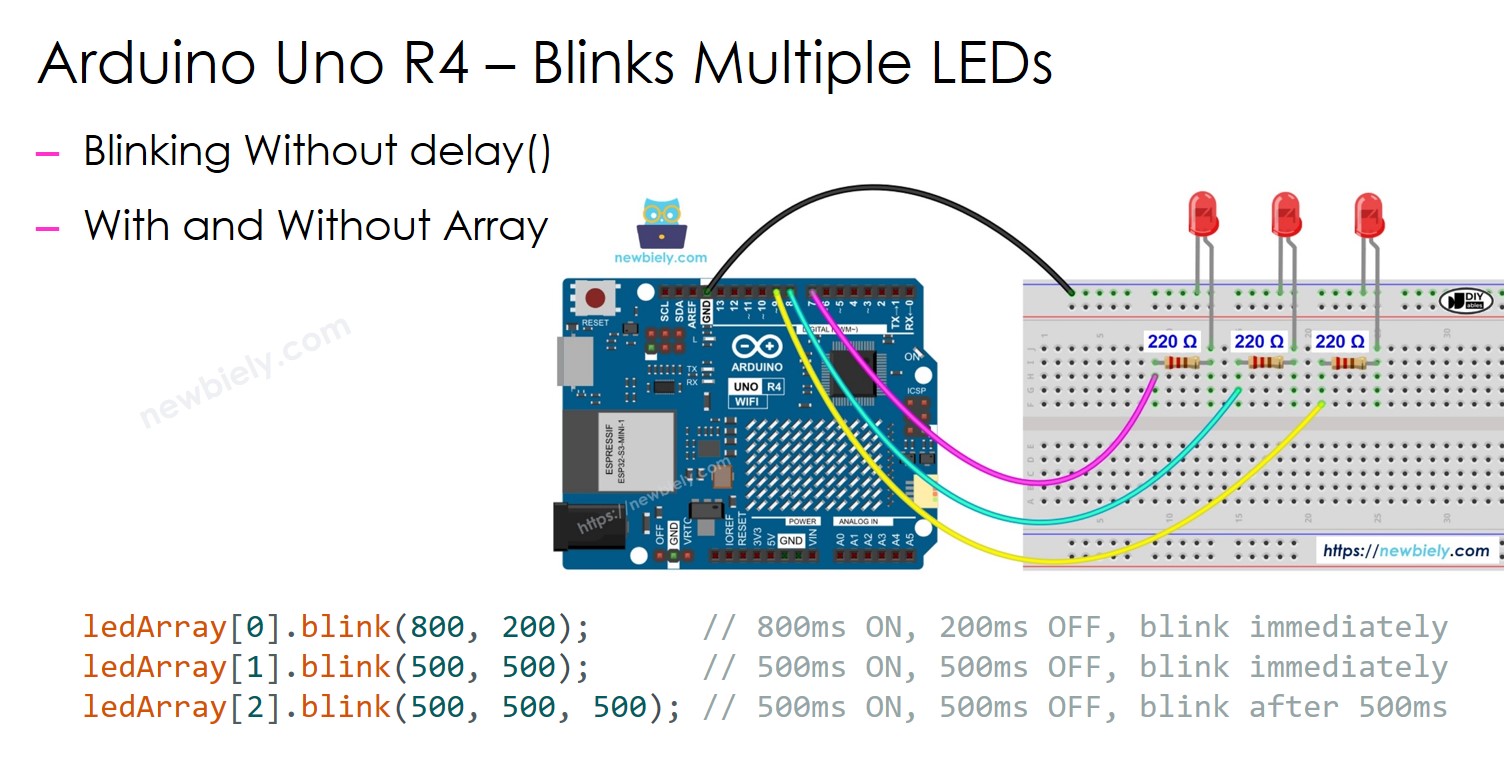
We will demonstrate with three LEDs. You can easily adjust this for two LEDs, four LEDs, or more.
Hardware Preparation
Or you can buy the following kits:
| 1 | × | DIYables STEM V4 IoT Starter Kit (Arduino included) | |
| 1 | × | DIYables Sensor Kit (18 sensors/displays) |
Additionally, some of these links are for products from our own brand, DIYables .
Buy Note: Use the LED Module for easier wiring. It includes an integrated resistor.

Overview of LED
Explore our comprehensive guide on LEDs, covering how to connect the hardware, how they work, how to set it up with Arduino UNO R4, and programming steps. Find out more here:
Wiring Diagram
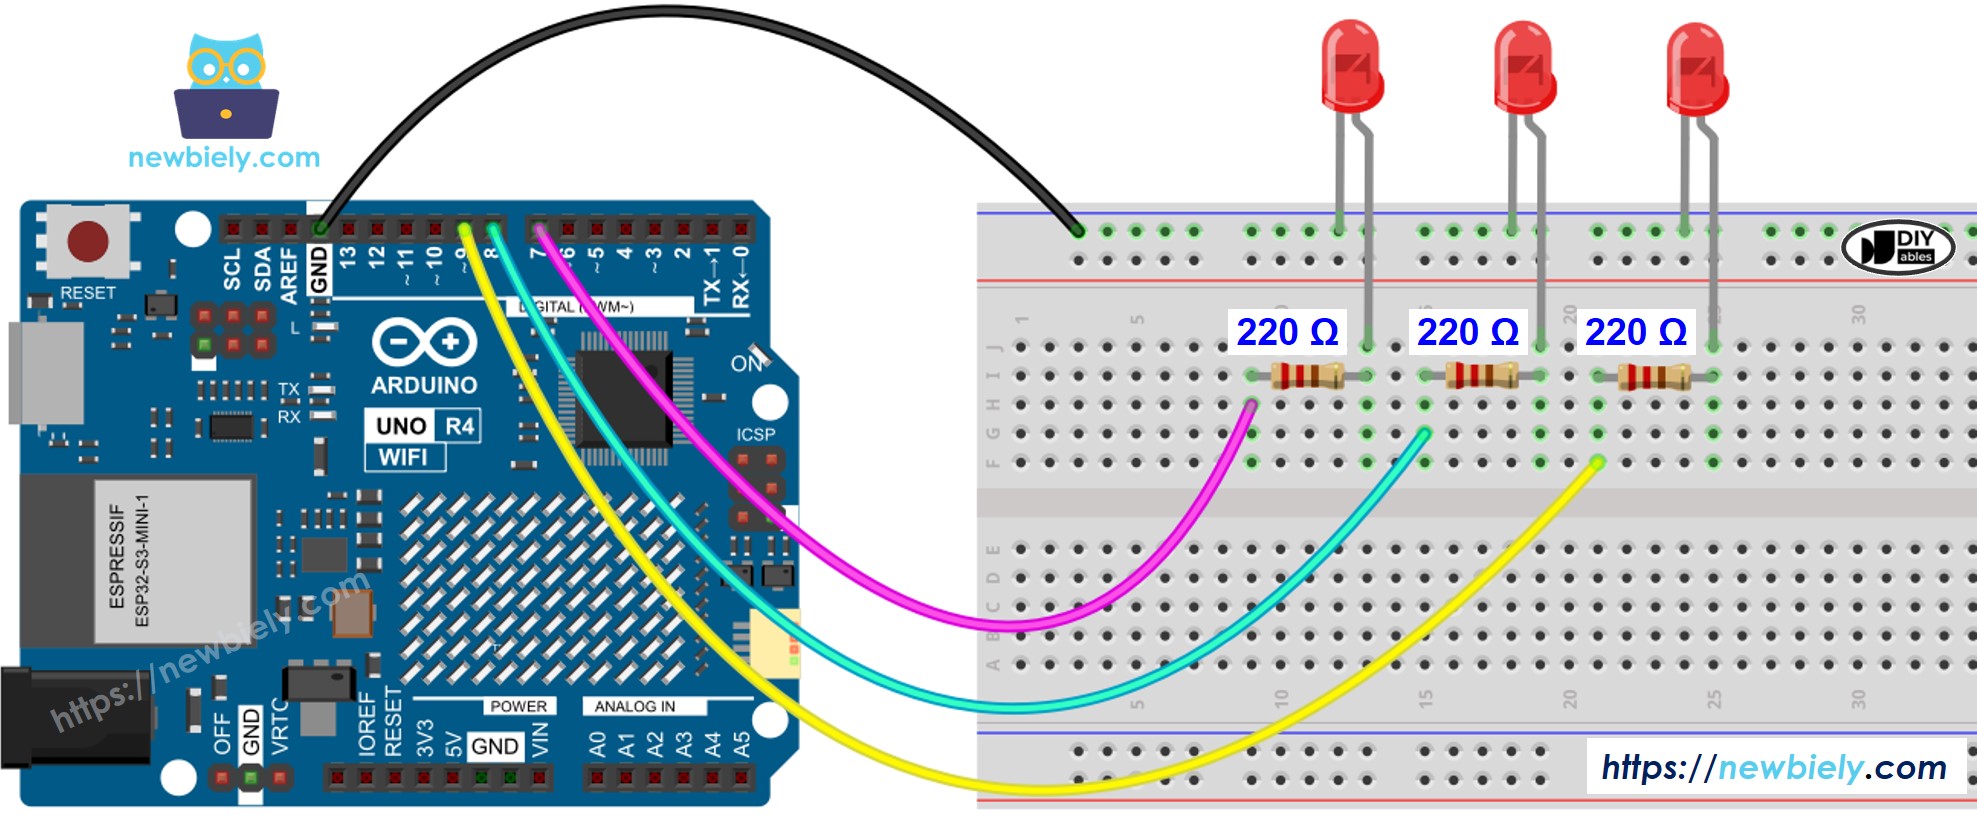
This image is created using Fritzing. Click to enlarge image
See The best way to supply power to the Arduino Uno R4 and other components.
Arduino UNO R4 Code - Blink Multiple LEDs
To blink several LEDs at the same time, we should not use the delay() function. This function stops other code from running, which means we cannot blink different LEDs together. We should use the millis() function to control the timing instead.
For beginners, managing timestamps when blinking several LEDs can be difficult. Luckily, the ezLED library makes this easier by dealing with timestamp management inside the library. This means users don't have to worry about managing timestamps themselves when using the library. Also, using a group of LEDs can make the code clearer and shorter.
Detailed Instructions
Follow these instructions step by step:
- If this is your first time using the Arduino Uno R4 WiFi/Minima, refer to the tutorial on setting up the environment for Arduino Uno R4 WiFi/Minima in the Arduino IDE.
- Connect the Arduino Uno R4 to the LEDs according to the provided diagram.
- Connect the Arduino Uno R4 board to your computer using a USB cable.
- Launch the Arduino IDE on your computer.
- Select the appropriate Arduino Uno R4 board (e.g., Arduino Uno R4 WiFi) and COM port.
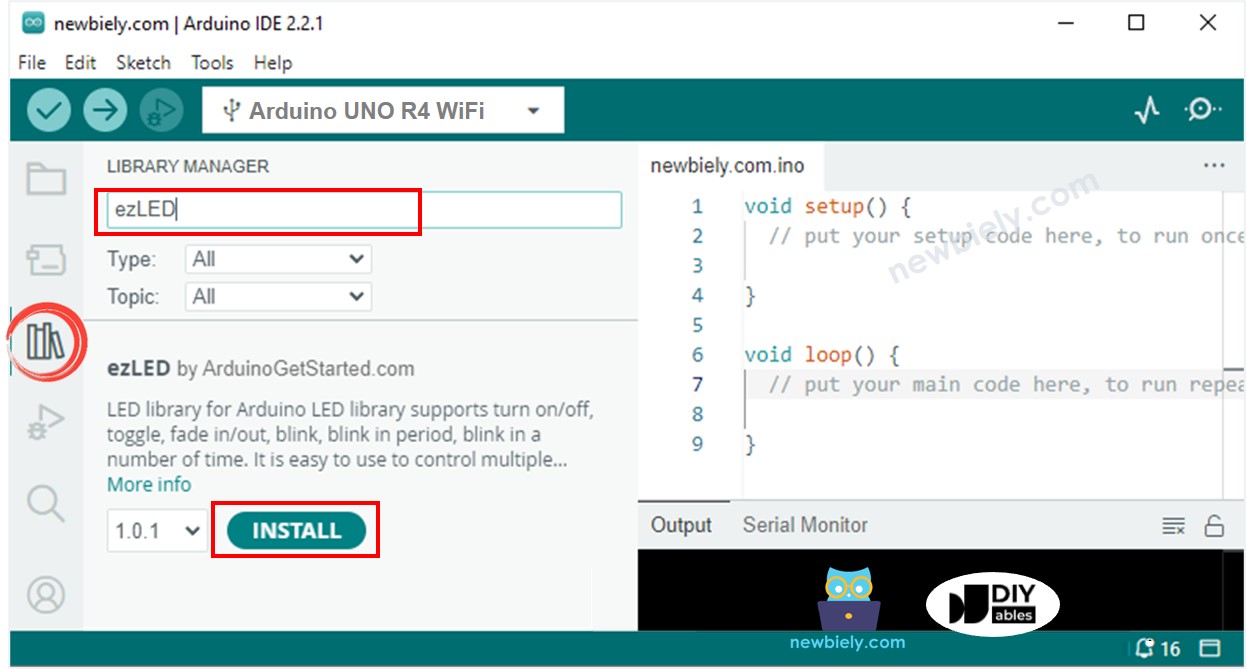
- Click on the Libraries icon on the left side of the Arduino IDE.
- Type "ezLED" in the search box and find the LED library created by Arduino UNO R4GetStarted.
- Click the Install button to add the ezLED library.
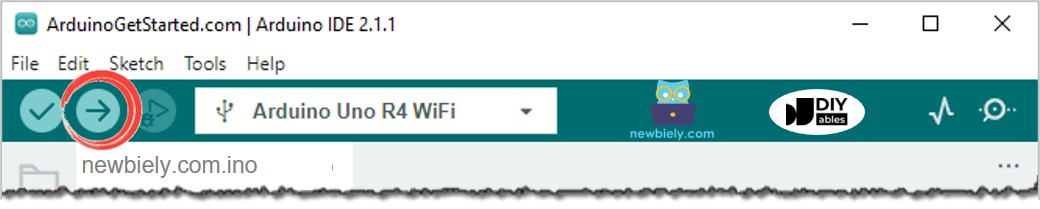
- Copy the provided code and paste it into the Arduino IDE.
- To load the code onto an Arduino UNO R4 board, click the Upload button in the Arduino IDE.
- See if the LED is on or off.
Arduino UNO R4 Code - Blink Multiple LEDs by using array
We can make the above code better by using an array of LEDs. The code below uses the array to manage LED objects.
Using the ezLED library, we can flexibly blink multiple LEDs like this:
- Make several LEDs flash at different speeds.
- Make several LEDs start flashing at different times.
- Make each LED flash over a specific duration.
- Make each LED flash a certain number of times.
Look at the sample code in the library.