Arduino UNO R4 - Electromagnetic Lock
In this tutorial, we are going to learn how to use Arduino UNO R4 to control the electromagnetic lock to programmably lock/unlock your door.
Hardware Preparation
Or you can buy the following kits:
| 1 | × | DIYables STEM V4 IoT Starter Kit (Arduino included) | |
| 1 | × | DIYables Sensor Kit (18 sensors/displays) |
Additionally, some of these links are for products from our own brand, DIYables .

Overview of Electromagnetic Lock
The electromagnetic lock, often called a maglock, is commonly used to secure doors. It typically works with various devices like switches, fingerprint readers, RFID/NFC readers, keypads, or applications on PCs and mobile devices to manage access to doors and building entrances.
Pinout
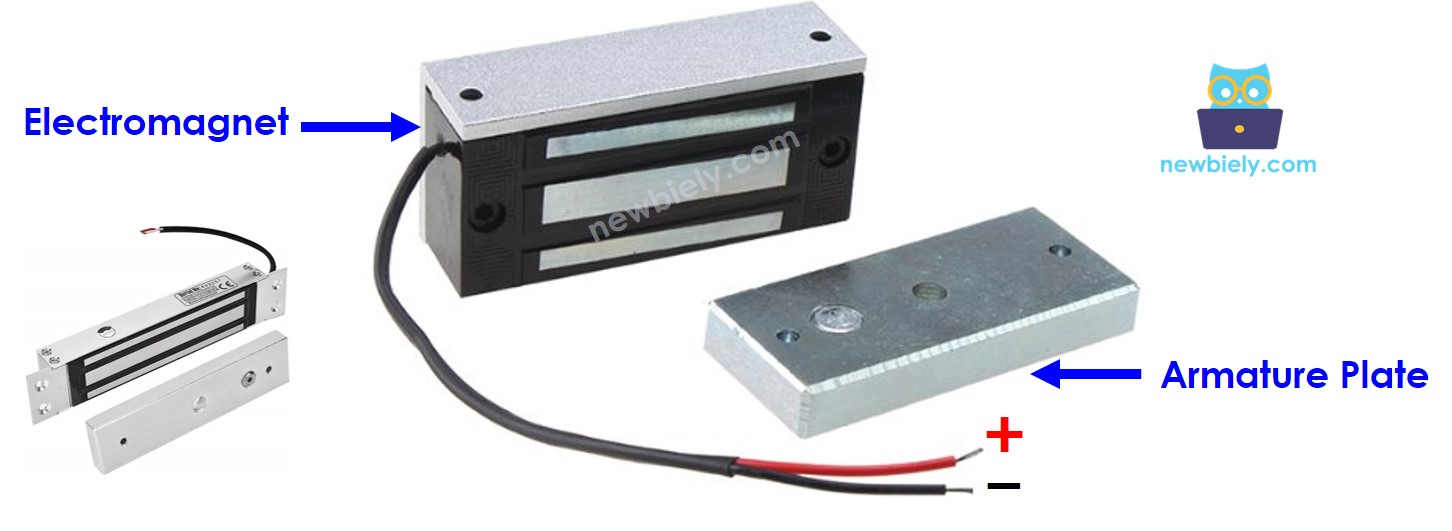
An electromagnetic lock has two parts:
- One electromagnet, has two pins
- One plate for the armature
How It Works
- When the electromagnet is on, electricity flows through it and produces a magnetic field that pulls the armature plate towards the electromagnet, causing it to lock. When the electromagnet is off, there is no magnetic field, and the armature plate does not get pulled towards the electromagnet, allowing it to unlock.
※ NOTE THAT:
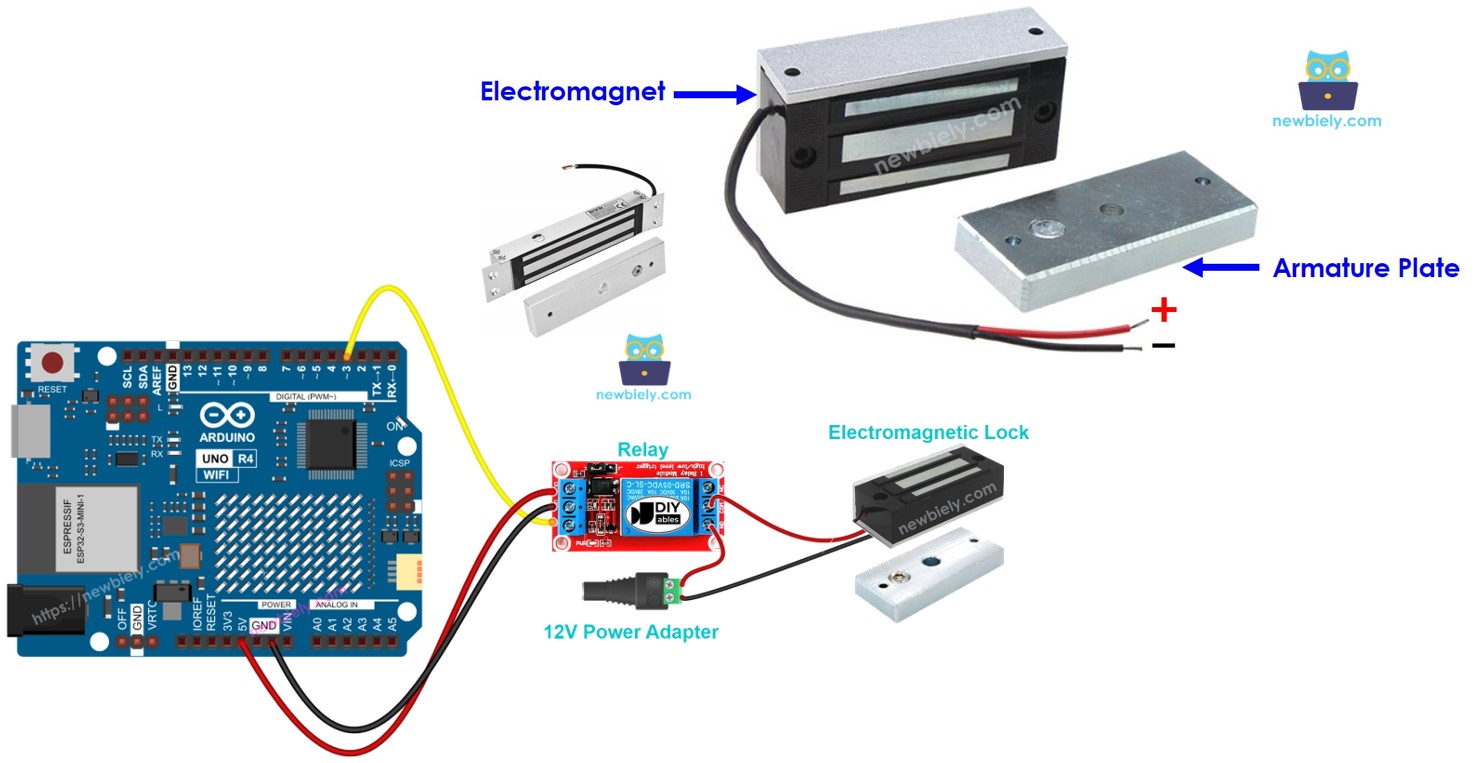
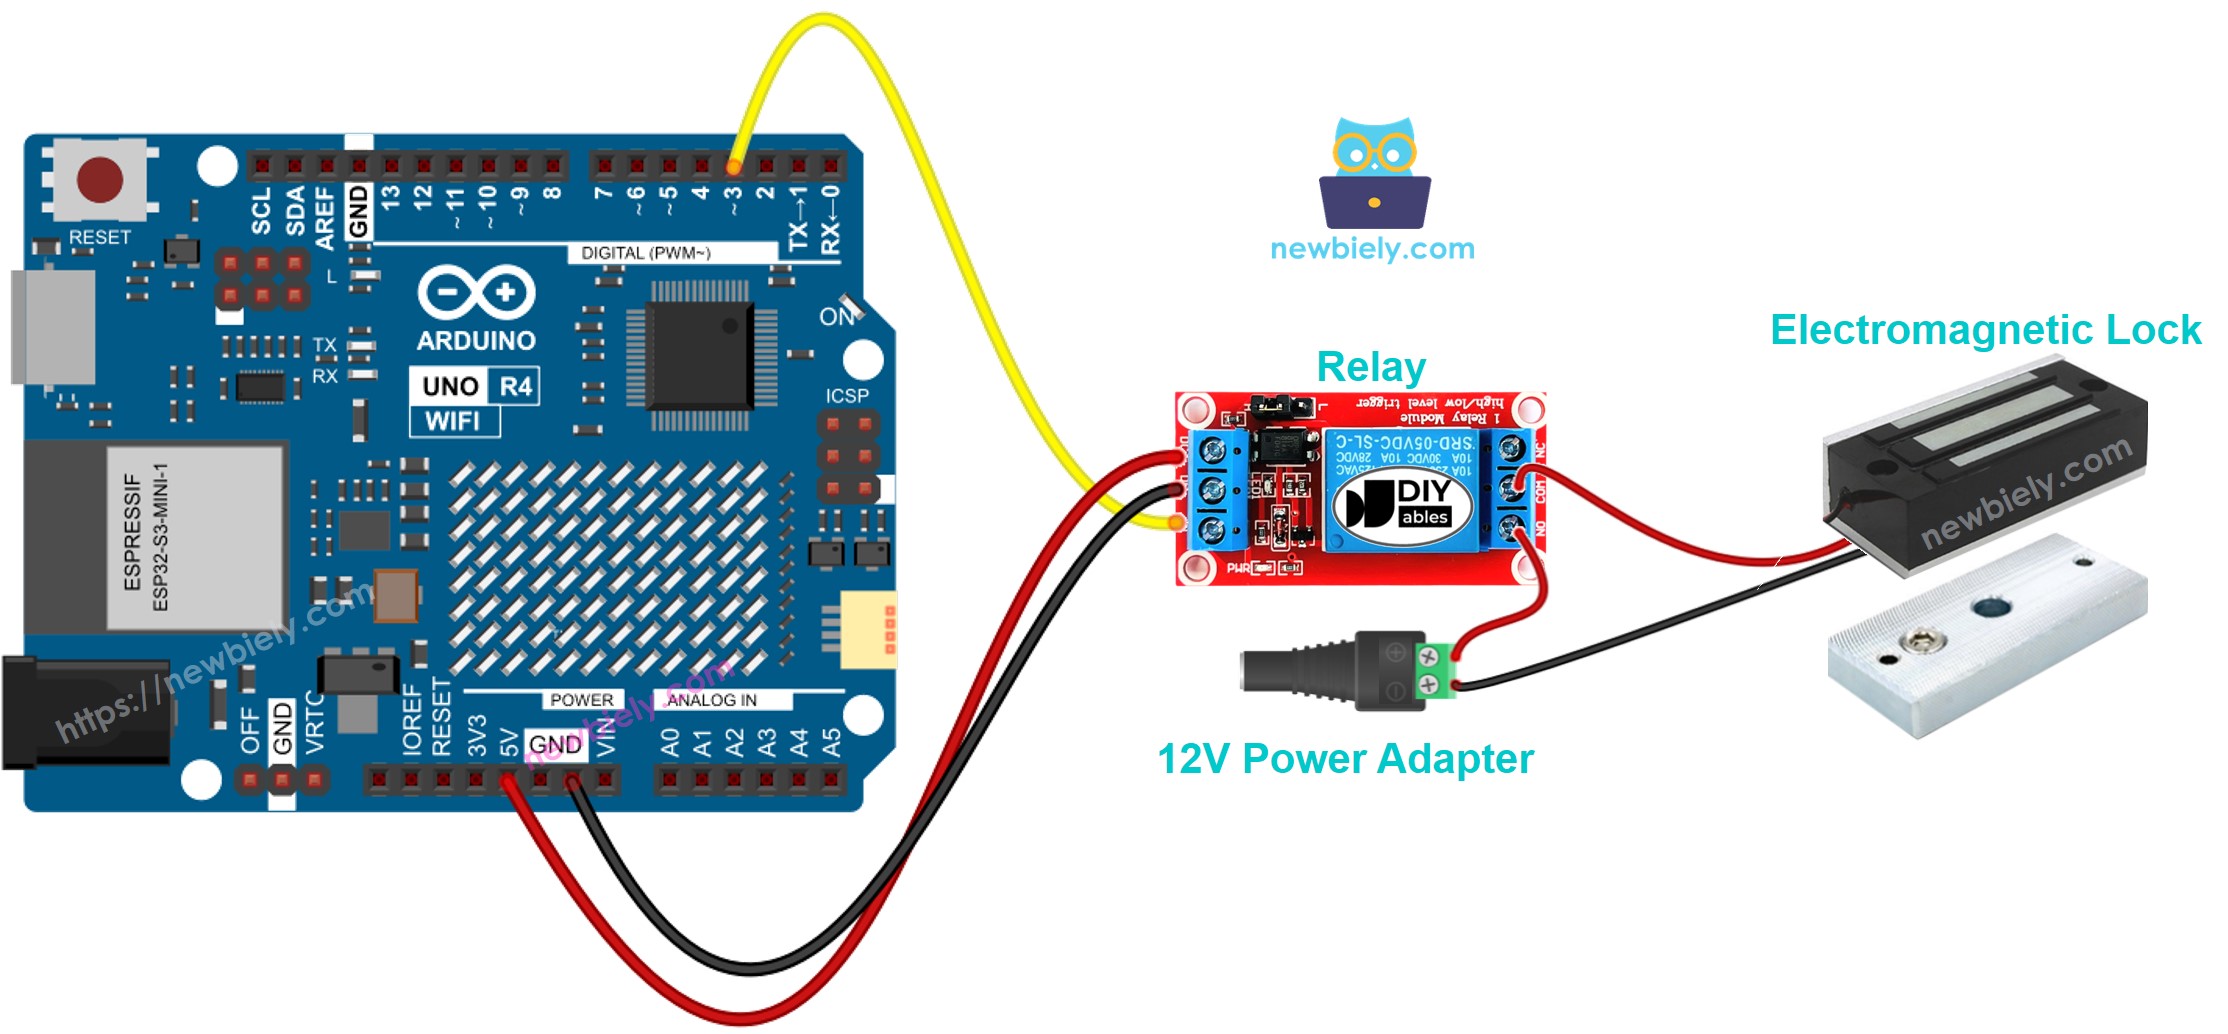
The electromagnetic lock often needs 12V, 24V, or 48V power supply. Thus, we CANNOT connect the electromagnetic lock directly to an Arduino UNO R4 pin. Instead, we must connect it through a relay to the Arduino UNO R4 pin.
If we link the electromagnetic lock to a relay in the normally open setting:
- When the relay is open, the door is unlocked.
- When the relay is closed, the door is locked.
You can connect Arduino UNO R4 to a relay to program it to operate an electromagnetic lock. To learn more about using a relay with Arduino UNO R4, visit Arduino UNO R4 - Relay tutorial.
To install it, fix the armature plate to the door or window (the part that moves) and attach the electromagnet to the door frame (the part that does not move). When you close the door, these two parts should touch each other.
Wiring Diagram
This image is created using Fritzing. Click to enlarge image
See The best way to supply power to the Arduino Uno R4 and other components.
Arduino UNO R4 Code
This code locks and unlocks the door every 5 seconds.
Detailed Instructions
Follow these instructions step by step:
- If this is your first time using the Arduino Uno R4 WiFi/Minima, refer to the tutorial on setting up the environment for Arduino Uno R4 WiFi/Minima in the Arduino IDE.
- Connect the electromagnetic lock to the Arduino Uno R4 according to the provided diagram.
- Connect the Arduino Uno R4 board to your computer using a USB cable.
- Launch the Arduino IDE on your computer.
- Select the appropriate Arduino Uno R4 board (e.g., Arduino Uno R4 WiFi) and COM port.
- Copy the code above and open it in Arduino IDE.
- Click the Upload button in Arduino IDE to send the code to Arduino UNO R4.
- Bring the armature plate near to the electromagnet.
- Observe the attraction between the armature plate and the electromagnet.