Arduino UNO R4 - Rain Sensor
In this guide, we will learn to use an Arduino UNO R4 with a rain sensor to detect rain or snow. We will cover the following topics:
- Connecting a rain sensor to an Arduino UNO R4.
- Programming the Arduino UNO R4 to recognize rain using a digital signal from the rain sensor.
- Programming the Arduino UNO R4 to determine rain intensity using an analog signal from the rain sensor.

You can then change the code to turn on a motor or an alarm when it senses rain or snow.
Hardware Preparation
Or you can buy the following kits:
| 1 | × | DIYables STEM V4 IoT Starter Kit (Arduino included) | |
| 1 | × | DIYables Sensor Kit (30 sensors/displays) | |
| 1 | × | DIYables Sensor Kit (18 sensors/displays) |
Additionally, some of these links are for products from our own brand, DIYables .
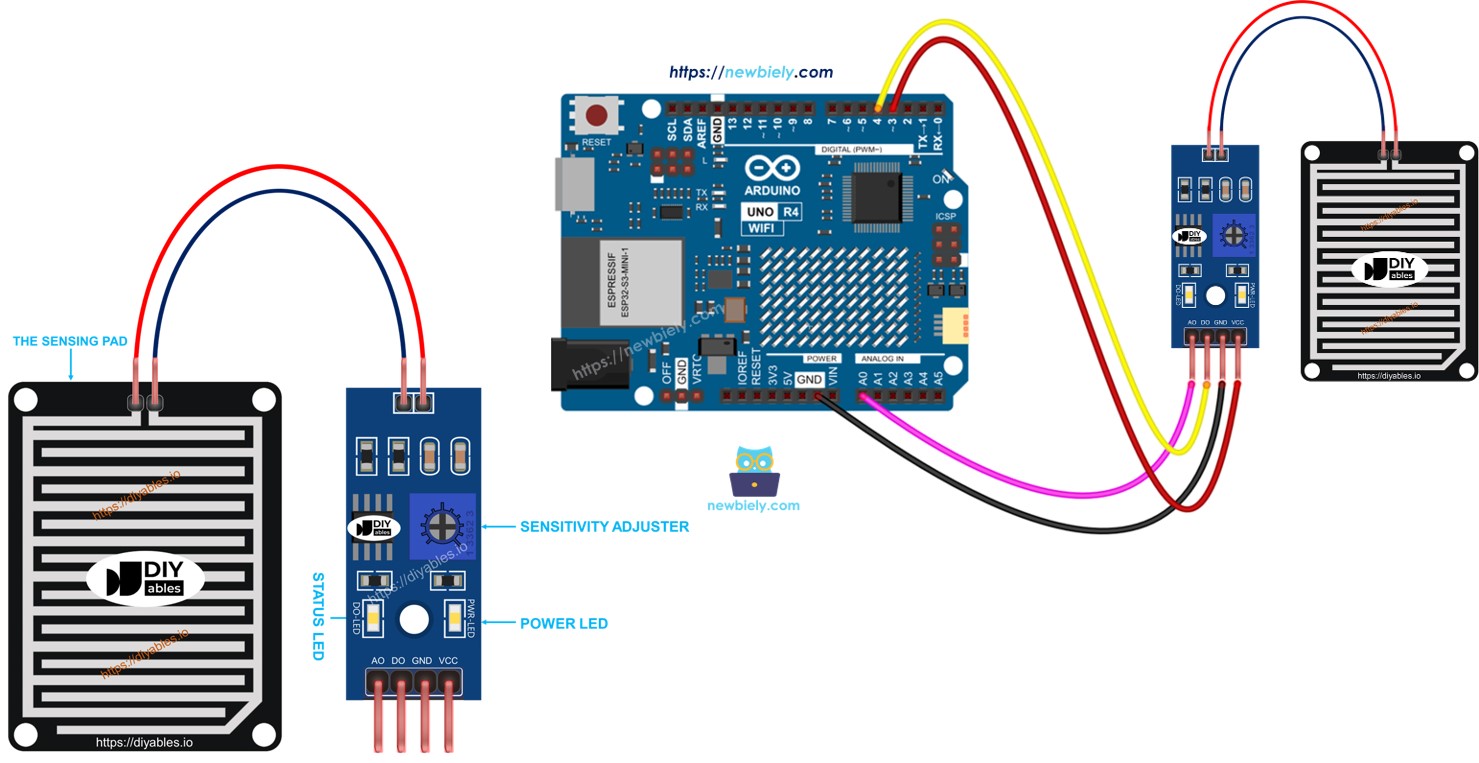
Overview of Rain Sensor
The rain sensor can detect and measure the amount of rain or snow. It gives two types of output signals: a digital signal (LOW or HIGH) and an analog signal.
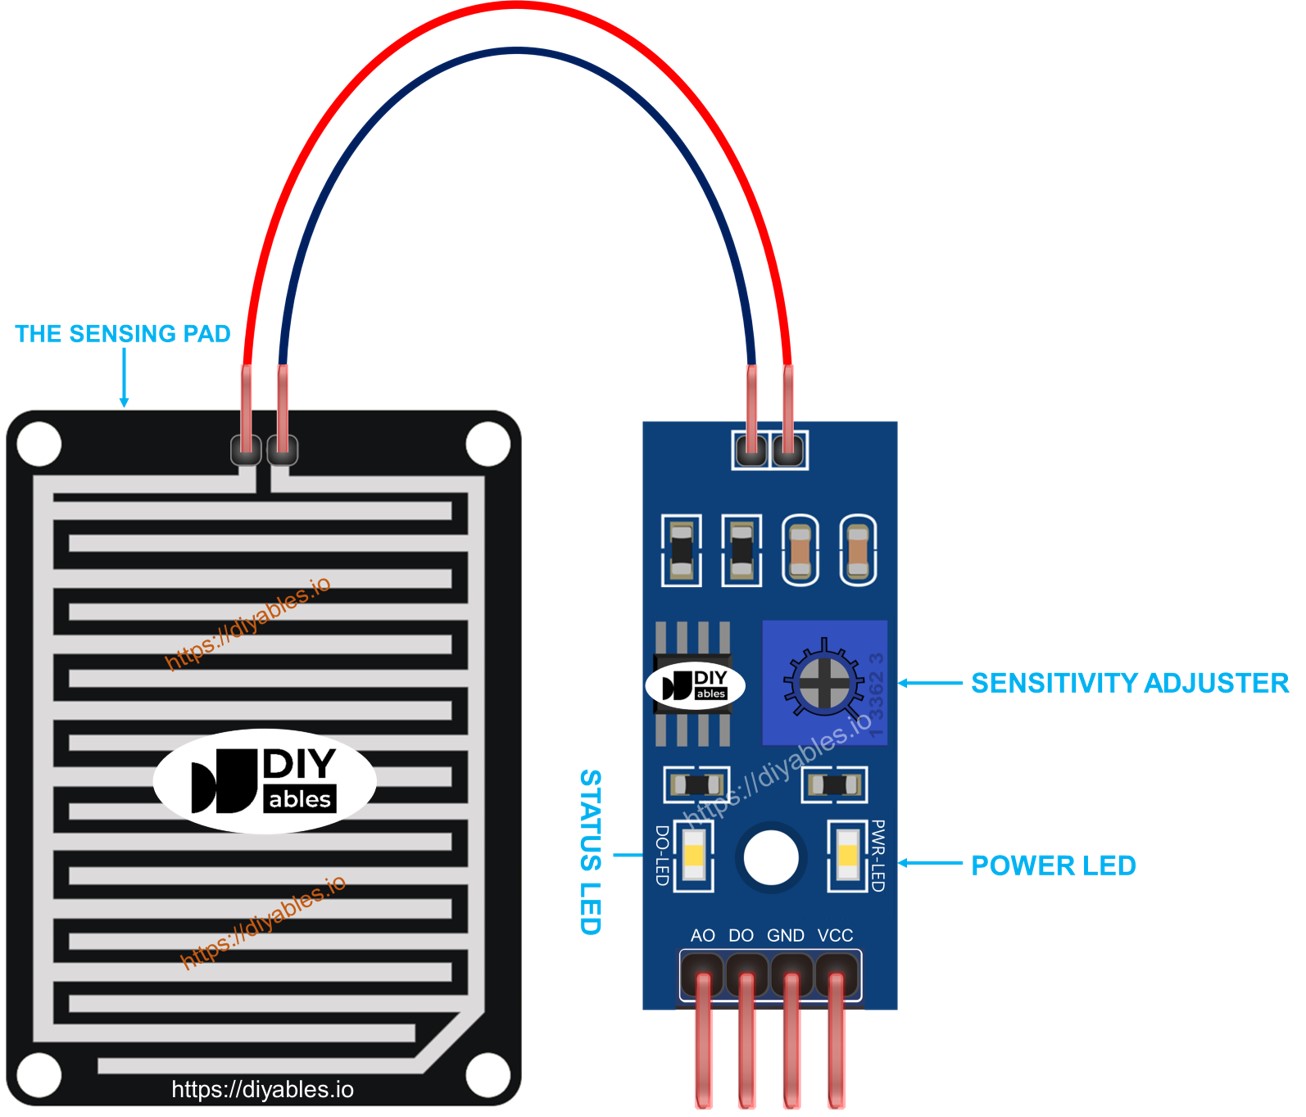
The rain sensor has two components:
- The detection pad
- The electronic unit

The sensing pad
The sensing pad is placed outdoors where it may be exposed to rain or snow, such as on a roof. The pad has several copper lines, divided into two types: power lines and sensor lines. These two types of lines are separate and do not connect unless water or snow bridges them. Both types of lines function the same way, so you can choose any line to be the power line and another to be the sensoria line.
The electronic module
The rain sensor's electronic module changes the signal from the sensing pad into an analog or digital value that the Arduino UNO R4 can read. It has four pins.
- VCC pin: Connect this to VCC (3.3V to 5V).
- GND pin: Connect this to GND (0V).
- DO pin: This is a digital output pin. It shows HIGH when there is no rain and LOW when rain is detected. Adjust the rain detection level with the potentiometer.
- AO pin: This is an analog output pin. The output value goes down when more water is on the sensing pad and goes up when there is less water.
It also has two LED lights:
- One power indicator light (PWR-LED).
- One rain status indicator light (DO-LED) on the DO pin: it lights up when there is rain.
How It Works
For the DO pin:
- The module includes a potentiometer to adjust the sensitivity.
- If the rain level exceeds the set limit, the sensor's output pin becomes LOW, and the DO-LED light turns on.
- If the rain level is under the set limit, the sensor's output pin stays HIGH, and the DO-LED light stays off.
Regarding the AO pin:
- When there is more water in the sensing pad, the value from the AO pin is lower.
- When there is less that is present on the sensing pad, the value from the AO pin is higher.
The potentiometer does not change the value on the AO pin.
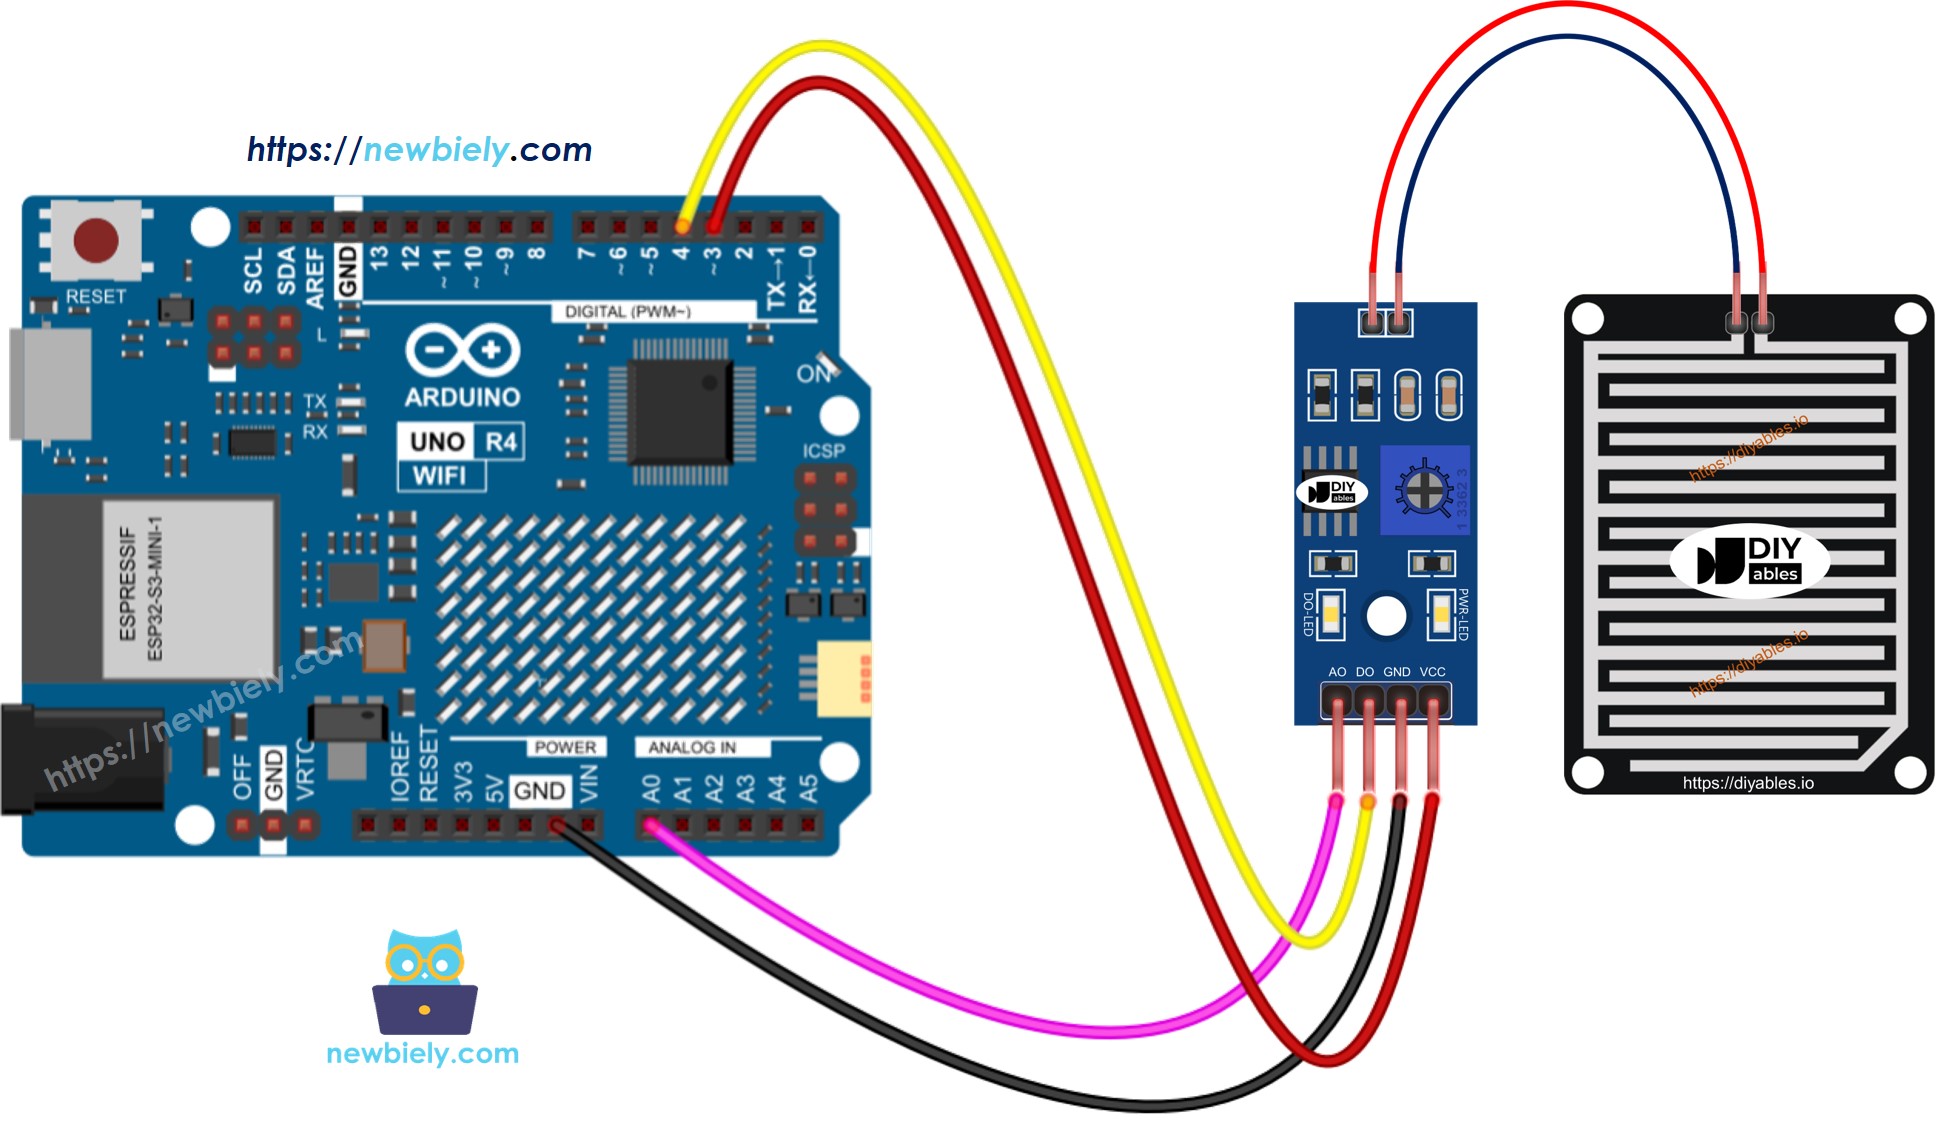
Wiring Diagram
Connect the VCC pin of the sensor to either a 3.3V or 5V pin on the Arduino UNO R4. However, directly connecting it can reduce the sensor's lifespan due to electrochemical corrosion. Instead, it's better to connect the sensor's VCC pin to an output pin on the Arduino. You can then program this pin to supply power to the sensor only when taking readings. This method helps minimize the effects of electrochemical corrosion.
The rain sensor module has two outputs. You can use one or both, depending on your needs.

This image is created using Fritzing. Click to enlarge image
See The best way to supply power to the Arduino Uno R4 and other components.
Arduino UNO R4 Code - Read value from DO pin
Detailed Instructions
Follow these instructions step by step:
- If this is your first time using the Arduino Uno R4 WiFi/Minima, refer to the tutorial on setting up the environment for Arduino Uno R4 WiFi/Minima in the Arduino IDE.
- Connect the rain sensor to the Arduino Uno R4 according to the provided diagram.
- Connect the Arduino Uno R4 board to your computer using a USB cable.
- Launch the Arduino IDE on your computer.
- Select the appropriate Arduino Uno R4 board (e.g., Arduino Uno R4 WiFi) and COM port.
- Copy the code above and open it in Arduino IDE.
- Click the Upload button in Arduino IDE to upload the code to Arduino UNO R4.
- Put a few drops of water on the rain sensor.
- Check the results on the Serial Monitor.
Please remember, if the LED light stays on all the time or is off even when the sensor is exposed to rain, you can change the potentiometer to adjust the sensor's sensitivity.
Arduino UNO R4 Code - Read value from AO pin
Detailed Instructions
- Copy the code and open it in Arduino IDE
- Click the Upload button in Arduino IDE to upload the code to Arduino UNO R4
- Put some water on the rain sensor
- Check the result on the Serial Monitor.
