Arduino UNO R4 - Obstacle Avoidance Sensor
In this guide, we will learn how to use the Arduino UNO R4 and the infrared obstacle avoidance sensor to detect obstacles.
Hardware Preparation
Or you can buy the following kits:
| 1 | × | DIYables STEM V4 IoT Starter Kit (Arduino included) | |
| 1 | × | DIYables Sensor Kit (18 sensors/displays) |
Additionally, some of these links are for products from our own brand, DIYables .

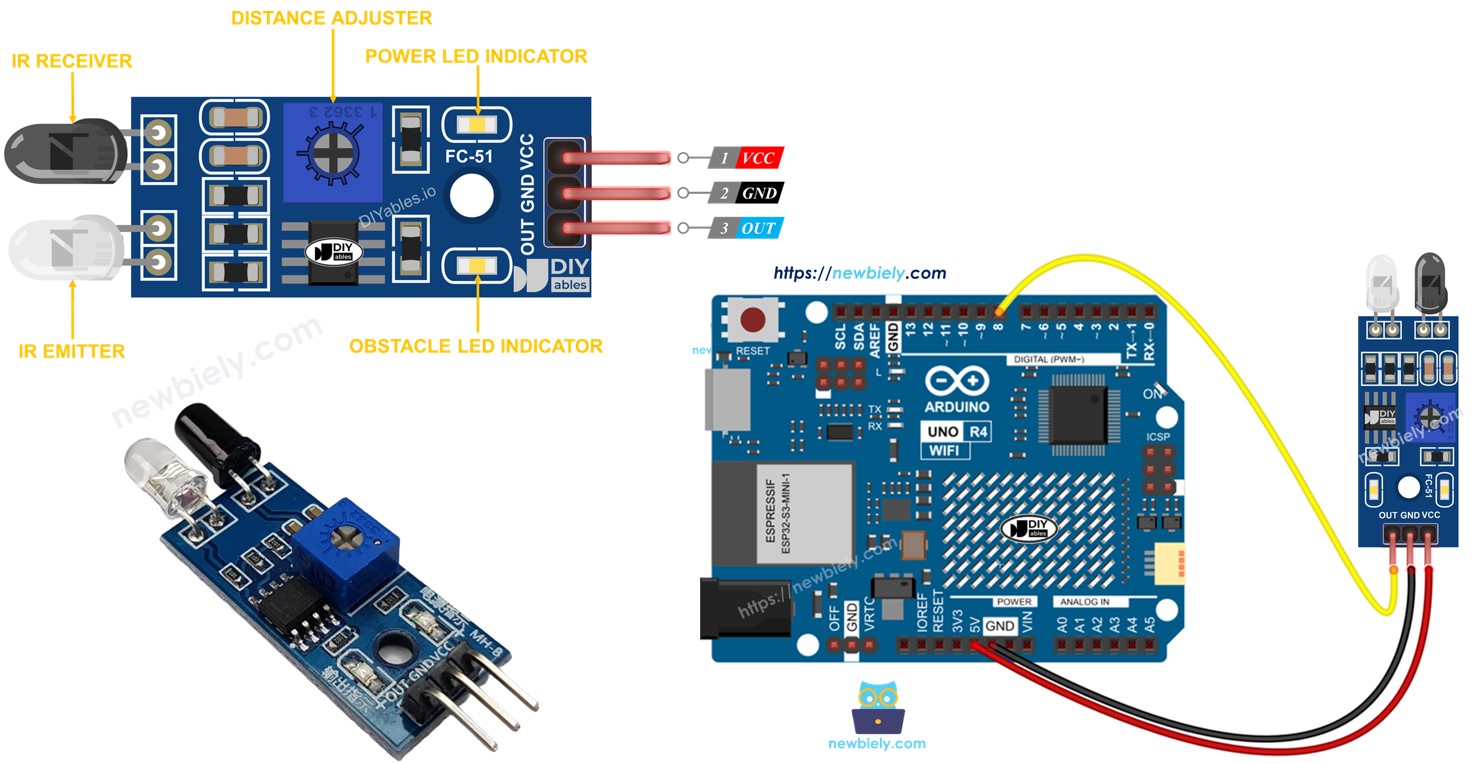
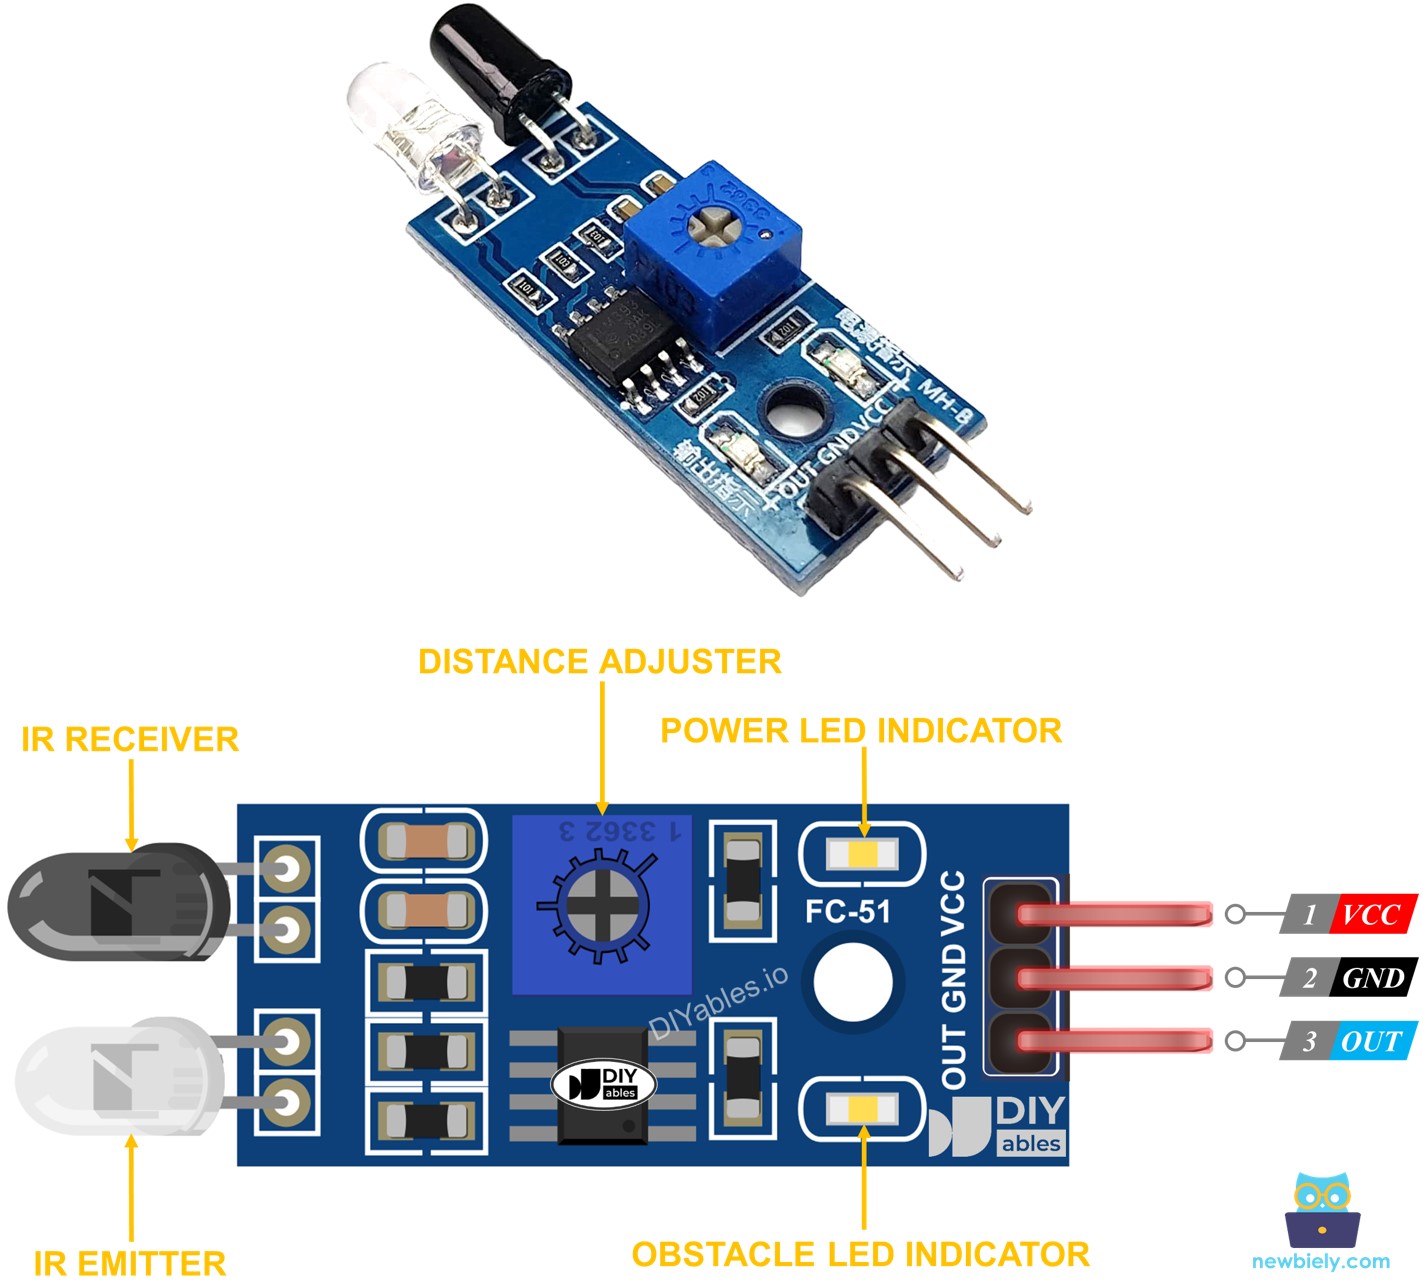
Overview of IR Obstacle Avoidance Sensor
The infrared (IR) obstacle sensor can find obstacles in front of it using an infrared signal. It can detect objects from 2cm to 30cm away. You can change the detection distance with a built-in tool called a potentiometer.
Pinout
The IR obstacle avoidance sensor has three pins:
- GND pin: Connect this pin to GND (0V).
- VCC pin: Connect this pin to VCC (5V or 3.3V).
- OUT pin: This is an output pin. It is LOW if there is an obstacle and HIGH if there is no obstacle. Connect this pin to the input pin of the Arduino UNO R4.
How It Works
An infrared obstacle sensor module includes an IR transmitter and an IR receiver. The IR transmitter sends out an IR signal, while the IR receiver detects this signal when it bounces back from an object to check if there is an obstacle. The detection of an obstacle is shown through the OUT pin.
- When there is an obstacle in front of the sensor, the OUT pin of the sensor is LOW.
- When there is no obstacle in front of the sensor, the OUT pin of the it is HIGH.
※ NOTE THAT:
During shipping, the sensor might get bent or damaged, which can cause it to not work properly. If the sensor is not working right, adjust the infrared transmitter and receiver so they are lined up parallel to each other.
Wiring Diagram
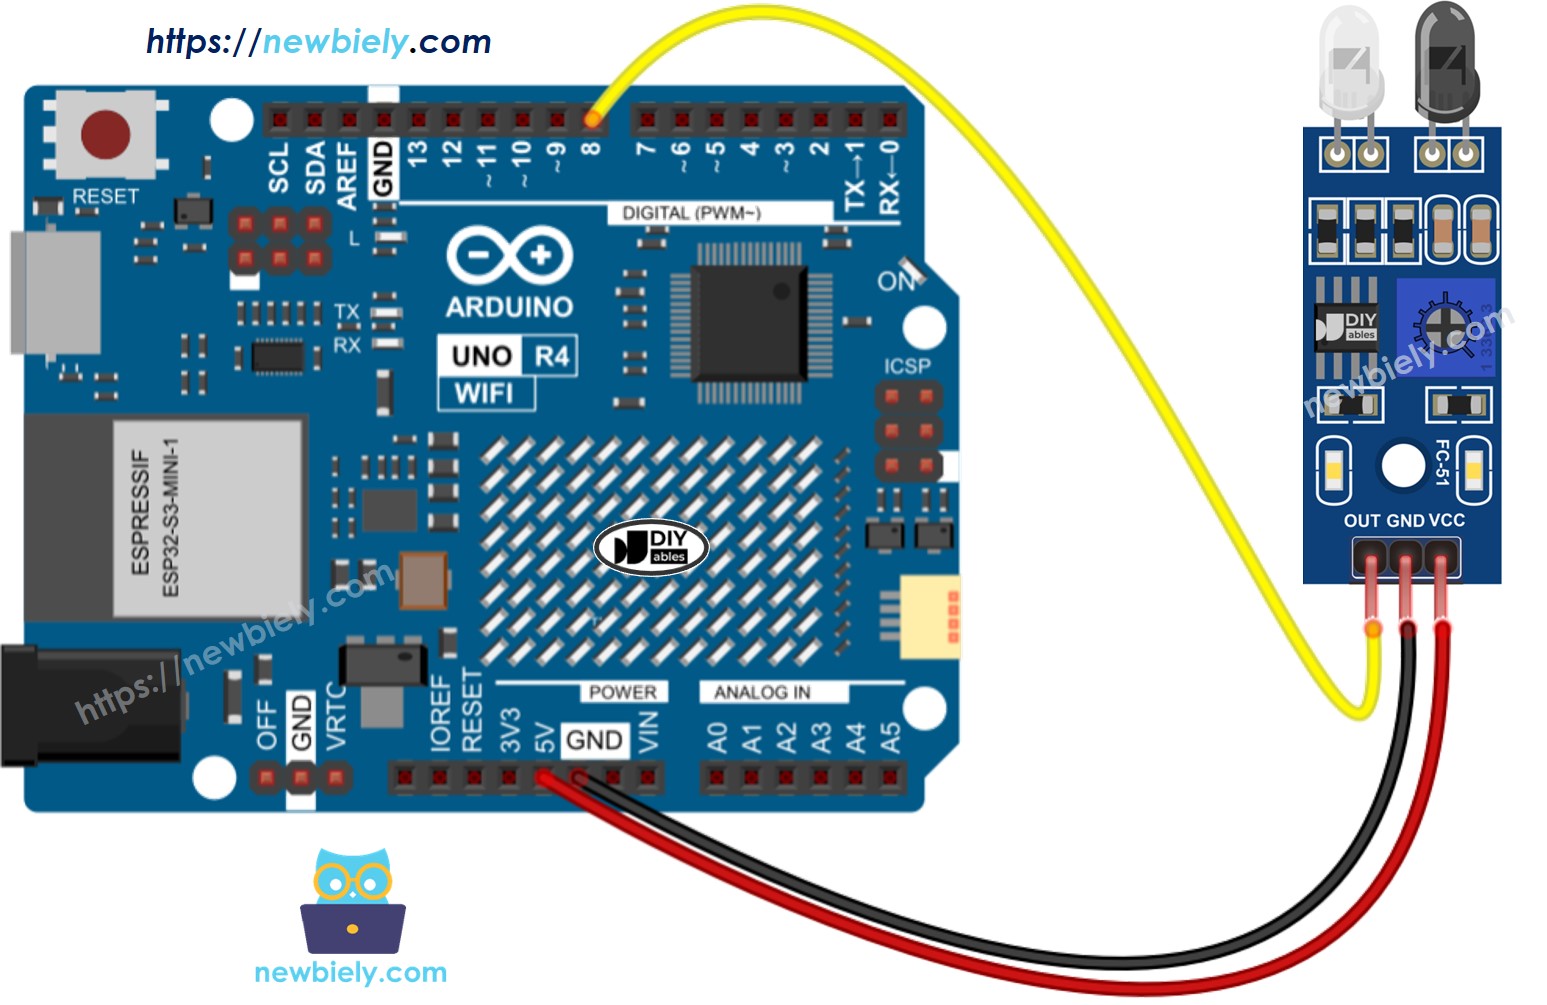
This image is created using Fritzing. Click to enlarge image
See The best way to supply power to the Arduino Uno R4 and other components.
How To Program For IR Obstacle Avoidance Sensor
- Set the Arduino UNO R4 pin as a digital input using the pinMode() function. For instance, configure pin 8.
- Reads the state of the Arduino UNO R4 pin by using digitalRead() function.
Arduino UNO R4 Code
There are use-cases for using the obstacle sensor:
- Do something or do nothing, depending on whether there is an obstacle or not.
- Do something or do nothing, when you detect an obstacle or when it is gone.
Arduino UNO R4 code for checking if the obstacle is present
Detailed Instructions
Follow these instructions step by step:
- If this is your first time using the Arduino Uno R4 WiFi/Minima, refer to the tutorial on setting up the environment for Arduino Uno R4 WiFi/Minima in the Arduino IDE.
- Connect the obstacle avoidance sensor to the Arduino Uno R4 according to the provided diagram.
- Connect the Arduino Uno R4 board to your computer using a USB cable.
- Launch the Arduino IDE on your computer.
- Select the appropriate Arduino Uno R4 board (e.g., Arduino Uno R4 WiFi) and COM port.
- Copy the code and open the provided code with the Arduino IDE.
- Click the Upload button in the Arduino IDE to upload the code to the Arduino UNO R4.
- Place an obstacle in front of the sensor for some time, then take it away.
- Check the results on the Serial Monitor.
Arduino UNO R4 code for detecting obstacle
Detailed Instructions
- Copy the code and open it in Arduino IDE.
- Click the Upload button in Arduino IDE to upload the code to the Arduino UNO R4.
- Place an obstacle in front of the sensor for a moment, then take it away.
- Check the results on the Serial Monitor.