Arduino UNO R4 - MySQL
This tutorials instructs you how to use Arduino UNO R4 collect data from sensors and save it in a MySQL database. In detail, we will learn:
- How to program Arduino UNO R4 to connect to MySQL database
- How to program Arduino UNO R4 to insert data into MySQL database
- How to program Arduino UNO R4 to update data into MySQL database
- How to program Arduino UNO R4 to retrieve data from MySQL database
Hardware Preparation
Or you can buy the following kits:
| 1 | × | DIYables STEM V4 IoT Starter Kit (Arduino included) | |
| 1 | × | DIYables Sensor Kit (18 sensors/displays) |
Additionally, some of these links are for products from our own brand, DIYables .

Arduino UNO R4 - MySQL
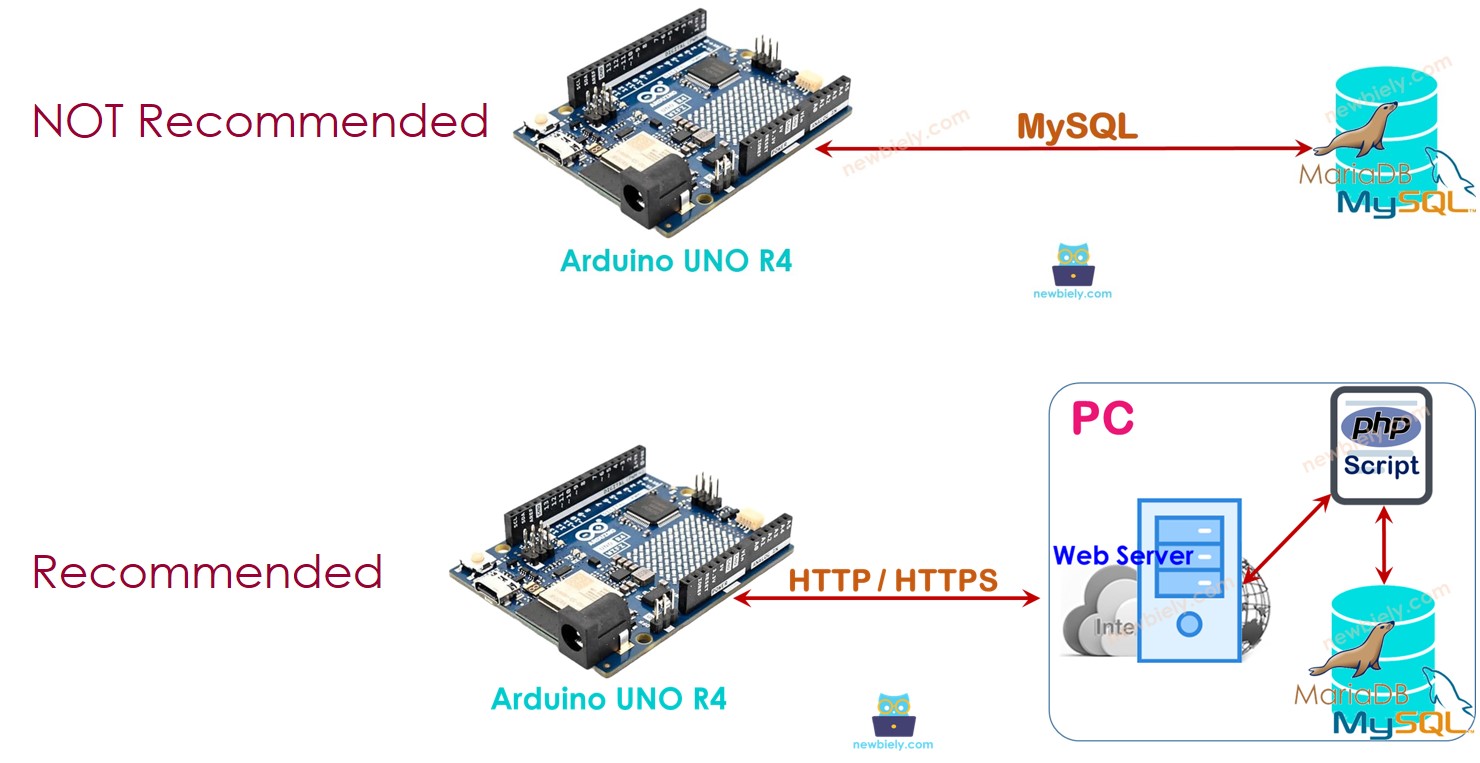
The Arduino UNO R4 can connect with the MySQL database in two different methods:
- Arduino UNO R4 connects directly to MySQL Server using a MySQL protocol (this is the direct method).
- Arduino UNO R4 connects to MySQL Server through an HTTP protocol (this is the indirect method).
Let's see which one is better.
Arduino UNO R4 interacts directly to MySQL Server
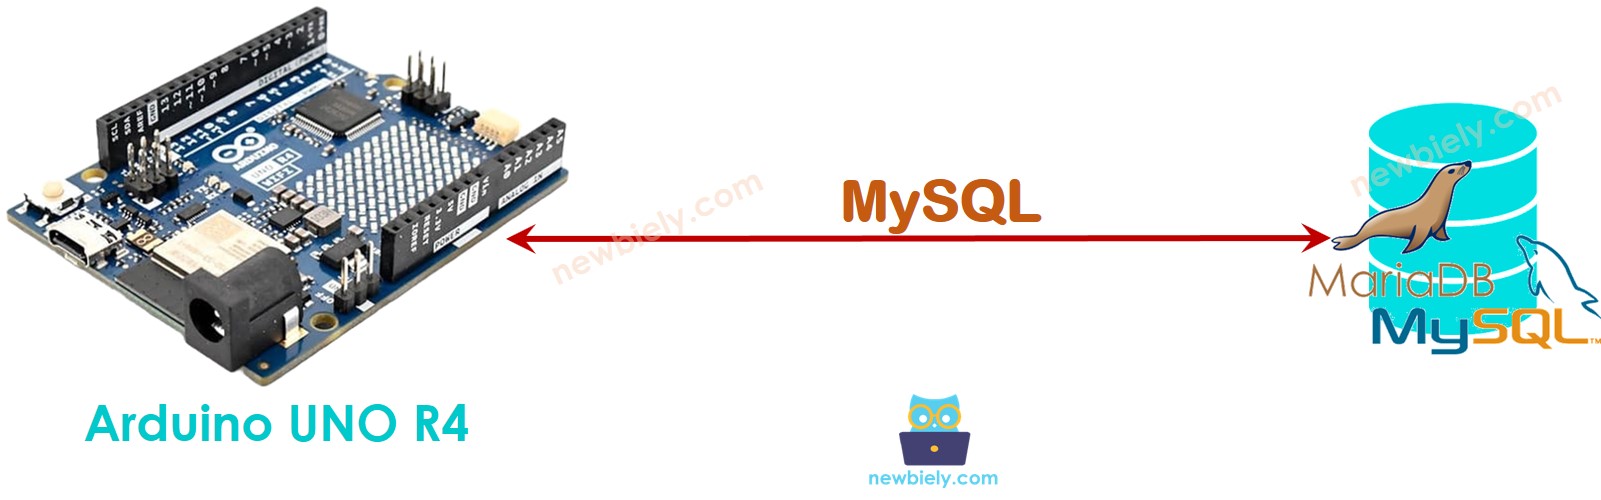
This might seem easy, but there are several drawbacks:
- Allowing a MySQL User to access the database remotely can be risky for security, even with limited user privileges.
- Processing data in Arduino UNO R4 or a MySQL server makes the Arduino code and MySQL script more complex and heavily uses Arduino's memory and CPU.
- The MySQL server might send a large amount of data to Arduino UNO R4, which could cause it to run out of memory.
- Many MySQL libraries do not support SSL/TLS, meaning that usernames and passwords are sent without encryption, posing another security risk.
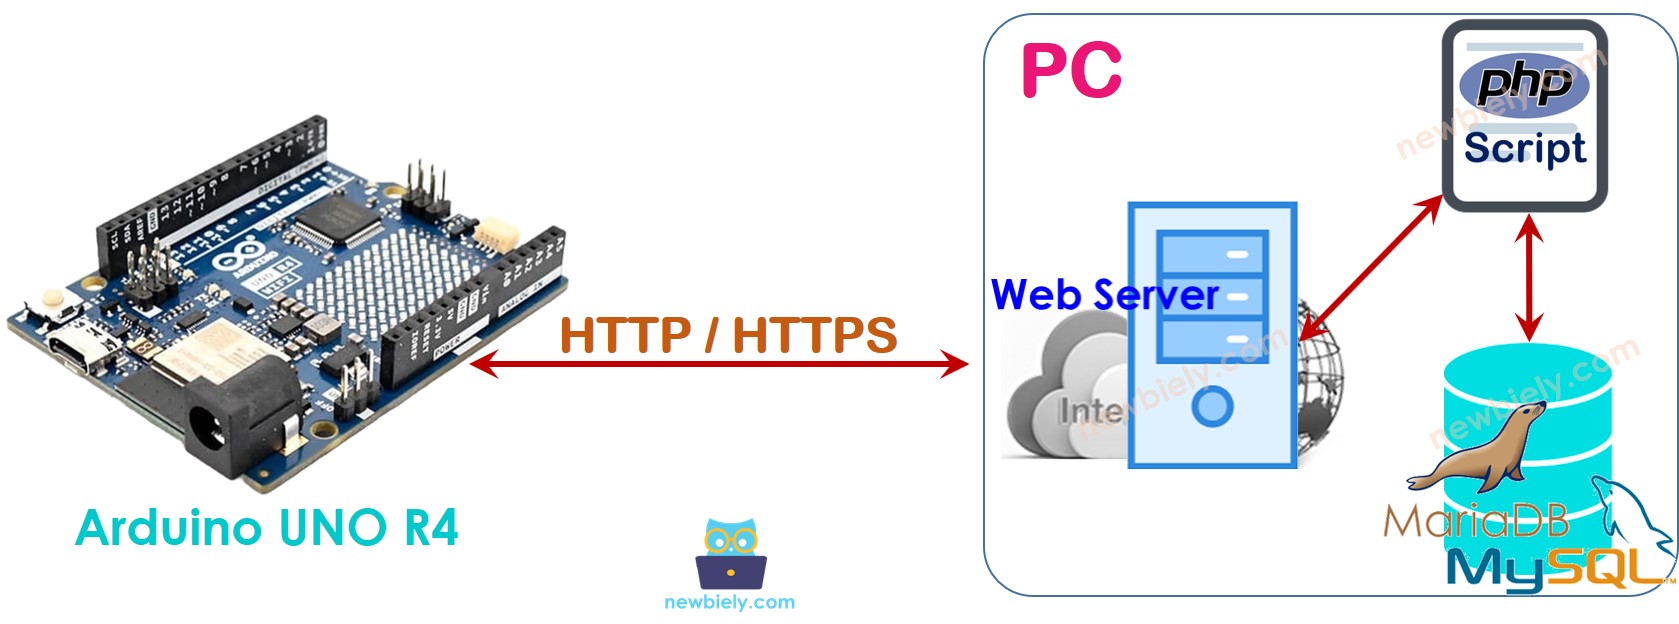
Arduino UNO R4 interacts indirectly to MySQL Server via HTTP/HTTPS
This indirect method solves all the issues that the direct method has. Let’s first look at how this indirect method works before we explore how it avoids the problems of the direct method.
How it works
- Step 1: Arduino UNO R4 sends an HTTP Request to Web Server
- Step 2: Web Server executes PHP script
- Step 3: PHP script receives data from HTTP Request, processes it, and interacts with MySQL database.
- Step 4: PHP script processes the results and sends them back to Arduino UNO R4 through HTTP Response
This guide will also instructs you how to install a Web server and MySQL server on your PC. It seems complex, but it's not.
Now, let's explore how the indirect method helps to avoid the drawbacks of the direct method.
- By putting the MySQL server and HTTP server on the same machine, you can set the MySQL user account to only access from that machine. The username and password for this account are saved on the server (mentioned in step 3), which helps increase security.
- A PHP script (steps 3 and 4) handles the data processing. This makes things simpler and less complex for both the Arduino UNO R4 and the MySQL servers. Using PHP for data processing is easier than using Arduino UNO R4 code or MySQL scripts.
- The PHP script processes the data and then sends only what is necessary to the Arduino UNO R4 (step 4). This helps to prevent the Arduino UNO R4 from running out of memory.
- Most Ethernet/WiFi libraries support TLS/SSL, enabling HTTPS requests. With HTTPS, data is encrypted and safely transferred over the Internet.
In step 1, you can use a different username and password to connect the Arduino UNO R4 with the Web Server. It's important that the HTTP username and password are not the same as the MySQL username and password to keep things secure.
This guide will show how to connect Arduino UNO R4 to MySQL indirectly.
Arduino UNO R4 - MySQL via HTTP/HTTPS
We need to take the following step:
- Install MySQL server, Web server, and PHP on your computer
- Enable MySQL and Web server
- Create a MySQL User account
- Create a MySQL database
- Create a MySQL table
- Write PHP scripts
- Program Arduino UNO R4
Now, let's take it one step at a time.
Install MySQL server, Web server, and PHP on your PC
The XAMPP package has everything included. We only need to install it once.
- Get XAMPP from this link
- Install it.
After installation, the folder named C:\xampp\htdocs will appear on your PC. This folder will contains the PHP code (explained later).
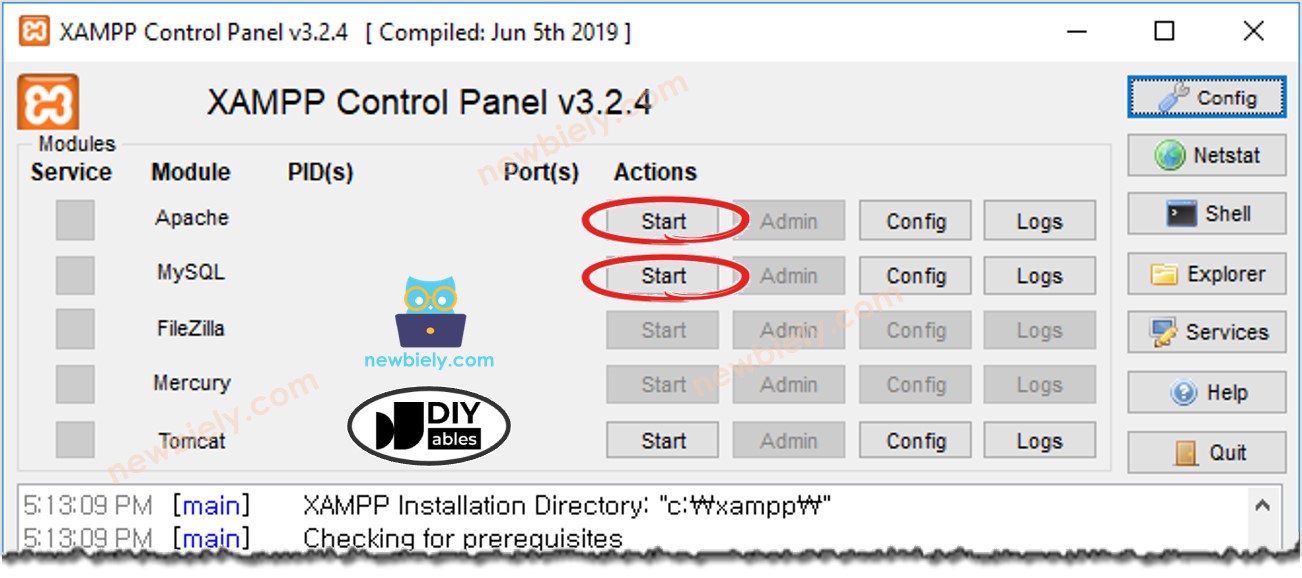
Enable MySQL and Web server
- Open the XAMPL Control Panel
- Click the Start button to turn on MySQL and the Web server (Refer to the image below)
Create a MySQL User account
We will set up a MySQL account that can access the MySQL database only from the local computer.
- Even if someone knows your username and password, they can't get into your MySQL database remotely.
- Since PHP and MySQL are on the same PC, PHP can use the username and password to connect to the MySQL database.
Let's create a MySQL user account with the username ArduinoUnoR4 and the password newbiely.com.
- Open Command Prompt on your computer. Keep it open until you finish the tutorial.
- Enter this command in Command Prompt:
- MySQL's default setting includes a root account that does not have a password. It is recommended that you create a password for this account.
Type the following command in the Command Prompt to set the root account password: (e.g. YOUR-ROOT-PASSWORD)
- Enter this command in the Command Prompt:
- Enter your root password and press Enter.
- Create a MySQL user account with the username 'ArduinoUnoR4' and the password 'newbiely.com'. Copy the following commands and paste them into the Command Prompt:
You have now successfully created a MySQL user account. Remember the username and password, as you will need them for the PHP script.
Create a MySQL database
Create a database called db_arduino by entering this command in Command Prompt:
Create a MySQL table
Let's make a table called tbl_temperature. Copy the following commands and paste them into the Command Prompt:
Write one or more PHP files
Create a PHP file called insert_temp.php at C:\xampp\htdocs
This PHP code takes temperature from HTTP Request and inserts it to the database.
- Find out your computer's IP address. Search on Google if you are unsure how to find it.
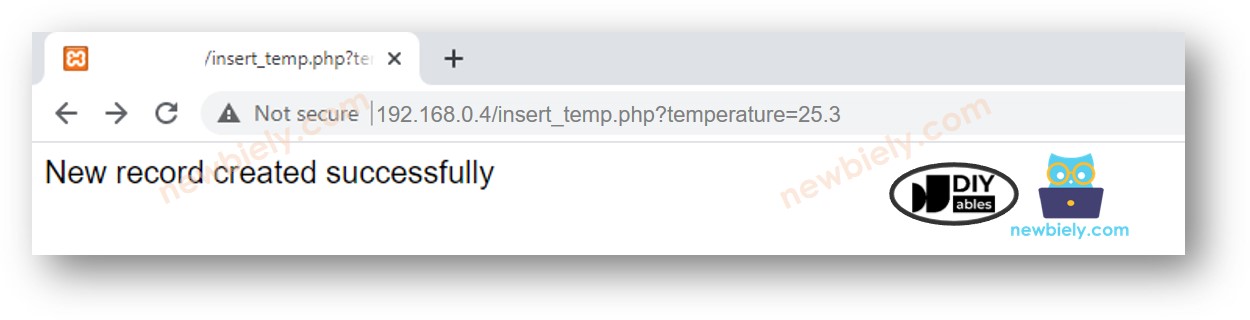
- To check if the PHP code is working, open a web browser (like Chrome) and go to this link: http://192.168.0.4/insert_temp.php?temperature=25.3. Remember to use your own computer's IP address instead of "192.168.0.4".
- You will see the results displayed in your web browser.
- To see if the data is saved in the database, type this command in the Command Prompt:
The temperature 25.3 is saved in the database. Next, we need to program the Arduino UNO R4 to send a similar HTTP request to your computer.
Write Arduino UNO R4 code
This Arduino UNO R4 code sends an HTTP request to your computer to add a temperature of 30.5°C to the database.
Arduino UNO R4 Code for Arduino UNO R4 R4 WiFi
Detailed Instructions
Follow these instructions step by step:
- If this is your first time using the Arduino Uno R4 WiFi/Minima, refer to the tutorial on setting up the environment for Arduino Uno R4 WiFi/Minima in the Arduino IDE.
- Connect the Arduino Uno R4 board to your computer using a USB cable.
- Launch the Arduino IDE on your computer.
- Select the appropriate Arduino Uno R4 board (e.g., Arduino Uno R4 WiFi) and COM port.
- Replace the IP address in the code with your computer's IP address.
- Compile and upload the code to the Arduino UNO R4.
- Open the Serial Monitor.
- View the output on the Serial Monitor.
- To see if the information is saved in the database, type this command in Command Prompt:
The temperature 30.5 is saved in the database.
How Arduino UNO R4 insert, update or get data to/from MySQL database
In the example, we learned how to add data to the MySQL database. To update or retrieve data, the process is similar. Just change the MySQL queries in the PHP script. For more information, visit W3Schools.
Advanced Usage
To improve security,
- You can modify the code of Arduino UNO R4 to use HTTPS instead of HTTP. For how to do this, visit Arduino UNO R4 - HTTPS.
- You can authenticate using a username and password when connecting the Arduino UNO R4 to a Web server. Learn more at Basic access authentication.
※ NOTE THAT:
To create a full system with top security, we must add more features (like preventing MySQL injection, turning HTTPS into REST API, and using JSON format for data). However, this guide is meant for beginners learning Arduino UNO R4. We kept it very simple. After you finish this guide, you can learn more advanced topics.