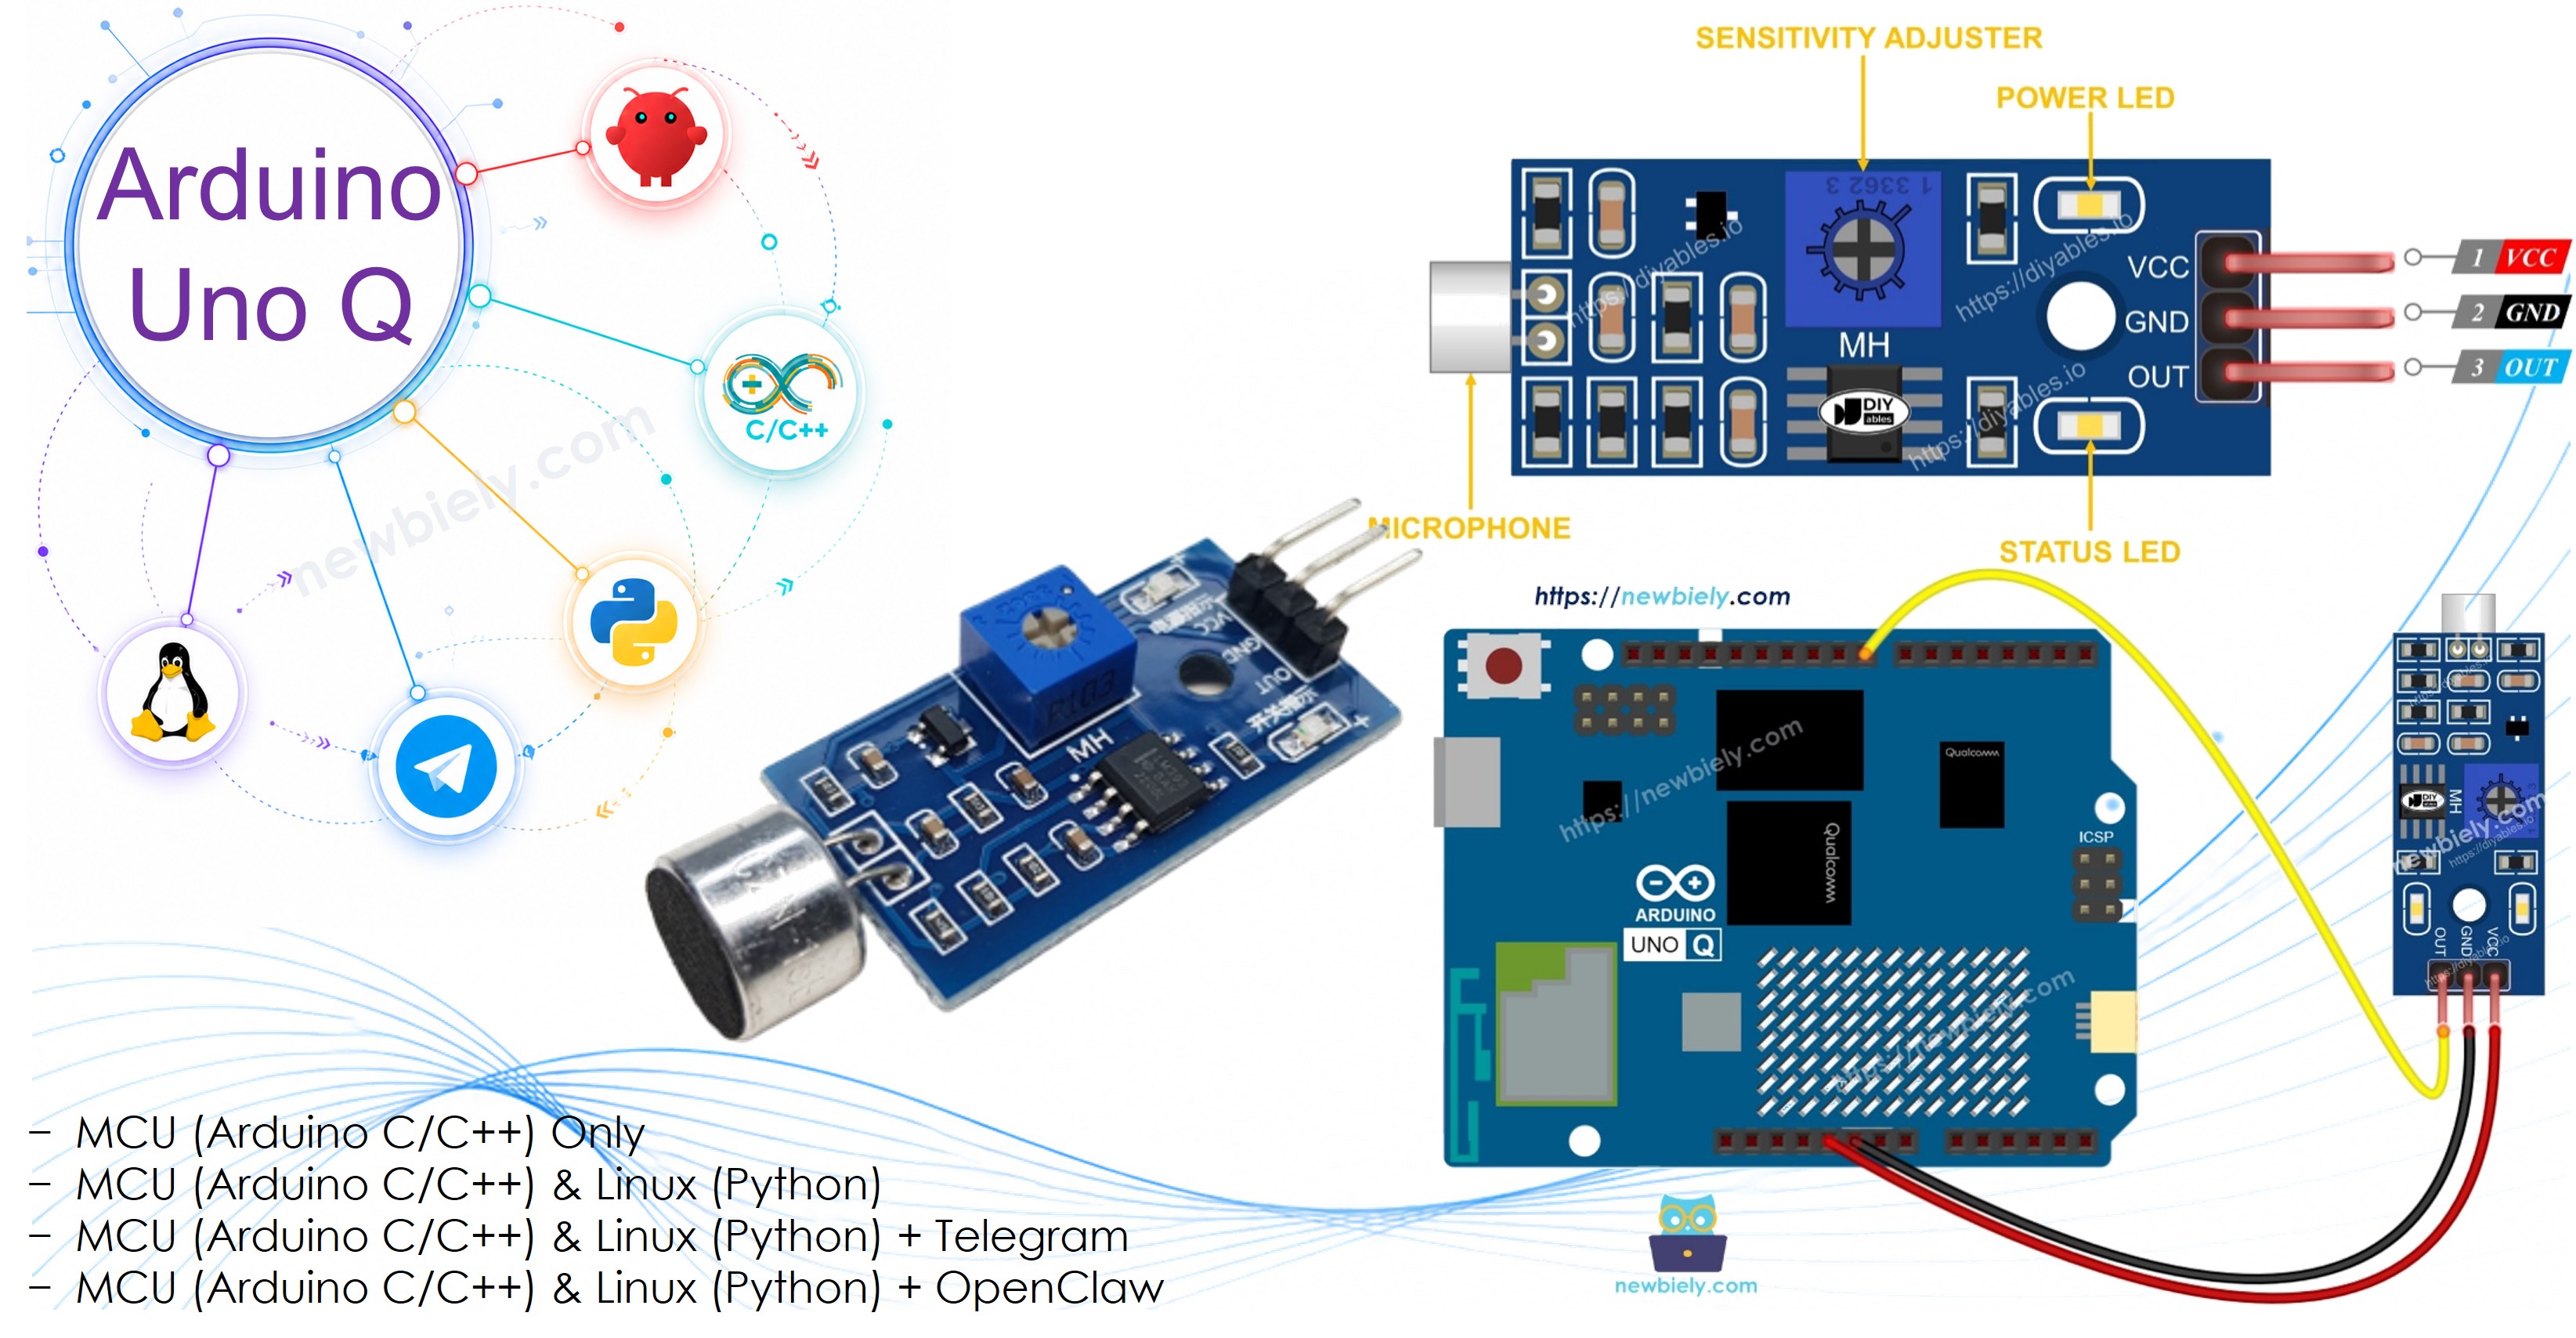
Arduino UNO Q - Sound Sensor
A sound sensor detects sounds in the environment and outputs a digital signal. It includes an onboard potentiometer to adjust sensitivity. Use it to trigger actions when a clap, knock, or loud noise is detected. With Bridge and Telegram, your Arduino UNO Q can send you instant alerts when it hears a sound.
In this tutorial, you will learn:
- What a sound sensor is and how it works
- How to wire the sound sensor to the Arduino UNO Q MCU
- How to read the digital output to detect sounds
- How to use Bridge to expose sound state and events to the Linux side (Python)
- How to receive Telegram alerts when sound is detected on Arduino UNO Q
- How to use OpenClaw on Arduino UNO Q with the sound sensor
Hardware Preparation
Or you can buy the following kits:
| 1 | × | DIYables Sensor Kit (18 sensors/displays) |
Additionally, some of these links are for products from our own brand, DIYables .
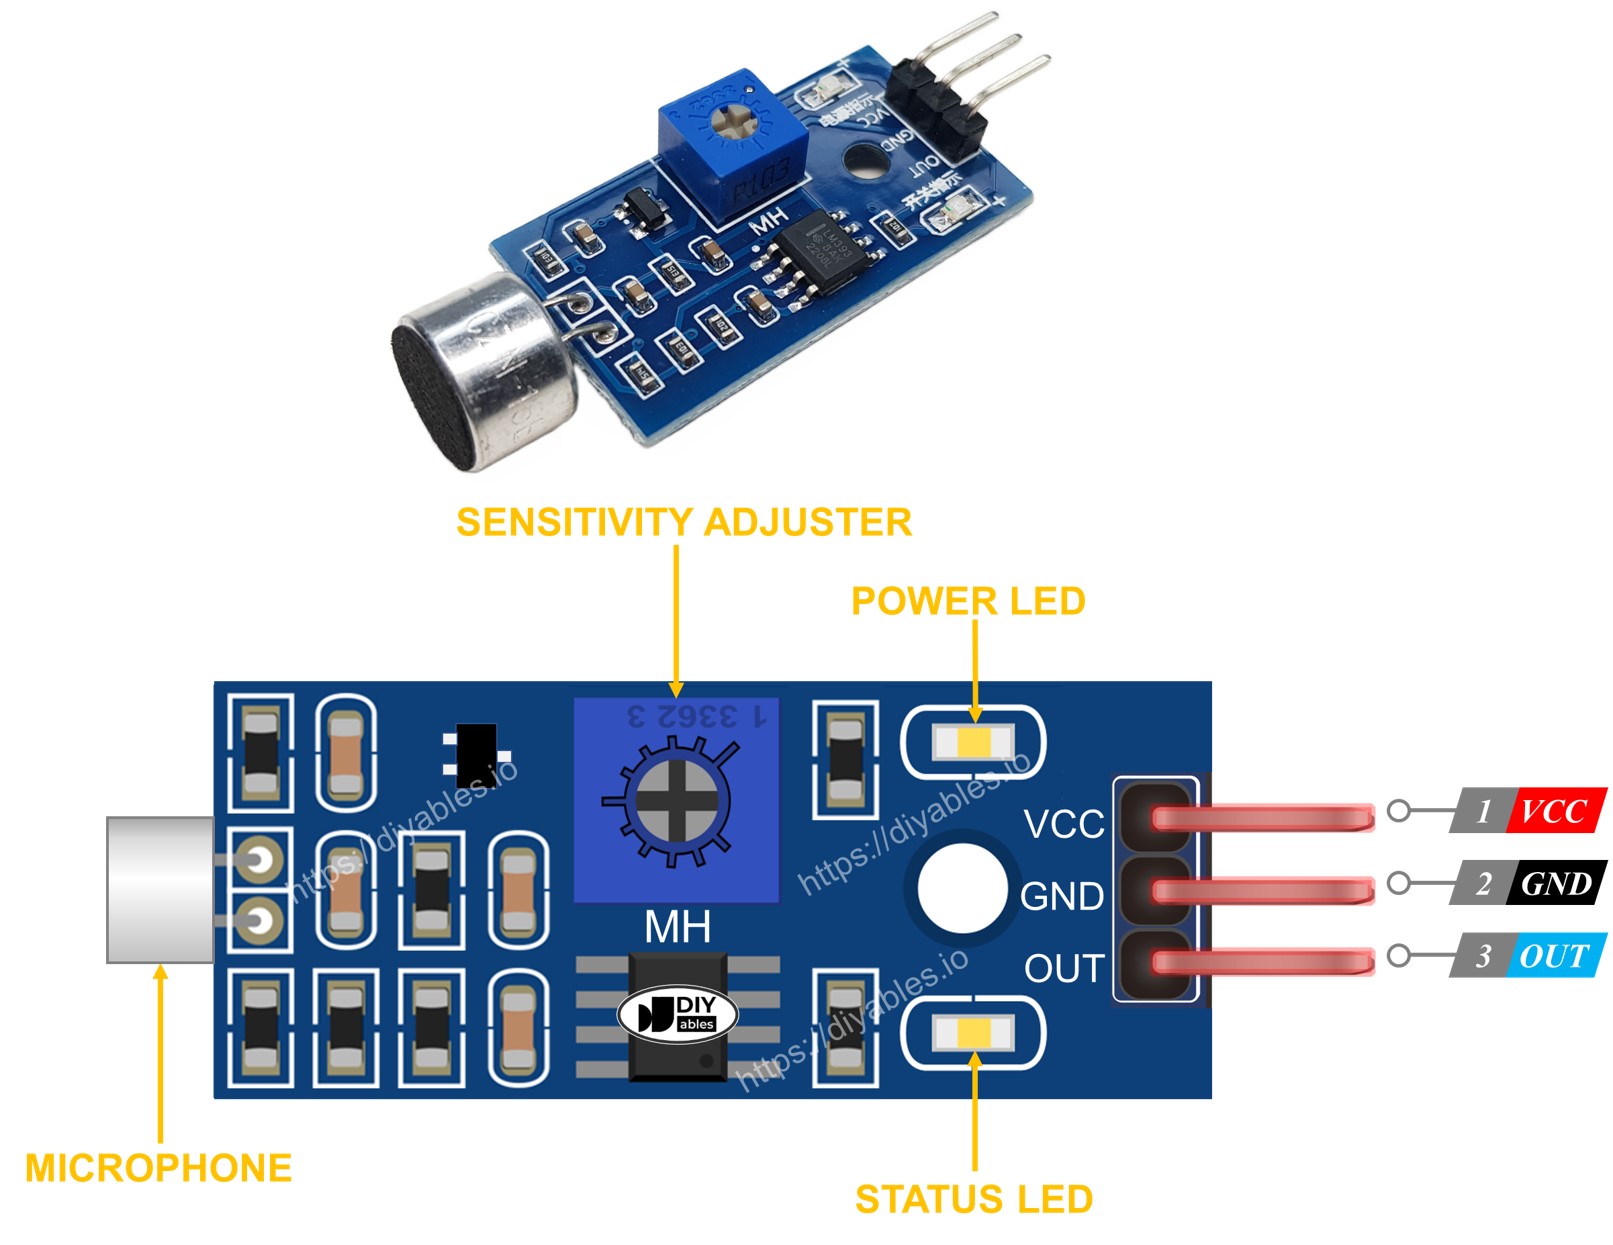
Overview of the Sound Sensor
A sound sensor module has a small microphone that detects vibrations in the air (sound waves). The module converts these into a digital signal:
- HIGH: Quiet — no sound detected above the threshold
- LOW: Sound detected
The module includes:
- VCC pin: 3.3V to 5V power supply
- GND pin: Ground
- OUT pin: Digital output — HIGH = quiet, LOW = sound detected
- Onboard potentiometer: Adjusts detection sensitivity
- PWR LED: Power indicator
- Sound LED: Lights up when sound is detected
How to Adjust Sensitivity
Turn the potentiometer on the module:
- Clockwise: More sensitive (detects softer sounds)
- Counter-clockwise: Less sensitive (only loud sounds trigger it)
Adjust it until the Sound LED reliably triggers on a clap or knock but stays off in ambient noise.
Wiring Diagram
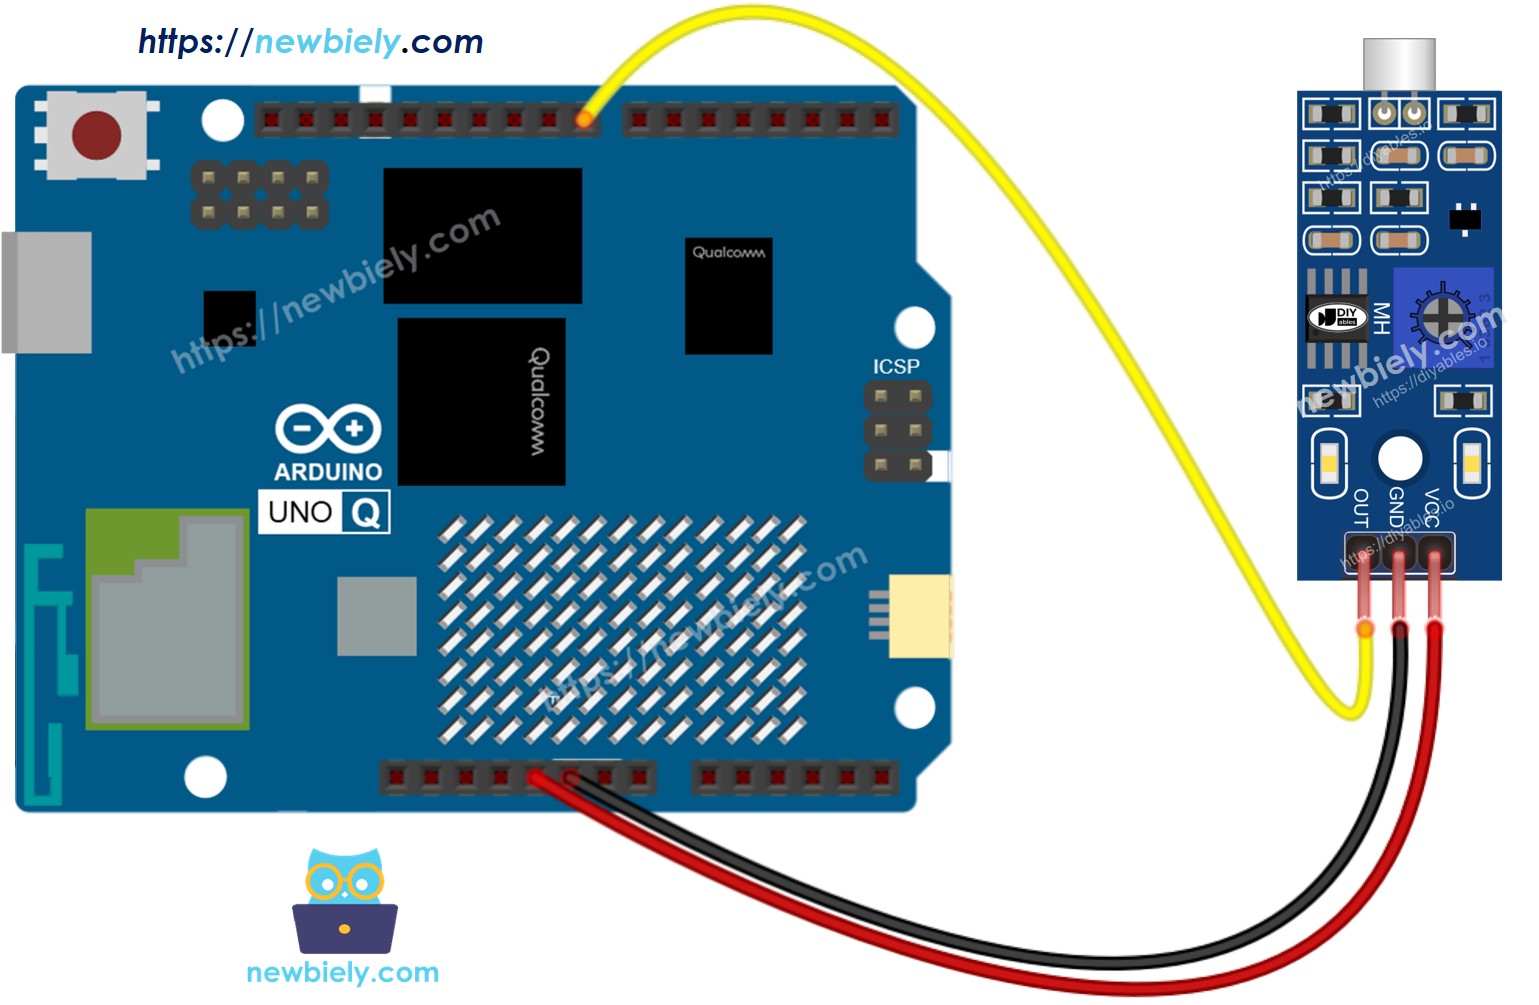
This image is created using Fritzing. Click to enlarge image
| Sound Sensor Pin | Arduino UNO Q MCU |
|---|---|
| GND | GND |
| VCC | 5V |
| OUT | D8 |
How To Program For Sound Sensor
- Configure the sensor pin as a digital input:
- Read the digital output:
- Detect sound events by comparing to the previous state:
Arduino UNO Q Code
The Arduino UNO Q has two processors working together:
- The STM32 MCU reads the sound sensor's digital output and detects sound events
- The Qualcomm MPU runs Debian Linux with Wi-Fi — in this section, only the MCU is programmed. A later section shows how both processors work together via Bridge.
Detailed Instructions
First time with Arduino UNO Q? Follow the Getting Started with Arduino UNO Q tutorial before proceeding.
- Connect: Wire the sound sensor to the Arduino UNO Q MCU as shown in the wiring diagram.
- Open Arduino App Lab: Launch Arduino App Lab and wait until it detects your Arduino UNO Q.
- Create a new App: Click the Create New App button.

- Give the App a name, for example: SoundSensor
- Click Create to confirm.

- Paste the sketch: Copy the MCU code above and paste it into sketch/sketch.ino.
- Upload: Click the Run button in Arduino App Lab.

- Clap near the sensor or tap the table — observe the Serial Monitor output.
- Adjust the potentiometer on the module if detection is not reliable.
App Lab Console Output
Bridge: Linux + MCU
This section shows how to program both processors of the Arduino UNO Q so the Linux side can read sound state and receive sound events via Bridge:
- The sound sensor is connected to the MCU — the MCU monitors the digital output continuously and caches the current state
- The MPU cannot read the sensor pin directly — it calls Bridge functions to get the current state or check for new sound events
- The MPU has Wi-Fi — running full Debian Linux, it can send Telegram alerts the moment a sound is detected
- Arduino_RouterBridge enables RPC communication between the two processors
- ⚠️ /dev/ttyHS1 (Linux) and Serial1 (MCU) are RESERVED by the router — never open them in user code
In short: MCU detects sound via DO pin → sets event flag → MPU polls Bridge → MPU sends Telegram alert.
MCU Code (Bridge)
Python Code (Bridge)
Detailed Instructions
- Connect: Wire the sound sensor to the Arduino UNO Q as shown in the wiring diagram.
- Open Arduino App Lab and create a new App named SoundSensorBridge.
- Paste the MCU sketch into sketch/sketch.ino.
- Paste the Python code into the Python file.
- Install the library: Click the Add sketch library button (the open book icon with a + sign) in the left sidebar.

- Search for Arduino_RouterBridge created by Arduino and click the Install button.
- Upload: Click the Run button.
- Clap near the sensor — observe the event appear in both consoles.
App Lab Console Output
Telegram
Receive instant Telegram alerts when sound is detected on the Arduino UNO Q sound sensor.
MCU sketch: Keep the same MCU sketch from the previous Bridge section.
Python Code (Telegram)
Detailed Instructions
- Replace YOUR_TELEGRAM_BOT_TOKEN with your actual bot token from BotFather.
- Replace YOUR_CHAT_ID with your Telegram chat ID.
- Paste this Python code into your App's Python file (keep the same MCU sketch).
- Click the Run button — clap near the sensor to trigger a Telegram alert.
App Lab Console Output

ArduinoBot
OpenClaw
You can adapt the OpenClaw to this tutorial by refering the instruction on Arduino Uno Q - OpenClaw Tutorial
Project Ideas
You can build many useful projects with the sound sensor and Arduino UNO Q:
- Clap Switch: Detect two quick claps and toggle a relay via Bridge to turn a light or fan on or off — Python counts clap events within a 500 ms window and sends the toggle command
- Baby Monitor: Mount the sensor in a room — when it detects continuous sound (crying), the MPU sends a Telegram alert so you know immediately from anywhere in the house
- Intrusion Alert: Combine the sound sensor with the door sensor — Telegram alerts for both door open and unexpected loud noise, with timestamp and duration logged to a file on Linux
- Sound Level Logger: Poll the sound state every second and log detection frequency to a CSV — send a daily Telegram report showing peak sound hours for noise monitoring
- Smart Doorbell: Detect a knock on the door via sound sensor — the MPU sends a Telegram message with a photo (if a camera is attached) so you can see who's at the door remotely
Challenge Yourself
Ready to go further with the sound sensor on Arduino UNO Q? Try these challenges:
- Easy: Add a sound counter to the Python code — count how many times sound is detected per minute and print the total every 60 seconds in the console.
- Medium: Implement clap pattern recognition in Python: detect a double-clap (two sounds within 600 ms) versus a single clap — send different Telegram messages for each pattern.
- Advanced: Build a sound duration tracker: record the start and end time of each sound event on the MCU side using millis() — expose the last duration via a get_duration() Bridge function and include it in every Telegram alert.