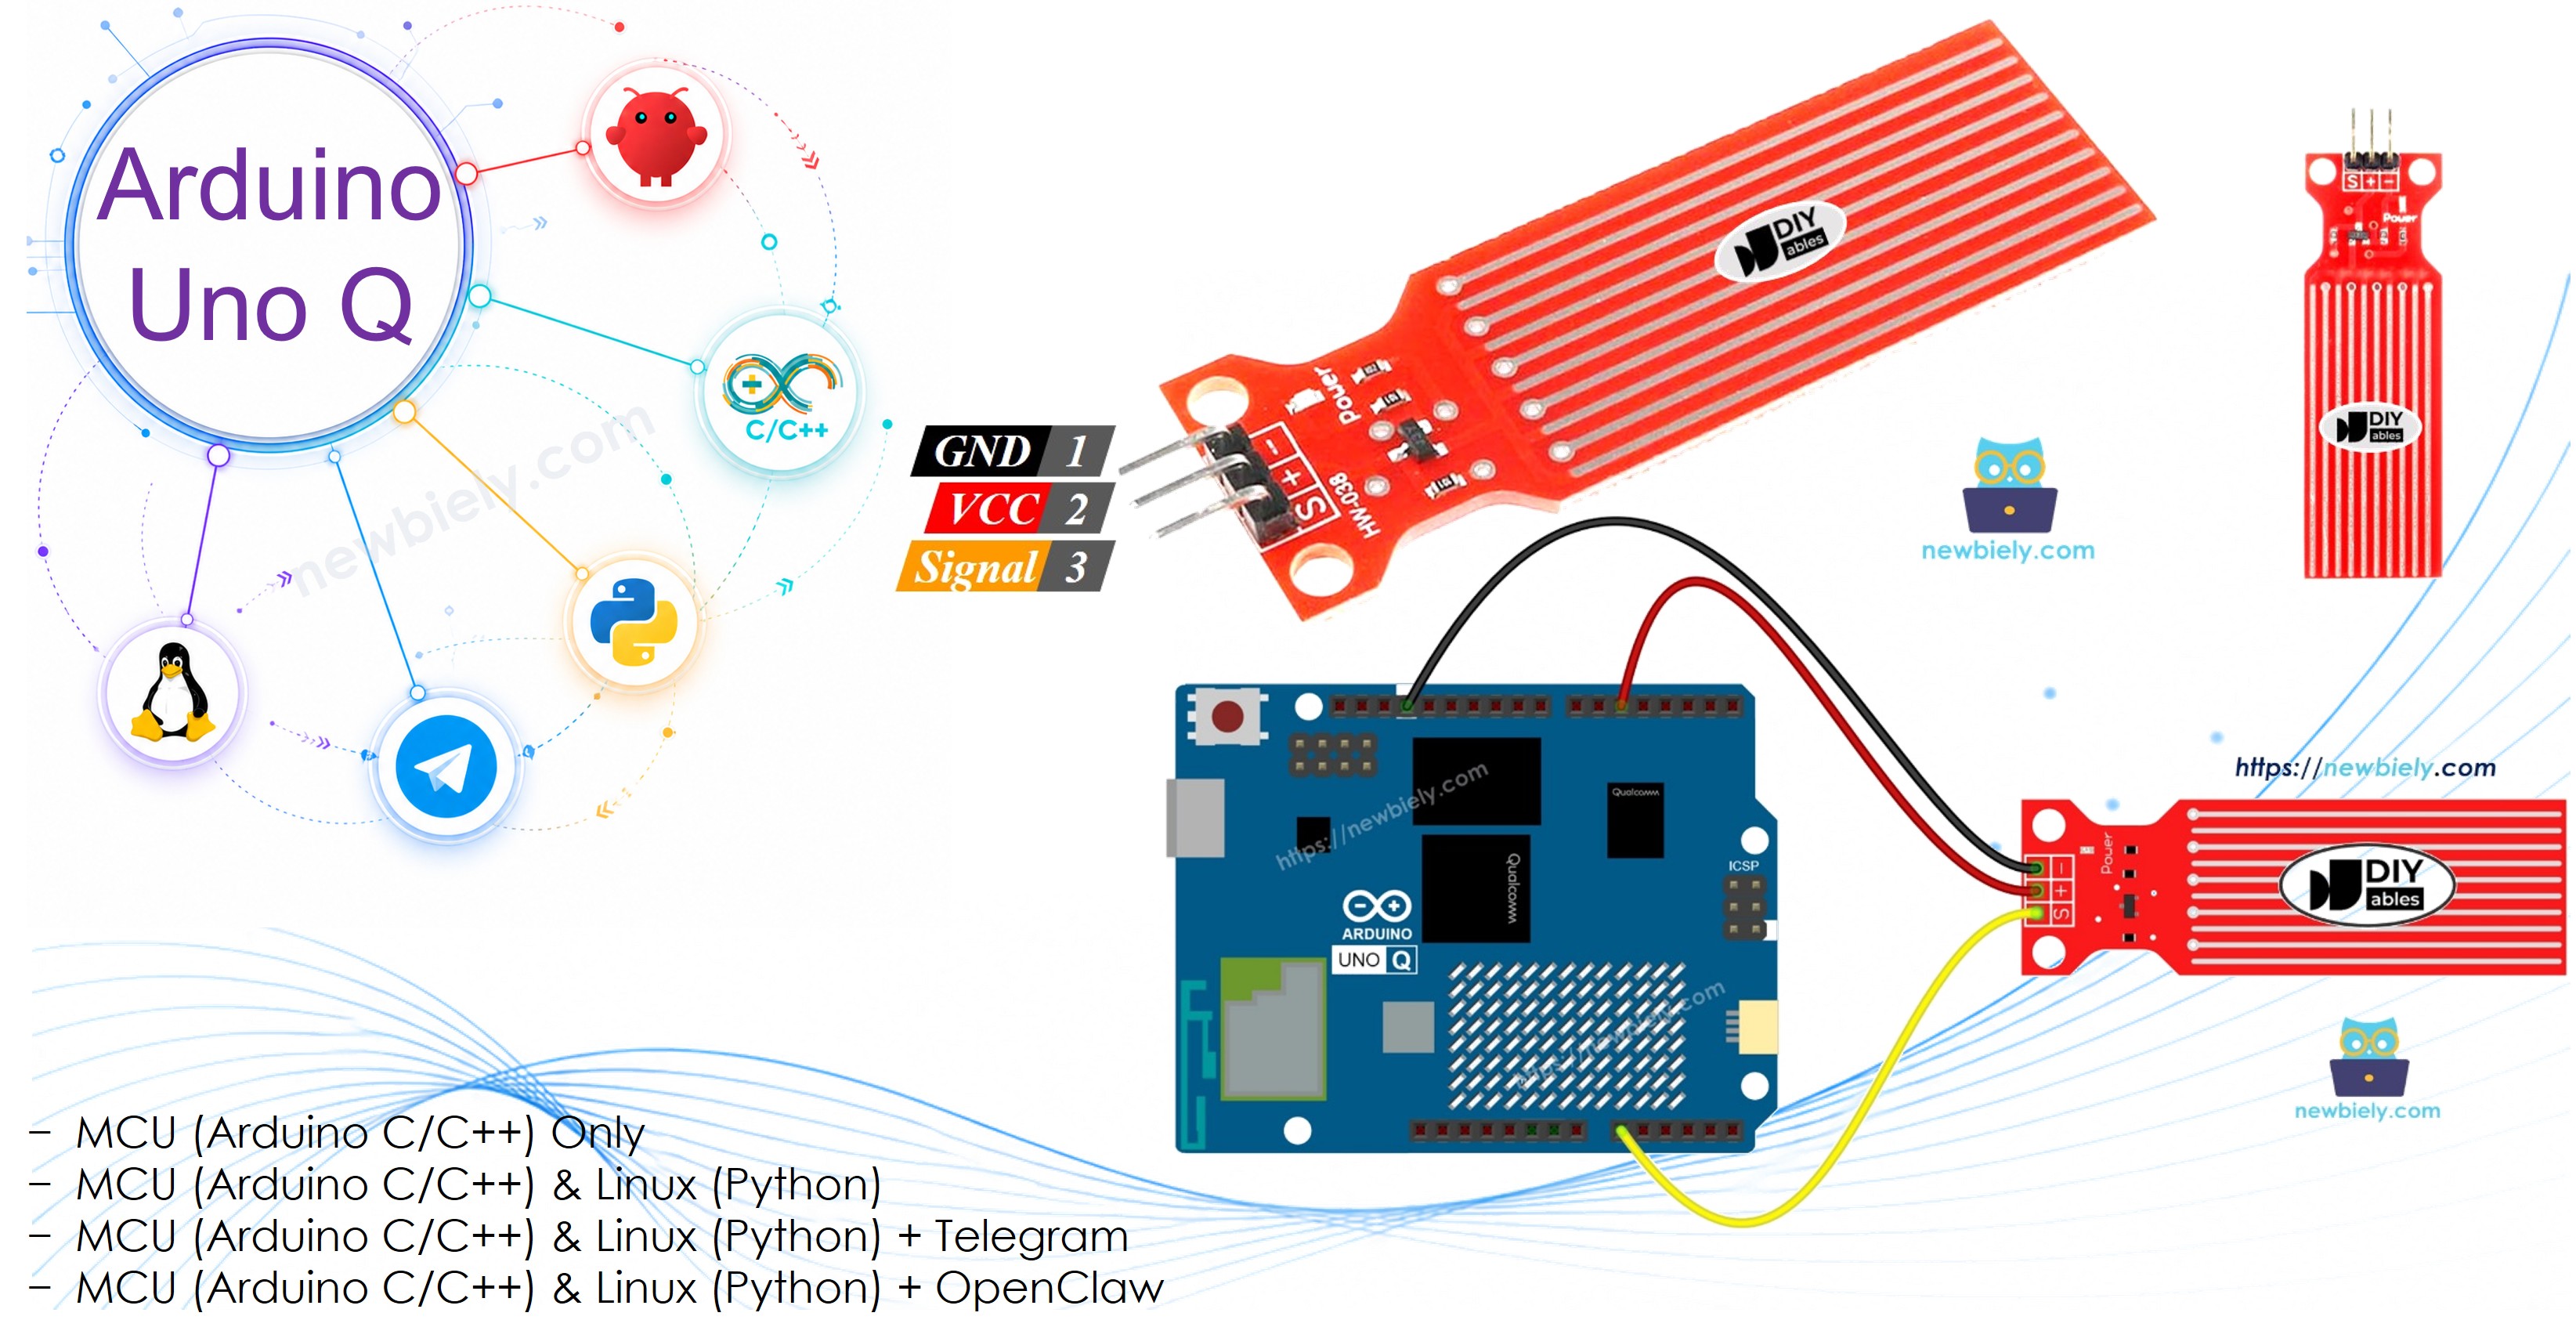
Arduino UNO Q - Water Sensor

A water sensor can detect water leaks, rainfall, and tank overflow. On Arduino UNO Q, the sensor's analog signal is read by the 12-bit MCU ADC (0–4095 range). With Bridge and Telegram, you receive instant alerts on your phone the moment water is detected.

In this tutorial, you will learn:

Arduino UNO Q Water Sensor

Hardware Preparation

1×Arduino UNO Q
1×USB Cable for Arduino Uno Q
1×Water level sensor
1×Jumper Wires
1×Recommended: Screw Terminal Block Shield for Arduino Uno
1×Recommended: Sensors/Servo Expansion Shield for Arduino Uno
1×Recommended: Breadboard Shield for Arduino Uno
1×Recommended: Enclosure for Arduino Uno
1×Recommended: Prototyping Base Plate & Breadboard Kit for Arduino UNO

Or you can buy the following kits:

1×DIYables Sensor Kit (18 sensors/displays)
Disclosure: Some of the links provided in this section are Amazon affiliate links. We may receive a commission for any purchases made through these links at no additional cost to you.
Additionally, some of these links are for products from our own brand, DIYables .

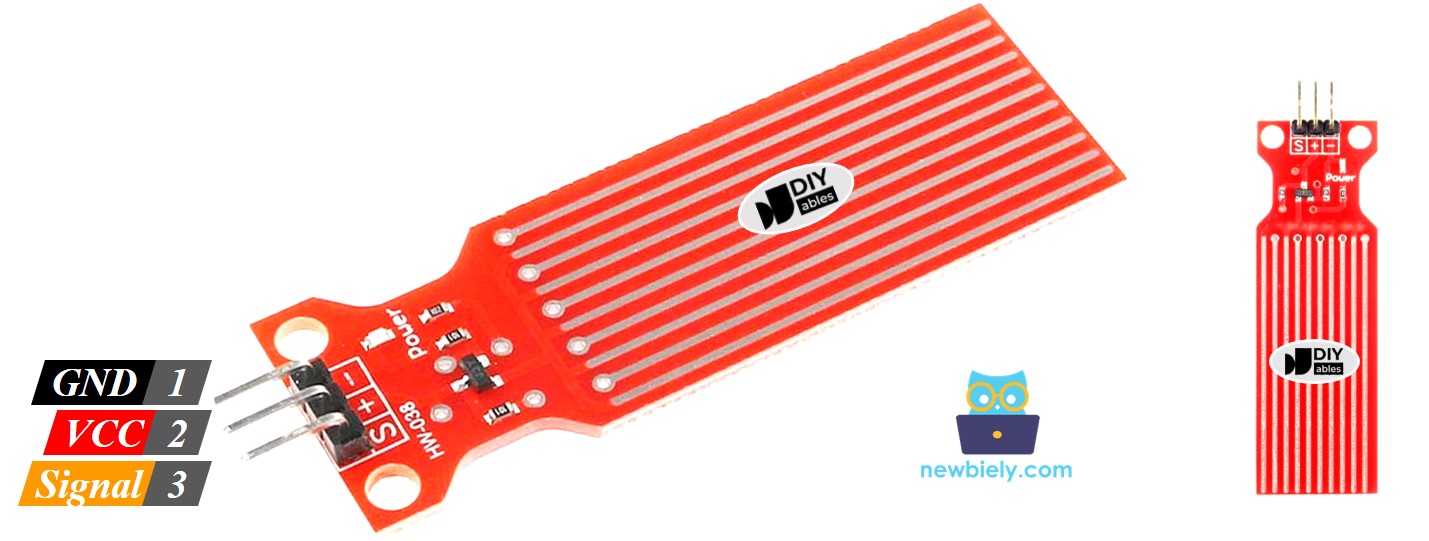
Overview of the Water Sensor

Pinout

The water sensor has three pins:

  • S (Signal): Analog output — connect to an analog input pin on the MCU
  • + (VCC): Power supply — connect to 3.3V or 5V. In this tutorial, connected to a digital pin for power control
  • - (GND): Ground
Water Sensor Pinout

※ NOTE THAT:

It is recommended to connect VCC to a digital output pin rather than the always-on 5V. Power the sensor only when reading to reduce corrosion of the copper pads in humid environments.

How It Works

The sensor has 10 copper traces — alternating power and signal lines. When dry, they are isolated. When submerged in water, the water bridges the gaps and changes the resistance.

  • More water → lower resistance → higher output voltage → higher ADC reading
  • Less water → higher resistance → lower output voltage → lower ADC reading

The Arduino UNO Q MCU uses a 12-bit ADC with a 3.3V reference, so readings range from 0 to 4095 (not 0–1023 as on the classic Arduino Uno). Calibrate the threshold to your specific sensor and water type.

※ NOTE THAT:

Only the exposed copper traces should touch water. Never submerge the full sensor board or components. Install with the sensor pads facing down into the liquid.

Wiring Diagram

The wiring diagram between Arduino UNO Q Water Sensor

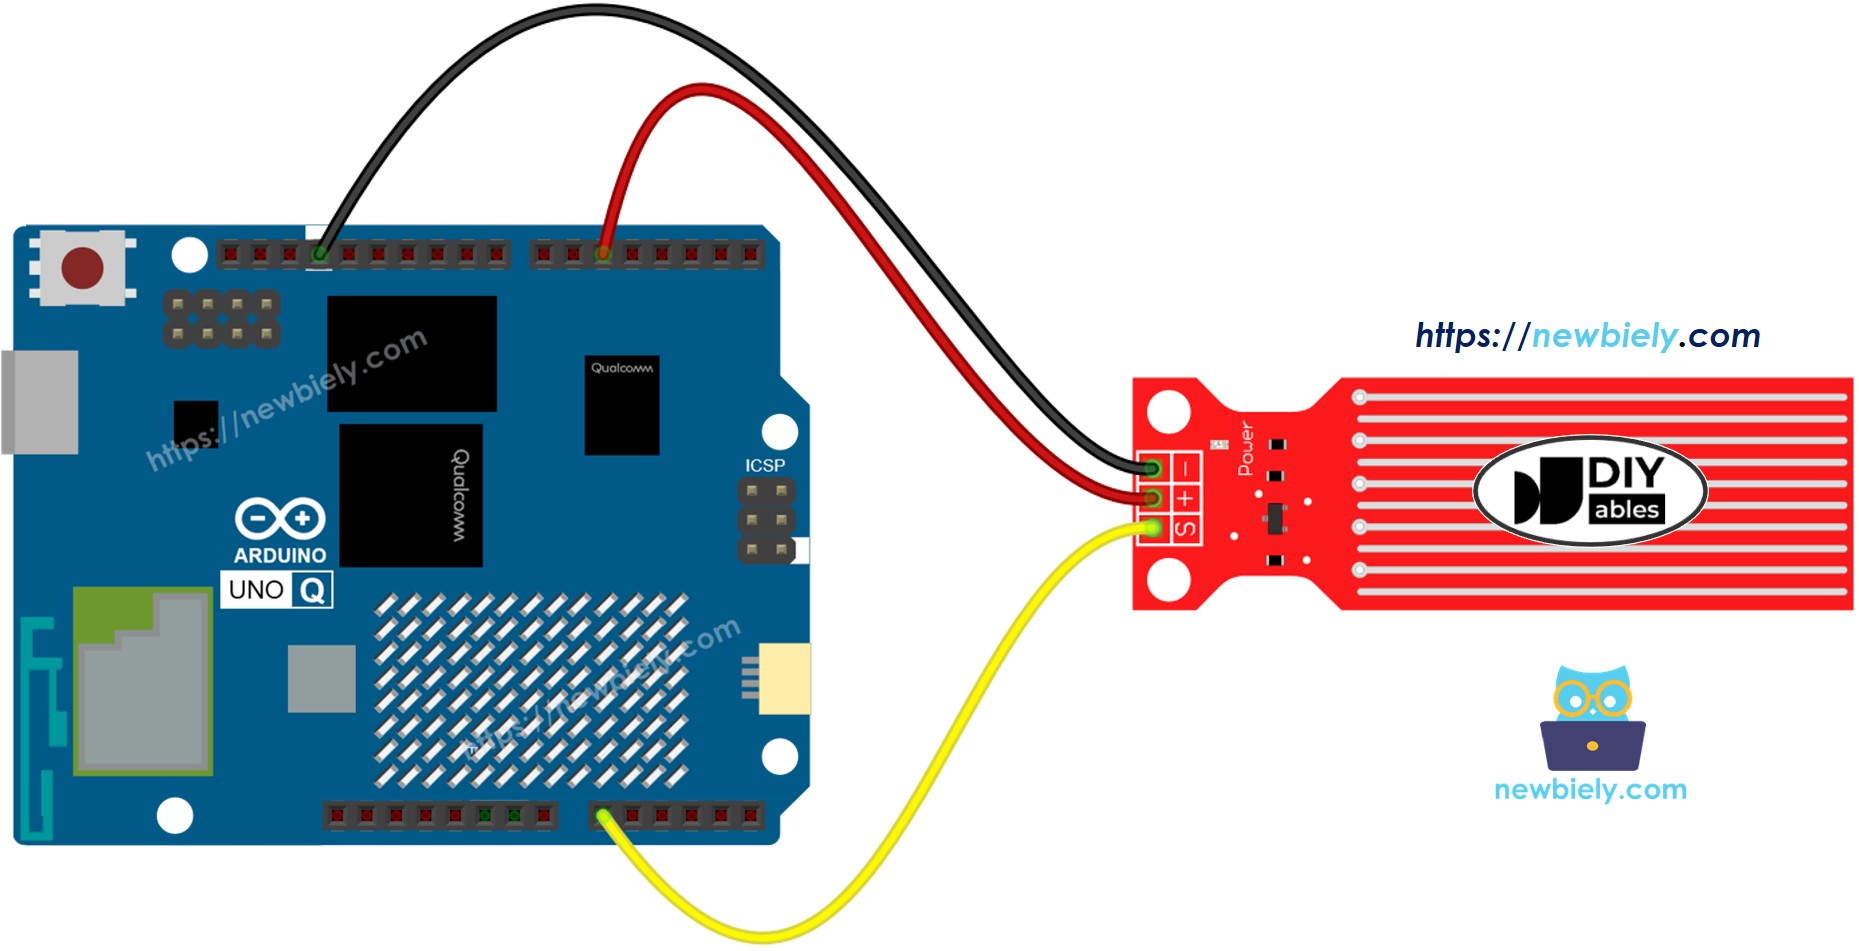
This image is created using Fritzing. Click to enlarge image

Water Sensor Pin Arduino UNO Q MCU
* (GND) GND
+ (VCC) D5 (controlled power)
S (Signal) A0

How To Program For Water Sensor

  • Set up pins:
pinMode(POWER_PIN, OUTPUT); digitalWrite(POWER_PIN, LOW); // off by default
  • Read sensor value:
digitalWrite(POWER_PIN, HIGH); // power on delay(10); // stabilize int value = analogRead(SIGNAL_PIN); // 0-4095 (12-bit ADC) digitalWrite(POWER_PIN, LOW); // power off
  • Detect water:
if (value > THRESHOLD) { Serial.println("Water detected!"); }

Arduino UNO Q Code

The Arduino UNO Q has two processors working together:

  • The STM32 MCU reads the water sensor via the 12-bit ADC every second and prints the result
  • The Qualcomm MPU runs Debian Linux and handles Wi-Fi, Python, and cloud connectivity
  • In this section, only the MCU is programmed — the Linux side stays idle. A later section shows how both processors work together via Bridge.

※ NOTE THAT:

The Arduino UNO Q MCU uses a 12-bit ADC (0–4095) with a 3.3V reference. This is different from the classic Arduino Uno which uses a 10-bit ADC (0–1023) with a 5V reference. Adjust the THRESHOLD value accordingly when calibrating.

/* * This Arduino UNO Q code was developed by newbiely.com * * This Arduino UNO Q code is made available for public use without any restriction * * For comprehensive instructions and wiring diagrams, please visit: * https://newbiely.com/tutorials/arduino-uno-q/arduino-uno-q-water-sensor */ // COPYRIGHT newbiely.com // AUTHOR: newbiely // This code is made available for public use without restriction. // For complete instructions, tutorials, and further information, visit: // https://newbiely.com/tutorials/arduino-uno-q/arduino-uno-q-water-sensor // Arduino UNO Q has a 12-bit ADC (0-4095) with 3.3V reference. // The water sensor VCC is powered only when reading to reduce corrosion. #define POWER_PIN 5 // The Arduino UNO Q MCU pin connected to VCC of water sensor #define SIGNAL_PIN A0 // The Arduino UNO Q MCU pin connected to the signal pin of water sensor // Threshold for detecting water (calibrate for your sensor and water) // With 12-bit ADC (0-4095), typical dry=0, partial=300-800, fully wet>1500 #define THRESHOLD 500 int value = 0; void setup() { Serial.begin(9600); pinMode(POWER_PIN, OUTPUT); digitalWrite(POWER_PIN, LOW); // start with sensor powered off Serial.println("Arduino UNO Q Water Sensor ready"); } void loop() { digitalWrite(POWER_PIN, HIGH); // power the sensor delay(10); // allow sensor to stabilize value = analogRead(SIGNAL_PIN); // read 12-bit ADC value (0-4095) digitalWrite(POWER_PIN, LOW); // power off the sensor Serial.print("Sensor value: "); Serial.print(value); if (value > THRESHOLD) { Serial.println(" => Water detected!"); } else { Serial.println(" => No water"); } delay(1000); }

Detailed Instructions

First time with Arduino UNO Q? Follow the Getting Started with Arduino UNO Q tutorial before proceeding.

  • Connect: Wire the water sensor to the Arduino UNO Q MCU as shown in the wiring diagram.
  • Open Arduino App Lab: Launch Arduino App Lab and wait until it detects your Arduino UNO Q.
  • Create a new App: Click the Create New App button.
Create New App in Arduino App Lab on Arduino UNO Q
  • Give the App a name, for example: WaterSensor
  • Click Create to confirm.
Arduino App Lab App folders and files on Arduino UNO Q
  • Paste the sketch: Copy the MCU code above and paste it into sketch/sketch.ino. Keep other files as default.
  • No library required — uses only the built-in analogRead() and digitalWrite().
  • Upload: Click the Run button in Arduino App Lab.
Click Run button in Arduino App Lab on Arduino UNO Q
  • Gradually lower the sensor pads into a glass of water and observe the ADC values rising in the Serial Monitor.

Calibration

After uploading, observe the sensor values:

  • Completely dry: value ≈ 0
  • Partially submerged: value ≈ 300–1000
  • Mostly submerged: value ≈ 1500–3000

Set THRESHOLD above the dry noise level (e.g., 500) to reliably detect the presence of water.

App Lab Console Output

DIYables_Apps
Stop
sketch.ino
1#include "Arduino_RouterBridge.h"
Serial Monitor
Python
Message (Enter to send a message to "Newbiely" on usb(2820070321))
New Line
9600 baud
[2026-04-29 09:00:01] Arduino UNO Q Water Sensor ready [2026-04-29 09:00:02] Sensor value: 0 => No water [2026-04-29 09:00:03] Sensor value: 0 => No water [2026-04-29 09:00:04] Sensor value: 312 => No water [2026-04-29 09:00:05] Sensor value: 875 => Water detected! [2026-04-29 09:00:06] Sensor value: 1943 => Water detected! [2026-04-29 09:00:07] Sensor value: 2501 => Water detected!

Bridge: Linux + MCU

This section shows how to program both processors of the Arduino UNO Q so the Linux side can read sensor values and receive water detection events via Bridge:

  • The water sensor is connected to the MCU — the MCU reads the ADC every second and caches the value
  • The MPU cannot read the ADC directly — it calls Bridge functions to get the sensor value, status, or events
  • The MPU has Wi-Fi — running full Debian Linux, it can send Telegram alerts when water is first detected
  • Arduino_RouterBridge enables RPC communication between the two processors
  • ⚠️ /dev/ttyHS1 (Linux) and Serial1 (MCU) are RESERVED by the router — never open them in user code

In short: MCU reads ADC each second → detects state change → sets event flag → MPU polls and sends Telegram alert.

MCU Code (Bridge)

/* * This Arduino UNO Q code was developed by newbiely.com * * This Arduino UNO Q code is made available for public use without any restriction * * For comprehensive instructions and wiring diagrams, please visit: * https://newbiely.com/tutorials/arduino-uno-q/arduino-uno-q-water-sensor */ // COPYRIGHT newbiely.com // AUTHOR: newbiely // This code is made available for public use without restriction. // For complete instructions, tutorials, and further information, visit: // https://newbiely.com/tutorials/arduino-uno-q/arduino-uno-q-water-sensor // Arduino UNO Q has a 12-bit ADC (0-4095) with 3.3V reference. #include "Arduino_RouterBridge.h" #define POWER_PIN 5 // The Arduino UNO Q MCU pin connected to VCC of water sensor #define SIGNAL_PIN A0 // The Arduino UNO Q MCU pin connected to the signal pin of water sensor #define THRESHOLD 500 int cached_value = 0; bool water_event = false; bool prev_water_detected = false; unsigned long last_read_ms = 0; const unsigned long READ_INTERVAL = 1000; String get_value(String arg) { return String(cached_value); } String get_status(String arg) { return cached_value > THRESHOLD ? "water_detected" : "no_water"; } String get_event(String arg) { if (water_event) { water_event = false; return "water_detected"; } return "none"; } void setup() { Bridge.begin(); Monitor.begin(); pinMode(POWER_PIN, OUTPUT); digitalWrite(POWER_PIN, LOW); Bridge.provide("get_value", get_value); Bridge.provide("get_status", get_status); Bridge.provide("get_event", get_event); Monitor.println("Arduino UNO Q Water Sensor Bridge ready"); } void loop() { unsigned long now = millis(); if (now - last_read_ms >= READ_INTERVAL) { last_read_ms = now; digitalWrite(POWER_PIN, HIGH); delay(10); cached_value = analogRead(SIGNAL_PIN); digitalWrite(POWER_PIN, LOW); bool water_detected = cached_value > THRESHOLD; if (water_detected && !prev_water_detected) { water_event = true; Monitor.print("Water detected! Sensor value: "); Monitor.println(cached_value); } else if (!water_detected && prev_water_detected) { Monitor.println("Water gone. Sensor dry."); } prev_water_detected = water_detected; } }

Python Code (Bridge)

/* * This Arduino UNO Q code was developed by newbiely.com * * This Arduino UNO Q code is made available for public use without any restriction * * For comprehensive instructions and wiring diagrams, please visit: * https://newbiely.com/tutorials/arduino-uno-q/arduino-uno-q-water-sensor */ # COPYRIGHT newbiely.com # AUTHOR: newbiely # This code is made available for public use without restriction. # For complete instructions, tutorials, and further information, visit: # https://newbiely.com/tutorials/arduino-uno-q/arduino-uno-q-water-sensor from arduino.app_utils import * import time def loop(): value = Bridge.call("get_value") status = Bridge.call("get_status") print(f"Sensor value: {value} Status: {status}") time.sleep(1) App.run(user_loop=loop)

Detailed Instructions

  • Connect: Wire the water sensor to the Arduino UNO Q as shown in the wiring diagram.
  • Open Arduino App Lab: Launch Arduino App Lab and wait for the board to be detected.
  • Create a new App: Click Create New App, name it WaterSensorBridge, then click Create.
  • Paste the MCU sketch: Copy the MCU Bridge code above and paste it into sketch/sketch.ino.
  • Paste the Python code: Copy the Python Bridge code above and paste it into the Python file in the App.
  • Install the library: Click the Add sketch library button (the open book icon with a + sign) in the left sidebar.
Add sketch library in Arduino App Lab on Arduino UNO Q
  • Search for Arduino_RouterBridge created by Arduino and click the Install button.
My Apps / DIYables Apps
Run
Bricks
No bricks added...
Sketch Libraries
No sketch libra...
Files
python
sketch
.gitignore
README.md
app.yaml
sketch.ino
Add sketch library
Arduino_RouterBridge Arduino

This library provides a simple RPC bridge for Arduino UNO Q boards, allowing communication between the board and other devices using MsgPack serialization.

0.4.1
Install
More Info
  • Upload: Click the Run button in Arduino App Lab.
Click Run button in Arduino App Lab on Arduino UNO Q
  • Dip the sensor pads into water and observe the status change in both consoles.

App Lab Console Output

DIYables_Apps
Stop
sketch.ino
1#include "Arduino_RouterBridge.h"
Serial Monitor
Python
Message (Enter to send a message to "Newbiely" on usb(2820070321))
New Line
9600 baud
[2026-04-29 09:00:01] Arduino UNO Q Water Sensor Bridge ready [2026-04-29 09:00:06] Water detected! Sensor value: 1243 [2026-04-29 09:00:09] Water gone. Sensor dry.
DIYables_Apps
Stop
sketch.ino
1#include "Arduino_RouterBridge.h"
Serial Monitor
Python
[2026-04-29 09:00:02] Sensor value: 0 Status: no_water [2026-04-29 09:00:03] Sensor value: 0 Status: no_water [2026-04-29 09:00:06] Sensor value: 1243 Status: water_detected [2026-04-29 09:00:09] Sensor value: 12 Status: no_water

Telegram

Receive instant Telegram alerts when water is detected by the sensor on Arduino UNO Q.

MCU sketch: Keep the same MCU sketch from the previous Bridge section.

Python Code (Telegram)

/* * This Arduino UNO Q code was developed by newbiely.com * * This Arduino UNO Q code is made available for public use without any restriction * * For comprehensive instructions and wiring diagrams, please visit: * https://newbiely.com/tutorials/arduino-uno-q/arduino-uno-q-water-sensor */ # COPYRIGHT newbiely.com # AUTHOR: newbiely # This code is made available for public use without restriction. # For complete instructions, tutorials, and further information, visit: # https://newbiely.com/tutorials/arduino-uno-q/arduino-uno-q-water-sensor from arduino.app_utils import * import requests import time TELEGRAM_BOT_TOKEN = "YOUR_TELEGRAM_BOT_TOKEN" CHAT_ID = "YOUR_CHAT_ID" last_update_id = 0 def get_updates(): global last_update_id url = f"https://api.telegram.org/bot{TELEGRAM_BOT_TOKEN}/getUpdates" params = {"offset": last_update_id + 1, "timeout": 5} try: response = requests.get(url, params=params, timeout=10) data = response.json() if data["ok"]: return data["result"] except Exception as e: print(f"Error getting updates: {e}") return [] def send_message(chat_id, text): url = f"https://api.telegram.org/bot{TELEGRAM_BOT_TOKEN}/sendMessage" payload = {"chat_id": chat_id, "text": text} try: requests.post(url, data=payload, timeout=10) except Exception as e: print(f"Error sending message: {e}") def loop(): # Check for water event event = Bridge.call("get_event") if event == "water_detected": value = Bridge.call("get_value") print(f"Water event! Sensor value: {value}") send_message(CHAT_ID, f"💧 Water detected! Sensor value: {value}") # Check for Telegram commands updates = get_updates() for update in updates: last_update_id = update["update_id"] if "message" not in update: continue message = update["message"] chat_id = message["chat"]["id"] text = message.get("text", "").strip() print(f"Received: {text}") if text == "/start": send_message(chat_id, "Arduino UNO Q Water Sensor Bot\n" "/value - Read raw sensor value (0-4095)\n" "/status - Read water detection status\n" "Automatic alert when water is detected") elif text == "/value": result = Bridge.call("get_value") send_message(chat_id, f"Sensor value: {result}") elif text == "/status": result = Bridge.call("get_status") send_message(chat_id, f"Status: {result}") else: send_message(chat_id, "Unknown command. Send /start for help.") time.sleep(0.5) App.run(user_loop=loop)

Detailed Instructions

  • Replace YOUR_TELEGRAM_BOT_TOKEN with your actual bot token from BotFather.
  • Replace YOUR_CHAT_ID with your Telegram chat ID.
  • Paste this Python code into your App's Python file (keep the same MCU sketch).
  • Click the Run button. Dip the sensor in water — receive the Telegram alert instantly.

App Lab Console Output

DIYables_Apps
Stop
sketch.ino
1#include "Arduino_RouterBridge.h"
Serial Monitor
Python
[2026-04-29 09:10:00] Waiting for Telegram messages... [2026-04-29 09:10:05] Water event! Sensor value: 1567 [2026-04-29 09:10:12] Received: /status
Telegram
Telegram 12:45
Welcome to Telegram!
ArduinoBot 10:19
Chatting with Arduino...
telegram-botfather
BotFather Yesterday
Your bot has been created.

ArduinoBot

bot
Today
/value
10:15 AM ✓✓
Sensor value: 0
10:16 AM
💧 Water detected! Sensor value: 1567
10:17 AM
/status
10:18 AM ✓✓
Status: water_detected
10:19 AM
/value
10:20 AM ✓✓
Sensor value: 1567
10:21 AM

OpenClaw

...OPENCLAW

OpenClaw support for Arduino UNO Q Water Sensor is coming soon.

...OPENCLAW

Project Ideas

You can build many useful projects with the water sensor and Arduino UNO Q:

  • Leak Alert System: Place the water sensor under a sink, washing machine, or water heater — receive an instant Telegram alert when a leak is detected, with the raw ADC value included for severity assessment
  • Rain Gauge: Mount the sensor outdoors under an open shelter to detect rainfall onset — Python logs rain events with timestamps to a file and sends a daily rain summary to Telegram
  • Fish Tank Overflow Guard: Position the sensor at the tank rim — when the water level reaches the sensor, the MPU alerts you via Telegram and optionally triggers a relay via Bridge to cut the water pump
  • Plant Watering Monitor: Check soil moisture with the water sensor — when dryness is detected (low ADC reading), send a Telegram reminder to water the plants
  • Basement Flood Monitor: Install multiple sensors at floor level throughout a basement — each sensor is connected to a separate analog pin, and Python reports which zones are flooded via Telegram

Challenge Yourself

Ready to go further with the water sensor on Arduino UNO Q? Try these challenges:

  • Easy: Add water level categories in Python: if int(value) < 200"dry", < 800"damp", < 2000"wet", else "flooded" — send the category with every Telegram status reply.
  • Medium: Implement a cooldown timer: after a water detected event triggers a Telegram alert, wait 60 seconds before sending another alert for the same event — prevent spam during a sustained leak.
  • Advanced: Log all sensor readings with timestamps to a CSV file on Linux every 10 seconds, and implement a /report Telegram command that sends a summary of the last hour: min value, max value, number of water-detected events, and duration of water contact.

※ OUR MESSAGES

  • As freelancers, We are AVAILABLE for HIRE. See how to outsource your project to us
  • Please feel free to share the link of this tutorial. However, Please do not use our content on any other websites. We invested a lot of effort and time to create the content, please respect our work!