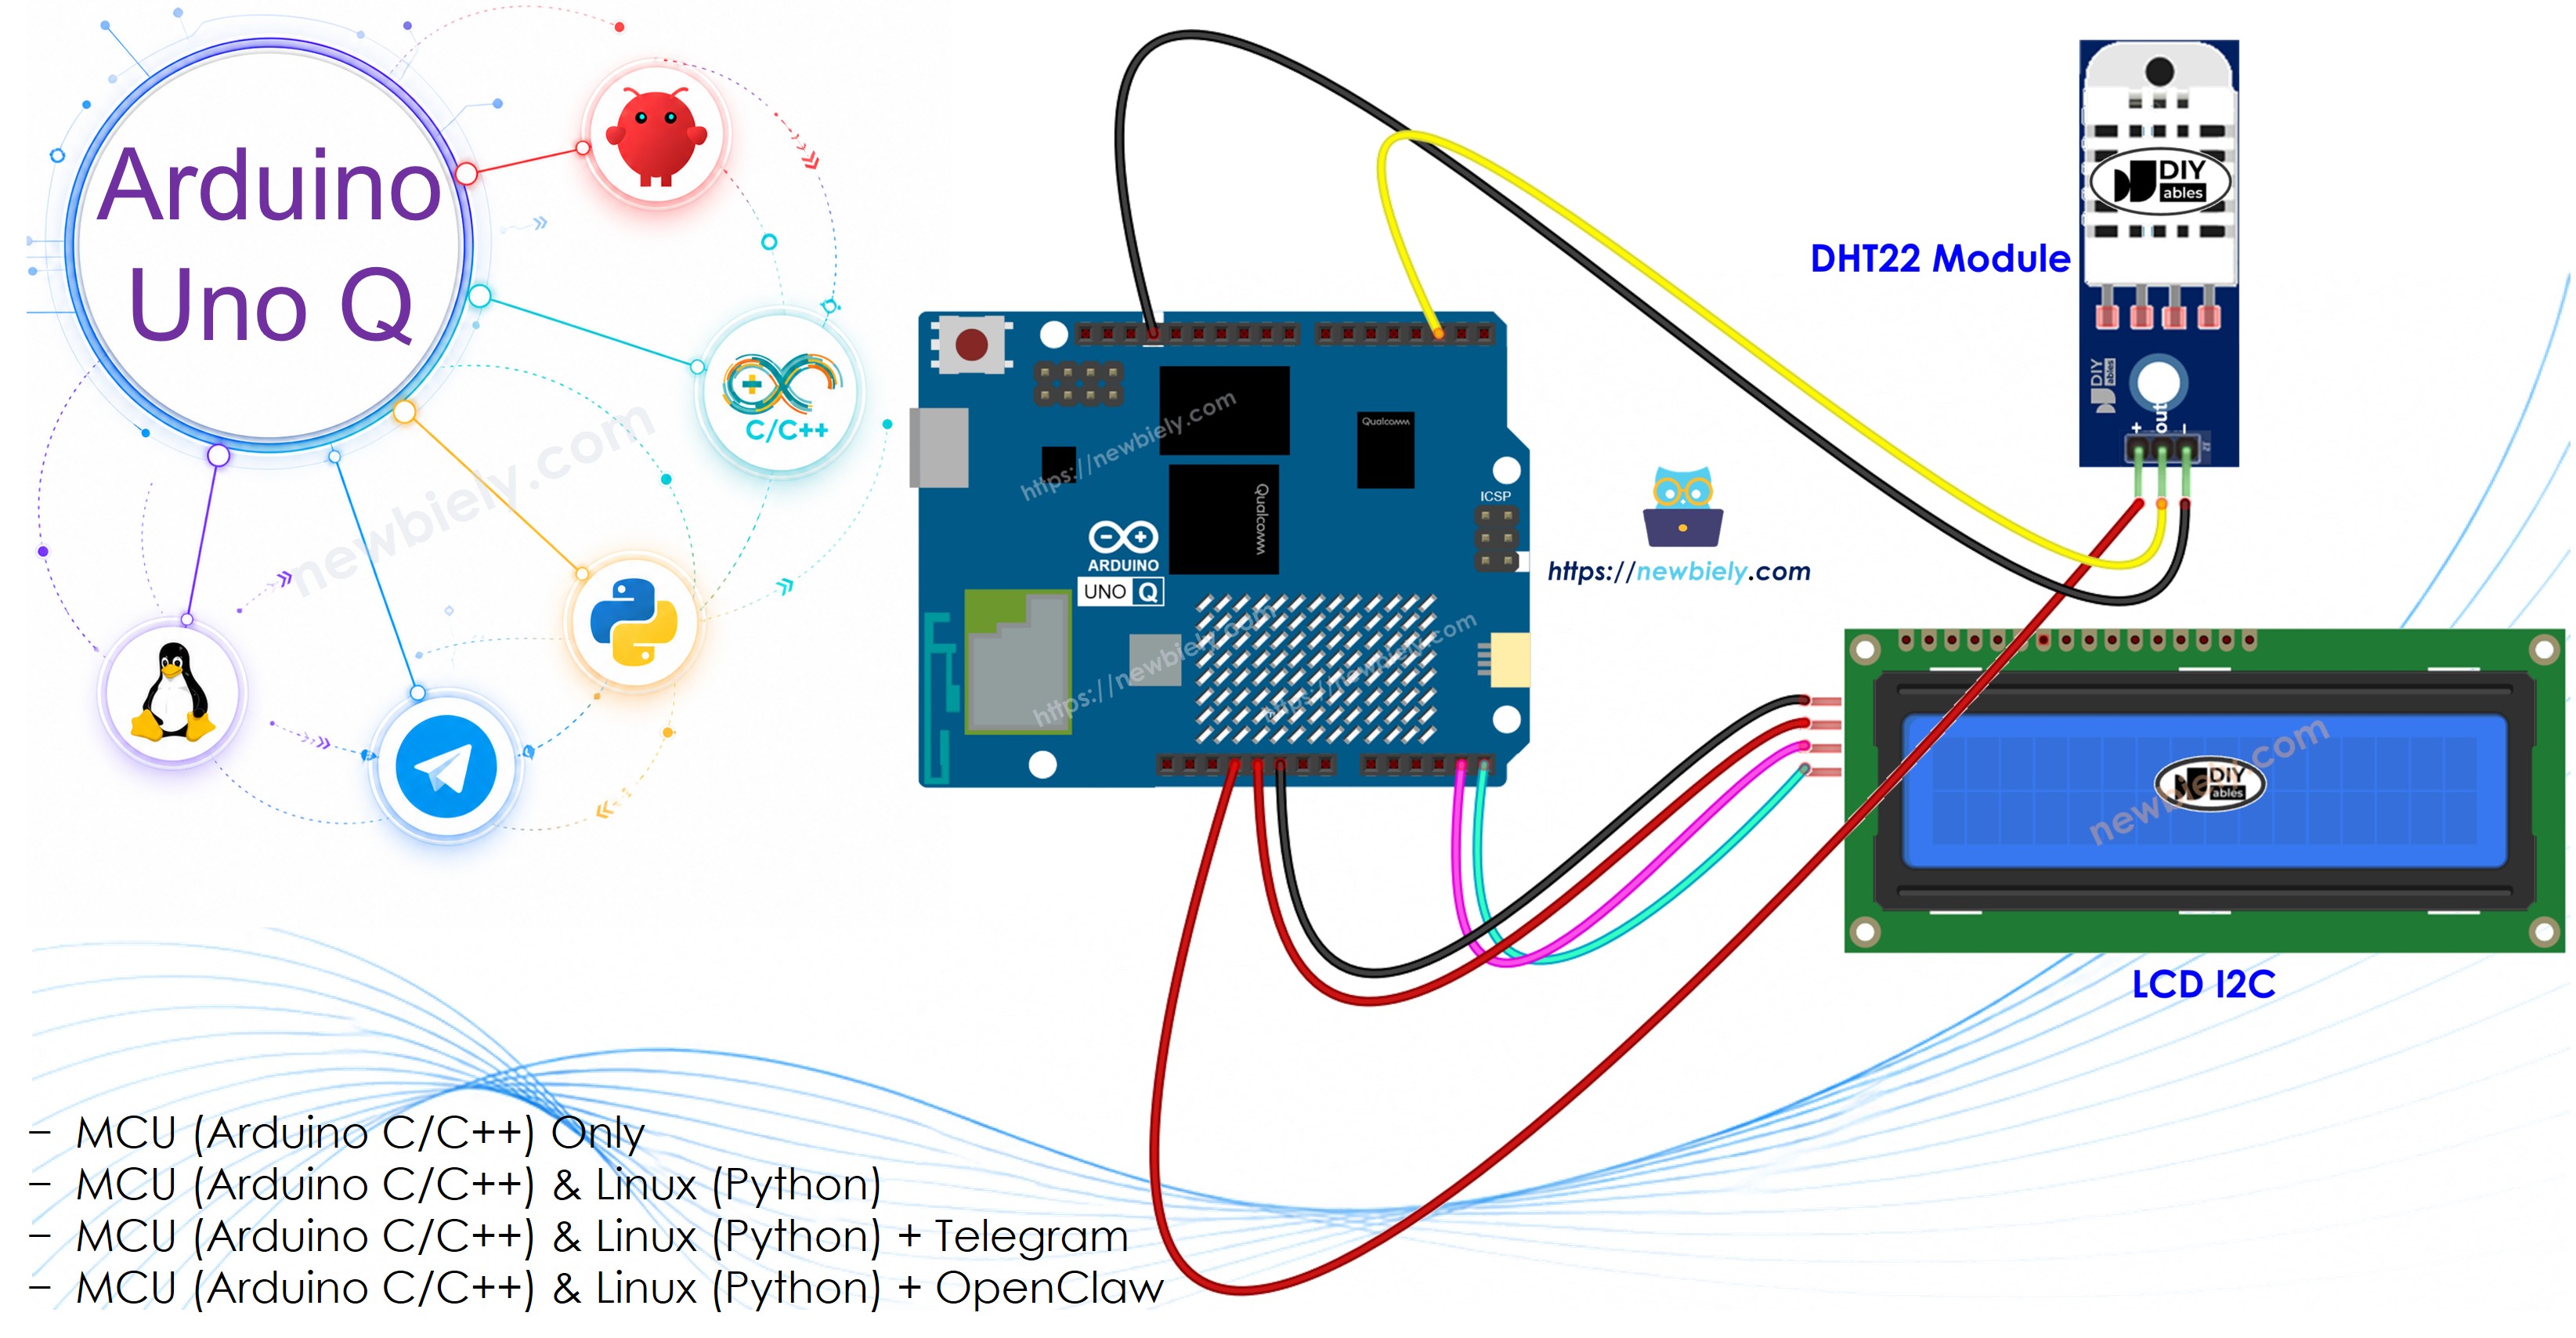
Arduino UNO Q - DHT22 - LCD
Combine the DHT22 high-precision humidity and temperature sensor with a 16x2 I2C LCD on Arduino UNO Q. The DHT22 delivers better accuracy than the DHT11 — perfect for projects that require precise environment monitoring with a clear display.
In this tutorial, you will learn:
- What the DHT22 sensor is and how it compares to DHT11
- How to wire the DHT22 and 16x2 I2C LCD to the Arduino UNO Q MCU
- How to program the MCU (C/C++ Arduino code) to read DHT22 and display data on the LCD
- How to program both the Linux side (Python) and MCU side (C/C++) to read sensor data via Bridge
- How to receive Telegram alerts when temperature or humidity exceeds thresholds on Arduino UNO Q
- How to use OpenClaw on Arduino UNO Q with the DHT22 and LCD
Hardware Preparation
Or you can buy the following kits:
| 1 | × | DIYables Sensor Kit (18 sensors/displays) |
Additionally, some of these links are for products from our own brand, DIYables .
Buy Note: Alternatively, you can assemble the LCD I2C display using LCD 1602 Display and PCF8574 I2C Adapter Module.
Overview of the DHT22 Sensor
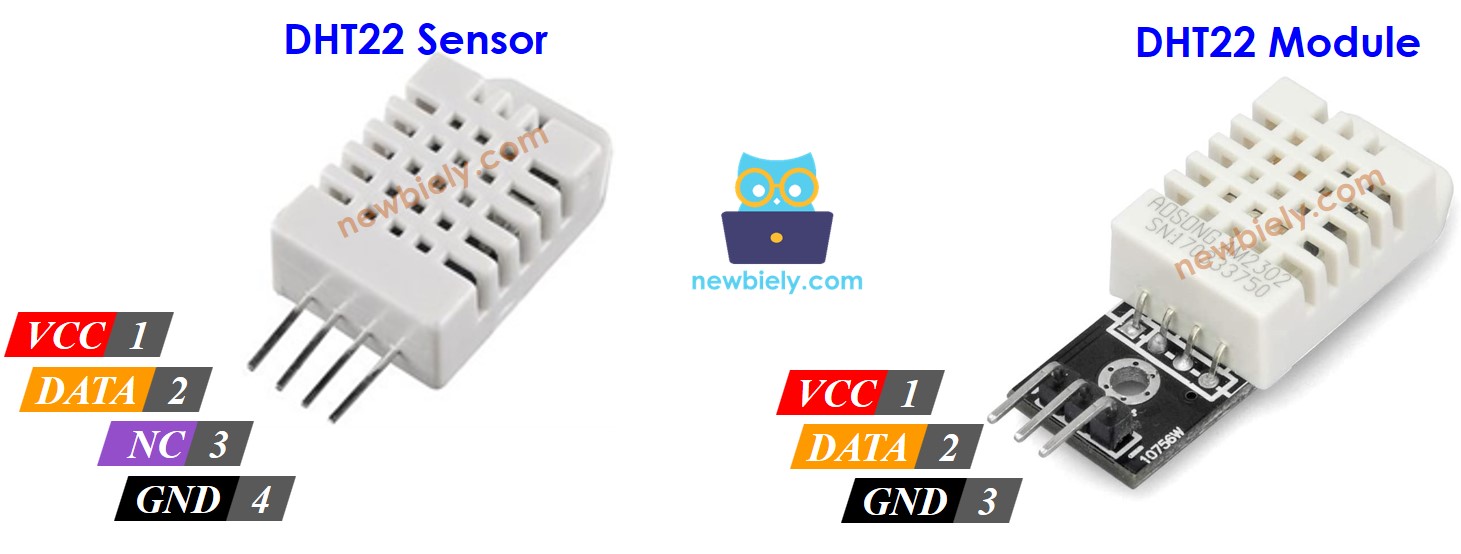
Pinout
The DHT22 has four pins (when using the common 3-pin module):
- GND: Connect to GND
- VCC: Connect to 3.3V or 5V
- DATA: Connect to digital pin 2 on the Arduino UNO Q MCU
How It Works
The DHT22 uses a single-wire digital protocol to transmit humidity and temperature. It offers higher precision than the DHT11:
- Humidity: 0–100% RH (±2–5% accuracy)
- Temperature: -40–80°C (±0.5°C accuracy)
Allow at least 2–3 seconds between readings.
Overview of the LCD Display
The 16x2 I2C LCD connects via I2C and displays two rows of 16 characters. The top row shows temperature (°C and °F) and the bottom row shows humidity. Default I2C address: 0x27.
Wiring Diagram
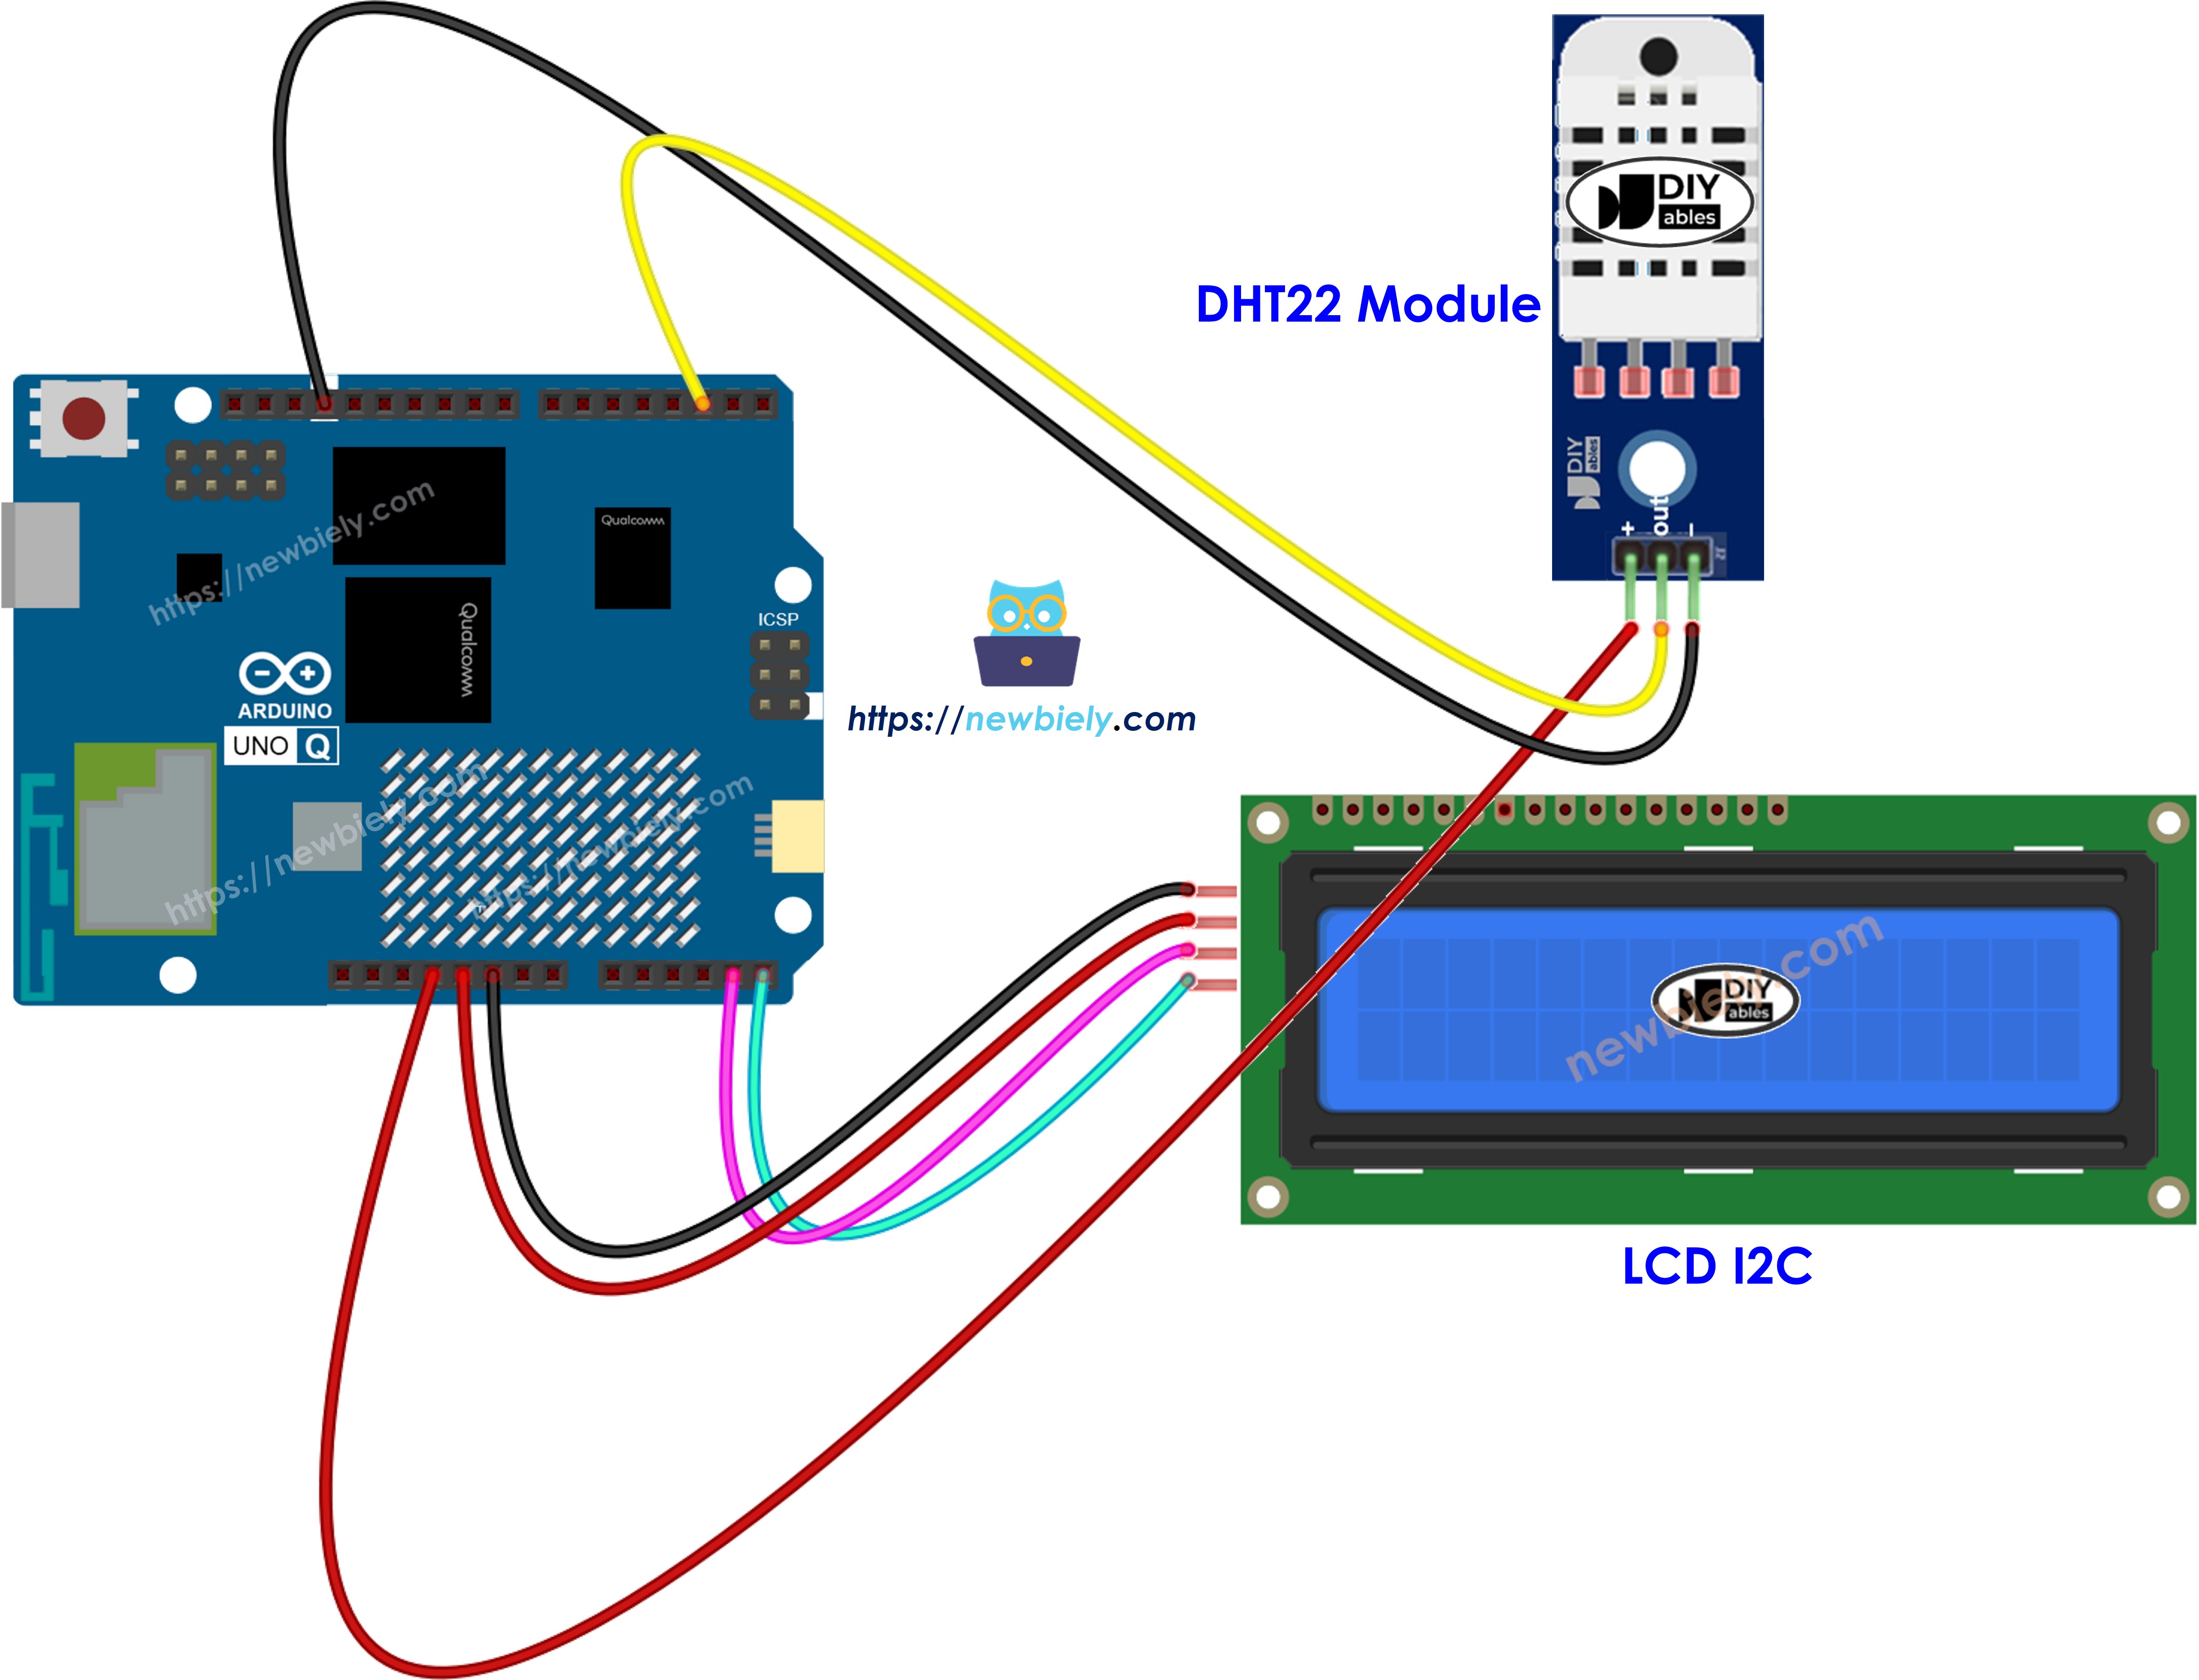
This image is created using Fritzing. Click to enlarge image
DHT22 to Arduino UNO Q MCU:
| DHT22 Pin | Arduino UNO Q MCU |
|---|---|
| GND | GND |
| VCC | 3.3V |
| DATA | D2 |
LCD I2C to Arduino UNO Q MCU:
| LCD Pin | Arduino UNO Q MCU |
|---|---|
| GND | GND |
| VCC | 5V |
| SDA | SDA |
| SCL | SCL |
How To Program For DHT22 + LCD
- Include the required libraries:
- Initialize the DHT22 and LCD:
- Read temperature and humidity (wait at least 3 seconds between reads):
- Always check for failed reads:
- Display on LCD:
Arduino UNO Q Code
The Arduino UNO Q has two processors working together:
- The STM32 MCU reads the DHT22 sensor and controls the LCD — all sensor and display logic runs on the MCU
- The Qualcomm MPU runs Debian Linux and handles Wi-Fi, Python, and cloud connectivity
- In this section, only the MCU is programmed — the Linux side stays idle. A later section shows how both processors work together via Bridge.
The MCU reads DHT22 every 3 seconds, displays temperature and humidity on the LCD, and prints to the Serial Monitor.
Detailed Instructions
First time with Arduino UNO Q? Follow the Getting Started with Arduino UNO Q tutorial before proceeding.
- Connect: Wire the DHT22 and LCD to the Arduino UNO Q MCU as shown in the wiring diagram.
- Open Arduino App Lab: Launch Arduino App Lab and wait until it detects your Arduino UNO Q.
- Create a new App: Click the Create New App button.

- Give the App a name, for example: Dht22Lcd
- Click Create to confirm.

- Paste the sketch: Copy the MCU code above and paste it into sketch/sketch.ino. Keep other files as default.
- Install the library: Click the Add sketch library button (the open book icon with a + sign) in the left sidebar.

- Search for DHT sensor library created by Adafruit and click the Install button.
- Search for DIYables LCD I2C created by DIYables.io and click the Install button.
- Upload: Click the Run button in Arduino App Lab.

- Watch temperature and humidity appear on the LCD and Serial Monitor every 3 seconds.
App Lab Console Output
Bridge: Linux + MCU
This section shows how to program both processors of the Arduino UNO Q so the Linux side can read DHT22 data and control the LCD via Bridge:
- The DHT22 sensor and LCD are connected to the MCU — all reading and display logic runs on the MCU every 3 seconds
- The MPU cannot access the sensor or LCD directly — it calls Bridge functions to retrieve readings or clear the display
- The MPU has Wi-Fi — running full Debian Linux, it can log readings, publish to dashboards, or send Telegram alerts
- Arduino_RouterBridge enables RPC communication between the two processors
- ⚠️ /dev/ttyHS1 (Linux) and Serial1 (MCU) are RESERVED by the router — never open them in user code
In short: MCU reads DHT22 every 3s and updates LCD → MPU reads via Bridge → MPU sends alerts over Wi-Fi.
MCU Code (Bridge)
Python Code (Bridge)
Detailed Instructions
- Connect: Wire the DHT22 and LCD to the Arduino UNO Q as shown in the wiring diagram.
- Open Arduino App Lab: Launch Arduino App Lab and wait for the board to be detected.
- Create a new App: Click Create New App, name it Dht22LcdBridge, then click Create.
- Paste the MCU sketch: Copy the MCU Bridge code above and paste it into sketch/sketch.ino.
- Paste the Python code: Copy the Python Bridge code above and paste it into the Python file in the App.
- Upload: Click the Run button in Arduino App Lab.
- Watch the LCD update every 3 seconds and readings appear in the Python console.
App Lab Console Output
Telegram
Monitor DHT22 readings remotely and receive automatic Telegram alerts when temperature or humidity rises above thresholds.
MCU sketch: Keep the same MCU sketch from the previous Bridge section.
Python Code (Telegram)
Detailed Instructions
- Replace YOUR_TELEGRAM_BOT_TOKEN with your actual bot token from BotFather.
- Replace YOUR_CHAT_ID with your Telegram chat ID.
- Paste this Python code into your App's Python file (keep the same MCU sketch).
- Click the Run button. Send /temp or /humidity from Telegram, or warm the sensor to trigger the high-temperature alert.
App Lab Console Output

ArduinoBot
OpenClaw
You can adapt the OpenClaw to this tutorial by refering the instruction on Arduino Uno Q - OpenClaw Tutorial
Project Ideas
You can build many useful projects with the DHT22 and LCD on Arduino UNO Q:
- Precision Room Thermometer-Hygrometer: The DHT22's ±0.5°C accuracy paired with the LCD's clear readout creates a reliable standalone instrument for room climate monitoring
- Food Storage Monitor: Keep tabs on humidity and temperature in a pantry or wine cellar — Telegram alerts notify when conditions drift outside safe ranges
- Plant Growing Station: Display temperature and humidity on the LCD to ensure ideal growing conditions — trigger a humidifier or fan via Bridge when readings drift
- Classroom Weather Station: Mount the DHT22 and LCD in a classroom — students can observe real-time readings and use the Bridge Python side to log and graph climate data over the school day
- Server Room Watchdog: Use the DHT22's extended temperature range (up to 80°C) to monitor rack temperatures — the LCD shows live status and Telegram sends immediate alerts before equipment damage occurs
Challenge Yourself
Ready to go further with the DHT22 and LCD on Arduino UNO Q? Try these challenges:
- Easy: Add scrolling text to the LCD — when temperature exceeds 35°C, scroll a warning message across the bottom row using lcd.scrollDisplayLeft().
- Medium: Implement a Telegram /setthreshold command that accepts a temperature value as argument and updates the alert threshold dynamically in the Python side (e.g., /setthreshold 30).
- Advanced: Build a dual-mode display — alternate the LCD between Celsius/Fahrenheit display and a dew point display every 5 seconds, with the dew point computed in Python via Bridge and sent back to the MCU via a set_dew_point(String) Bridge function.