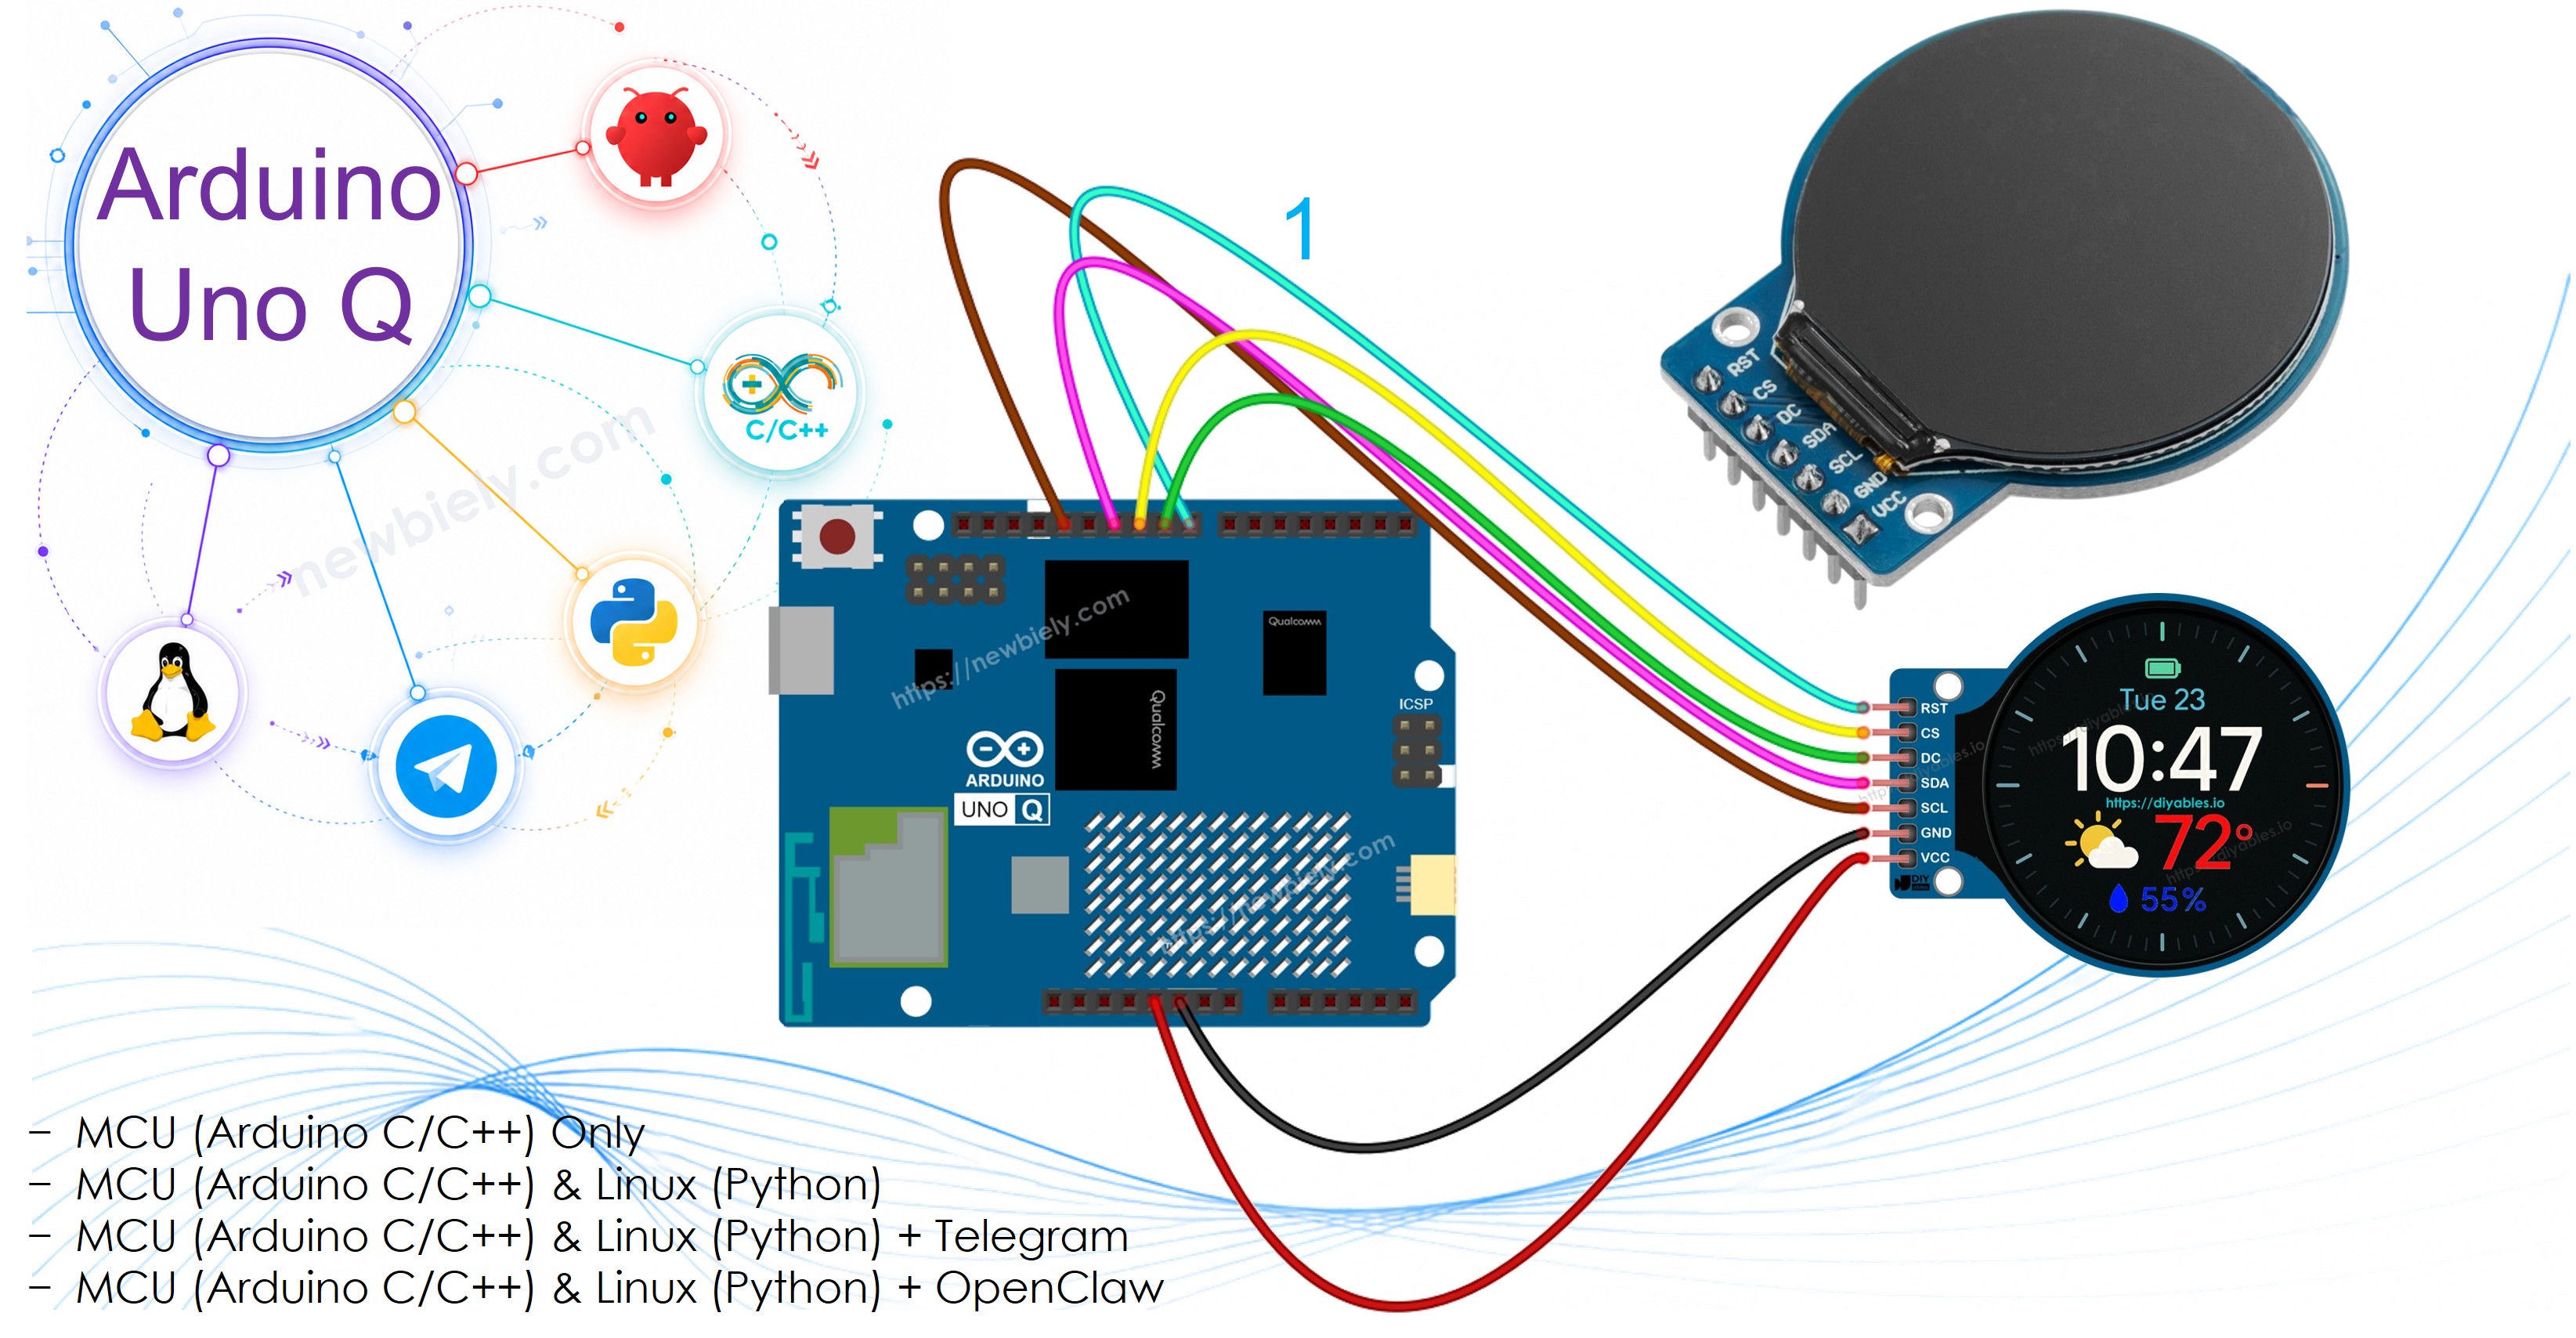
Arduino UNO Q - Round Circular TFT LCD Display
Want to add a stylish round screen to your Arduino UNO Q project? This beginner-friendly tutorial shows you how to use a 1.28 inch round circular TFT LCD display with Arduino UNO Q — step by step.
In this tutorial, you will learn:
- What a round circular TFT LCD display is and how it works
- How to wire the round TFT LCD display to Arduino UNO Q
- How to program the MCU (C/C++ Arduino code) to show text and graphics on the circular display
- How to program both the Linux side (Python) and MCU side (C/C++) to control the round display remotely via Bridge
- How to send Telegram messages to Arduino UNO Q to update what is shown on the round TFT display
- How to use OpenClaw on Arduino UNO Q to control the round TFT display
Hardware Preparation
Or you can buy the following kits:
| 1 | × | DIYables Sensor Kit (18 sensors/displays) |
Additionally, some of these links are for products from our own brand, DIYables .
Overview of the Round Circular TFT LCD Display
The 1.28 inch round circular TFT LCD display is a compact, eye-catching screen based on the GC9A01 driver.
Key specs and features:
- Screen shape: Circular — 240x240 pixels, round viewing area
- Size: 1.28 inches diagonal
- Driver IC: GC9A01 — use the DIYables_TFT_Round library
- Interface: SPI (4-wire) — only 5 signal wires needed
- Color: Full RGB color (65K colors)
- Power: 3.3V or 5V compatible
- Best for: Wearables, meters, dashboards, analog clock displays, and compact UI panels
The round display uses the SPI interface, connecting to the MCU's hardware SPI pins on the Arduino UNO Q.
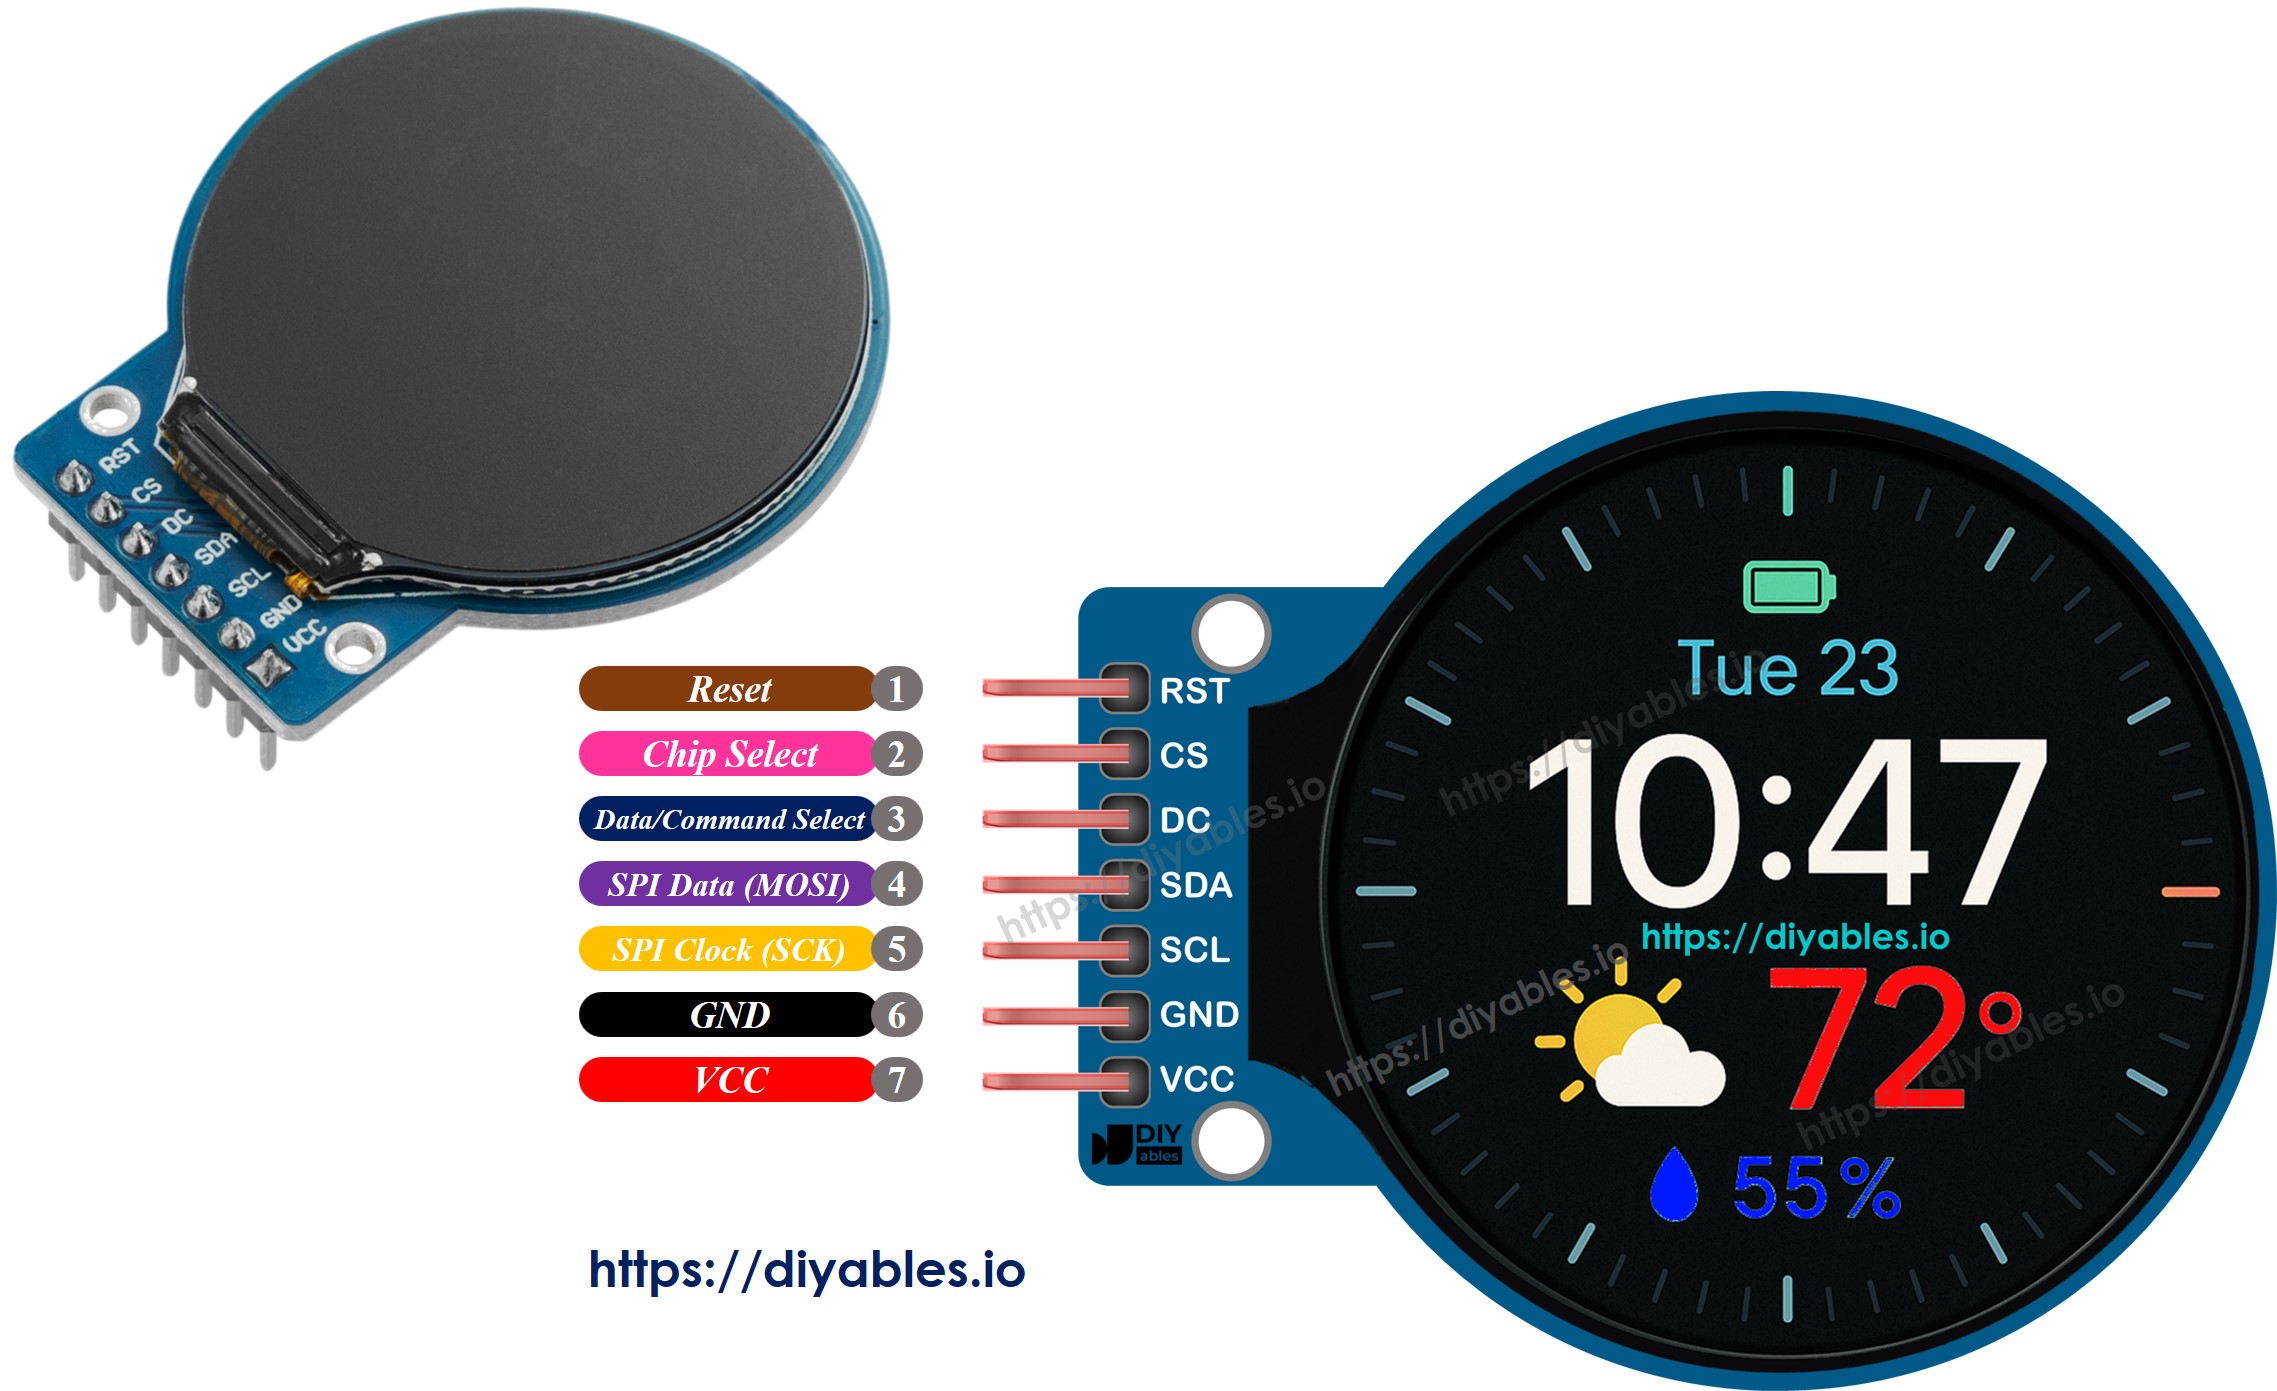
Pin descriptions:
- VCC: Power supply — connect to 3.3V
- GND: Ground
- SCL: SPI Clock — connect to D13
- SDA: SPI MOSI (data) — connect to D11
- DC: Data/Command select — connect to D9
- CS: Chip Select — connect to D10
- RST: Reset — connect to D8
Wiring Diagram
Connect the 1.28 inch round TFT LCD to the Arduino UNO Q's MCU pins as shown:
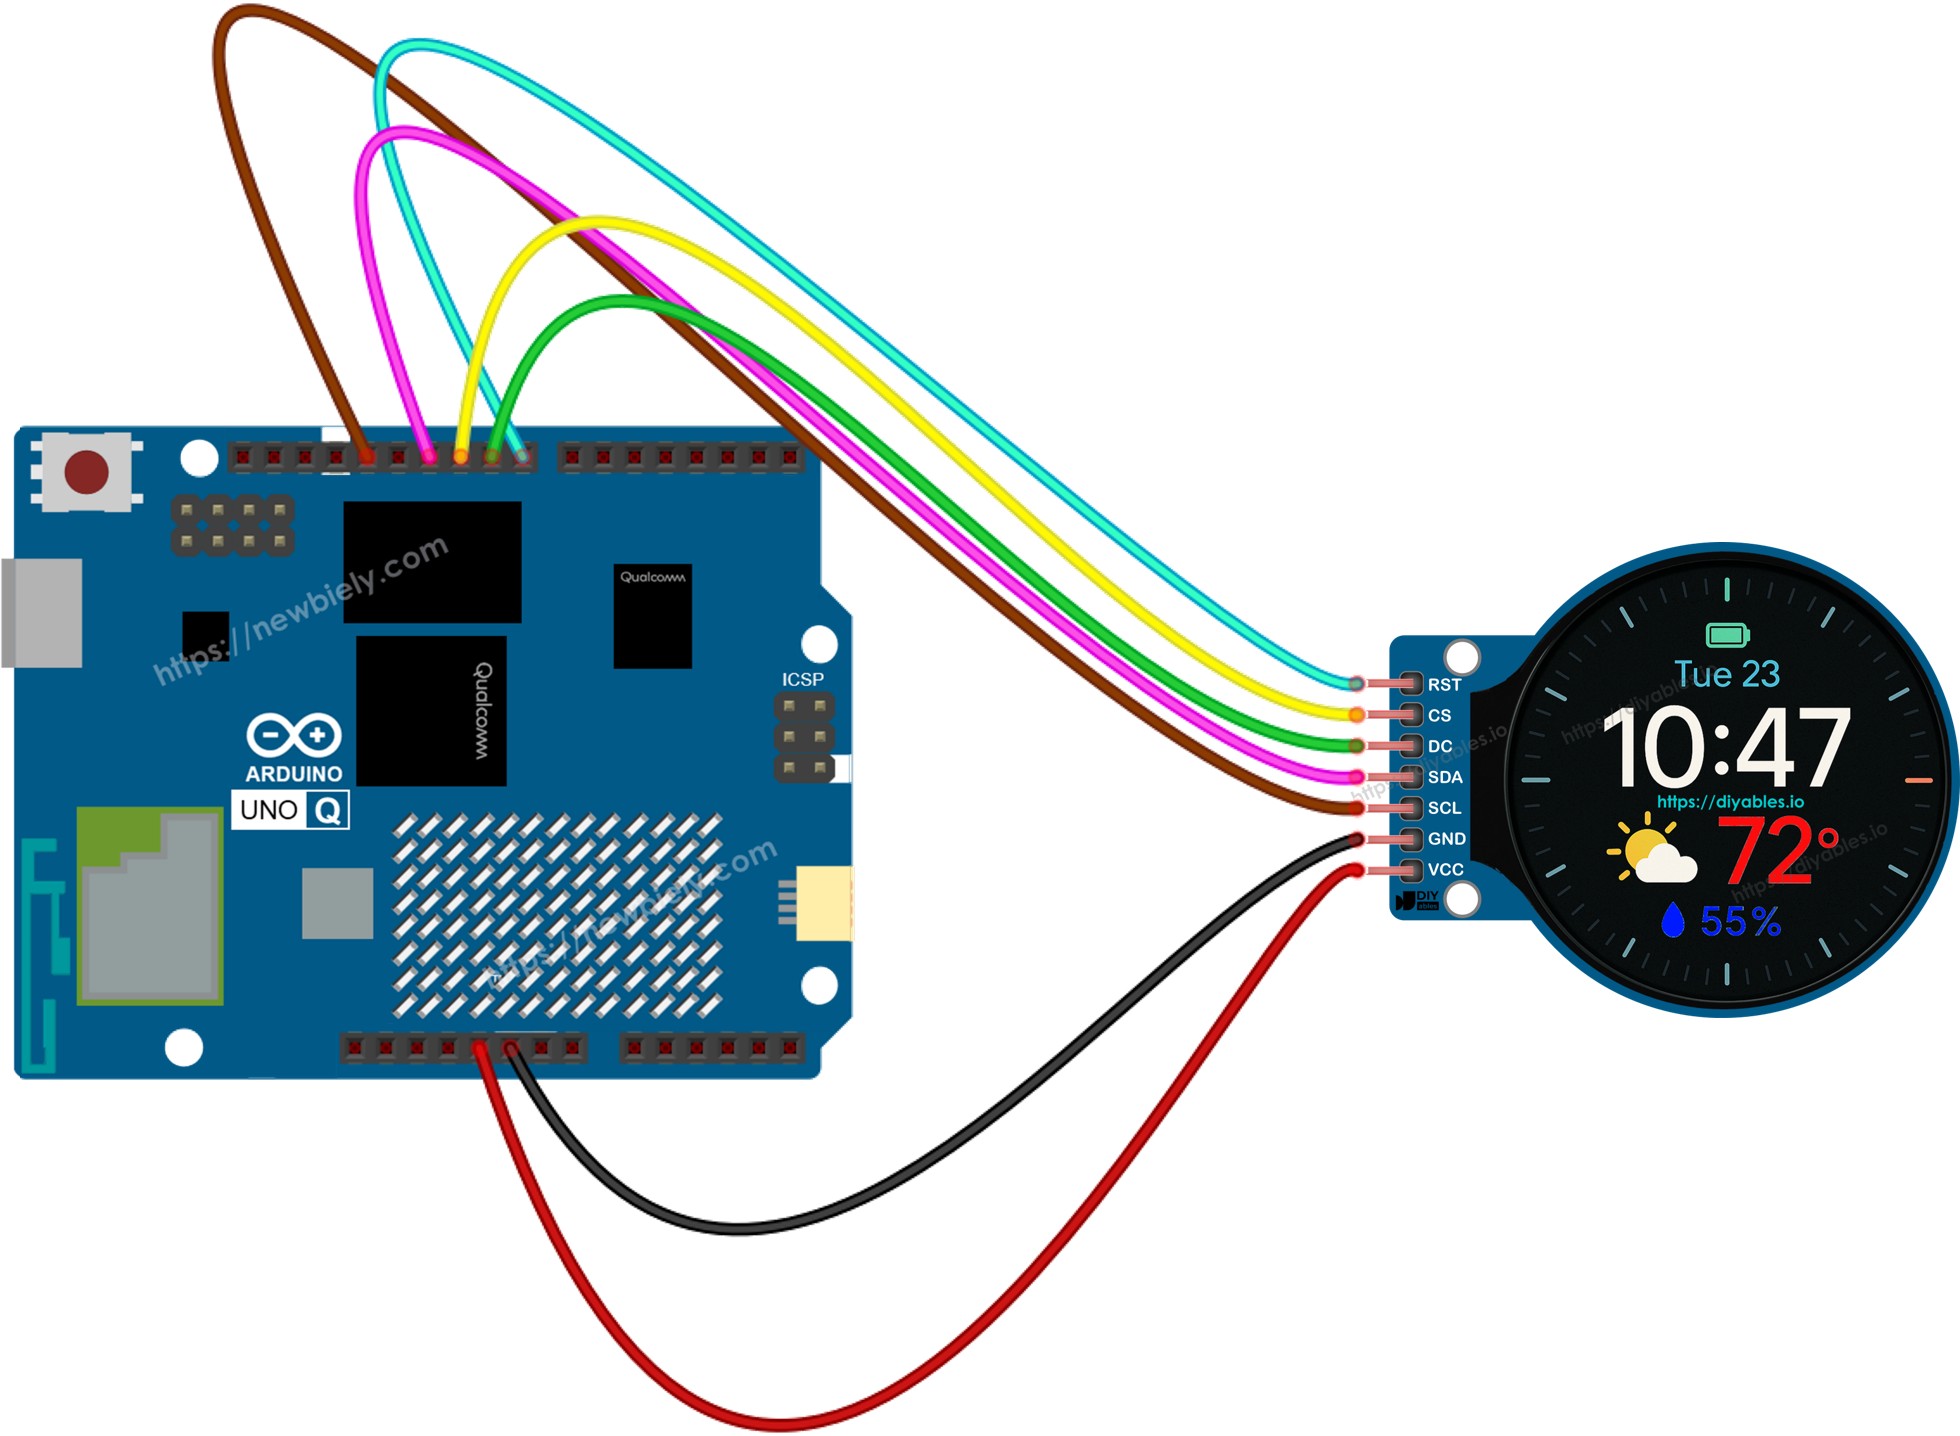
This image is created using Fritzing. Click to enlarge image
| Round TFT Pin | Arduino UNO Q MCU Pin | Description |
|---|---|---|
| VCC | 3.3V | Power supply |
| GND | GND | Ground |
| SCL | D13 | SPI Clock |
| SDA | D11 | SPI MOSI |
| DC | D9 | Data/Command |
| CS | D10 | Chip Select |
| RST | D8 | Reset |
Note: Use 3.3V for VCC — the GC9A01 display runs at 3.3V logic. The MCU's SPI pins output 3.3V on the Arduino UNO Q.
Arduino UNO Q Code
The Arduino UNO Q has two processors working together:
- The STM32 MCU drives the round TFT display via SPI — it renders all text and graphics
- The Qualcomm MPU runs Debian Linux and handles Wi-Fi, Python, and cloud connectivity
- In this section, only the MCU is programmed — the Linux side stays idle. A later section shows how both processors work together via Bridge.
The sketch below displays welcome text on the round circular TFT screen.
Detailed Instructions
First time with Arduino UNO Q? Follow the Getting Started with Arduino UNO Q tutorial to get your development environment ready before proceeding.
- Connect: Wire the round TFT LCD to the Arduino UNO Q as shown in the wiring diagram, then plug in the USB-C cable.
- Open Arduino App Lab: Launch Arduino App Lab and wait until it detects your Arduino UNO Q — this can take several minutes on first launch.
- Create a new App: Click the Create New App button.

- Give the App a name, for example: DIYables_RoundTftLcd
- Click Create to confirm.
- You will see a set of folders and files generated inside your new App.

- Find the sketch/sketch.ino file — this is where you will paste the MCU sketch.
- Install the library: Click the Add sketch library button (the open book icon with a + sign) in the left sidebar.

- Search for Arduino_RouterBridge created by Arduino and click the Install button.
- Search for DIYables TFT Round created by DIYables.io and click the Install button.
- Upload: Click the Run button in Arduino App Lab to compile and upload to the STM32.

Your round circular TFT display will light up and show "Arduino UNO Q", "Round TFT LCD", and "DIYables.io" in different colors!
- Pro Tip: The round screen is 240x240 pixels. Keep setCursor() positions within the circular visible area — text near the corners may be clipped by the round frame.
Bridge: Linux + MCU
This section shows how to program both processors of the Arduino UNO Q so the Linux side can control the round TFT display remotely:
- The round TFT display is connected to the MCU (STM32) via SPI — the MCU renders all output
- The MPU cannot drive the round TFT directly — it must request the MCU to display content via Bridge.call()
- The MPU has Wi-Fi — running full Debian Linux, it can connect to the Internet and trigger display updates remotely
- Arduino_RouterBridge enables RPC communication between the two processors
- ⚠️ /dev/ttyHS1 (Linux) and Serial1 (MCU) are RESERVED by the router — never open them in user code
In short: MCU controls the round TFT display → MPU sends display commands → MPU can update the screen from anywhere over the Internet.
MCU Code (Bridge)
Python Code (Bridge)
Detailed Instructions
- Connect: Wire the round TFT LCD to the Arduino UNO Q and plug in the USB-C cable.
- Open Arduino App Lab: Launch Arduino App Lab and wait for the board to be detected.
- Create a new App: Click Create New App, name it DIYables_RoundTftLcdBridge, then click Create.
- Paste the MCU sketch: Copy the MCU Bridge code above and paste it into sketch/sketch.ino.
- Paste the Python code: Copy the Python Bridge code above and paste it into the Python file in the App.
- Upload: Click the Run button in Arduino App Lab.
App Lab Console Output
Telegram
Control the round TFT display from anywhere using Telegram. Send a message from your phone and the round display updates in real time.
MCU sketch: Keep the same MCU sketch from the previous Bridge section.
Python Code (Telegram)
Detailed Instructions
- Replace YOUR_TELEGRAM_BOT_TOKEN with your actual bot token from BotFather.
- Replace YOUR_CHAT_ID with your Telegram chat ID.
- Paste this Python code into your App's Python file (keep the same MCU sketch).
- Click the Run button. Open Telegram and send commands to your bot.
App Lab Console Output

ArduinoBot
OpenClaw
You can adapt the OpenClaw to this tutorial by refering the instruction on Arduino Uno Q - OpenClaw Tutorial
Project Ideas
You can build many creative and useful projects using a round TFT display with Arduino UNO Q:
- Analog Clock Face: Show a real-time analog clock using NTP time fetched via Wi-Fi on the circular display
- Wearable Sensor Monitor: Display real-time heart rate, temperature, or step count on the compact round screen
- Smart Speedometer: Build a round gauge-style display that shows current speed or RPM fetched from a sensor
- Remote Notification Badge: Show incoming Telegram alerts or custom icons on the round screen mounted on a desk or wall
- Weather Mini Display: Show current temperature and weather icon fetched from an online API on the circular TFT
Challenge Yourself
Ready to go further with the round circular TFT display on Arduino UNO Q? Try these challenges:
- Easy: Modify the MCU sketch to draw a filled circle and a filled rectangle on the round display using the DIYables_TFT_Round drawing functions.
- Medium: Use the Bridge to send two values from Python — a label and a number — and have the MCU display them as a large centered number with a label below it on the round screen.
- Advanced: Build a Telegram-controlled analog clock face: the Python side fetches NTP time and sends hour/minute values via Bridge to the MCU, which draws clock hands on the round TFT display.