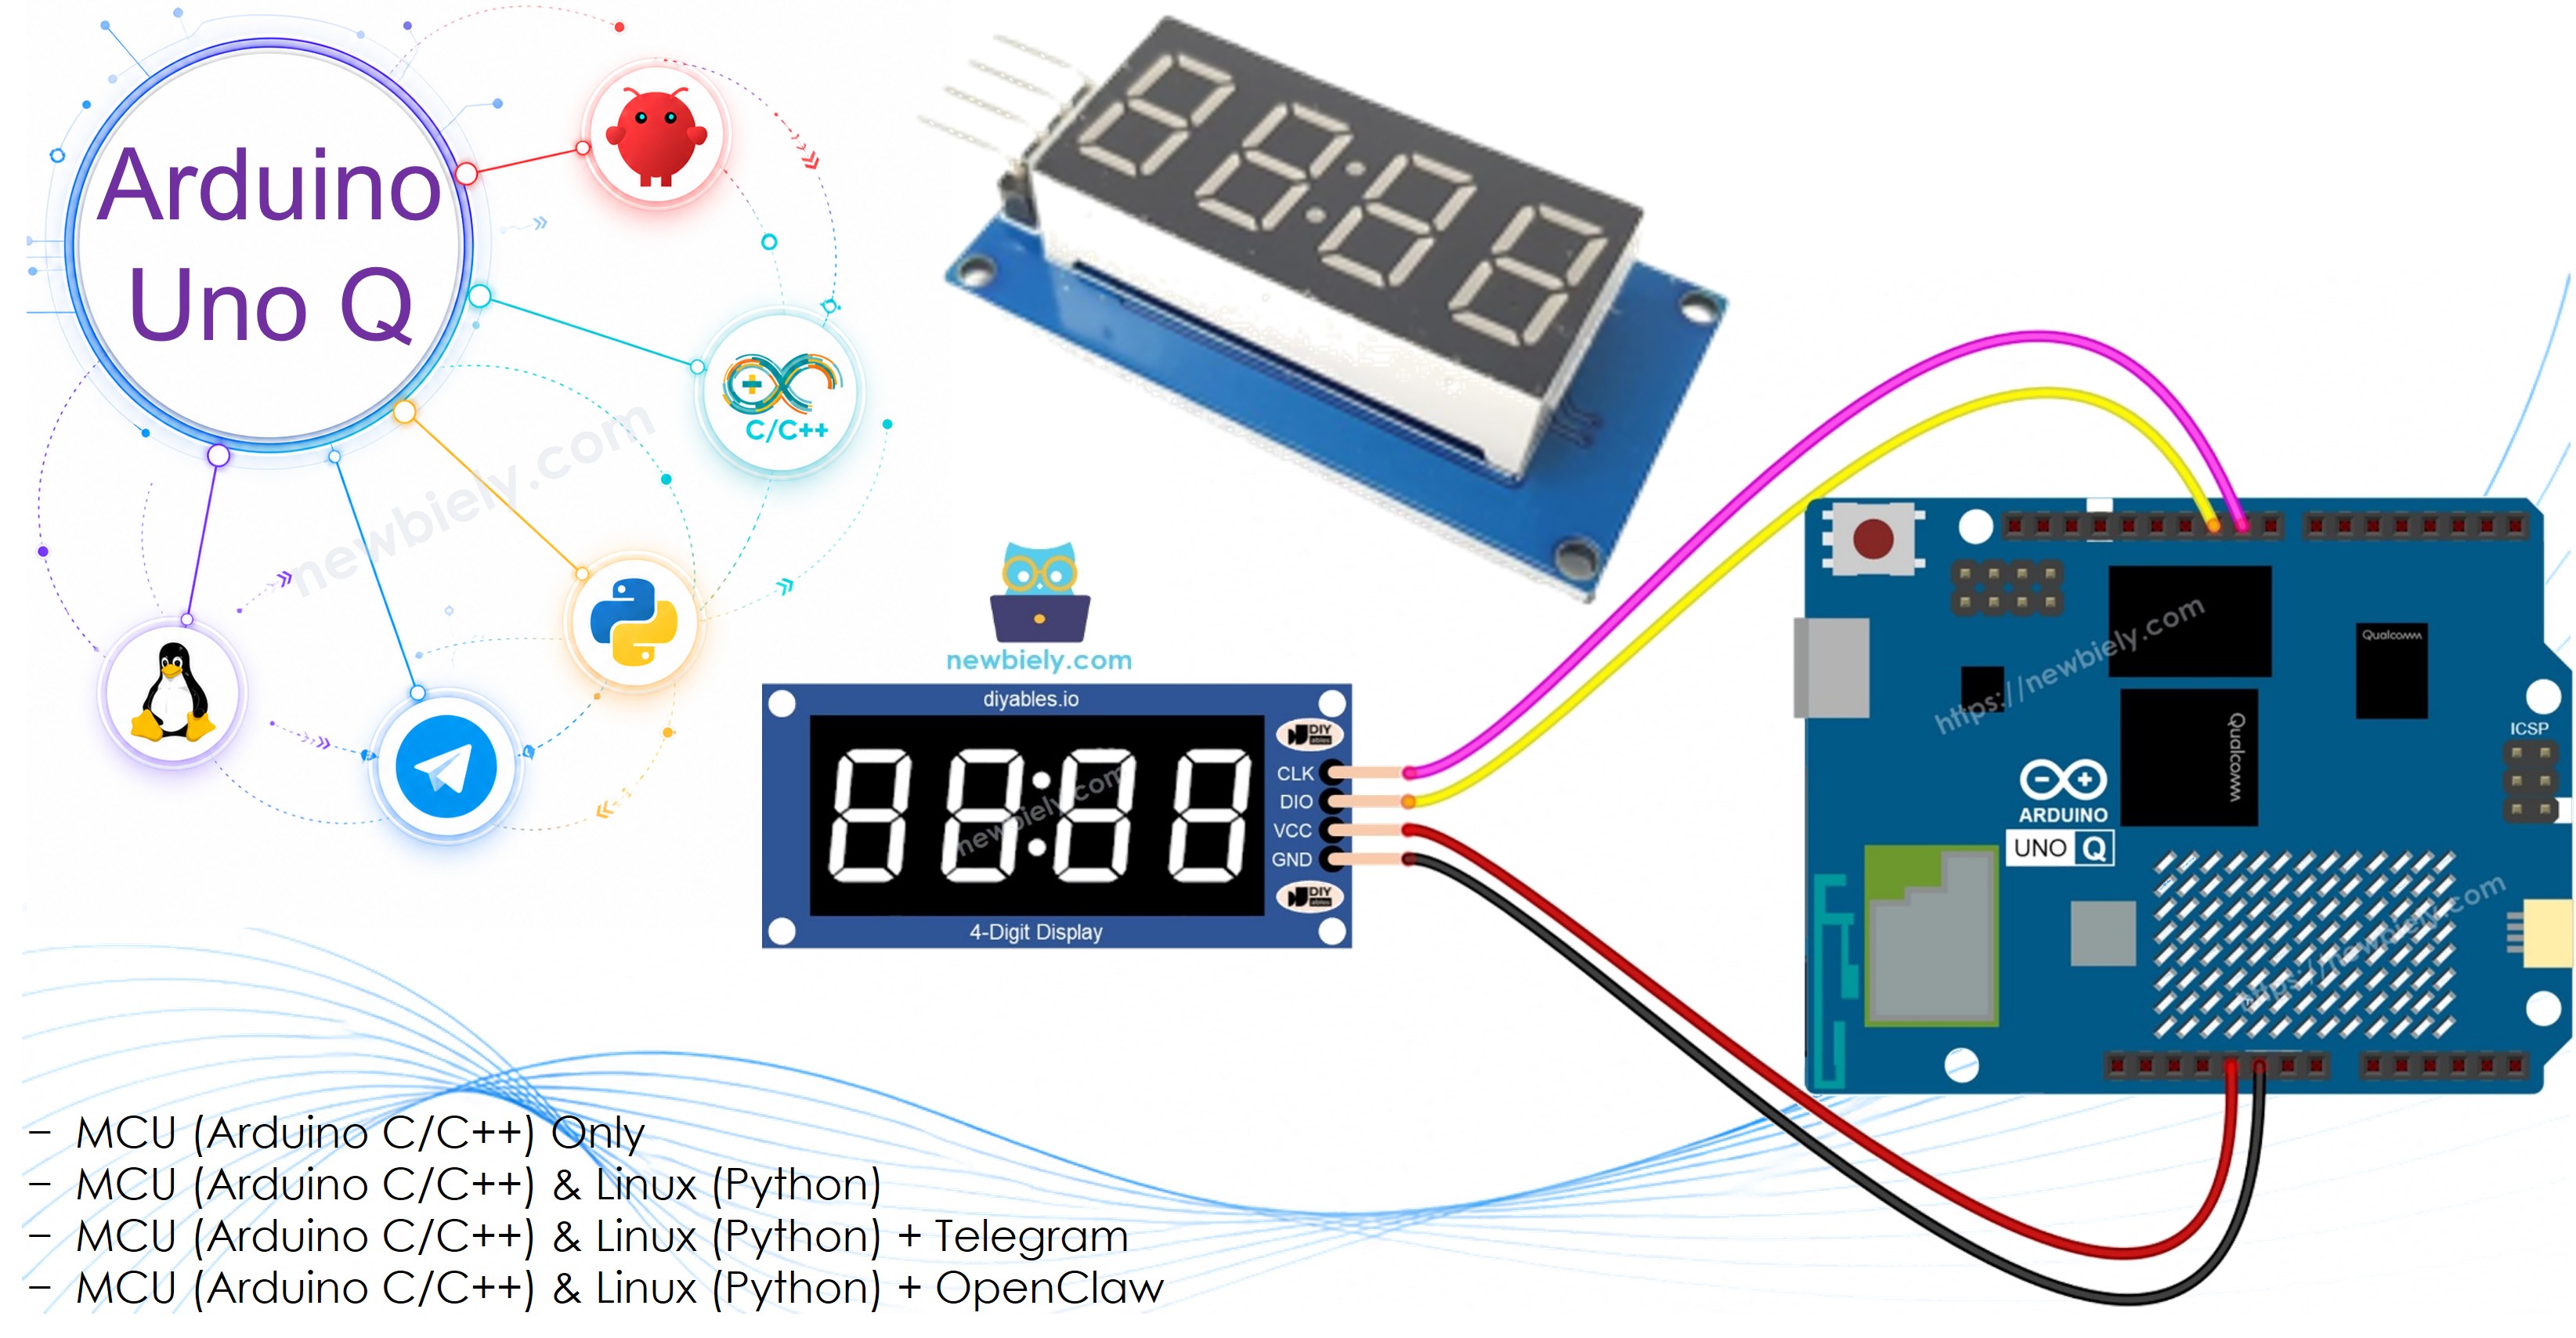
Arduino UNO Q - TM1637 4-Digit 7-Segment Display
Want to display numbers and time on a bright LED display with your Arduino UNO Q? This beginner-friendly tutorial shows you how to use a TM1637 4-digit 7-segment display with Arduino UNO Q — step by step.
In this tutorial, you will learn:
- What a TM1637 4-digit 7-segment display is and how it works
- How to wire the TM1637 display to Arduino UNO Q
- How to program the MCU (C/C++ Arduino code) to show integers, floats, and count values
- How to program both the Linux side (Python) and MCU side (C/C++) to control the display remotely via Bridge
- How to send Telegram messages to Arduino UNO Q to update the 7-segment display
- How to use OpenClaw on Arduino UNO Q to control the 7-segment display
Hardware Preparation
Or you can buy the following kits:
| 1 | × | DIYables Sensor Kit (18 sensors/displays) |
Additionally, some of these links are for products from our own brand, DIYables .
Overview of the TM1637 4-Digit 7-Segment Display
The TM1637 4-digit 7-segment display uses a dedicated driver IC that stores display data internally, so you only need 2 signal wires from the MCU.
Key specs and features:
- Digits: 4 digits with 7 segments each, plus decimal points
- Colon LED: Between digits 1 and 2 — perfect for clock-style HH:MM display
- Driver IC: TM1637 — data held in its own memory, no continuous updates needed
- Interface: 2-wire serial (CLK + DIO) — simple and minimal wiring
- Brightness: 8 adjustable brightness levels
- Power: 3.3V or 5V compatible
- Library: DIYables_4Digit7Segment_TM1637 — supports integers, floats, text, temperature, and time
| Pin | Function | Description |
|---|---|---|
| CLK | Clock Signal | Serial clock input |
| DIO | Data I/O | Serial data input/output |
| VCC | Power | 3.3V or 5V supply |
| GND | Ground | Common ground |
Pinout
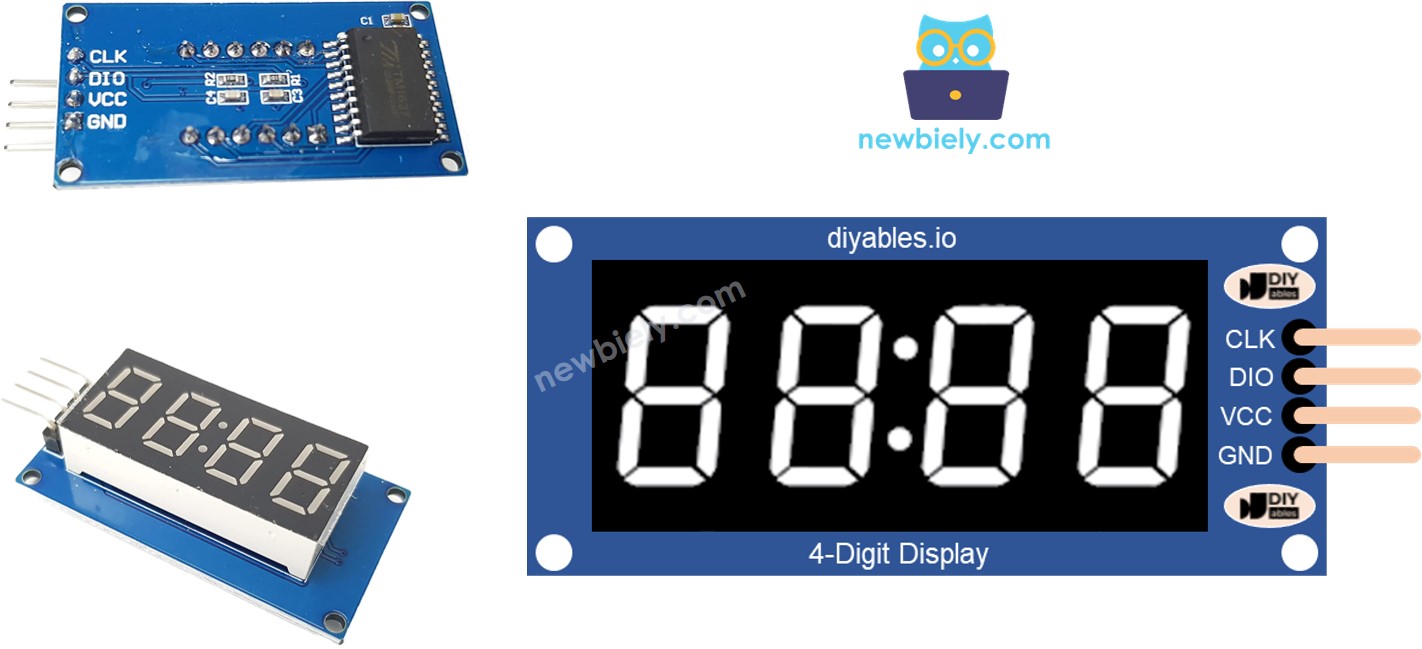
- CLK: Clock signal — synchronizes data transfer between MCU and TM1637
- DIO: Data input/output — carries serial data to and from the driver IC
- VCC: Power supply — connect to 3.3V or 5V
- GND: Ground — common ground
Wiring Diagram
Connect the TM1637 4-digit 7-segment display to the Arduino UNO Q MCU as shown:
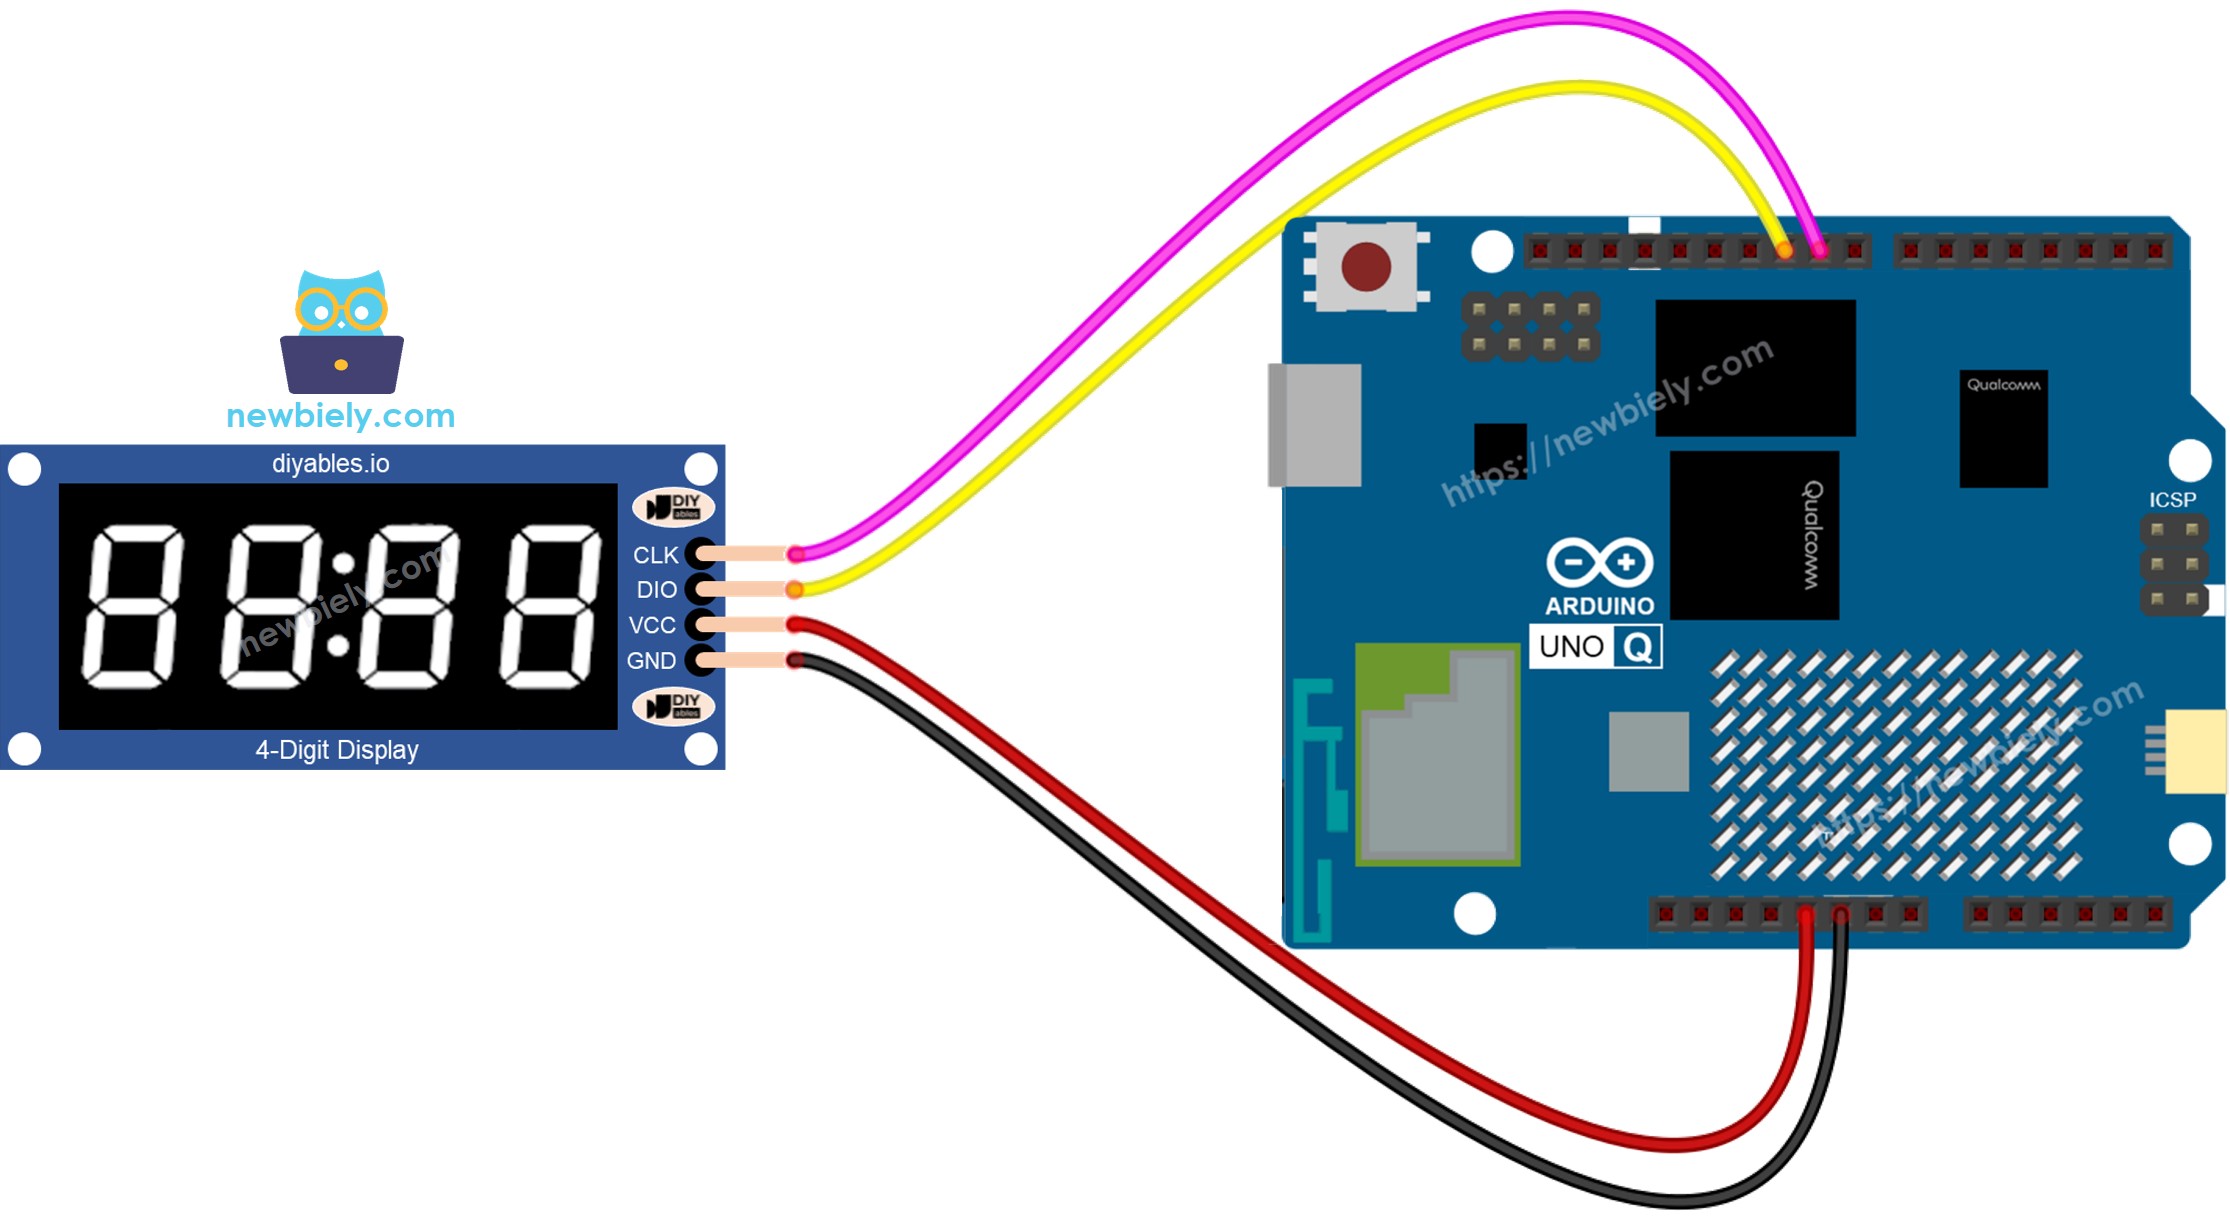
This image is created using Fritzing. Click to enlarge image
| TM1637 Pin | Arduino UNO Q MCU Pin | Description |
|---|---|---|
| CLK | D9 | Clock signal |
| DIO | D10 | Data input/output |
| VCC | 5V | Power supply |
| GND | GND | Ground |
Arduino UNO Q Code
The Arduino UNO Q has two processors working together:
- The STM32 MCU drives the TM1637 7-segment display directly via two digital pins
- The Qualcomm MPU runs Debian Linux and handles Wi-Fi, Python, and cloud connectivity
- In this section, only the MCU is programmed — the Linux side stays idle. A later section shows how both processors work together via Bridge.
The sketch below counts from 0 to 9999 on the 7-segment display, incrementing every second.
Note: Unlike the 74HC595 display, the TM1637 holds its data in internal memory — you do NOT need to call a loop() refresh function. delay() can be used freely.
Detailed Instructions
First time with Arduino UNO Q? Follow the Getting Started with Arduino UNO Q tutorial to get your development environment ready before proceeding.
- Connect: Wire the TM1637 display to the Arduino UNO Q as shown, then plug in the USB-C cable.
- Open Arduino App Lab: Launch Arduino App Lab and wait until it detects your Arduino UNO Q — this can take several minutes on first launch.
- Create a new App: Click the Create New App button.

- Give the App a name, for example: DIYables_7SegTM1637
- Click Create to confirm.
- You will see a set of folders and files generated inside your new App.

- Find the sketch/sketch.ino file — this is where you will paste the MCU sketch.
- Install the library: Click the Add sketch library button (the open book icon with a + sign) in the left sidebar.

- Search for Arduino_RouterBridge created by Arduino and click the Install button.
- Search for DIYables_4Digit7Segment_TM1637 created by DIYables.io and click the Install button.
- Upload: Click the Run button in Arduino App Lab to compile and upload to the STM32.

Your TM1637 display will start counting from 0 to 9999, incrementing every second!
- Pro Tip: Use display.setBrightness(7) in setup() to set the maximum brightness level (0 = dimmest, 7 = brightest).
Bridge: Linux + MCU
This section shows how to program both processors of the Arduino UNO Q so the Linux side can control the TM1637 display remotely:
- The TM1637 7-segment display is connected to the MCU (STM32) — the MCU writes values via 2-wire serial
- The MPU cannot control the display directly — it must request the MCU to update values via Bridge.call()
- The MPU has Wi-Fi — running full Debian Linux, it can connect to the Internet and push display updates remotely
- Arduino_RouterBridge enables RPC communication between the two processors
- ⚠️ /dev/ttyHS1 (Linux) and Serial1 (MCU) are RESERVED by the router — never open them in user code
In short: MCU drives the TM1637 display → MPU sends values → MPU can update the display from anywhere over the Internet.
MCU Code (Bridge)
Python Code (Bridge)
Detailed Instructions
- Connect: Wire the TM1637 display to the Arduino UNO Q and plug in the USB-C cable.
- Open Arduino App Lab: Launch Arduino App Lab and wait for the board to be detected.
- Create a new App: Click Create New App, name it DIYables_7SegTM1637Bridge, then click Create.
- Paste the MCU sketch: Copy the MCU Bridge code above and paste it into sketch/sketch.ino.
- Paste the Python code: Copy the Python Bridge code above and paste it into the Python file in the App.
- Upload: Click the Run button in Arduino App Lab.
App Lab Console Output
Telegram
Control the TM1637 7-segment display from anywhere using Telegram. Send a number from your phone and the display updates instantly.
MCU sketch: Keep the same MCU sketch from the previous Bridge section.
Python Code (Telegram)
Detailed Instructions
- Replace YOUR_TELEGRAM_BOT_TOKEN with your actual bot token from BotFather.
- Replace YOUR_CHAT_ID with your Telegram chat ID.
- Paste this Python code into your App's Python file (keep the same MCU sketch).
- Click the Run button. Open Telegram and send commands to your bot.
App Lab Console Output

ArduinoBot
OpenClaw
You can adapt the OpenClaw to this tutorial by refering the instruction on Arduino Uno Q - OpenClaw Tutorial
Project Ideas
You can build many useful projects using a TM1637 7-segment display with Arduino UNO Q:
- Internet Clock: Python fetches the current time via NTP and sends it to the MCU to display in HH:MM format with the colon blinking
- Remote Counter: Send a count value to the display via Telegram — useful for production counters or score boards
- Live Temperature Display: Fetch temperature from a sensor on the MCU and show it on the 7-segment display via Bridge
- Countdown Timer: Python sends a start value via Bridge, and the MCU counts down to zero on the display
- Pomodoro Timer: Display work/break intervals on the TM1637 display, controlled and tracked via Telegram
Challenge Yourself
Ready to go further with the TM1637 7-segment display on Arduino UNO Q? Try these challenges:
- Easy: Modify the MCU sketch to display 26.5 on startup using display.print(26.5, 1) and add display.setBrightness(7) for maximum brightness.
- Medium: Use the Bridge to implement a /time HH MM Telegram command that sends hours and minutes to the MCU, which then displays them in HH:MM format with the colon enabled.
- Advanced: Build a Telegram-controlled countdown timer: /timer <seconds> starts counting down from the given value, the display shows the remaining seconds, and /stop halts the countdown.