Arduino Nano 33 IoT - 28BYJ-48 Stepper Motor ULN2003 Driver
In this lesson, we will talk about these topics:
- Controlling one 28BYJ-48 stepper motor with an Arduino Nano 33 IoT and a ULN2003 driver.
- Controlling several 28BYJ-48 stepper motors with an Arduino Nano 33 IoT and a ULN2003 driver.

Stepper motors are great for controlling movement precisely because they divide a full rotation into many small steps. These motors are used in many devices such as printers, 3D printers, CNC machines, and factory automation systems.
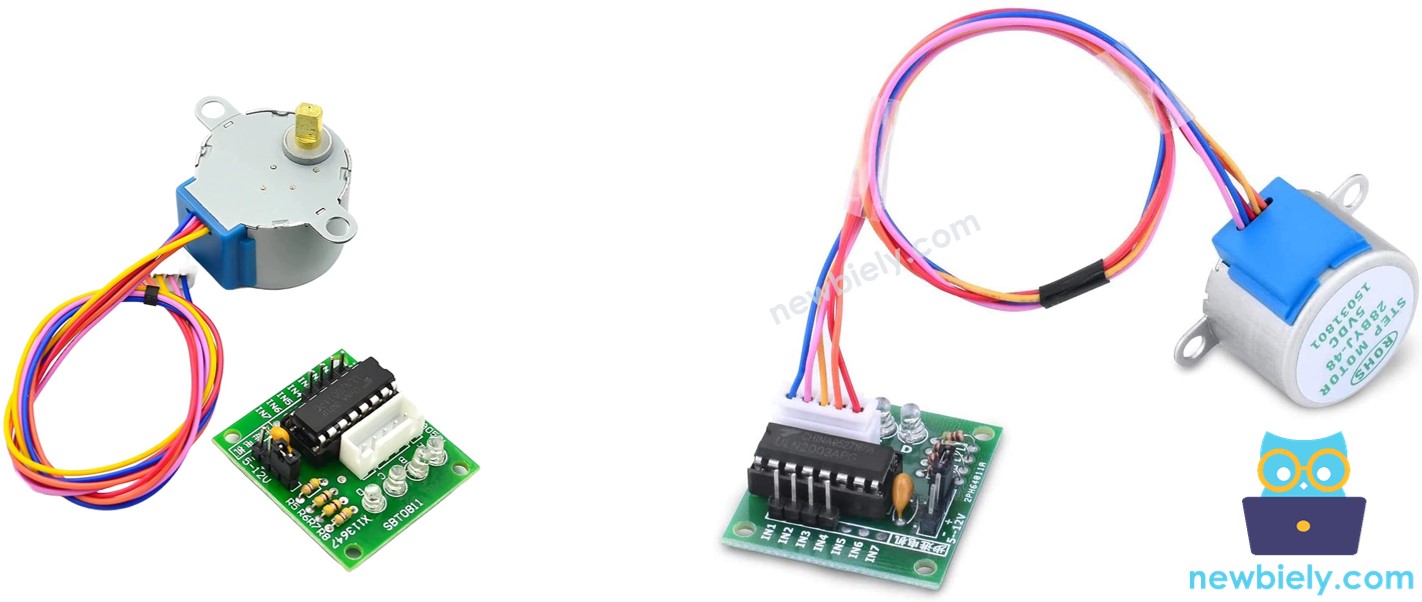
A cheap way to learn about stepper motors is by trying out 28BYJ-48 motors. These motors usually come with ULN2003 driver boards, which make them very easy to use.
Hardware Preparation
Or you can buy the following kits:
| 1 | × | DIYables Sensor Kit (18 sensors/displays) |
Additionally, some of these links are for products from our own brand, DIYables .
Overview of 28BYJ-48 Stepper Motor
According to the data sheet, the 28BYJ-48 motor, when set to full-step mode, moves 11.25 degrees with each step. This means it needs 32 steps to make one full 360-degree turn (360 divided by 11.25 equals 32).
The motor also has a 1/64 reduction gear set. This means its steps are multiplied: 32 steps times 64 equals 2048 steps in one full turn. Each step turns the motor by about 360° divided by 2048, which is roughly 0.1758 degrees per step.
Conclusion: When the motor takes 2048 full steps, it makes one complete turn.
Pinout
The 28BYJ-48 stepper motor has 5 pins. You don't need to know all the details about these pins—you just need to connect it to the ULN2003 motor driver's connector.
Overview of ULN2003 Stepper Motor Driver Module
The ULN2003 is a very popular motor driver for stepper motors. Its main features are:
- Four LEDs light up to show the activity of the four control input lines, clearly displaying the current stepping state of the motor. These LEDs are practical and also add a visual aspect to the stepping process.
- The module includes an ON/OFF jumper to disconnect power from the connected stepper motor. This feature provides an easy way to manage the motor’s power supply efficiently.
ULN2003 Pinout
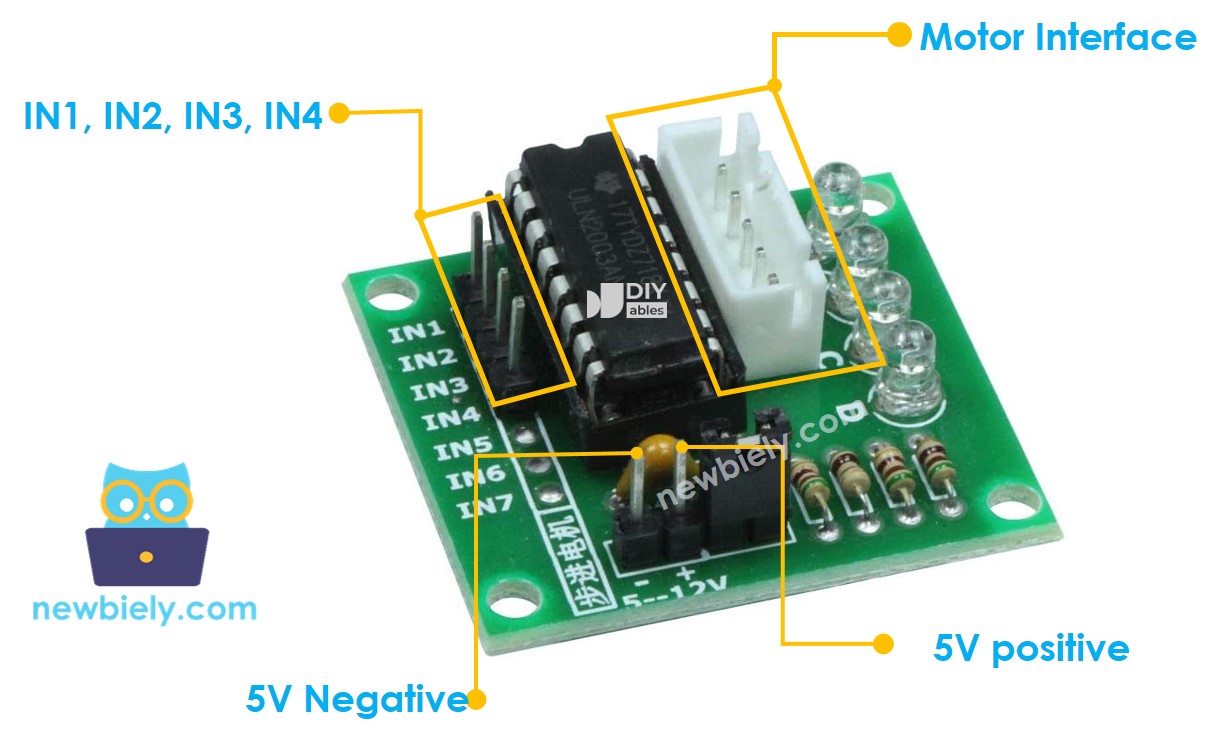
The ULN2003 module has 6 pins and one female connector.
- IN1 pin: This pin controls the motor. Connect it to one of the output pins on the Arduino Nano 33 IoT.
- IN2 pin: This pin also controls the motor. Attach it to another output pin on the Arduino Nano 33 IoT.
- IN3 pin: Use this pin to drive the motor. Connect it to an output pin on the Arduino Nano 33 IoT.
- IN4 pin: This pin is for controlling the motor. Connect it to an output pin on the Arduino Nano 33 IoT.
- GND pin: This is the common ground. It must be connected to the ground (GND) on both the Arduino Nano 33 IoT and the external power supply.
- VDD pin: This pin provides power to the motor. Connect it to the external power supply.
- Motor Connector: This is the spot where the motor plugs in.
※ NOTE THAT:
Here are some simple instructions for powering stepper motors:
- Make sure that the external power supply has the same voltage as the stepper motor needs. For example, if your stepper motor uses 12V DC, you must use a 12V supply. Similarly, the 28BYJ-48 stepper motor works on 5V DC, so you need a 5V supply.
- Even if the stepper motor runs on 5V, do not connect the VDD pin to the 5V pin on the Arduino Nano 33 IoT. Instead, connect the VDD pin to a separate 5V power supply. This is important because stepper motors can require a lot of power, which might be too much for the Arduino Nano 33 IoT’s power source and could cause problems or damage.
Wiring Diagram
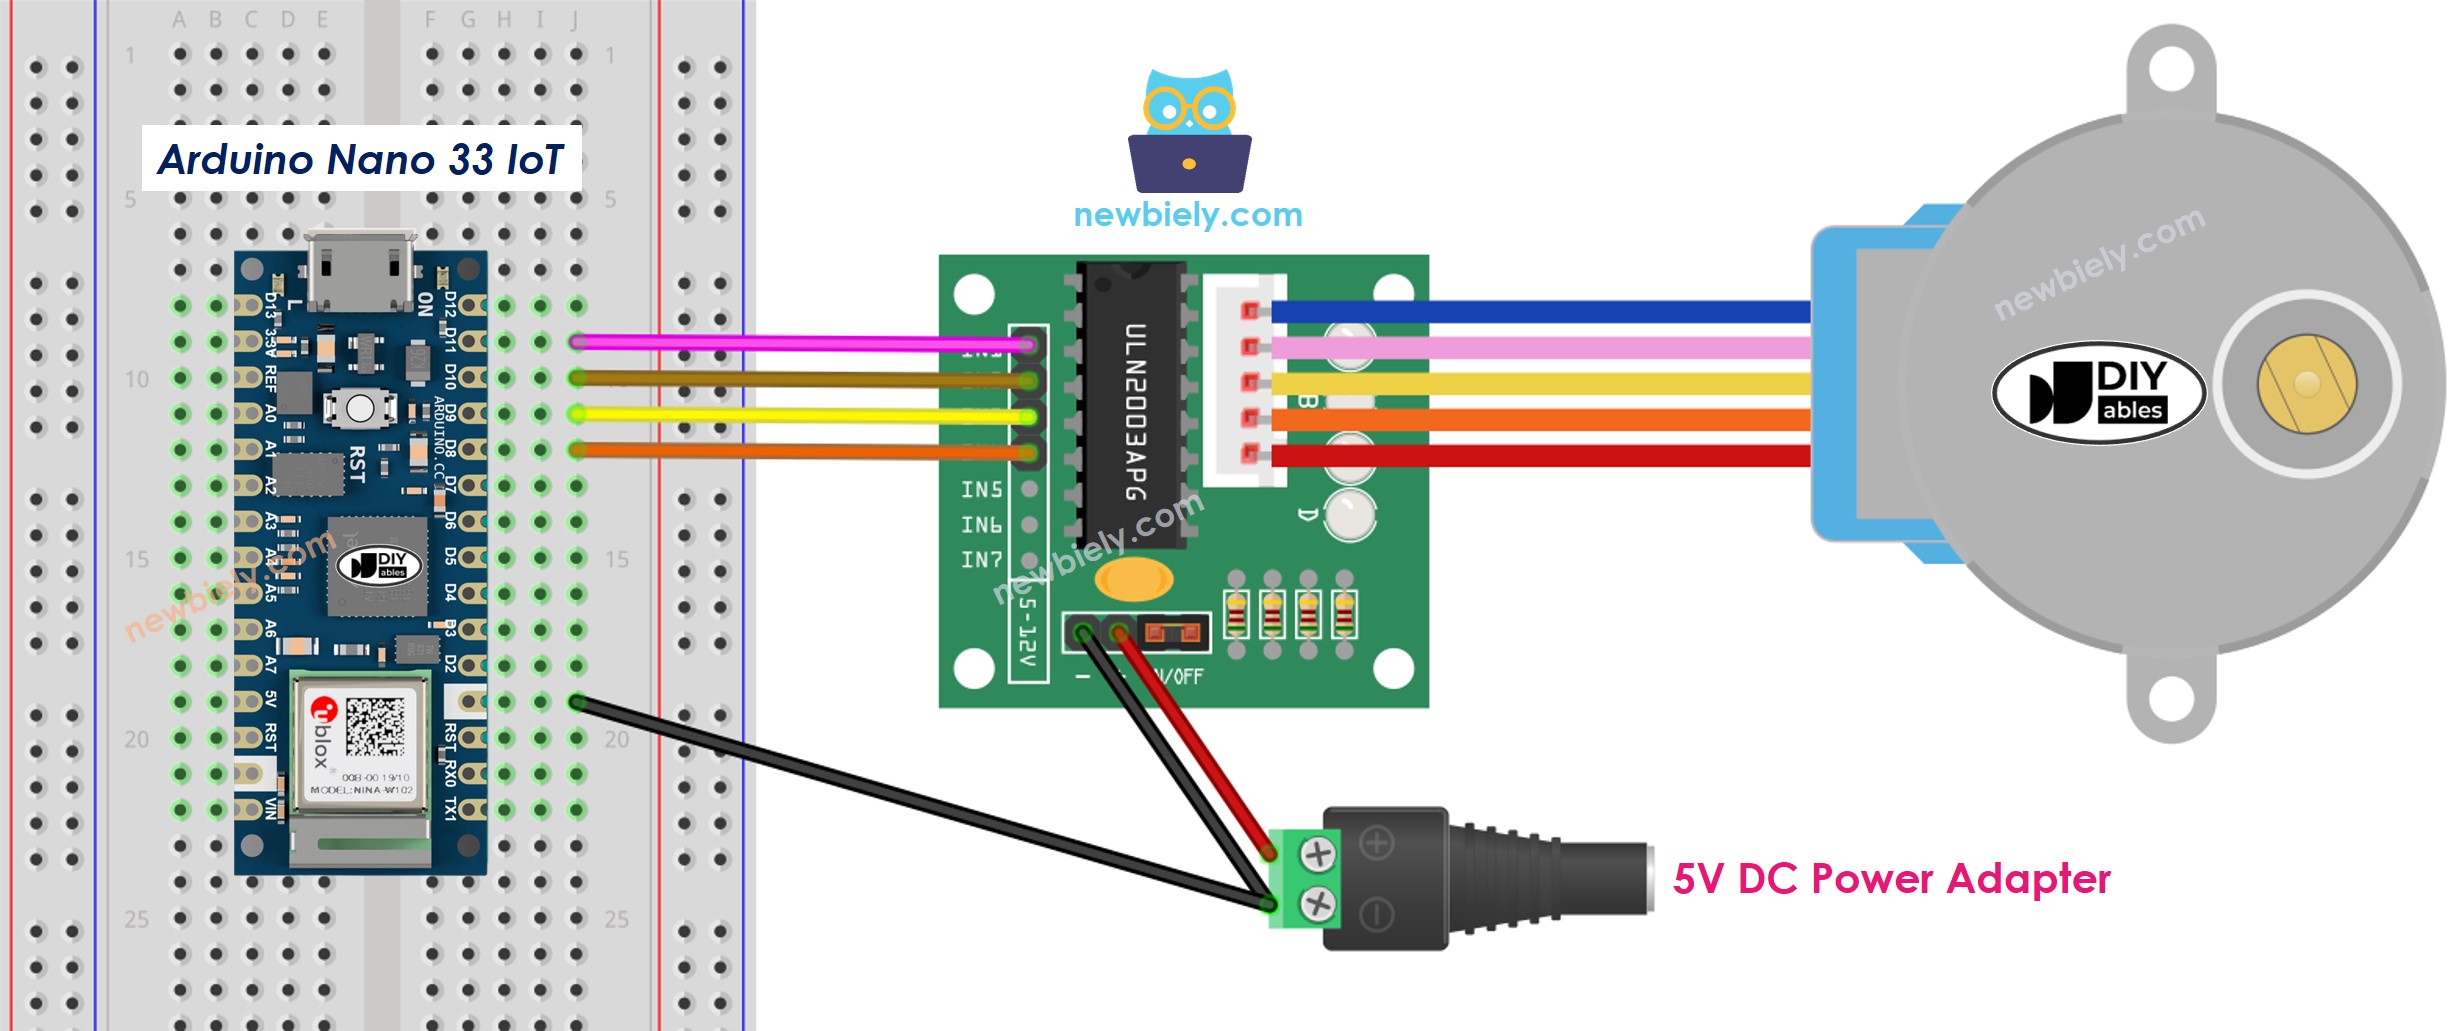
This image is created using Fritzing. Click to enlarge image
Remember, you don't need to worry about the wire colors on the stepper motor. Just plug the male connector on the 28BYJ-48 stepper motor into the female connector on the ULN2003 driver.
How To Program to control a stepper motor
If you want to control a stepper motor, there are three basic ways to do it:
- Complete Step
- Half Step
- Tiny Step
For simple tasks, the full-step method is usually enough. However, in the last part of this guide, we will explain all three methods in detail. Keep in mind that programming these methods can be difficult. The good news is that there are many libraries that take care of this complexity. All you need to do is use the right library to make controlling stepper motors in your projects easier.
The Arduino IDE has a built-in Stepper library, but we suggest not using it for these reasons:
- Blocking Behavior: This library works in a way that takes over all of the Arduino Nano 33 IoT's resources, so it cannot do other tasks while it controls the stepper motor.
- Limited Features: The built-in Stepper library might not offer every function or feature you want for your project.
We suggest using the AccelStepper library. This library gives you many benefits, for example:
- Acceleration and Deceleration: This means the motor can speed up and slow down gradually, giving you better control.
- Full-Step and Half-Step Driving: You can choose between full-step and half-step modes for your motor.
- Multiple Simultaneous Steppers: AccelStepper lets you control several motors at the same time, each moving on its own.
However, please note that the library has one drawback: it does not support micro-step driving.
Arduino Nano 33 IoT Code
Detailed Instructions
If you are new to the Arduino Nano 33 IoT, be sure to check out our Getting Started with Arduino Nano 33 IoT tutorial. Then, follow these steps:
- Connect the components to the Arduino Nano 33 IoT board as depicted in the diagram.
- Use a USB cable to connect the Arduino Nano 33 IoT board to your computer.
- Launch the Arduino IDE on your computer.
- Select the Arduino Nano 33 IoT board and choose its corresponding COM port.
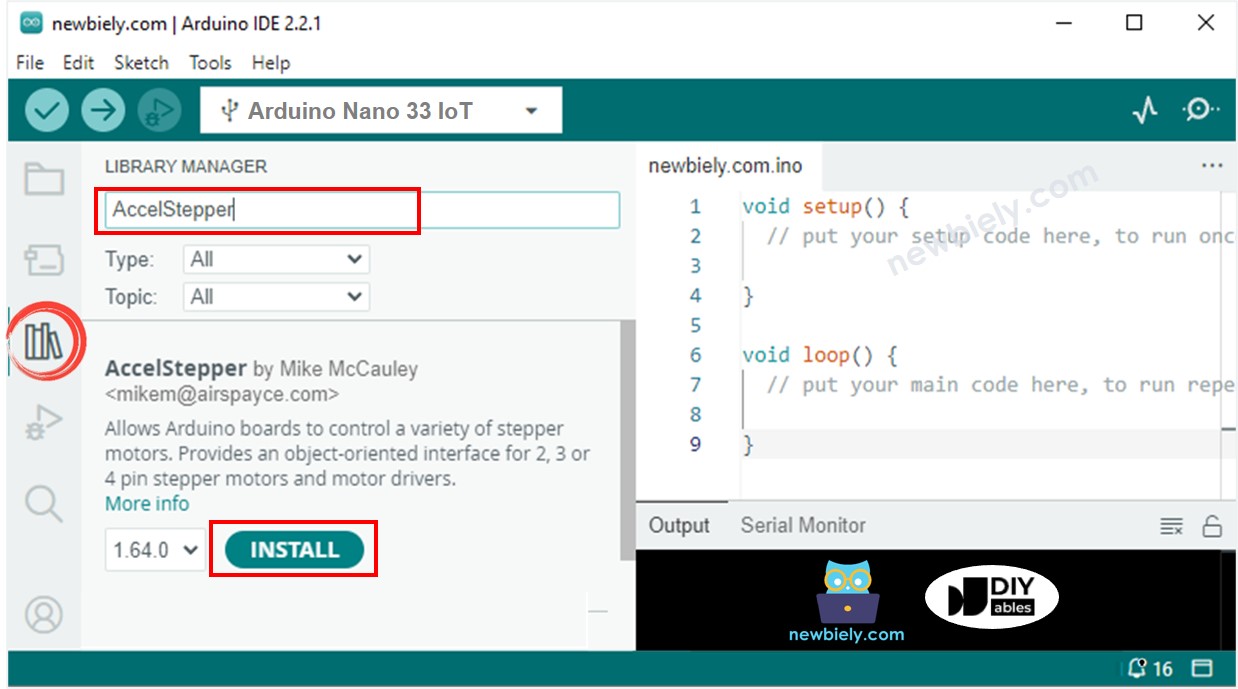
- Open the Library Manager by clicking the Library Manager icon on the left side of the Arduino IDE.
- Type AccelStepper in the search box, then look for the AccelStepper library by Mike McCauley.
- Click the Install button to add the AccelStepper library.
- Copy the code above and open it with Arduino IDE.
- Click the Upload button in Arduino IDE to load the code onto your Arduino Nano 33 IoT.
- Watch the motor turn. It should:
- Turn one complete time in the clockwise direction,
- Then turn two complete times in the anticlockwise direction,
- Then turn two complete times in the clockwise direction.
- Open the Serial Monitor to view the result.
That process repeats over and over without stopping.
How to control a multiple 28BYJ-48 stepper motors
Let's learn how to control two stepper motors separately at the same time.
Wiring Diagram for two 28BYJ-48 stepper motors
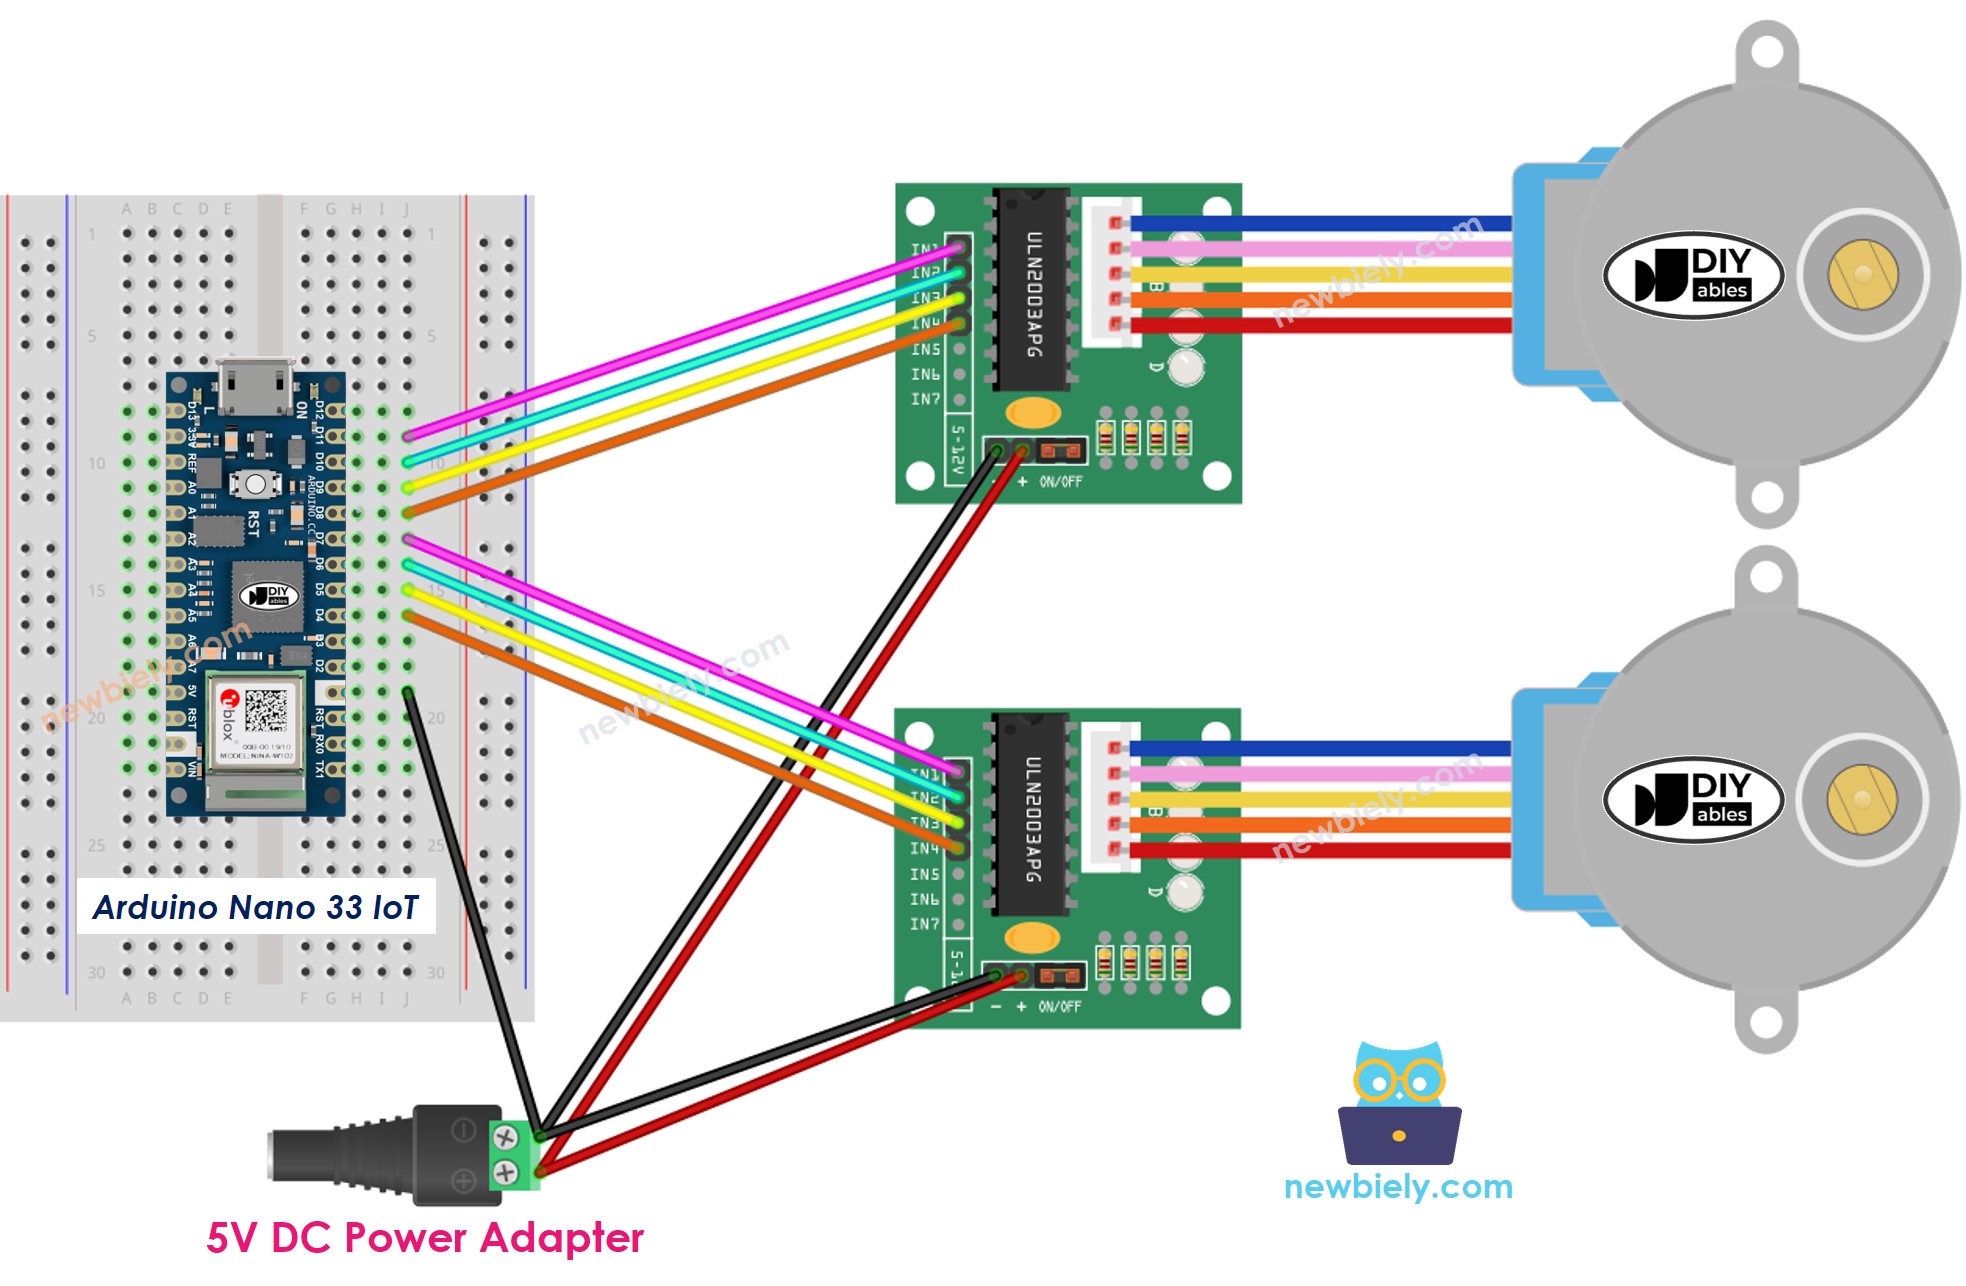
This image is created using Fritzing. Click to enlarge image