Arduino Nano 33 IoT - LED - Fade
This guide shows you how to use:
- Arduino Nano 33 IoT dims the LED using the delay() function.
- Arduino Nano 33 IoT dims the LED using the millis() function.
- Arduino Nano 33 IoT dims the LED using the ezLED library.
Hardware Preparation
Or you can buy the following kits:
| 1 | × | DIYables Sensor Kit (18 sensors/displays) |
Additionally, some of these links are for products from our own brand, DIYables .
Buy Note: Use the LED Module for easier wiring. It includes an integrated resistor.
Overview of LED
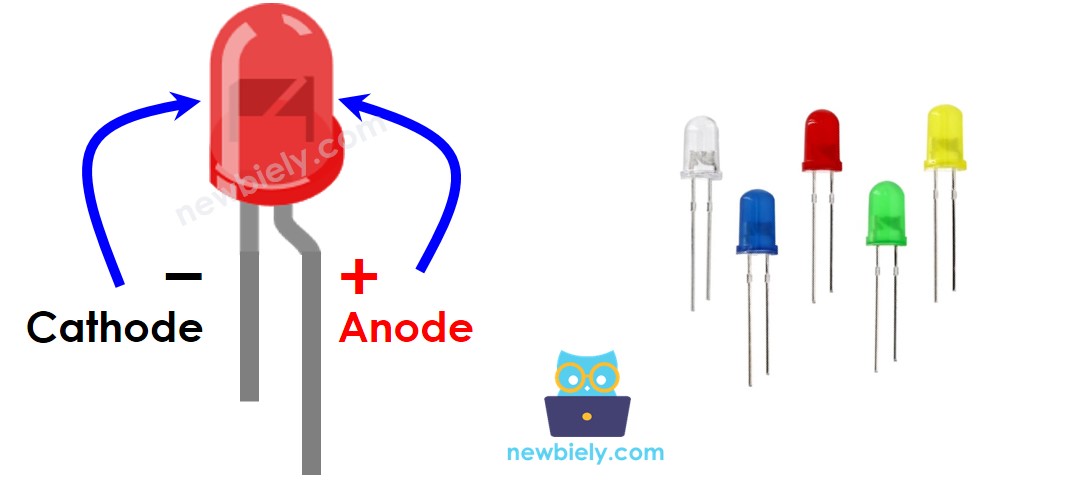
LED Pinout
An LED has two metal legs:
- Cathode (-) pin: Plug this pin into the ground (0V).
- Anode (+) pin: Use this pin to turn the LED on or off.
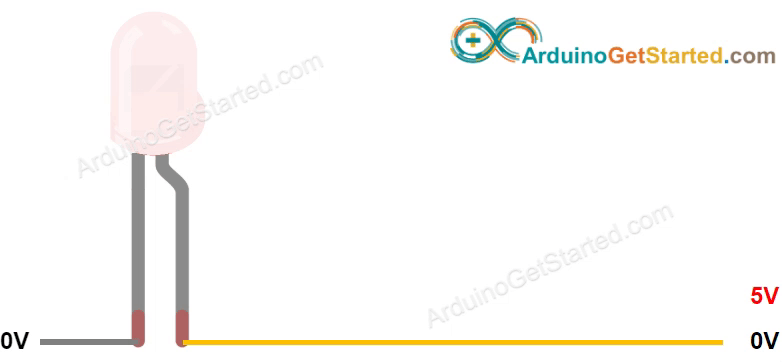
How LED Works
After connecting the negative (-) side to the ground:
- Connect GND (ground) to the positive (anode) side, and the LED will be off.
- Connect VCC (power) to the positive side, and the LED will be on.
- Apply a PWM (Pulse Width Modulation) signal to the positive side, and the LED's brightness will change depending on the PWM duty cycle. The duty cycle can be from 0 to 255—the higher the number, the brighter the LED.
- A PWM value of 0 acts like connecting to GND, so the LED stays off.
- A PWM value of 255 acts like connecting to VCC, so the LED shines at full brightness.
※ NOTE THAT:
Most of the time, you need a resistor to keep the LED from burning out. The resistor’s value depends on the LED's specifications.
Arduino Nano 33 IoT - fade LED
The digital output pins on the Arduino Nano 33 IoT can be set to create a PWM signal. By connecting the positive side of an LED to a pin on the Arduino Nano 33 IoT and the negative side to the ground, and programming the Arduino to change the PWM duty cycle, you can make the LED slowly turn on and off.
Wiring Diagram between LED and Arduino Nano 33 IoT
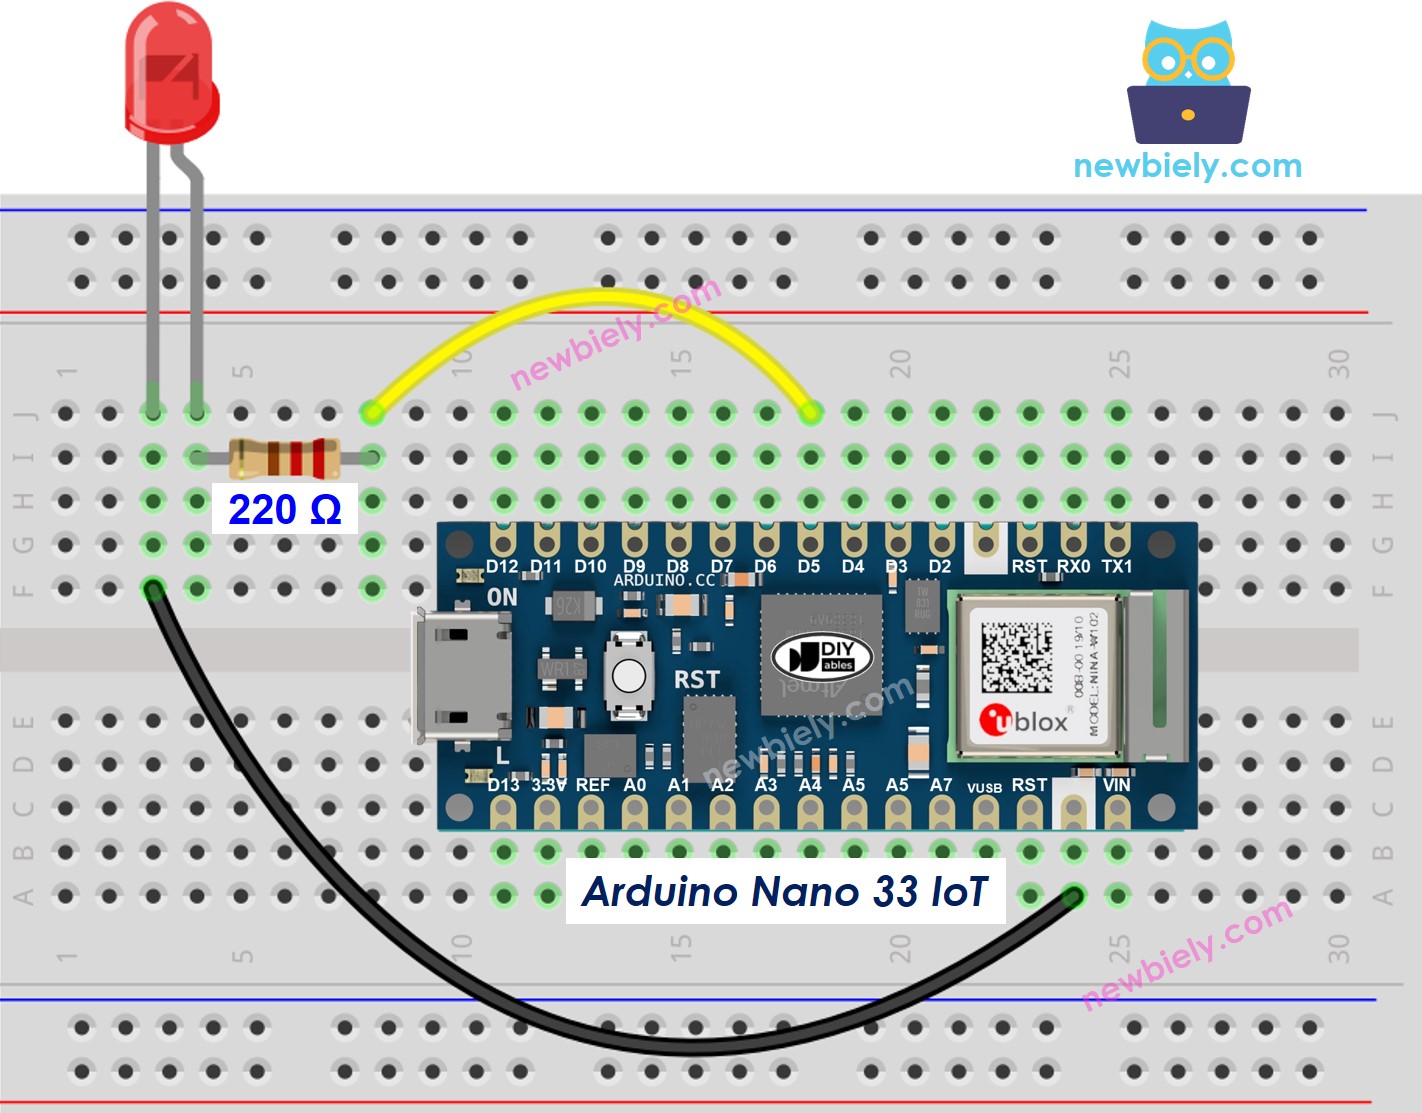
This image is created using Fritzing. Click to enlarge image
How To Program
- Set up a pin on the Arduino Nano 33 IoT as an output using the pinMode() function. For example, use pin D5 as an output.
- Adjust the LED brightness by creating a PWM signal with the right on/off ratio using the analogWrite() function.
Brightness is a number between 0 and 255.
Arduino Nano 33 IoT Code - Simple Fade Example
Detailed Instructions
If you are new to the Arduino Nano 33 IoT, be sure to check out our Getting Started with Arduino Nano 33 IoT tutorial. Then, follow these steps:
- Connect the components to the Arduino Nano 33 IoT board as depicted in the diagram.
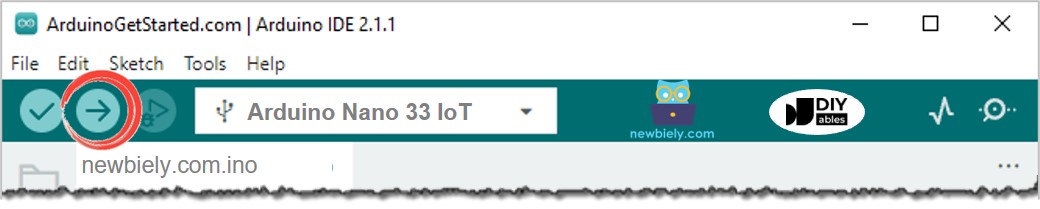
- Use a USB cable to connect the Arduino Nano 33 IoT board to your computer.
- Launch the Arduino IDE on your computer.
- Select the Arduino Nano 33 IoT board and choose its corresponding COM port.
- Copy the code below and paste it in the Arduino program.
- Compile your code and send it to your Arduino Nano 33 IoT board by clicking the Upload button in the Arduino software.
- Look at how bright the LED is.
Line-by-line Code Explanation
The Arduino Nano 33 IoT code above has an explanation for each line. Please check the notes in the code!
※ NOTE THAT:
The example above uses the delay() function to slowly turn the LED on and off. However, delay() does not make the fading smooth and stops other parts of your program from running at the same time. In the next sections, we will learn how to create a smooth fade with the LED without stopping other code, by using the millis() function.