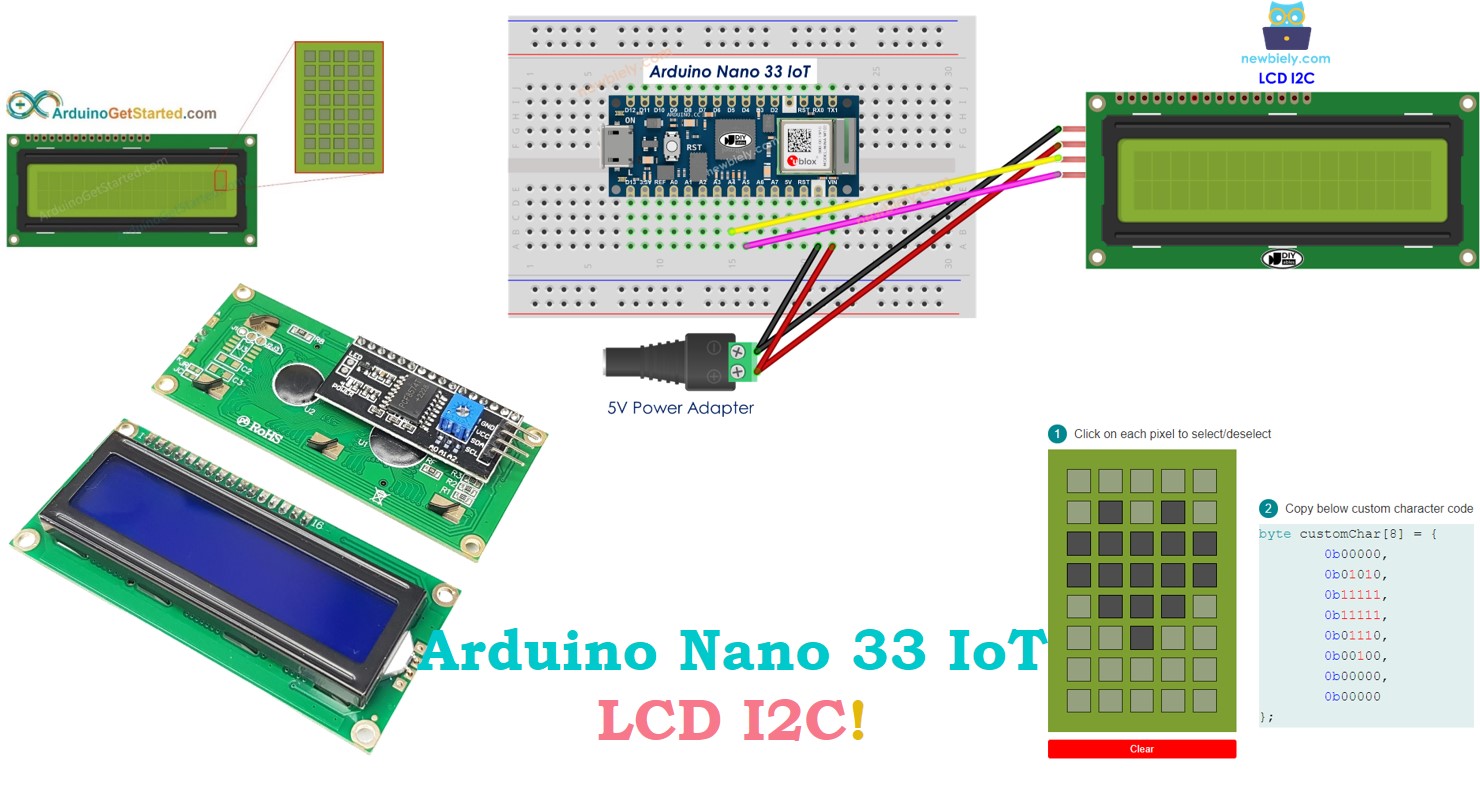
Arduino Nano 33 IoT - LCD
This guide explains how to use the Arduino Nano 33 IoT with an LCD I2C. We will learn:
- How to display text on an LCD I2C screen using the Arduino Nano 33 IoT board.
- How to display special symbols on an LCD I2C screen using the Arduino Nano 33 IoT board.
Hardware Preparation
Or you can buy the following kits:
| 1 | × | DIYables Sensor Kit (18 sensors/displays) |
Additionally, some of these links are for products from our own brand, DIYables .
Buy Note: Alternatively, you can assemble the LCD I2C display using LCD 1602 Display and PCF8574 I2C Adapter Module.
Overview of LCD I2C 16x2
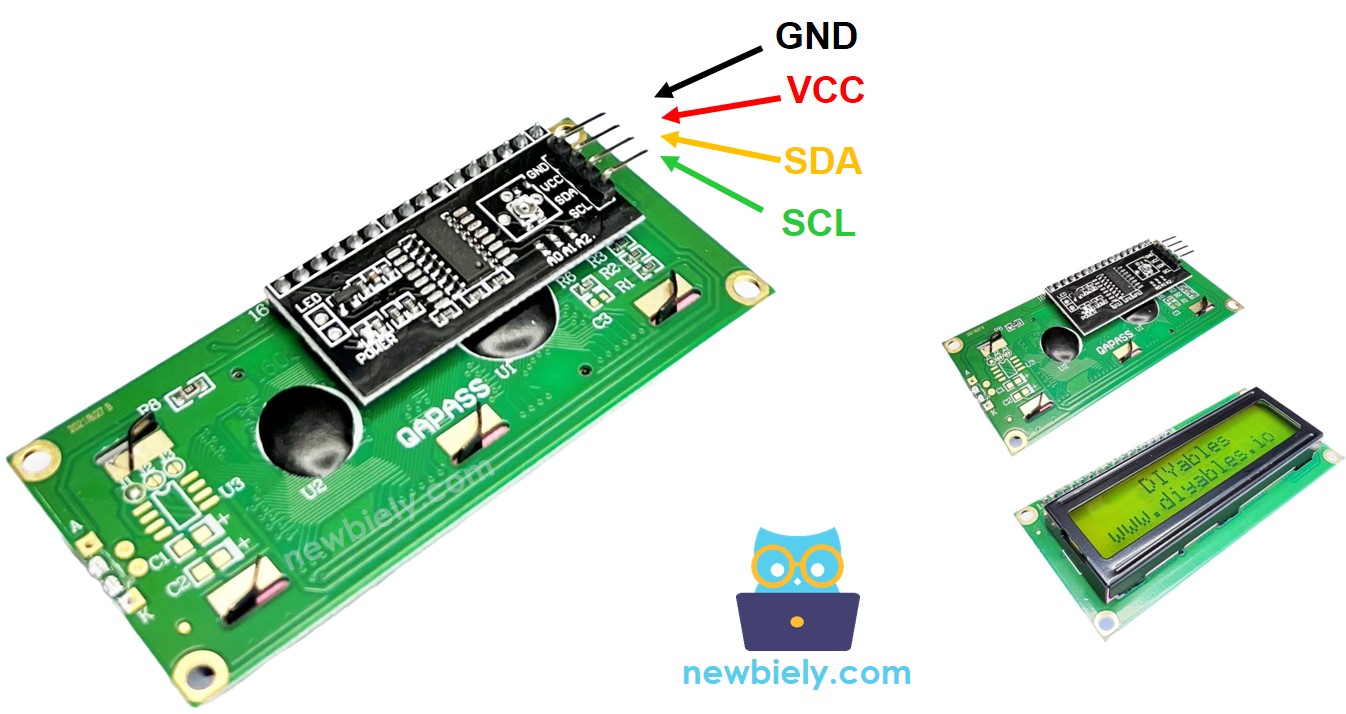
LCD I2C Pinout
The LCD display that uses I2C has four pins.
- VCC pin: This pin provides power to the LCD and should be connected to 5V.
- GND pin: Connect this pin to ground (0V).
- SCL pin: This pin is for the I2C clock signal.
- SDA pin: This pin is for the I2C data signal.
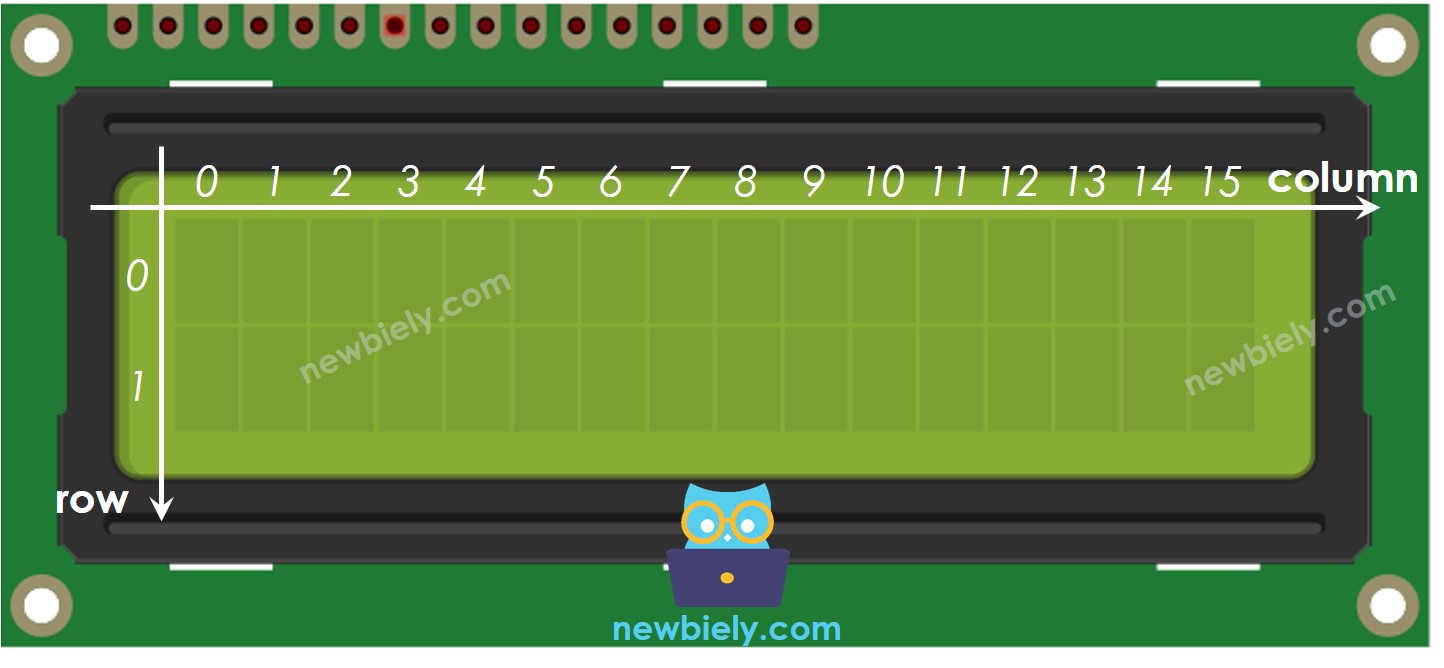
LCD 16x2 Coordinates
LCD I2C 16x2 has two rows and sixteen columns, and the numbers start at 0.
Wiring Diagram between LCD I2C and Arduino Nano 33 IoT
- When you use the USB port to give power to the Arduino Nano 33 IoT board.
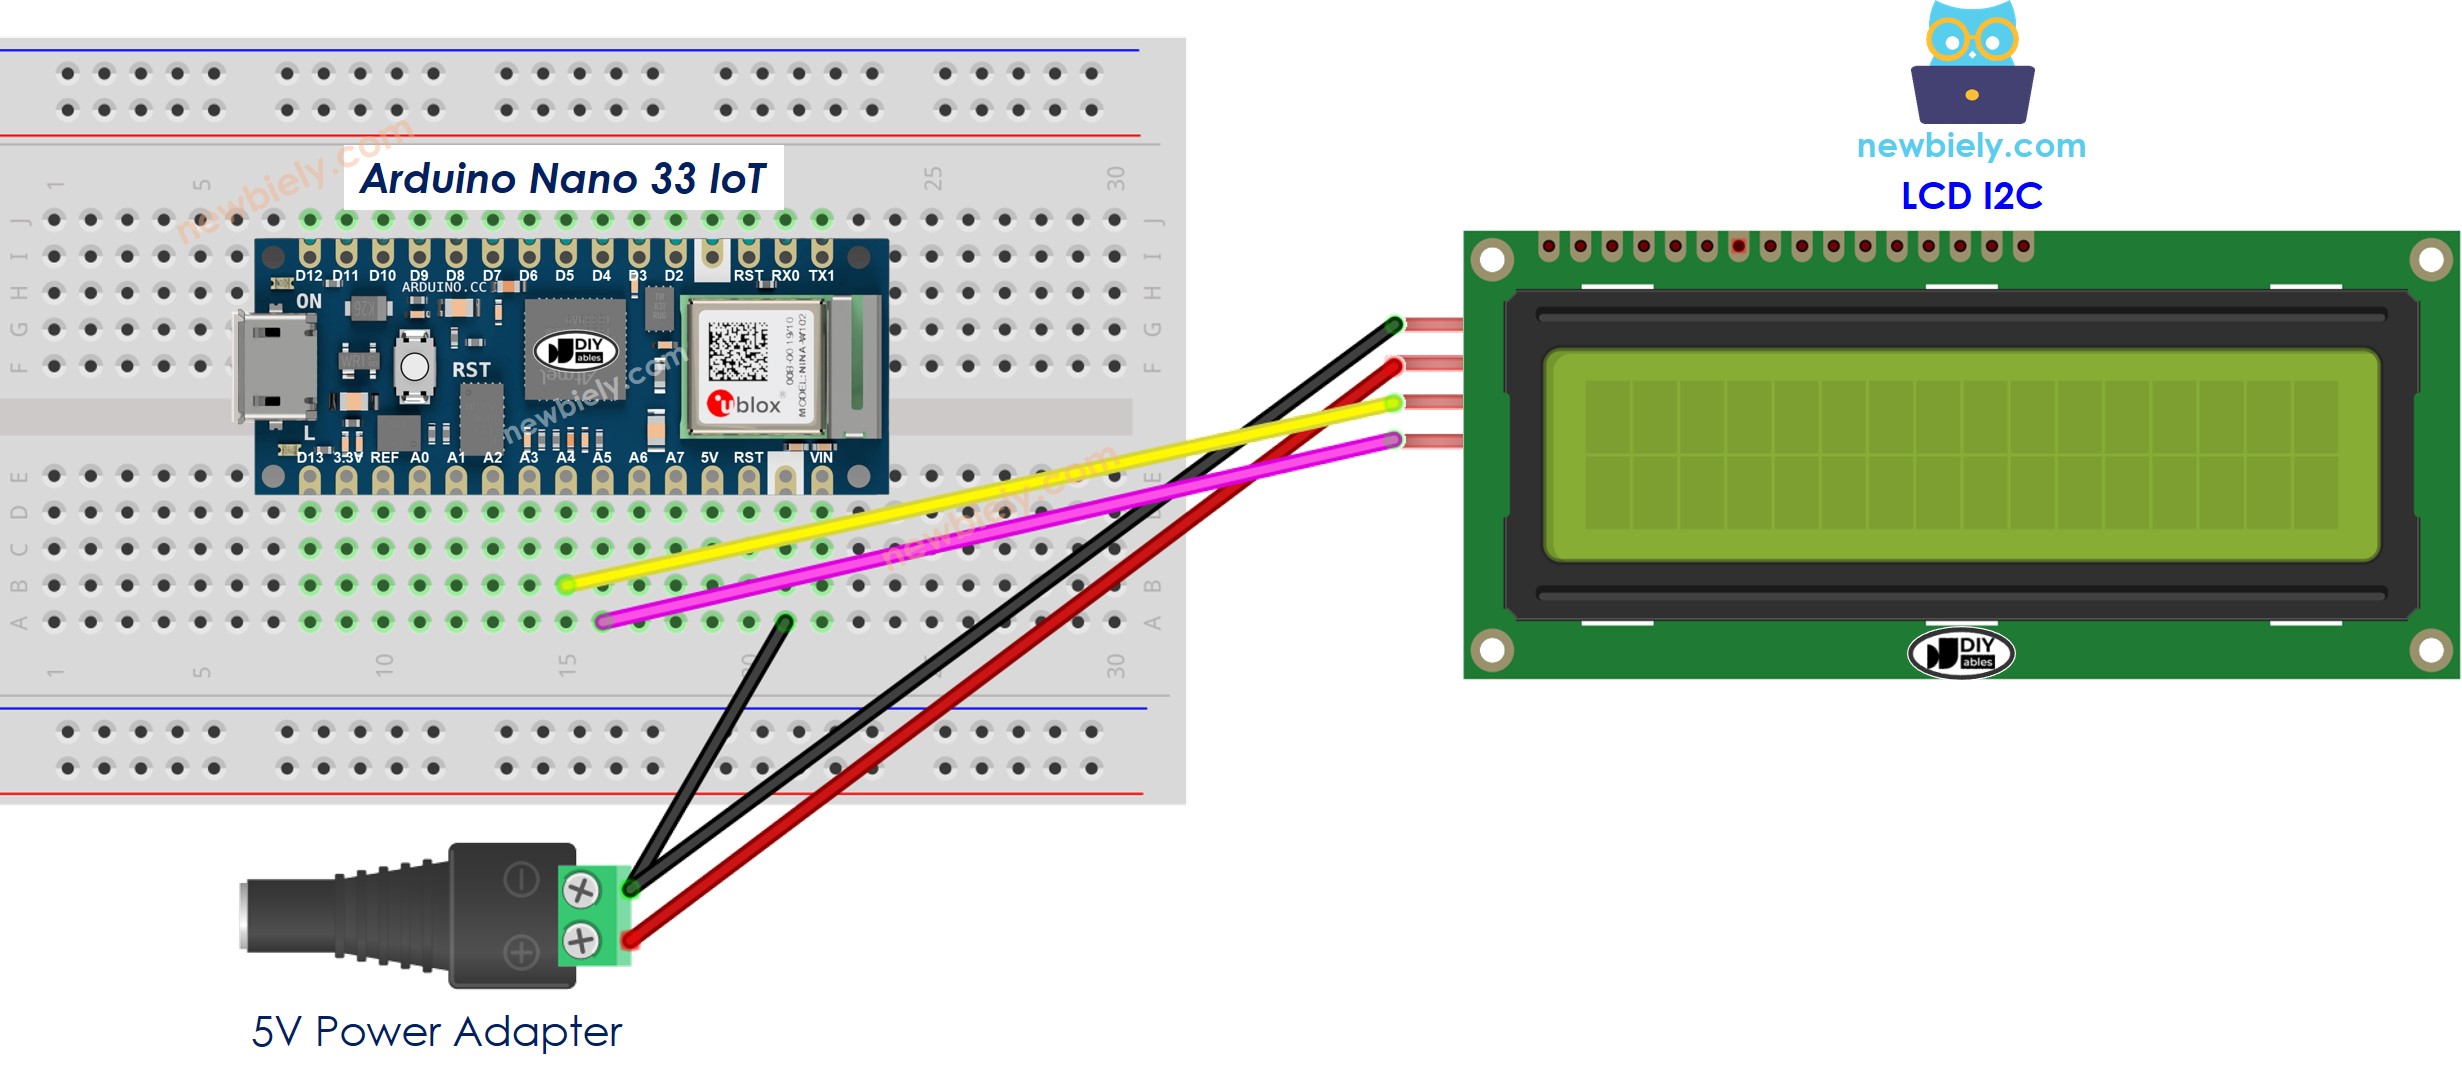
This image is created using Fritzing. Click to enlarge image
- When you power the Arduino Nano 33 IoT board using the Vin pin.
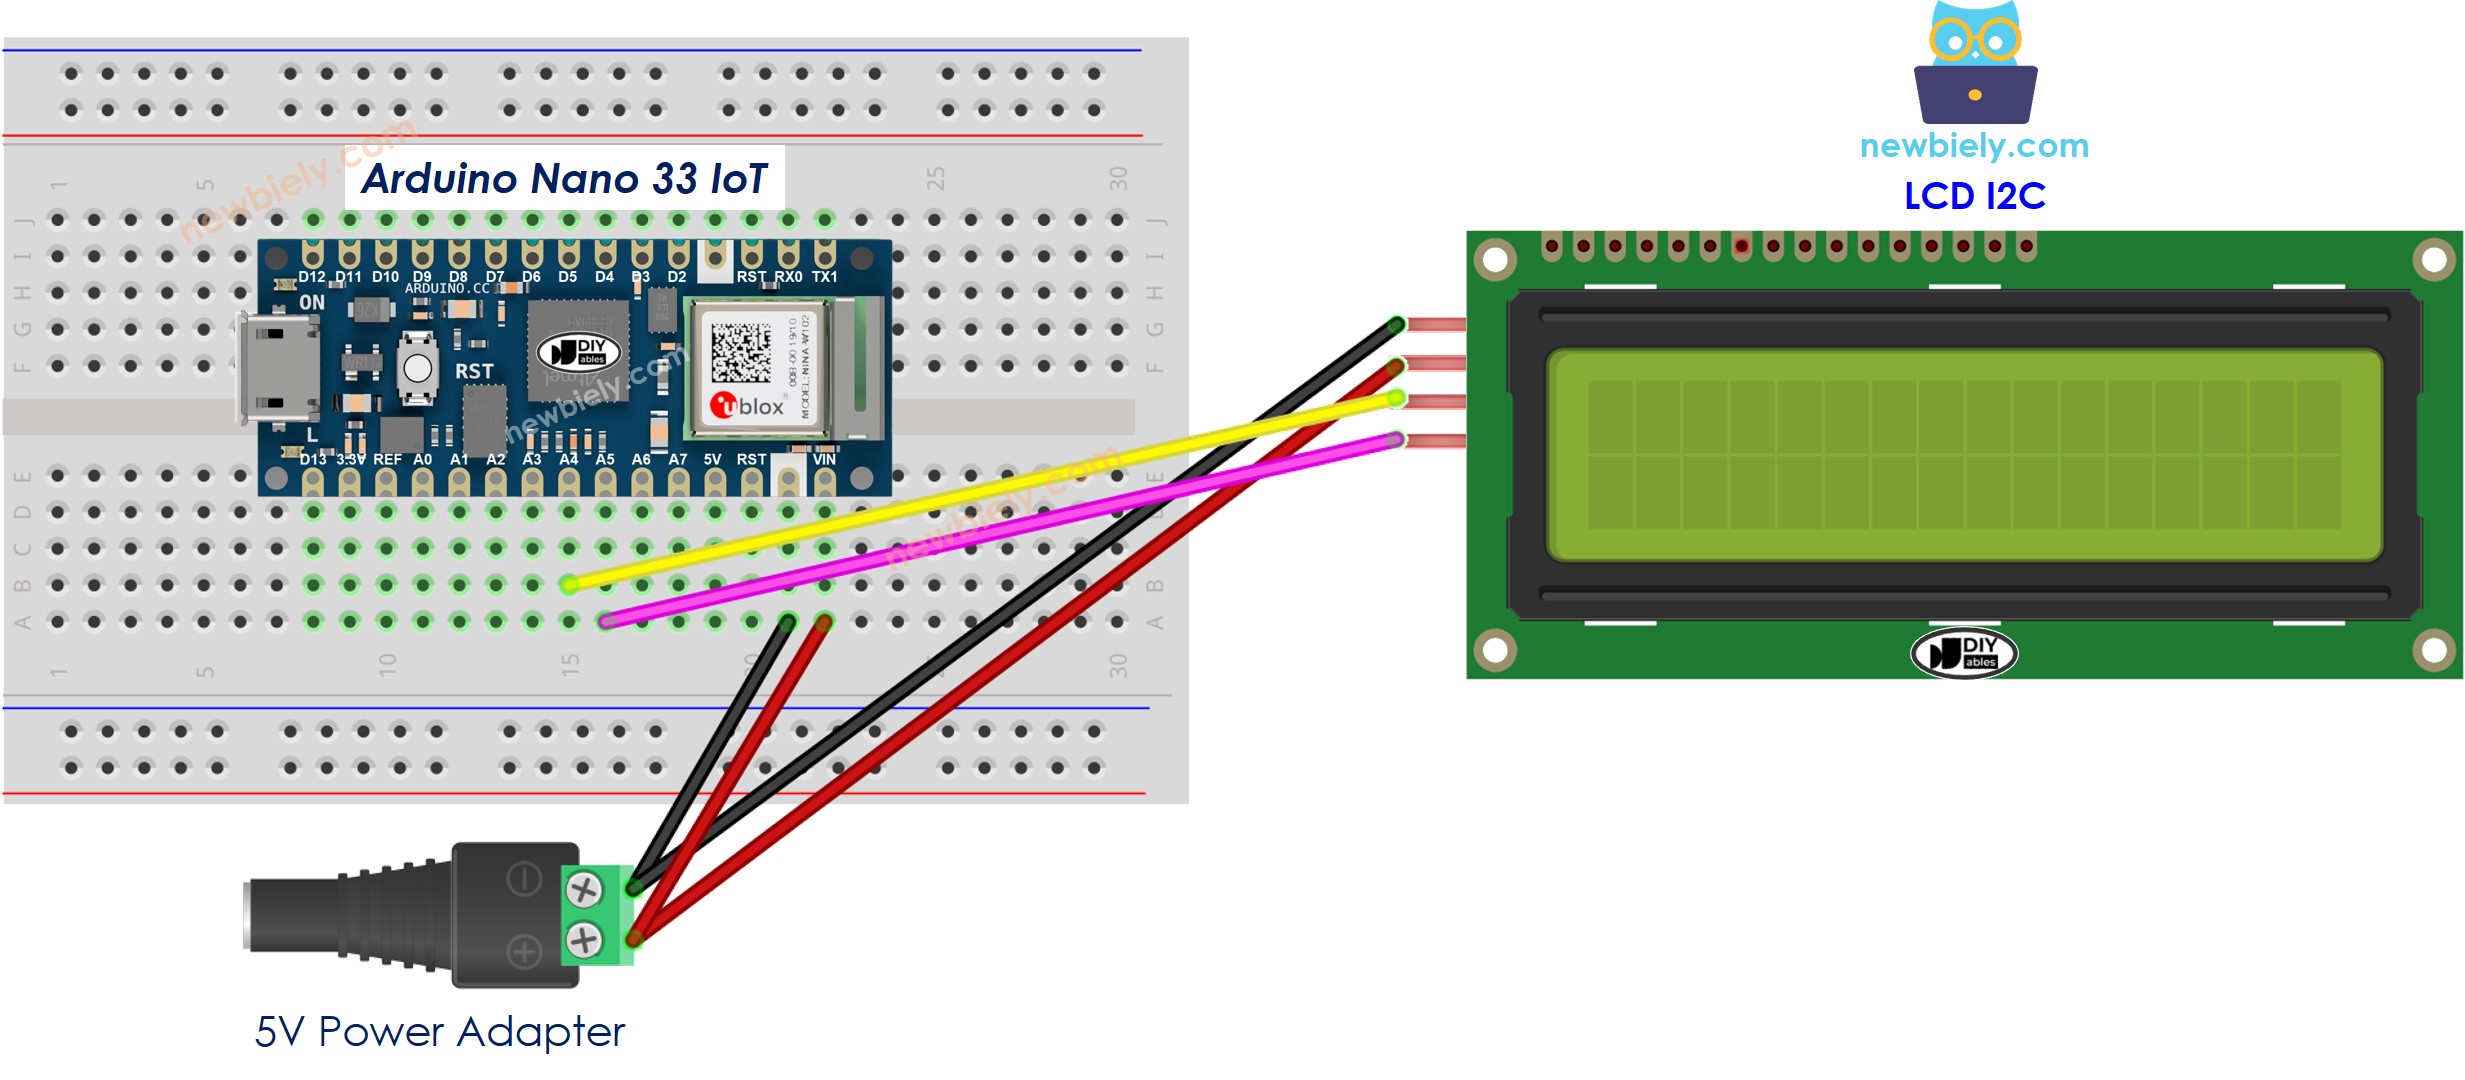
This image is created using Fritzing. Click to enlarge image
※ NOTE THAT:
When you power the Arduino Nano 33 IoT through the USB port, you can try powering the LCD display using the VBUS pin. This means you don't need an extra power source. However, keep in mind that the VBUS pin may not provide enough power for the LCD display to work properly.
How To Program LCD I2C using Arduino Nano 33 IoT
- Add the DIYables_LCD_I2C library:
- Create a DIYables_LCD_I2C object:
- Set up the LCD.
- Place the cursor at your chosen spot (column number, row number)
- Show a message on the LCD screen.
※ NOTE THAT:
The LCD I2C address may vary between manufacturers. In the code, we used the 0x27 address provided by the DIYables manufacturer.
Arduino Nano 33 IoT Code
Detailed Instructions
If you are new to the Arduino Nano 33 IoT, be sure to check out our Getting Started with Arduino Nano 33 IoT tutorial. Then, follow these steps:
- Connect the components to the Arduino Nano 33 IoT board as depicted in the diagram.
- Use a USB cable to connect the Arduino Nano 33 IoT board to your computer.
- Launch the Arduino IDE on your computer.
- Select the Arduino Nano 33 IoT board and choose its corresponding COM port.
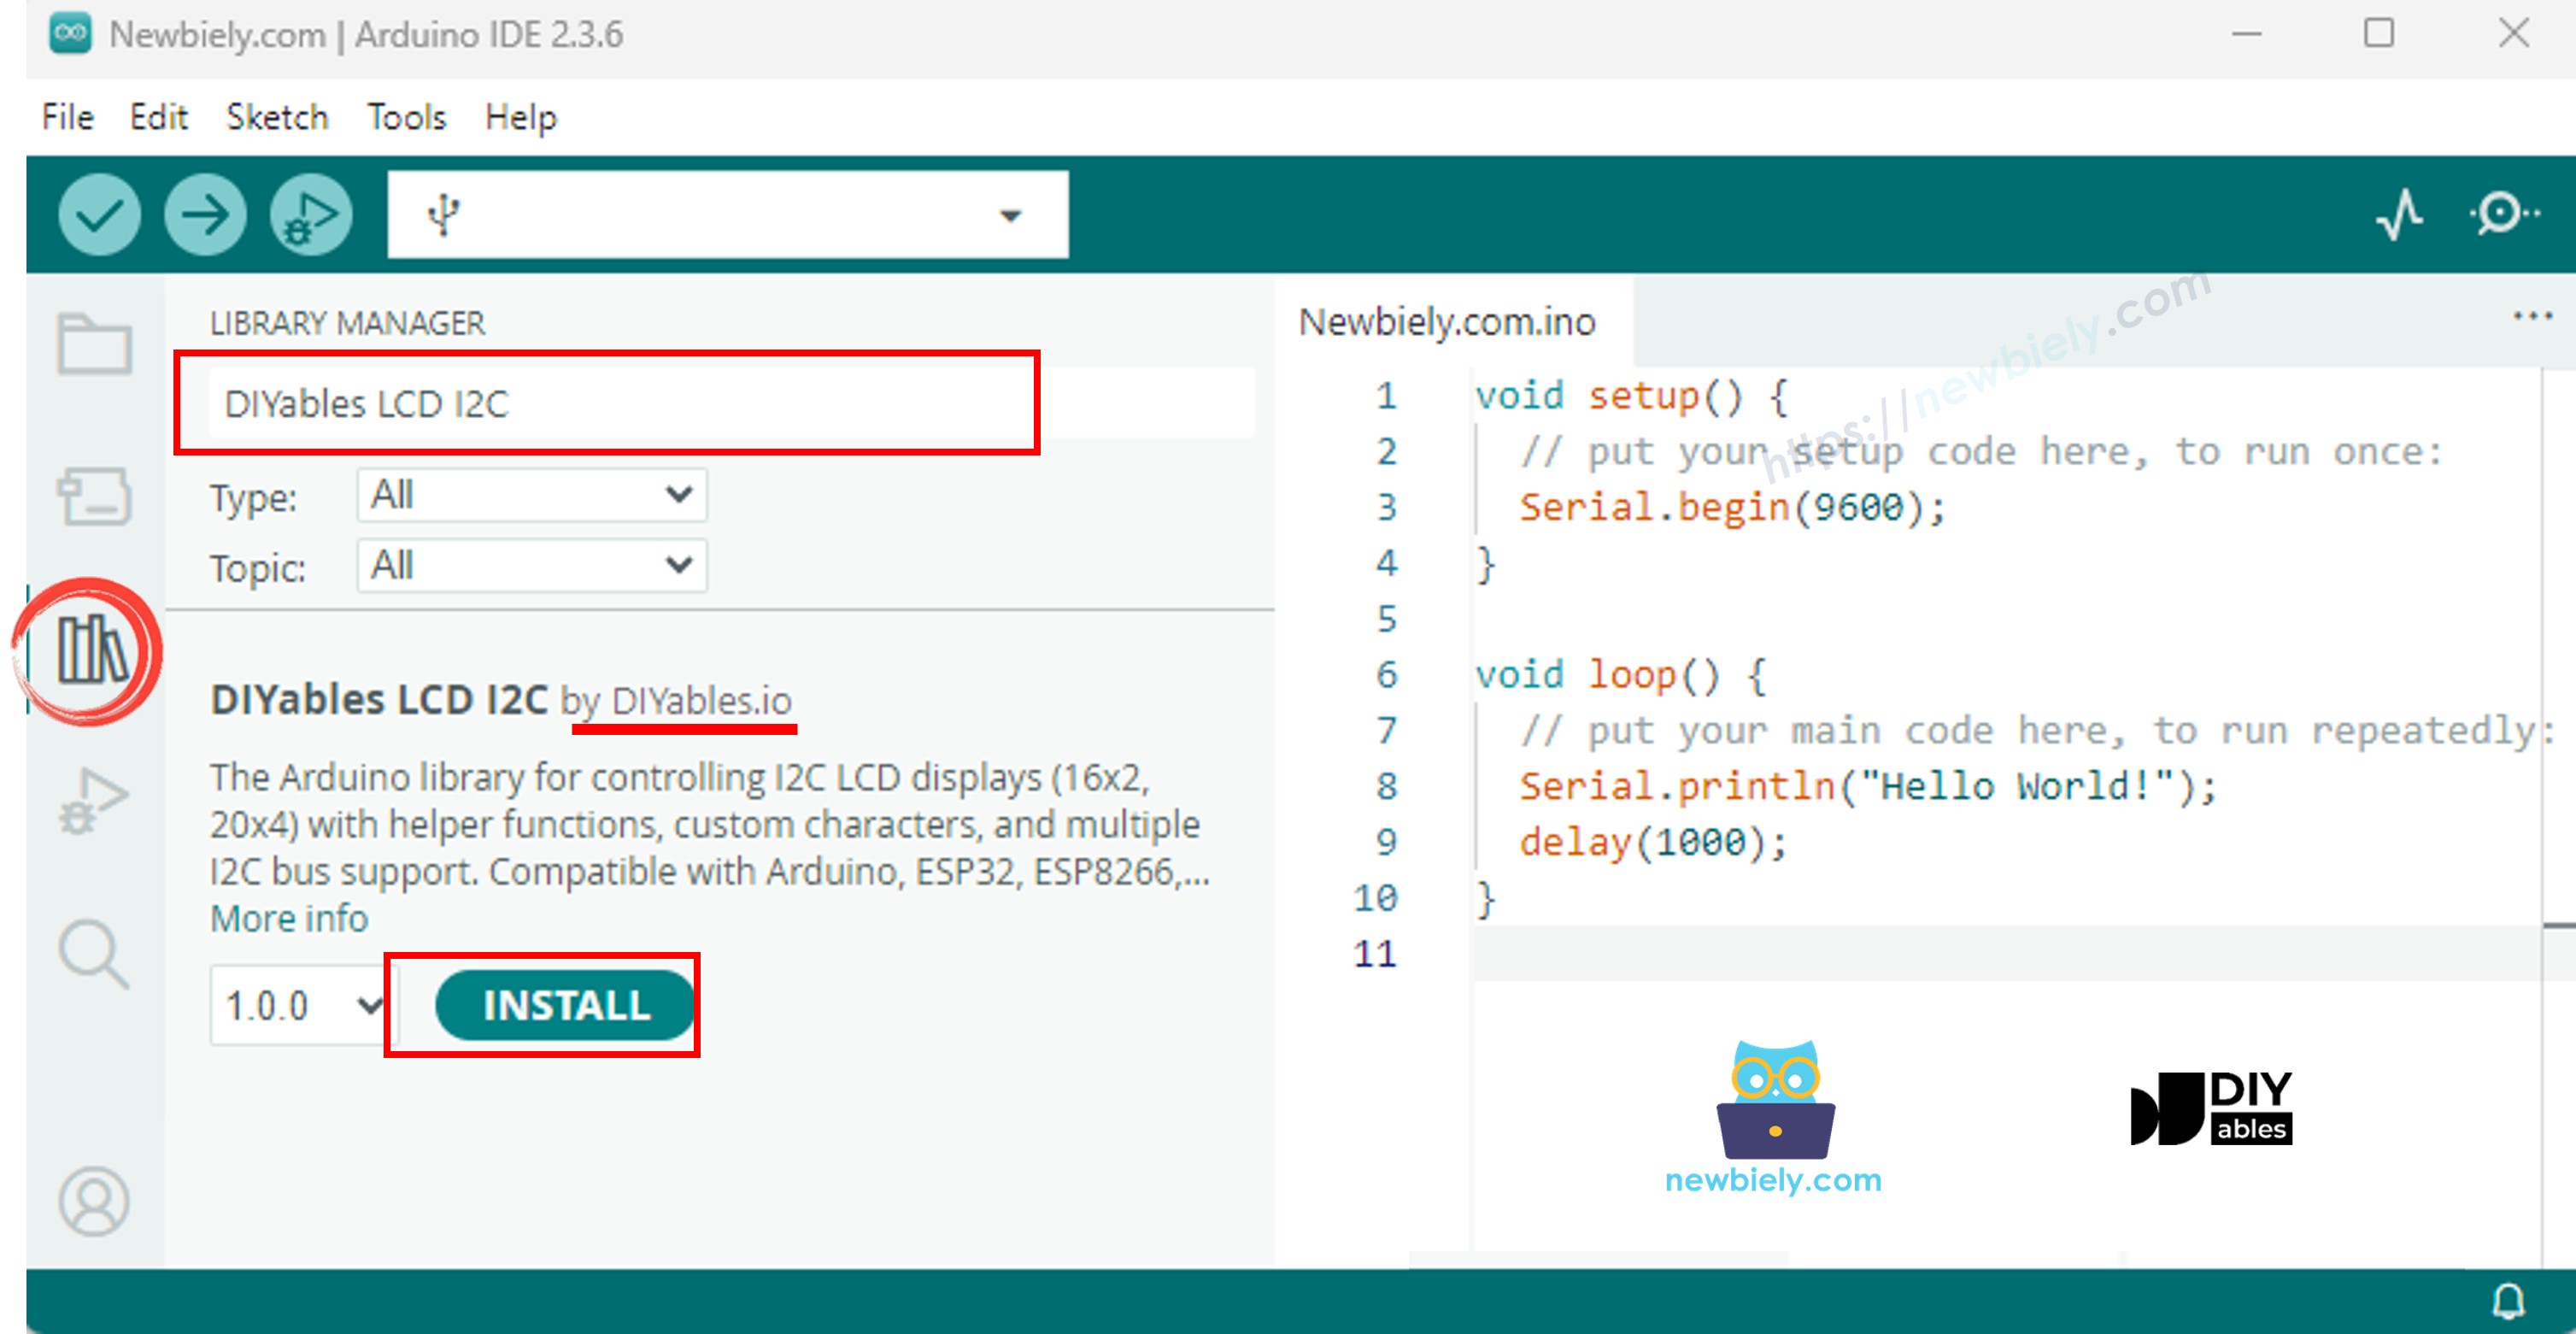
- Open the Library Manager by clicking the Library Manager icon on the left side of Arduino IDE.
- In the search box, type DIYables LCD I2C and find the DIYables_LCD_I2C library by DIYables. Click the Install button to add the DIYables_LCD_I2C library.
- Copy the code above and paste it into the Arduino IDE.
- Compile and upload the code to your Arduino Nano 33 IoT board by clicking the Upload button.
- See the result on the LCD screen.
- Try changing the text and its position.
Video Tutorial
Do More with LCD
Custom Character
If you want to show special characters or symbols (for example, emoticons), check out this guide on how to display special characters on an LCD.
Troubleshooting on LCD I2C
If your LCD screen is blank, please check this link: LCD does not work!- Checklist