Arduino Nano 33 IoT - Water/Liquid Valve
This guide explains how to control the flow of liquids like water, beer, or oil using the Arduino Nano 33 IoT and a solenoid valve. The same method works for controlling gas flow.
Hardware Preparation
Or you can buy the following kits:
| 1 | × | DIYables Sensor Kit (18 sensors/displays) |
Additionally, some of these links are for products from our own brand, DIYables .
Overview of Water/Liquid Valve
Pinout
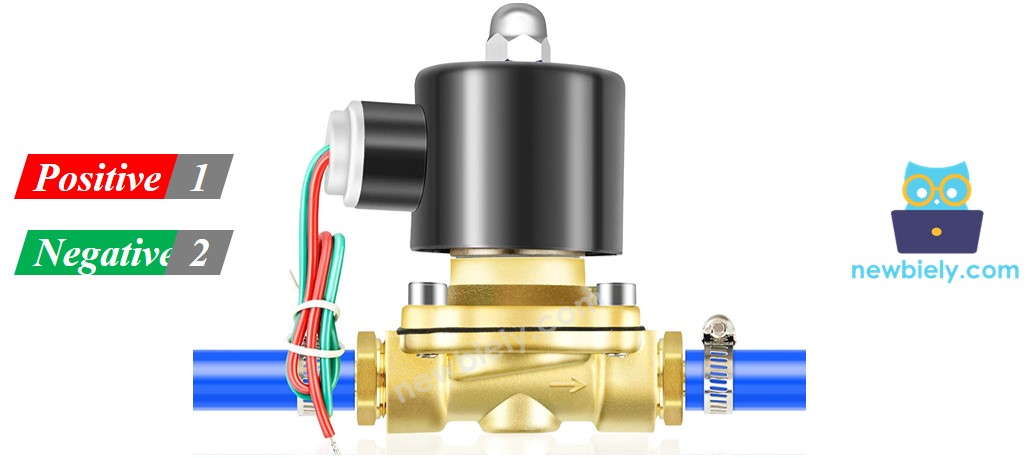
A solenoid valve normally has two connection points.
- Red positive pin (+): Connect this pin to the +12V terminal of your DC power supply.
- Black or other colored negative pin (–): Connect this pin to the ground (GND) terminal of your DC power supply.
How Water/Liquid Valve works
The valve is usually shut. When you add 12V of DC power to its two points, the valve opens so water or liquid can flow.
※ NOTE THAT:
Some valves have a rubber ring inside that needs a minimum pressure to open the valve after you apply 12V DC. This pressure is made by the liquid flowing.
Some valves only let the liquid flow in one direction.
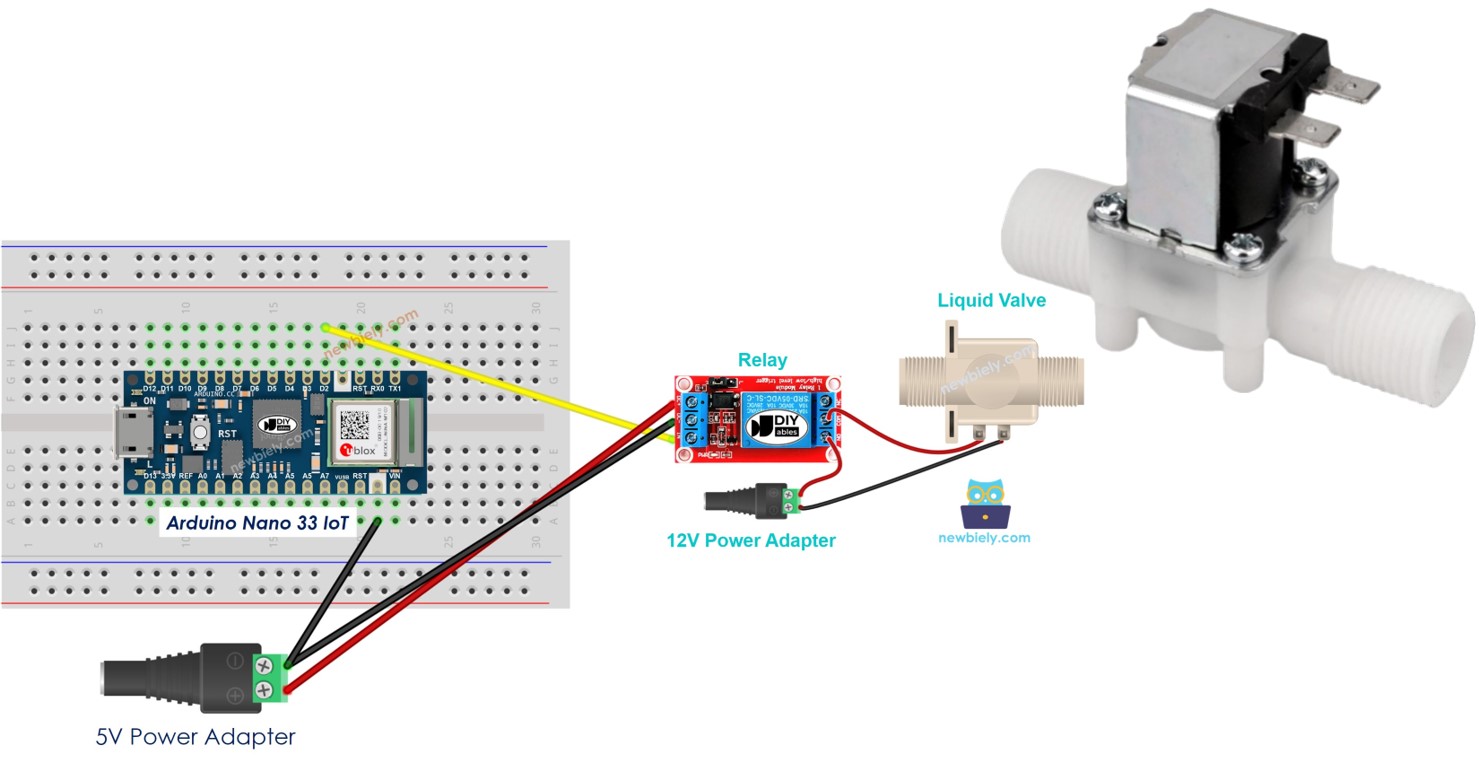
How to Control Water/Liquid Solenoid Valve
If the valve gets power from a 12V supply, it will open. To control the valve, you must use a relay between the Arduino Nano 33 IoT and the valve. The Arduino Nano 33 IoT sends signals to the solenoid valve through the relay. Find out more about the relay in the Arduino Nano 33 IoT - Relay tutorial.
Wiring Diagram
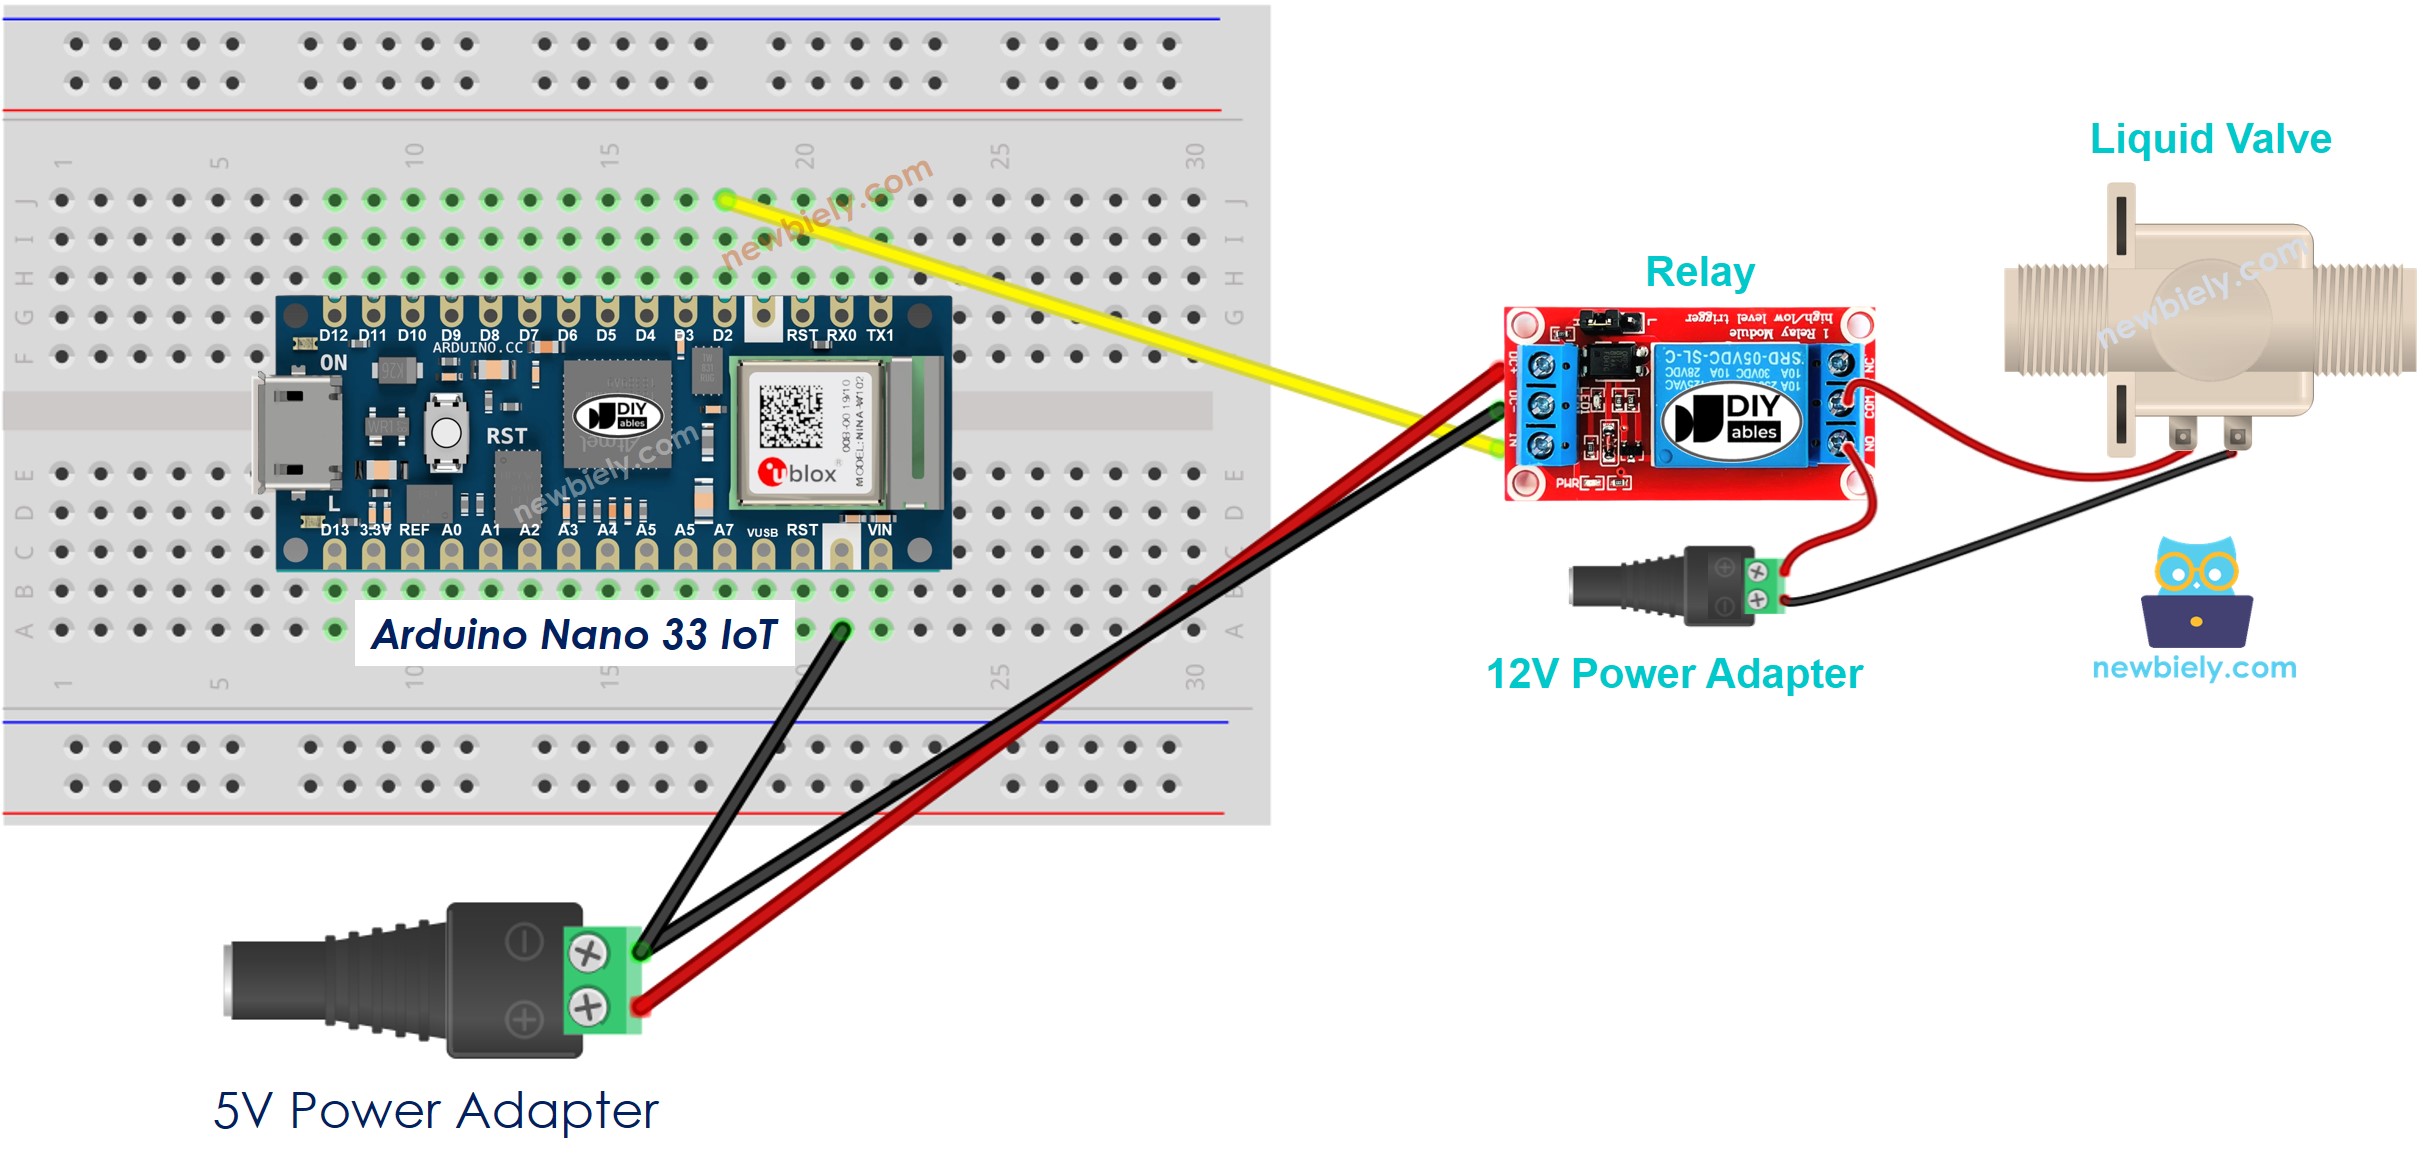
This image is created using Fritzing. Click to enlarge image
Arduino Nano 33 IoT Code
The code below repeatedly opens the water valve for five seconds, then closes it for five seconds.
Detailed Instructions
If you are new to the Arduino Nano 33 IoT, be sure to check out our Getting Started with Arduino Nano 33 IoT tutorial. Then, follow these steps:
- Connect the components to the Arduino Nano 33 IoT board as depicted in the diagram.
- Use a USB cable to connect the Arduino Nano 33 IoT board to your computer.
- Launch the Arduino IDE on your computer.
- Select the Arduino Nano 33 IoT board and choose its corresponding COM port.
- Copy the code above and paste it into the Arduino IDE.
- Click the Upload button to compile and send the code to your Arduino Nano 33 IoT board.
- Check to see if the water is flowing.
Code Explanation
The Arduino Nano 33 IoT code above explains each line clearly. Please check the comments in the code.