Arduino Nano 33 IoT - DHT11 - LCD
This guide shows you how to use the Arduino Nano 33 IoT to measure temperature and humidity with a DHT11 sensor and display the numbers on an LCD using I2C.
Hardware Preparation
Or you can buy the following kits:
| 1 | × | DIYables Sensor Kit (18 sensors/displays) |
Additionally, some of these links are for products from our own brand, DIYables .
Buy Note: Alternatively, you can assemble the LCD I2C display using LCD 1602 Display and PCF8574 I2C Adapter Module.
Overview of DHT11 and LCD
If you're new to using the DHT11, LCD, and Arduino Nano 33 IoT, please check out these tutorials:
These tutorials explain how DHT11 and LCD work, their pinouts, how to connect them to the Arduino Nano 33 IoT, and how to program Arduino Nano 33 IoT to work with the DHT11 and LCD.
Wiring Diagram
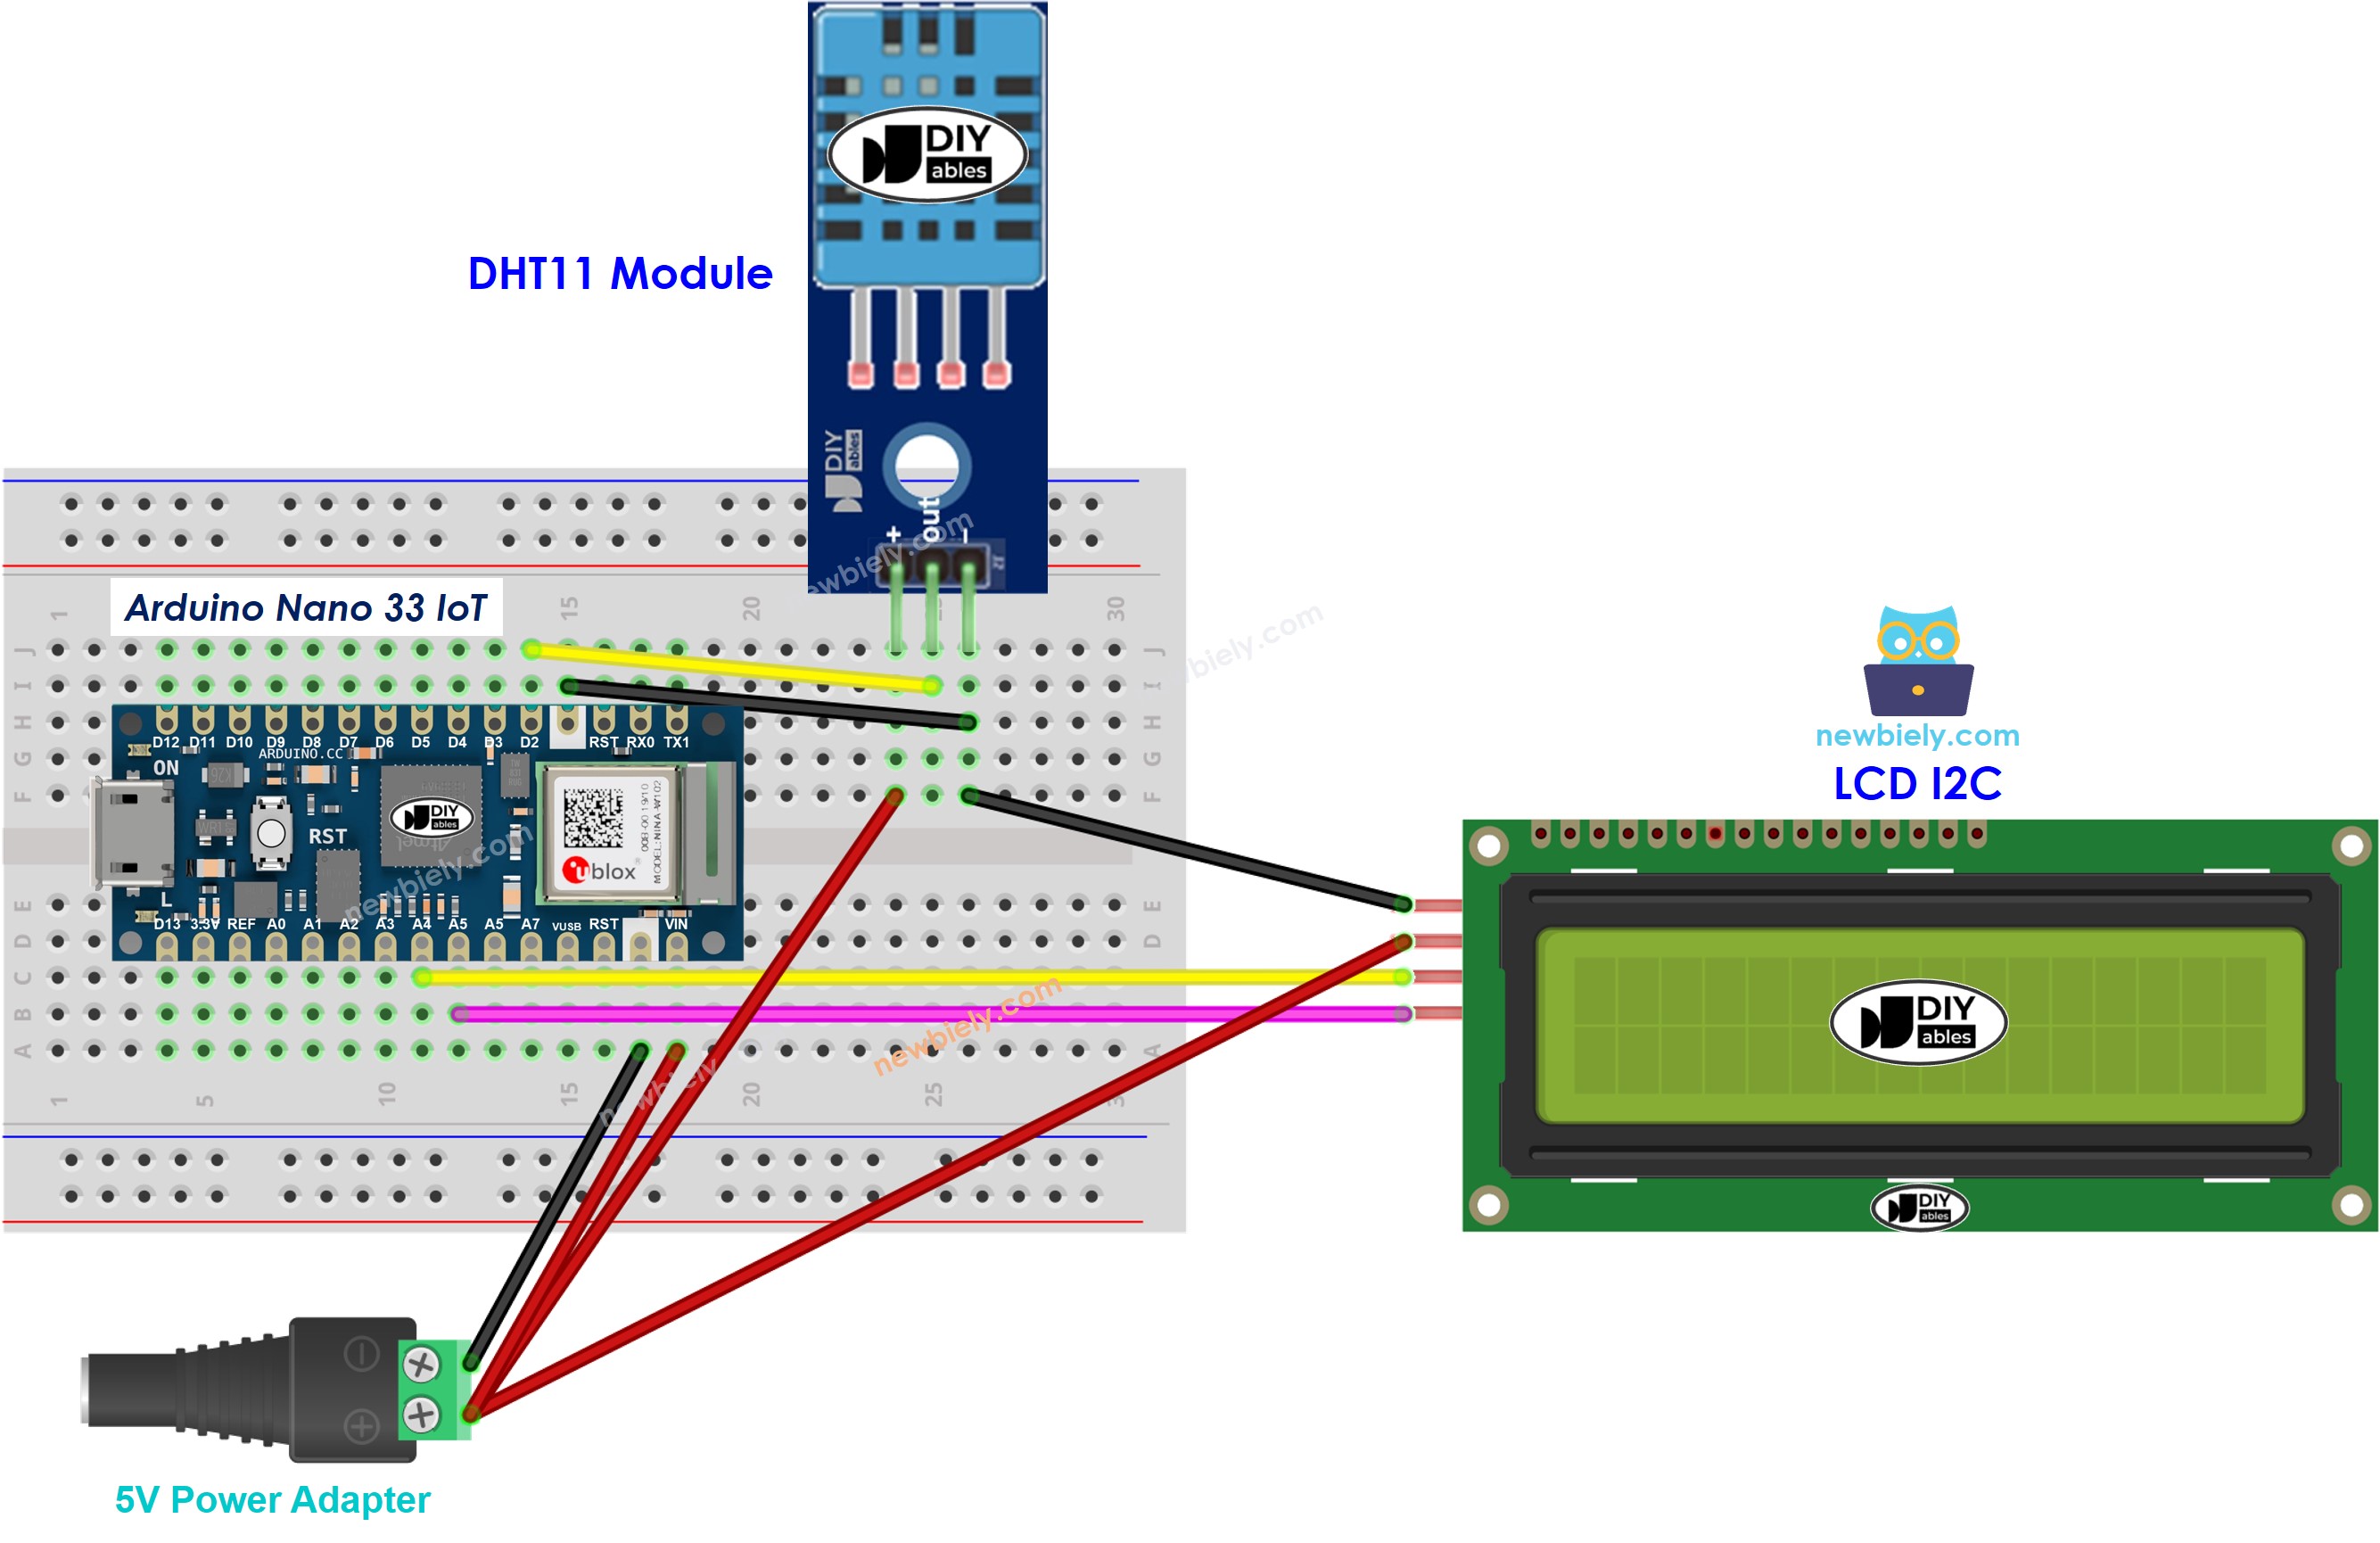
This image is created using Fritzing. Click to enlarge image
Arduino Nano 33 IoT Code - DHT11 Sensor - LCD I2C
※ NOTE THAT:
Different companies might use different LCD I2C addresses. In this code, we used the address 0x27 as provided by the DIYables company.
Detailed Instructions
If you are new to the Arduino Nano 33 IoT, be sure to check out our Getting Started with Arduino Nano 33 IoT tutorial. Then, follow these steps:
- Connect the components to the Arduino Nano 33 IoT board as depicted in the diagram.
- Use a USB cable to connect the Arduino Nano 33 IoT board to your computer.
- Launch the Arduino IDE on your computer.
- Select the Arduino Nano 33 IoT board and choose its corresponding COM port.
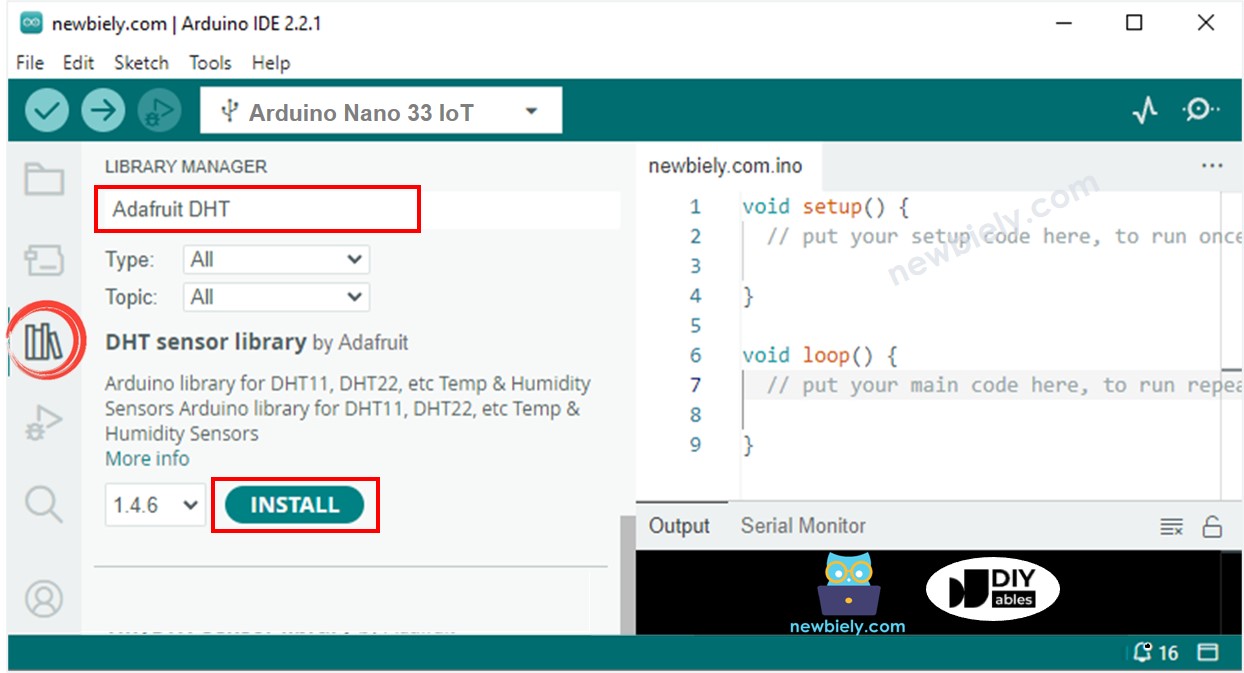
- Click the Libraries icon on the left side of the Arduino program.
- Type DHT in the search box and find the DHT sensor library by Adafruit.
- Click the Install button to add the library.
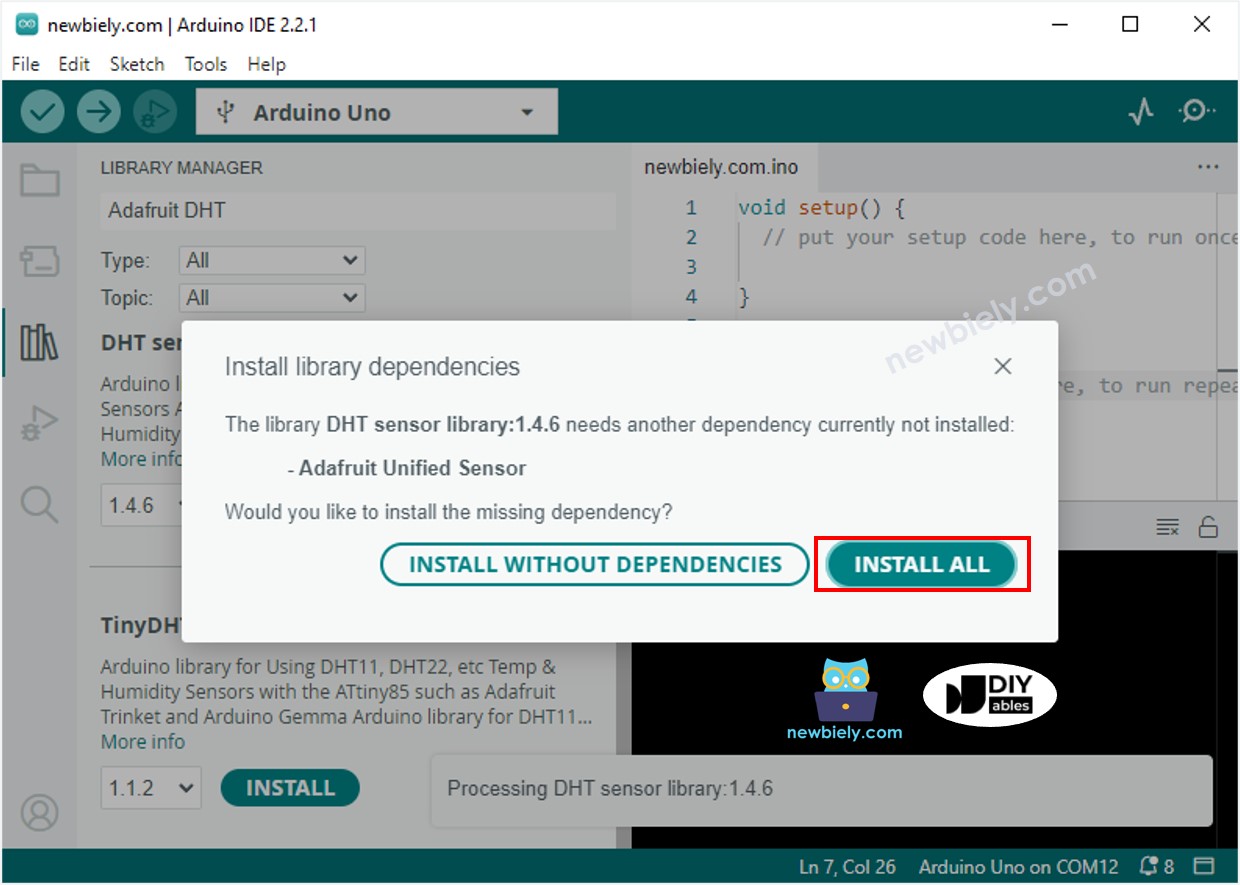
- A window will pop up asking you to set up the extra software for the library.
- Click the Install All button to install all the extra software.
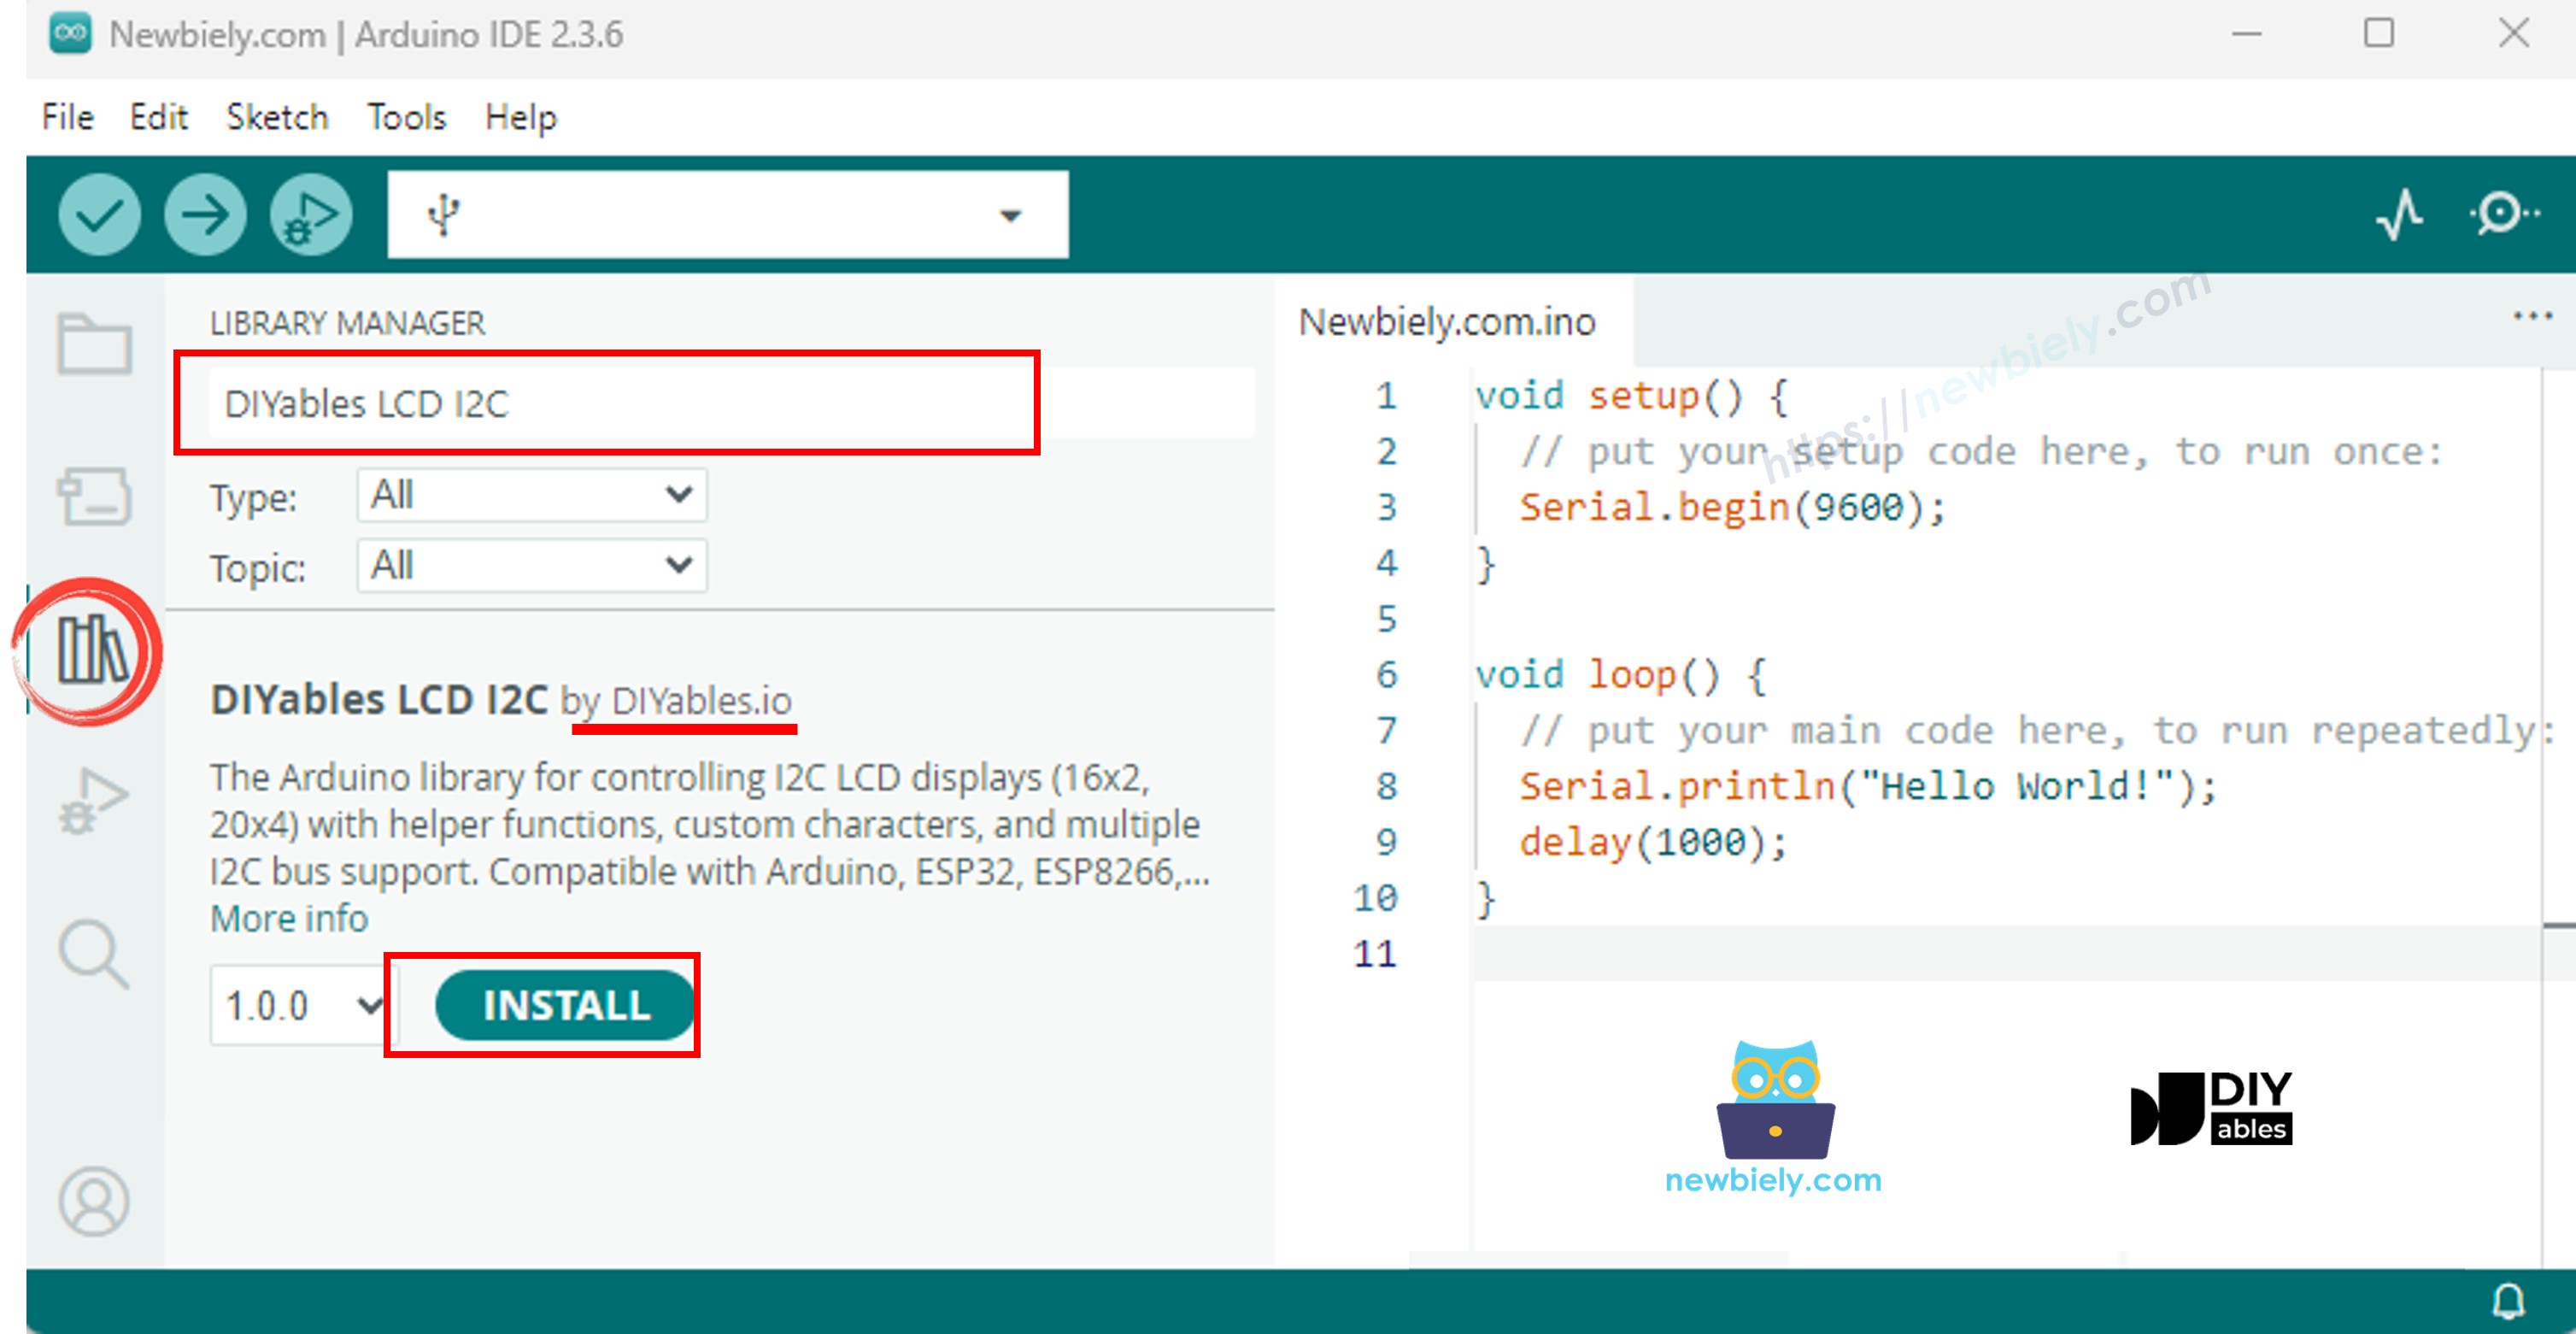
- Type DIYables LCD I2C in the search box, and then find the DIYables_LCD_I2C library by DIYables.
- Click the Install button to add the DIYables_LCD_I2C library.
- Copy the above code and paste it into the Arduino IDE.
- Click the Upload button in the Arduino IDE to compile the code and send it to the Arduino Nano 33 IoT board.
- Change the temperature that the sensor reads by making it colder or warmer. For example, place the sensor near a hot cup of coffee.
- Watch the result on the LCD screen.
If your LCD screen stays blank, check the LCD I2C troubleshooting guide.