Arduino Nano 33 IoT - Limit Switch
This guide explains how to use the limit switch with Arduino Nano 33 IoT.
Please note that this guide is only about how to use a Limit Switch. Do not mix it up with the things that come next.
Hardware Preparation
Or you can buy the following kits:
| 1 | × | DIYables Sensor Kit (18 sensors/displays) |
Additionally, some of these links are for products from our own brand, DIYables .
Overview of Limit Switch
It is called a Limit Switch because it detects when a moving object reaches its end.
A Limit Switch is called that because its main job is to tell when a moving object reaches its end.
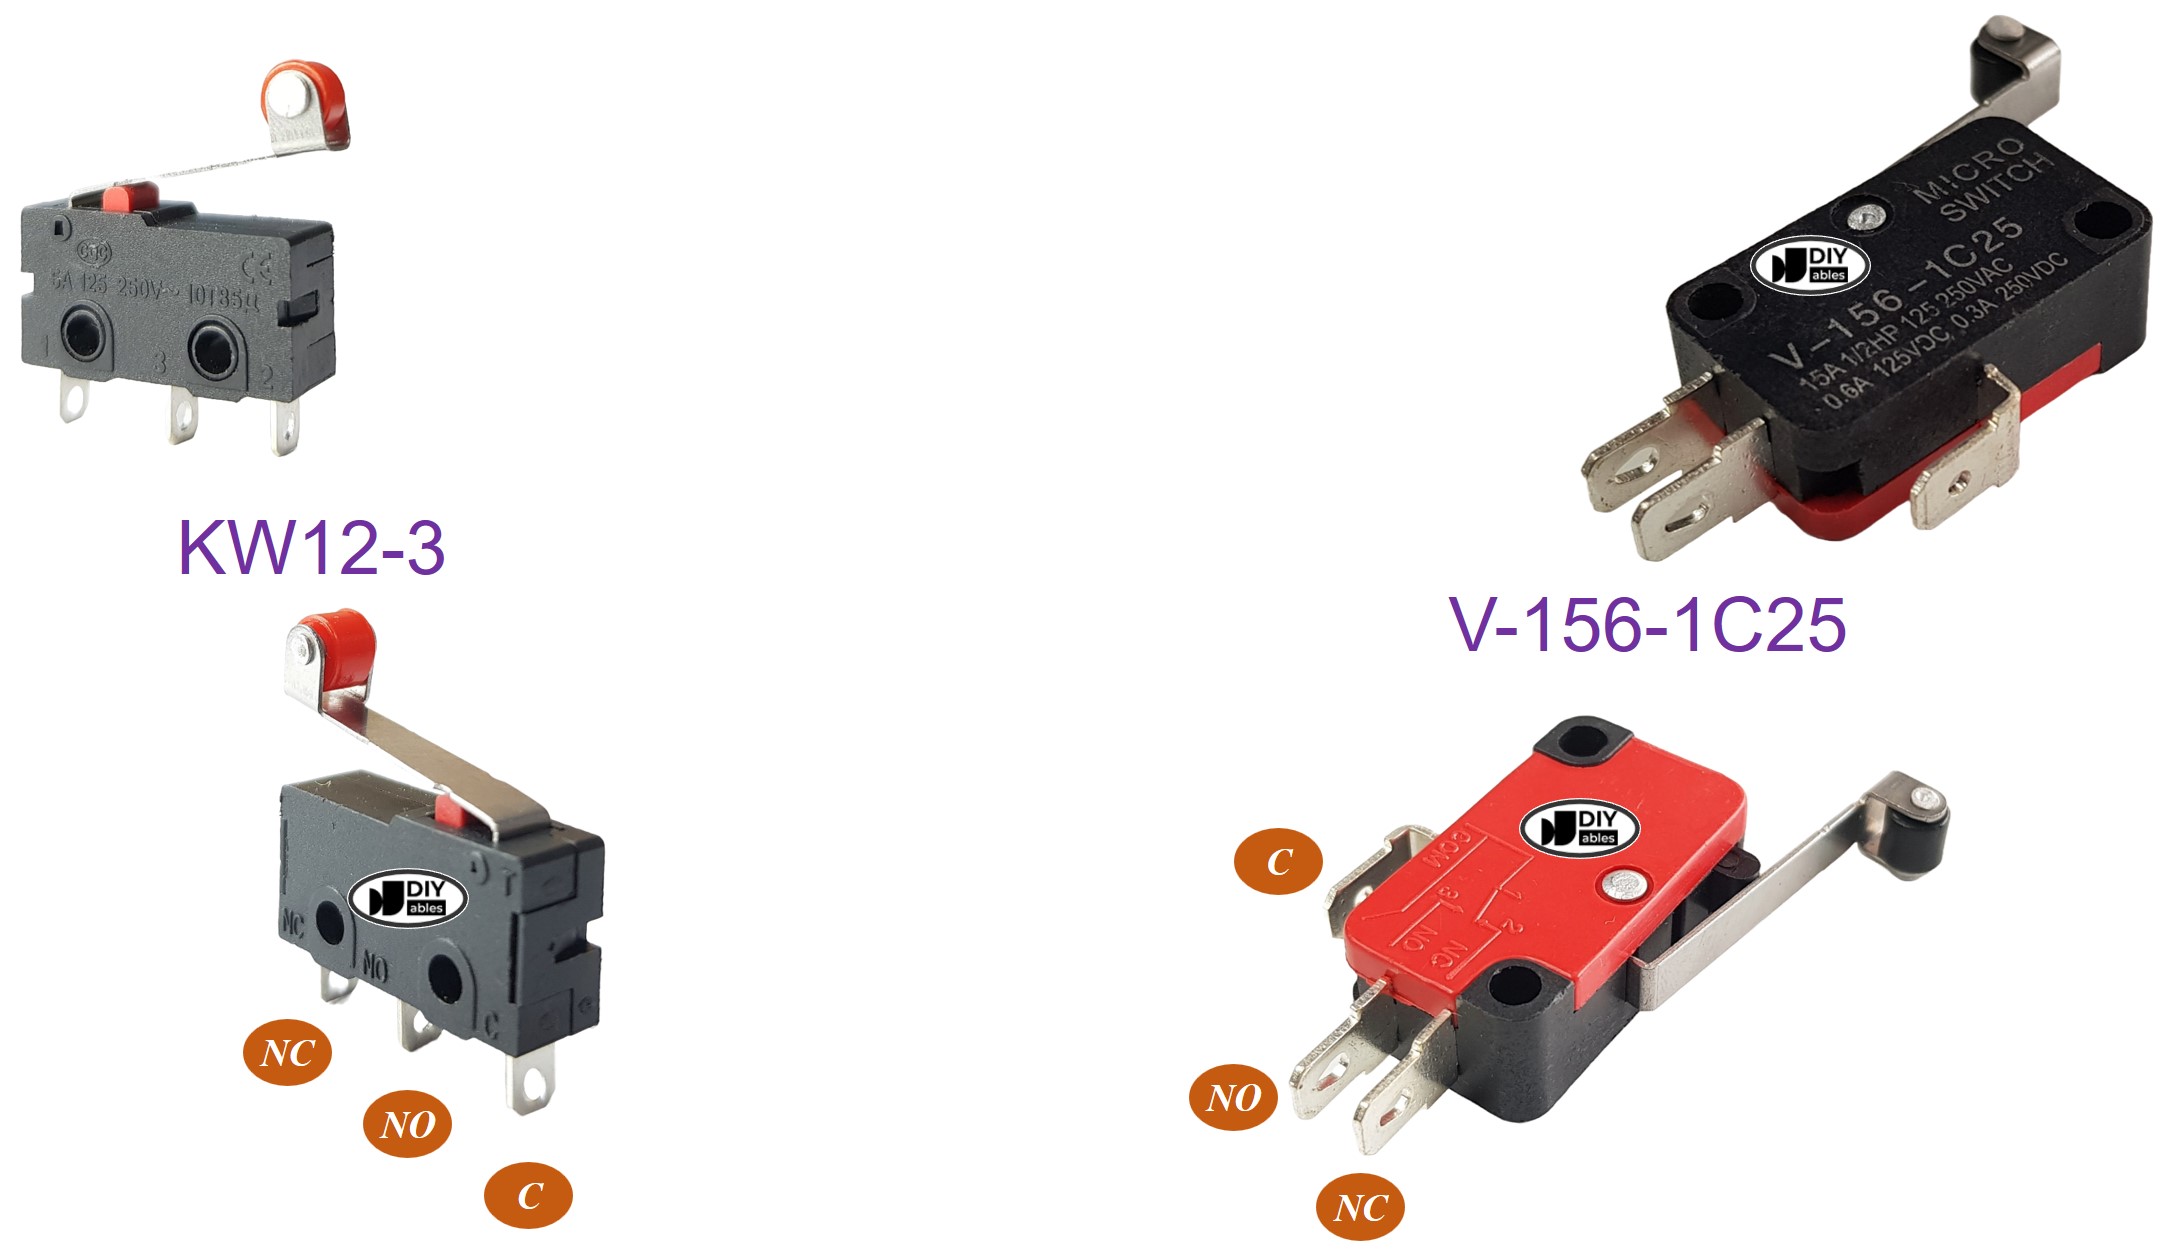
Pinout
There are several types of limit switches, with KW12-3 and V-156-1C25 being the most popular. Each one has three pins:
- C pin: This is the common pin. It works with both the open and closed types.
- NO pin: This is the normally open pin. It is used when the switch is set to open.
- NC pin: This is the normally closed pin. It is used when the switch is set to closed.
How It Works
A common limit switch setup only uses two pins: the C pin and one of the other two pins. This creates four different ways to use the switch. The table below shows how to connect the switch and what readings you will see on an Arduino Nano 33 IoT for each method.
| C pin | NO pin | NC pin | Arduino Nano 33 IoT Input Pin's State | |
|---|---|---|---|---|
| 1 | GND | Arduino Nano 33 IoT Input Pin (with pull-up) | not connected | HIGH when untouched, LOW when touched |
| 2 | GND | not connected | Arduino Nano 33 IoT Input Pin (with pull-up) | LOW when untouched, HIGH when touched |
| 3 | VCC | Arduino Nano 33 IoT Input Pin (with pull-down) | not connected | LOW when untouched, HIGH when touched |
| 4 | VCC | not connected | Arduino Nano 33 IoT Input Pin (with pull-down) | HIGH when untouched, LOW when touched |
By swapping the GND pin and the Arduino Nano 33 IoT input pin in each of four methods, there are eight ways to connect an Arduino Nano 33 IoT to a limit switch.
Of the eight options, this guide will focus on one way. It will use the first way as an example.
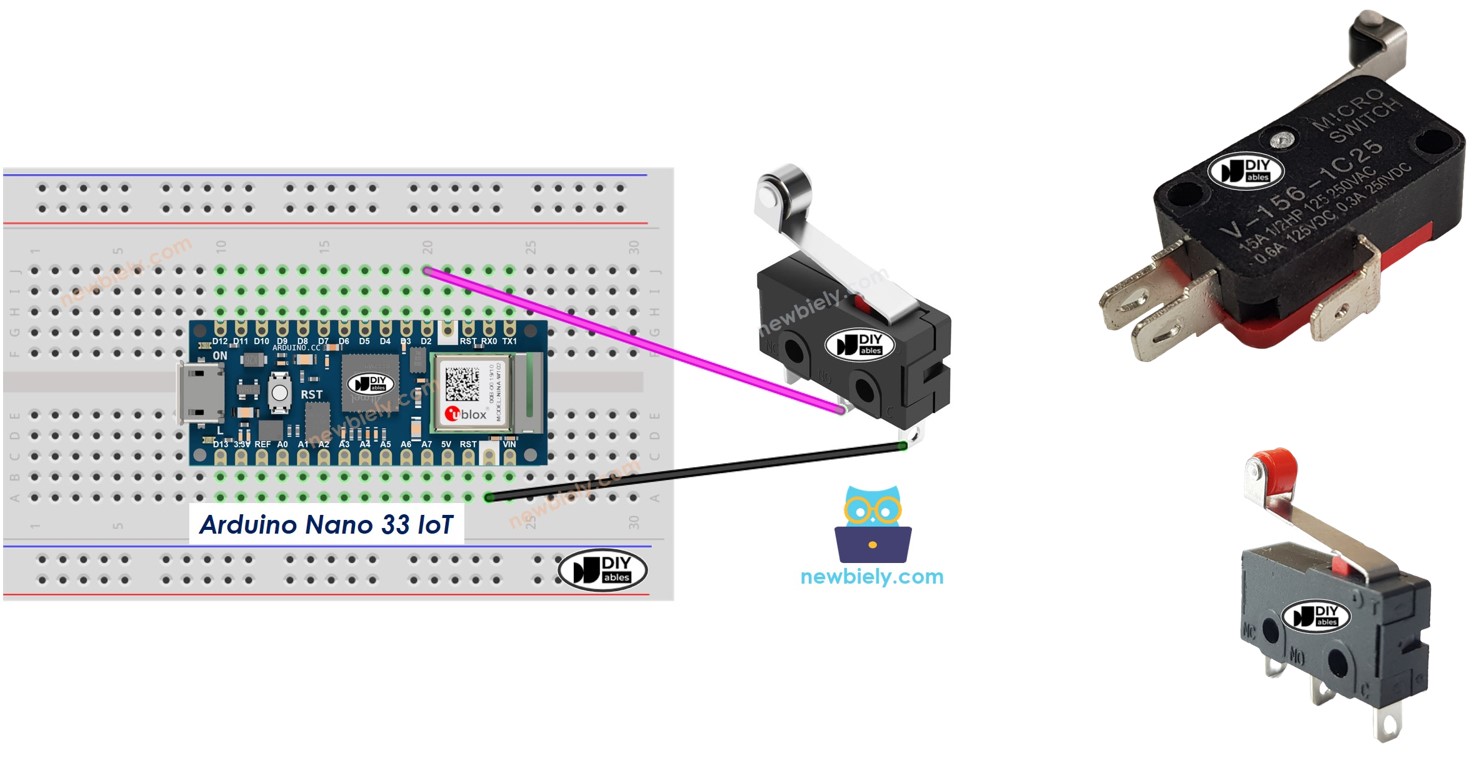
Wiring Diagram
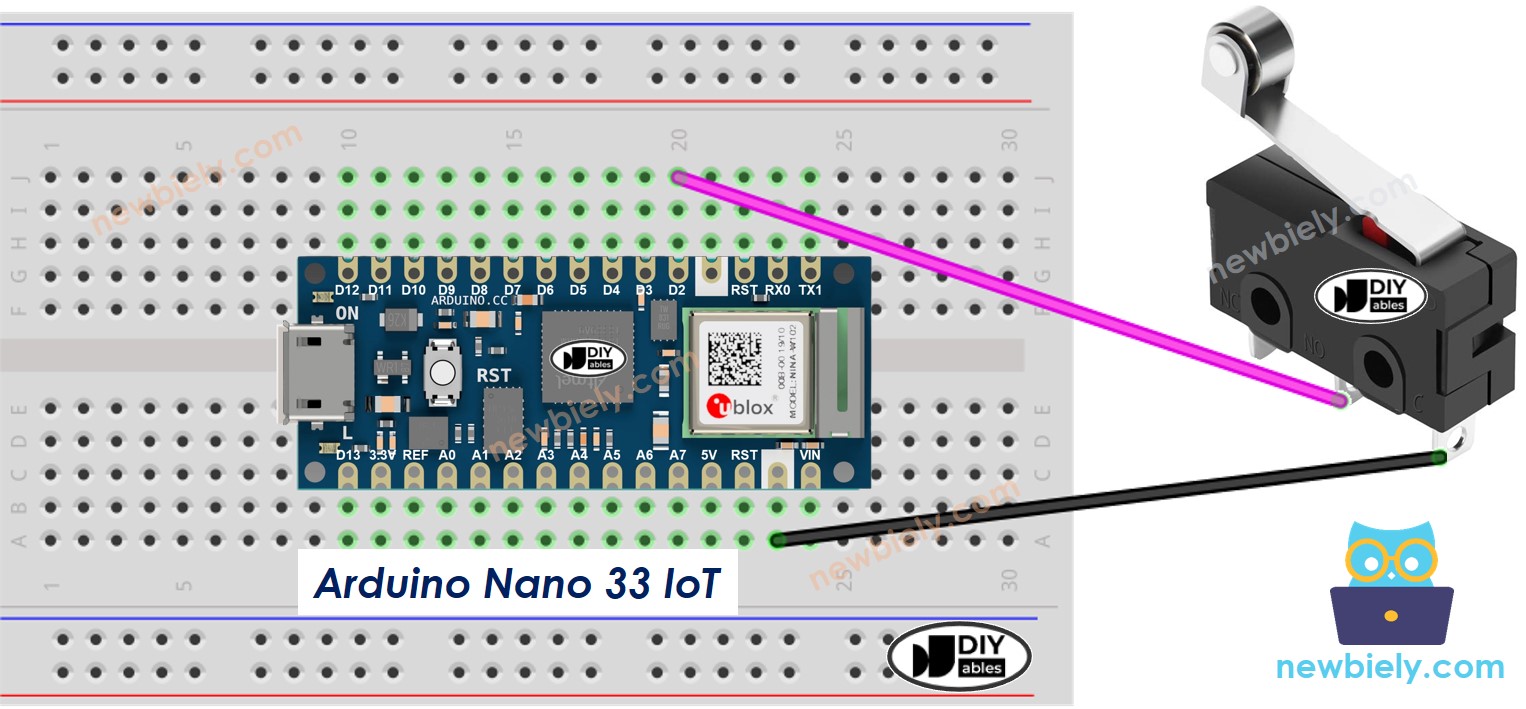
This image is created using Fritzing. Click to enlarge image
For a strong and safe wiring connection, we suggest soldering the wires to the limit switch’s pin and then covering the joint to keep it secure.
For a strong and safe connection, it's best to use a soldering iron soldering iron to join the wires and limit switch pins. Then, use heat shrink tubes heat shrink tubes for extra protection.
※ NOTE THAT:
Please note that the Arduino Nano 33 IoT pins A4 and A5 have built-in pull-up resistors for I2C communication. Although these pins can be used as digital input pins, it is recommended to avoid using them for digital input. If you must use them, do NOT use internal or external pull-down resistors for these pins
Arduino Nano 33 IoT Code - Limit Switch
Just like a regular button, a limit switch needs debouncing. Debouncing helps avoid extra signals when the switch is pressed, but it can make the code harder to understand. Fortunately, the ezButton library already handles debouncing for you. The library also uses an internal pull-up resistor, which makes the programming process much simpler.
Just like a normal button, a limit switch also needs a process called debouncing (you can learn more at the provided link). Debouncing is meant to avoid errors from quick, repeated signals, but it can make the code a bit more complex. The ezButton library, however, includes debouncing and uses built-in pull-up features, which makes programming much easier.
※ NOTE THAT:
Two common ways to use a Limit Switch are:
- Use it to decide between two actions. When the switch is pressed, do one thing. When the switch is not pressed, do the other.
- Use it to perform an action when the state of the switch changes. When the switch goes from not pressed to pressed, or from pressed to not pressed, do something specific.
Detailed Instructions
If you are new to the Arduino Nano 33 IoT, be sure to check out our Getting Started with Arduino Nano 33 IoT tutorial. Then, follow these steps:
- Connect the components to the Arduino Nano 33 IoT board as depicted in the diagram.
- Use a USB cable to connect the Arduino Nano 33 IoT board to your computer.
- Launch the Arduino IDE on your computer.
- Select the Arduino Nano 33 IoT board and choose its corresponding COM port.
- Connect your Limit Switch to the Arduino Nano 33 IoT using the wiring diagram above.
- Plug the Arduino Nano 33 IoT into your computer with a USB cable.
- Open the Arduino IDE software.
- Install the ezButton library. See the the instructions.
- Choose the right board and port in the Arduino IDE.
- Click the Upload button in the Arduino IDE to compile the code and send it to the board.
- Test the Limit Switch by pressing and releasing it.
- Check the output on the Serial Monitor in the Arduino IDE.