Arduino Nano 33 IoT - Button - Debounce
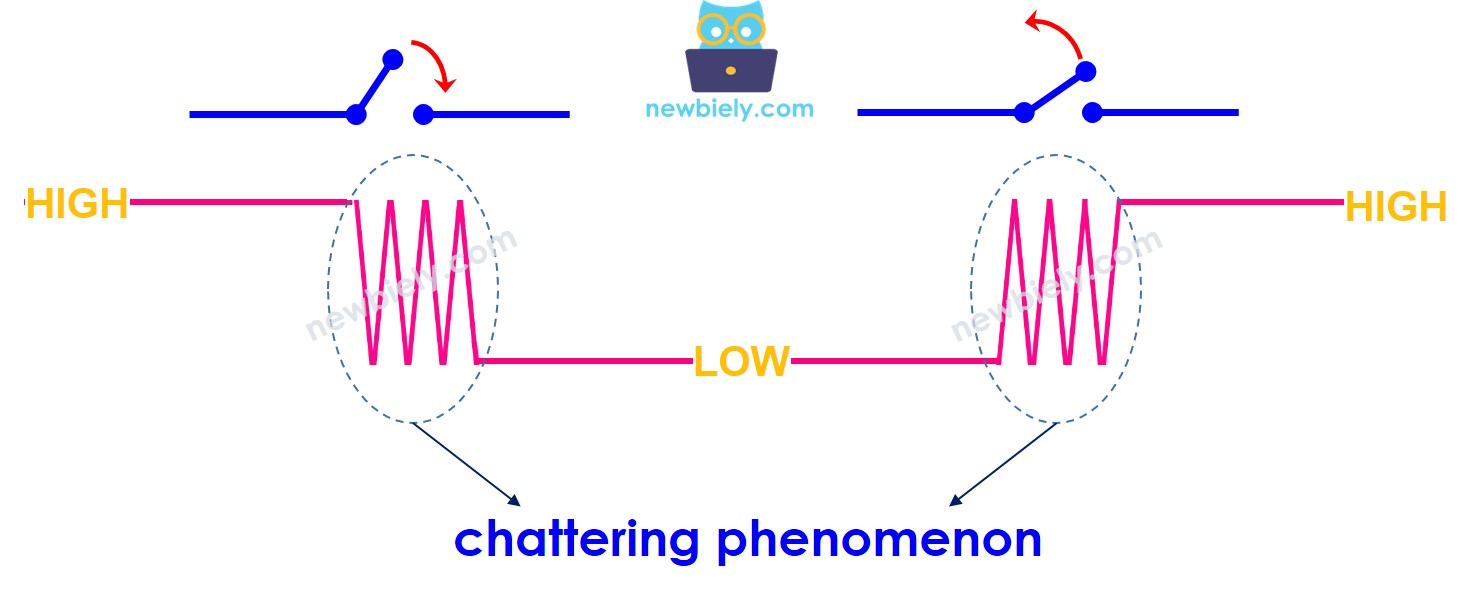
When you press or release a button, or flip a switch between ON and OFF, its state changes from LOW to HIGH (or HIGH to LOW) just one time. Is this correct?
No, it's not. In the real world, when you press a button once, its state (LOW and HIGH) can change back and forth several times very quickly instead of just one time. This is because of the physical properties of the button, and it's known as chattering. Chattering can make devices like the Arduino Nano 33 IoT detect several button presses when you only pressed it once. This causes problems. The method used to fix this issue is called debouncing. This tutorial explains how to do that.
This guide gives:
- How to remove false signals from a single button in Arduino Nano 33 IoT code
- How to remove false signals from one button using a library in Arduino Nano 33 IoT code
- How to remove false signals from several buttons using a library in Arduino Nano 33 IoT code
Hardware Preparation
Or you can buy the following kits:
| 1 | × | DIYables Sensor Kit (18 sensors/displays) |
Additionally, some of these links are for products from our own brand, DIYables .
Wiring Diagram
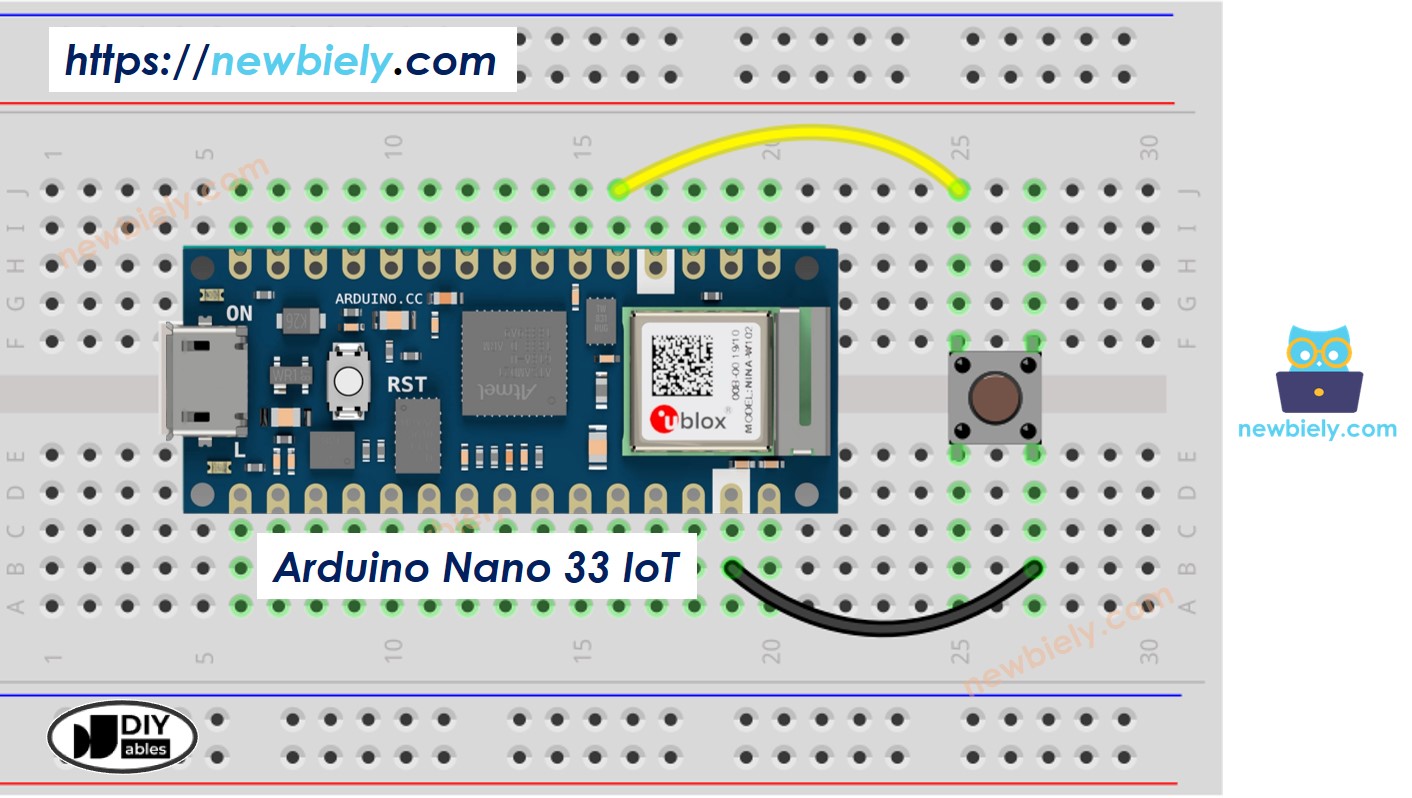
This image is created using Fritzing. Click to enlarge image
To explain clearly, let's run the Arduino Nano 33 IoT code once without debounce and once with debounce, and then compare what happens.
Reading Button without Debounce
Detailed Instructions
If you are new to the Arduino Nano 33 IoT, be sure to check out our Getting Started with Arduino Nano 33 IoT tutorial. Then, follow these steps:
- Connect the components to the Arduino Nano 33 IoT board as depicted in the diagram.
- Use a USB cable to connect the Arduino Nano 33 IoT board to your computer.
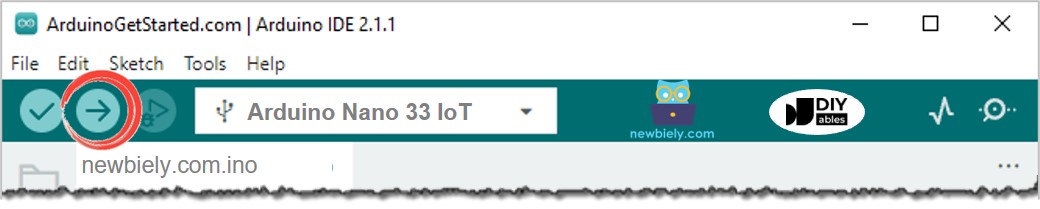
- Launch the Arduino IDE on your computer.
- Select the Arduino Nano 33 IoT board and choose its corresponding COM port.
- Copy the code below and paste it into the Arduino IDE.
- Build and send your code to the Arduino Nano 33 IoT board by clicking the Upload button in the Arduino IDE.
- Open the Serial Monitor in the Arduino program.
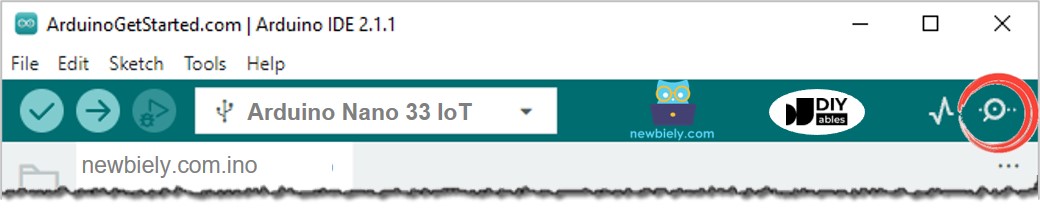
- Press the button and hold it for a few seconds, then let it go.
- Look at the Serial Monitor to see the result. It should look like the image below.
You pressed and released the button one time, but the Arduino Nano 33 IoT detected several presses and releases.
※ NOTE THAT:
Chattering doesn't happen every time. If you don't see it, please try the test a few times.
We Made It Simple - Arduino Nano 33 IoT Button Debounce Code with Library
To help beginners, especially when working with several buttons that might send extra signals, we created a simple library called ezButton. You can learn more about the ezButton library here: https://arduinogetstarted.com/tutorials/arduino-button-library
Arduino Nano 33 IoT Button Debounce Code for A Single Button
Arduino Nano 33 IoT Button Debounce Code for A Multiple Buttons
Let's write code that stops three buttons from being clicked too many times in a row.
The wiring diagram
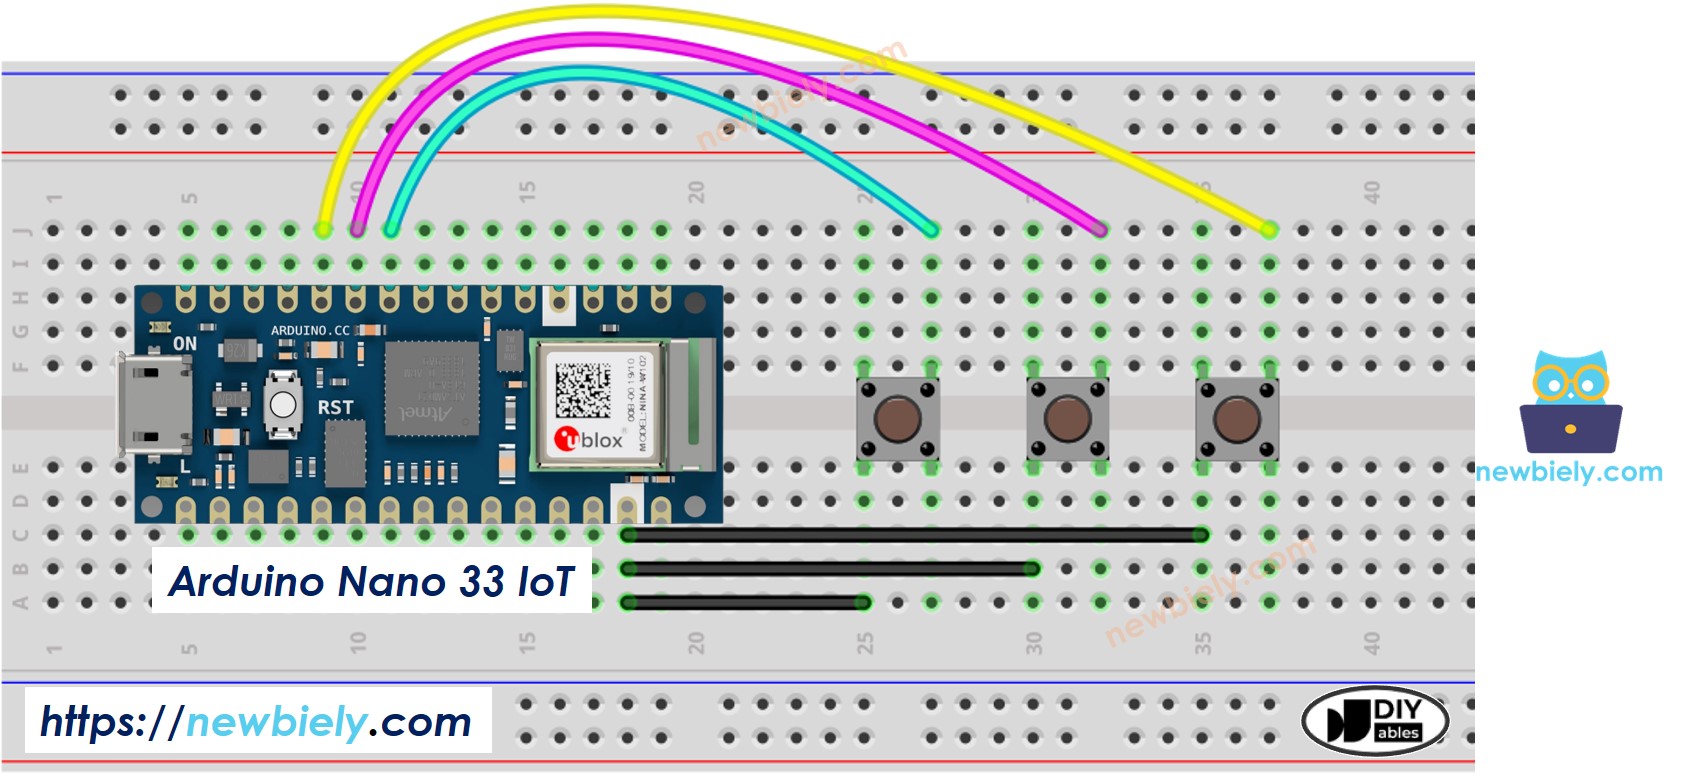
This image is created using Fritzing. Click to enlarge image
※ NOTE THAT:
Please note that the Arduino Nano 33 IoT pins A4 and A5 have built-in pull-up resistors for I2C communication. Although these pins can be used as digital input pins, it is recommended to avoid using them for digital input. If you must use them, do NOT use internal or external pull-down resistors for these pins
Video Tutorial
Additional Knowledge
- The DEBOUNCE_TIME depends on the device. Different devices might need different values.
- Debounce should also work for switches like on/off, limit, reed, and touch sensors.