Arduino Nano 33 IoT - Piezo Buzzer
This guide teaches you how to use the buzzer with your Arduino Nano 33 IoT. We will learn:
- How to hook up a buzzer to the Arduino Nano 33 IoT
- How to write a program for the Arduino Nano 33 IoT to control the buzzer and make sounds or a tune
Hardware Preparation
Or you can buy the following kits:
| 1 | × | DIYables Sensor Kit (18 sensors/displays) |
Additionally, some of these links are for products from our own brand, DIYables .
Overview of Piezo Buzzer
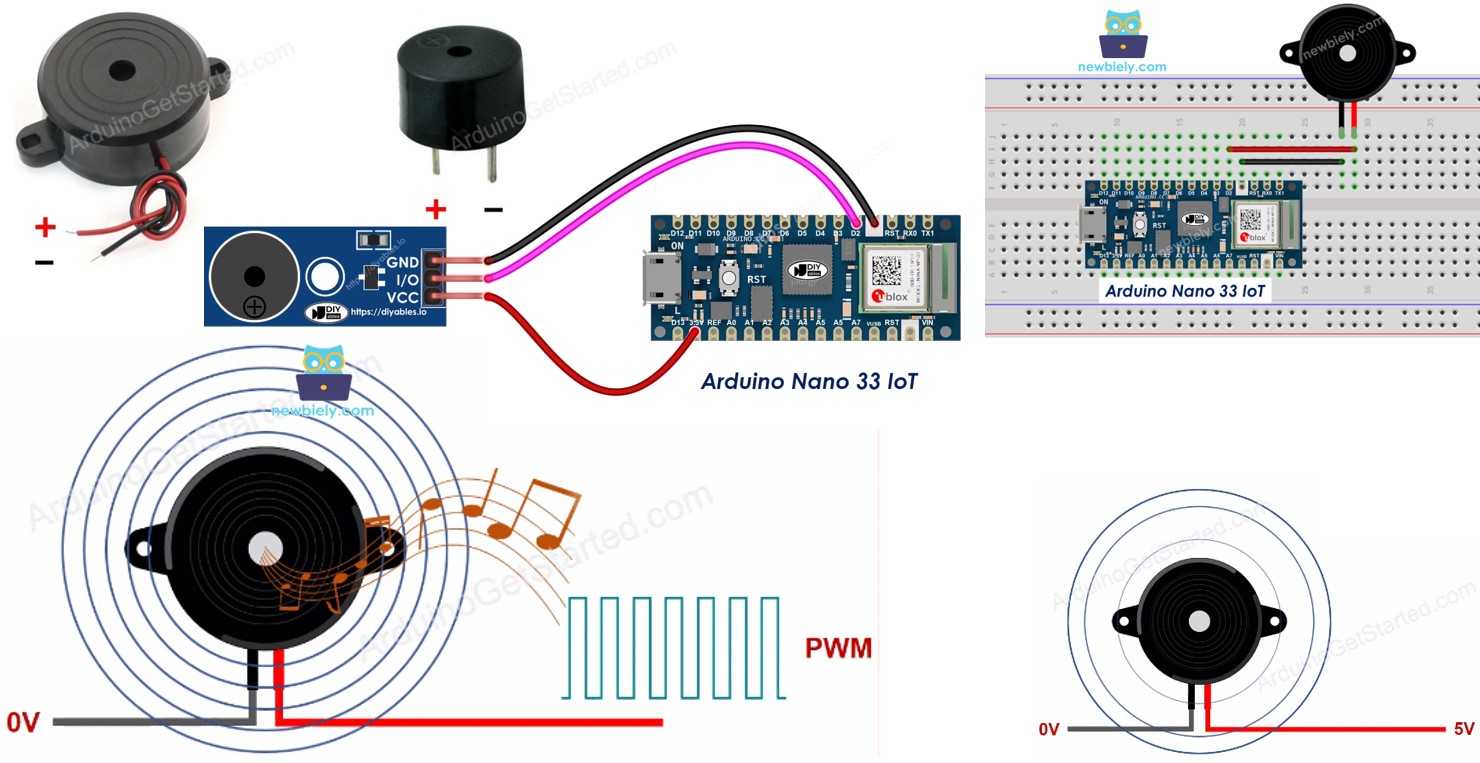
The Piezo Buzzer is an electronic device that makes sounds, beeps, or even plays music.
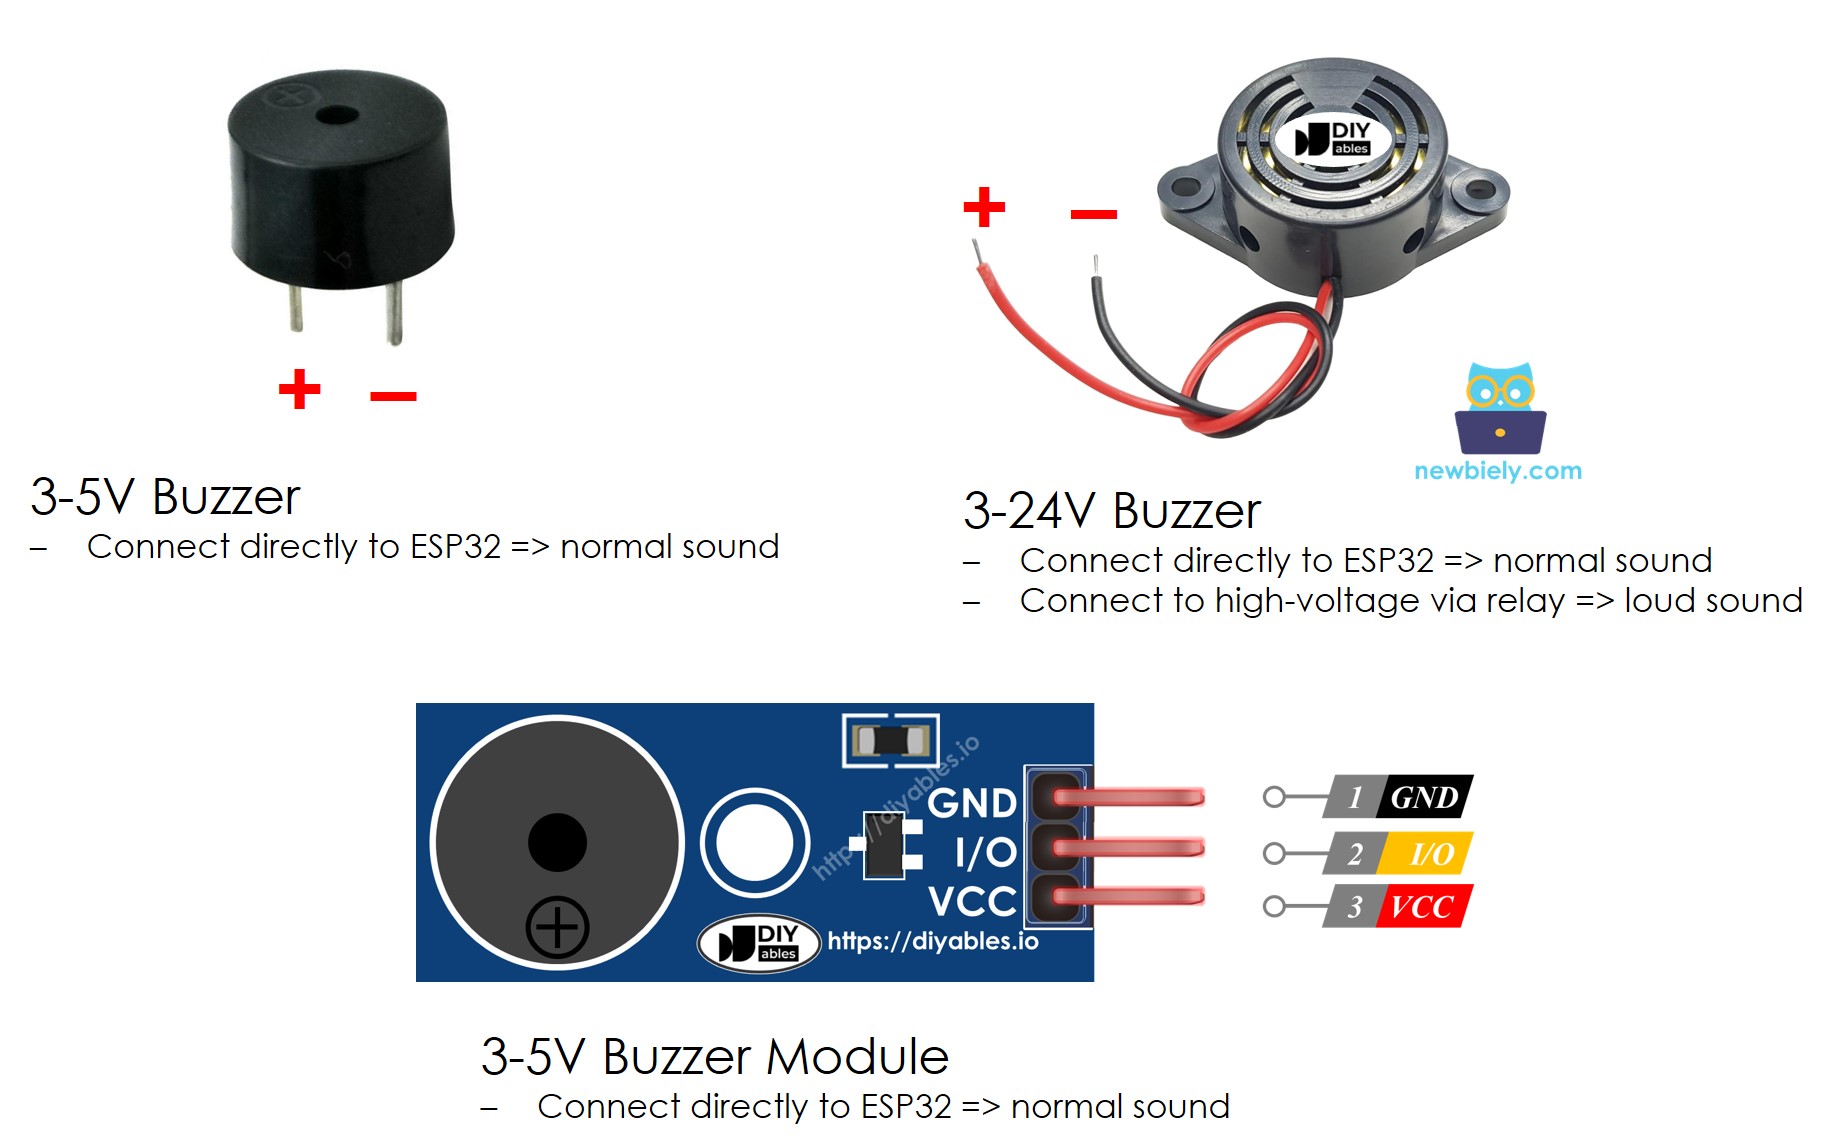
There is a 3V-24V active buzzer available on the market. It can work with low voltage (3-5V) or high voltage (12V or more).
- When connected straight to an Arduino pin, this buzzer makes a regular sound, which is great for things like keypad feedback. When hooked up to a high-voltage source using a relay, it makes a loud noise, making it perfect for alarms.
Piezo Buzzer Pinout
A piezo buzzer usually has two pins.
- Positive (+) pin: The Arduino Nano 33 IoT sends a control signal to this pin, either directly or through a relay.
- Negative (-) pin: Attach this pin to ground (0V).
How Piezo Buzzer Works
Check out this page to learn how a piezo buzzer works: https://arduinogetstarted.com/tutorials/arduino-piezo-buzzer#content_about_piezo_buzzer
Wiring Diagram between Piezo Buzzer and Arduino Nano 33 IoT
- The diagram that shows how to connect the piezo buzzer and the Arduino Nano 33 IoT.
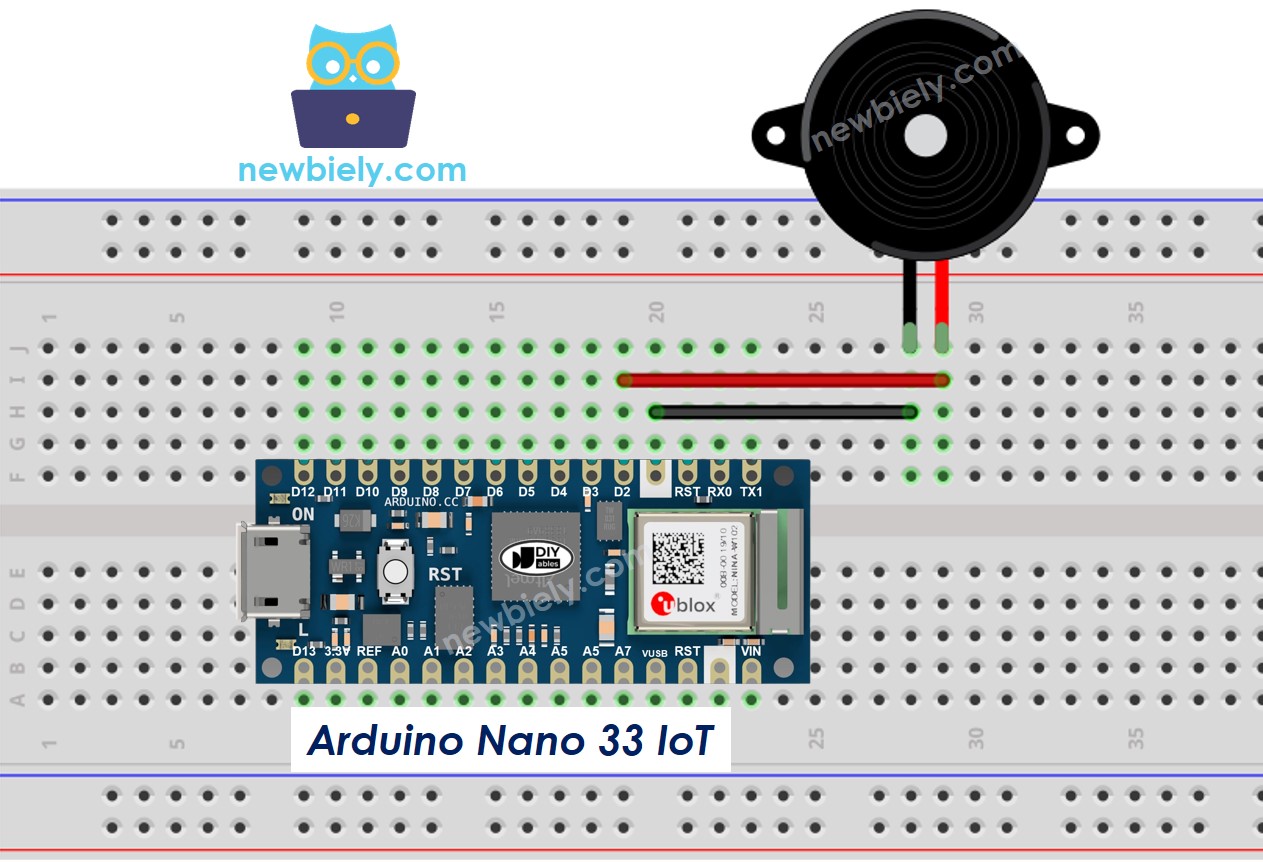
This image is created using Fritzing. Click to enlarge image
- Wiring diagram to connect the piezo buzzer module and the Arduino Nano 33 IoT.
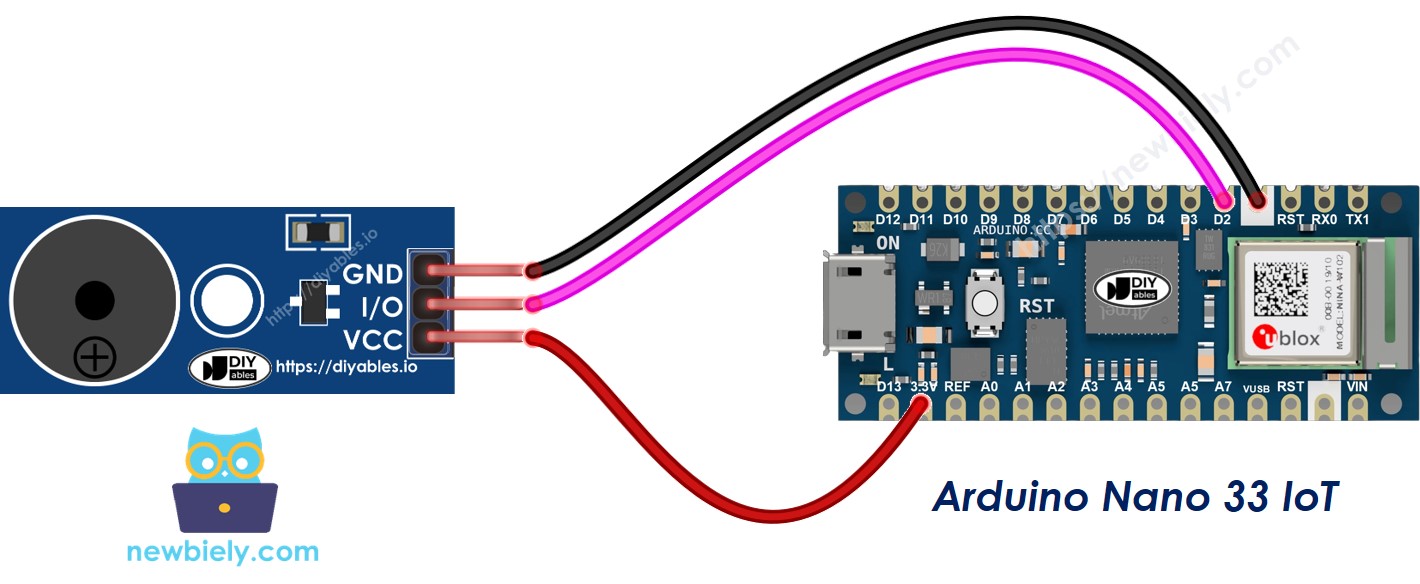
This image is created using Fritzing. Click to enlarge image
Arduino Nano 33 IoT Code
Detailed Instructions
If you are new to the Arduino Nano 33 IoT, be sure to check out our Getting Started with Arduino Nano 33 IoT tutorial. Then, follow these steps:
- Connect the components to the Arduino Nano 33 IoT board as depicted in the diagram.
- Use a USB cable to connect the Arduino Nano 33 IoT board to your computer.
- Launch the Arduino IDE on your computer.
- Select the Arduino Nano 33 IoT board and choose its corresponding COM port.
- Copy the code below and paste it into the Arduino IDE.
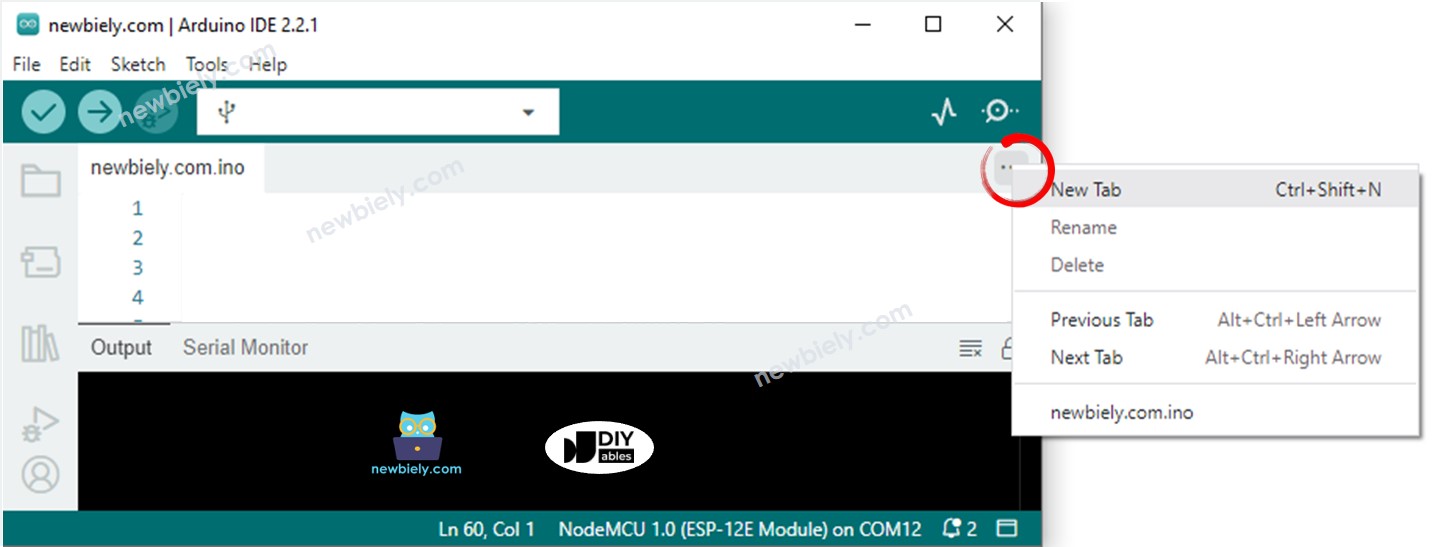
- Create the file named pitches.h in the Arduino IDE. To do this, either click the button right below the serial monitor icon and select New Tab, or press the Ctrl+Shift+N keys.
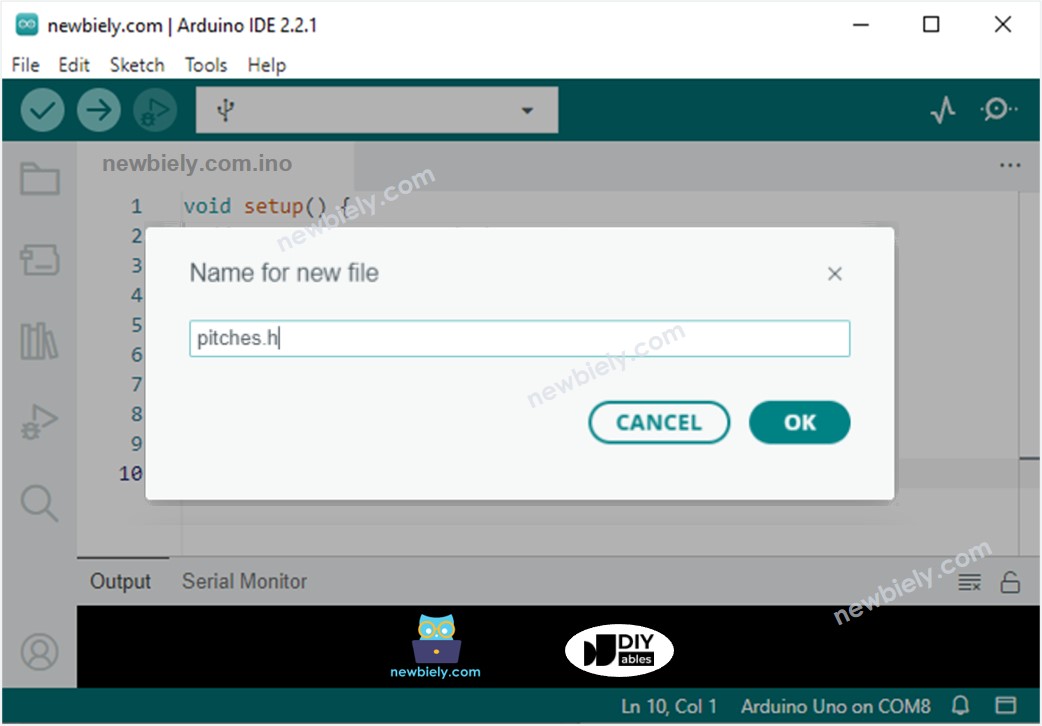
- Enter the file name pitches.h and press the OK button.
- Copy the code below and paste it into the file named pitches.h.
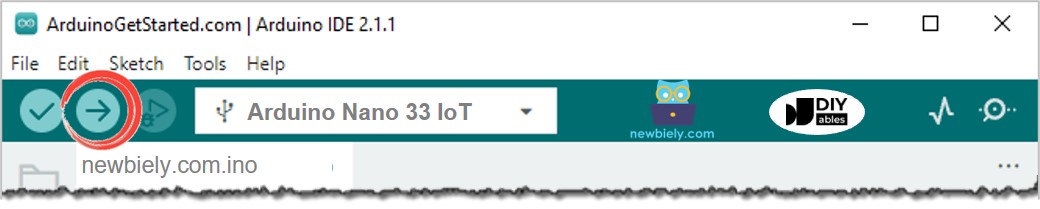
- Build and send your program to the Arduino Nano 33 IoT board by clicking the Upload button in the Arduino IDE.
- Listen to the music.
Modifying Arduino Nano 33 IoT Code
Let's change the Arduino Nano 33 IoT program so it plays the "Jingle Bells" song.
We only need to update the numbers in two lists: int melody[] and int noteDurations[].