Arduino Nano 33 IoT - Keypad 1x4
This guide will show you how to use a 1x4 keypad with an Arduino Nano 33 IoT. We will explain these topics:
- How to hook up a small 1x4 keypad to an Arduino Nano 33 IoT.
- How to write a program for the Arduino Nano 33 IoT that checks which keys on the 1x4 keypad are pressed.
Hardware Preparation
Or you can buy the following kits:
| 1 | × | DIYables Sensor Kit (18 sensors/displays) |
Additionally, some of these links are for products from our own brand, DIYables .
Overview of Keypad 1x4
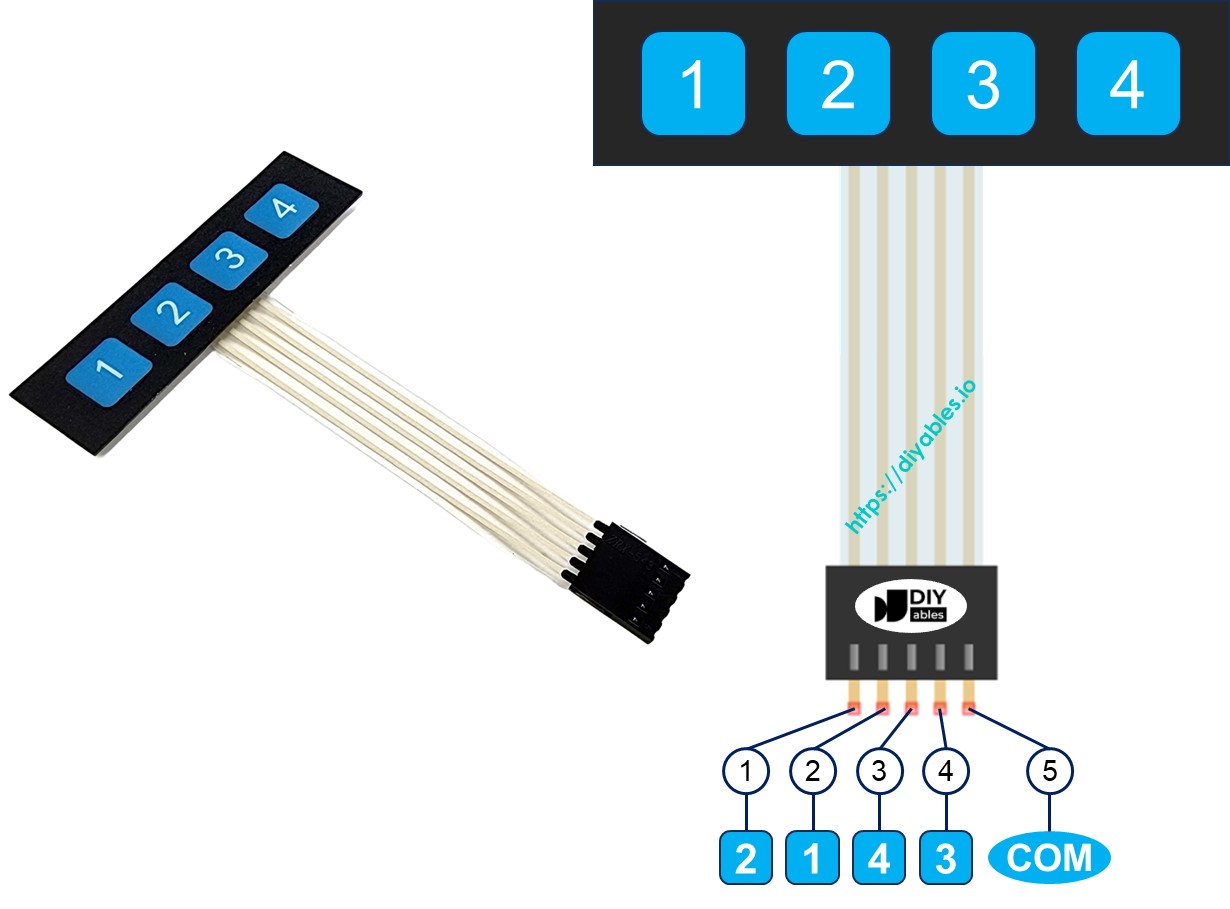
A 1x4 keypad has four buttons in a row. People use it to type passwords, browse menus, or operate devices.
Pinout
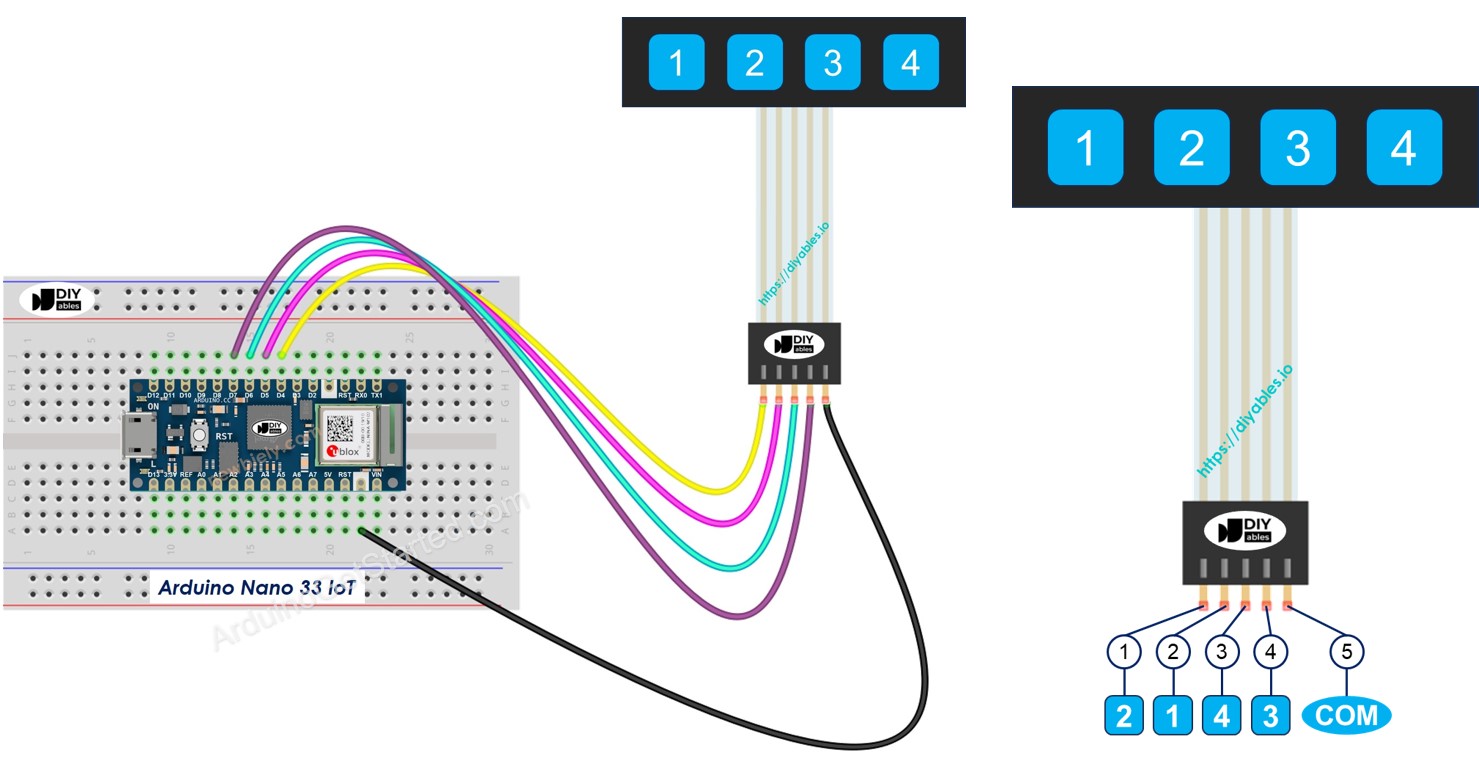
This 1x4 keypad has five pins. The pins are not arranged in the same order as the key labels.
- Pin 1 goes to key 2
- Pin 2 goes to key 1
- Pin 3 goes to key 4
- Pin 4 goes to key 3
- Pin 5 connects to every key and is shared by all
Wiring Diagram
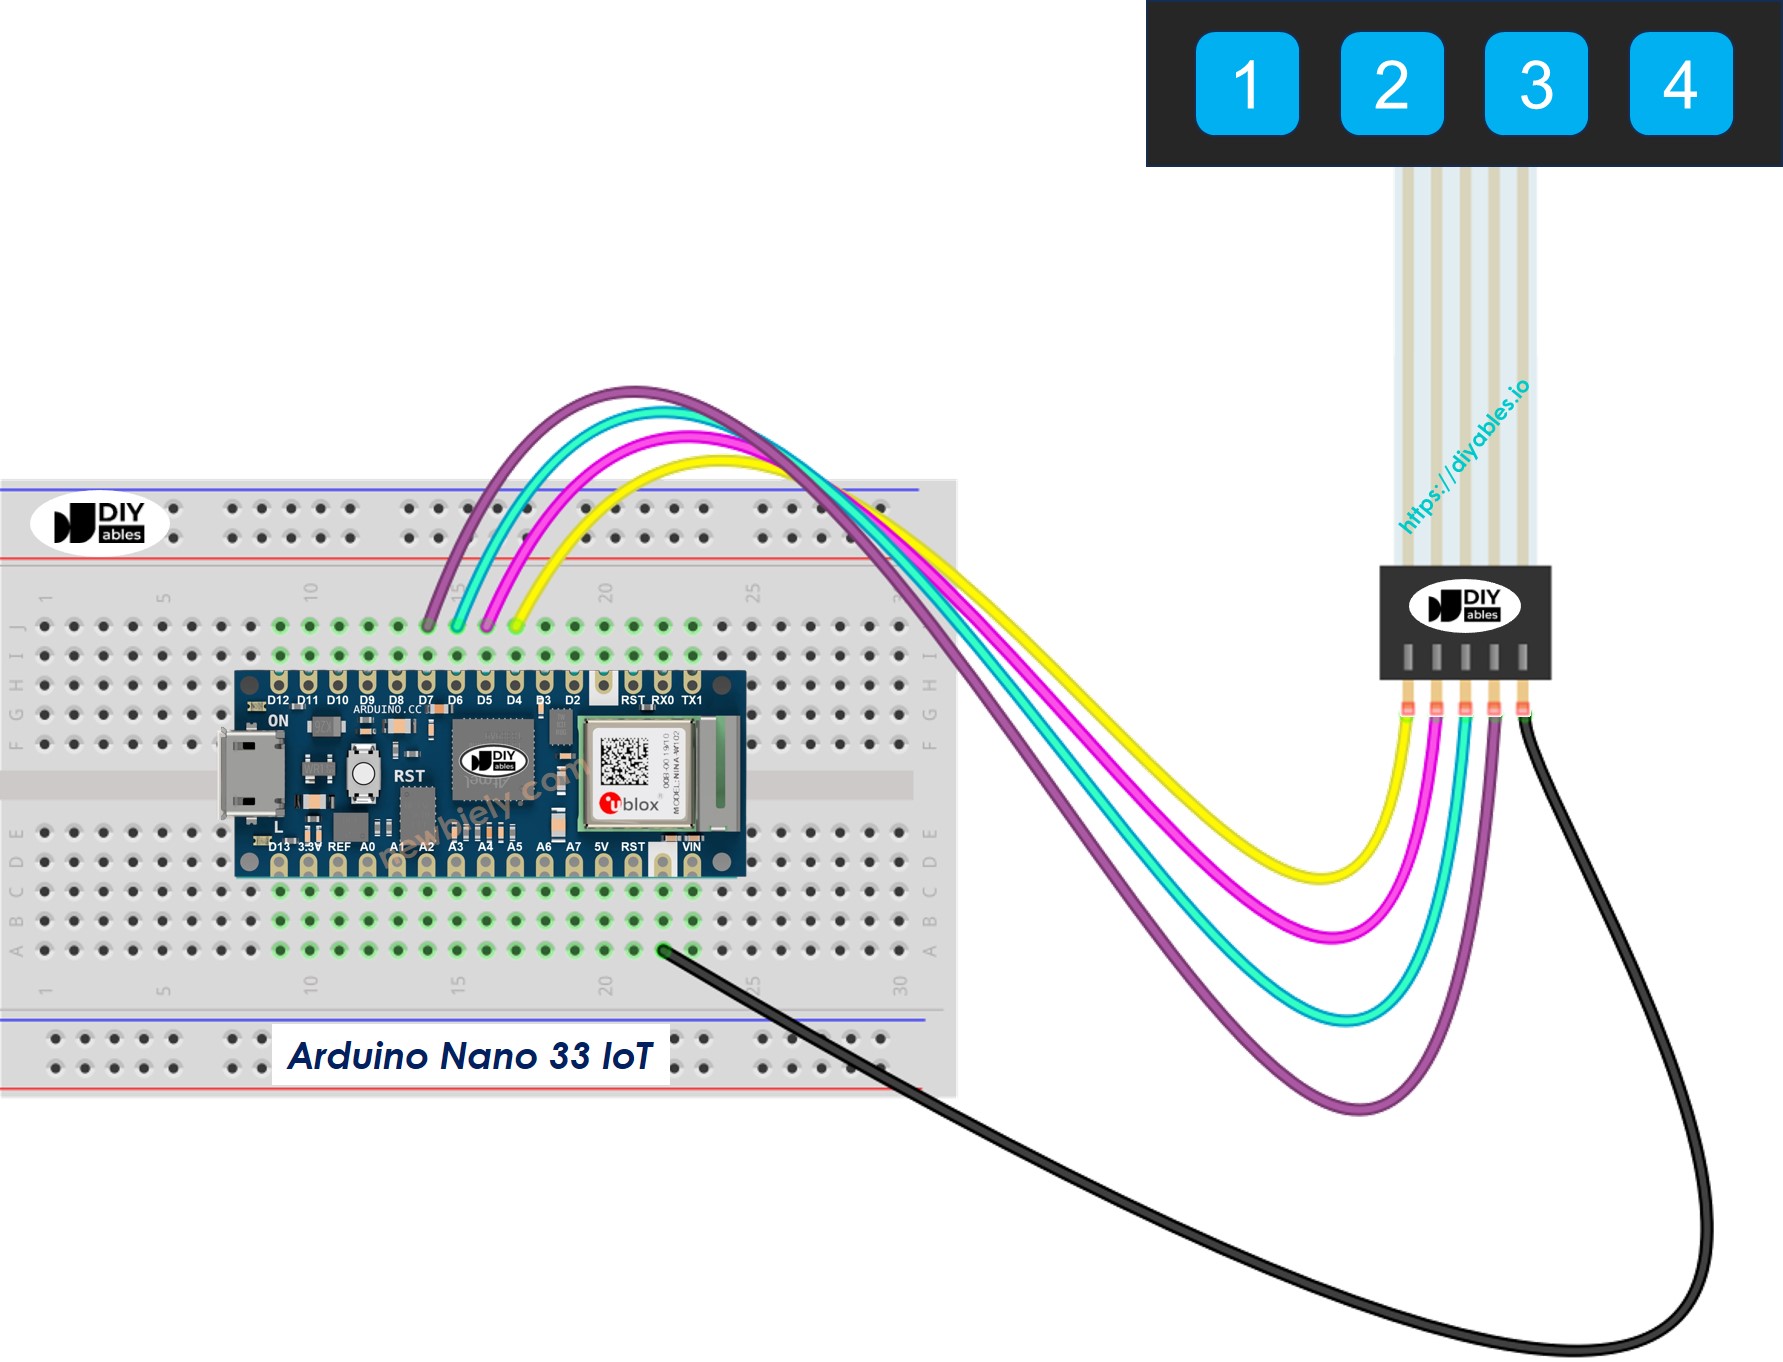
This image is created using Fritzing. Click to enlarge image
※ NOTE THAT:
Please note that the Arduino Nano 33 IoT pins A4 and A5 have built-in pull-up resistors for I2C communication. Although these pins can be used as digital input pins, it is recommended to avoid using them for digital input. If you must use them, do NOT use internal or external pull-down resistors for these pins
Arduino Nano 33 IoT Code
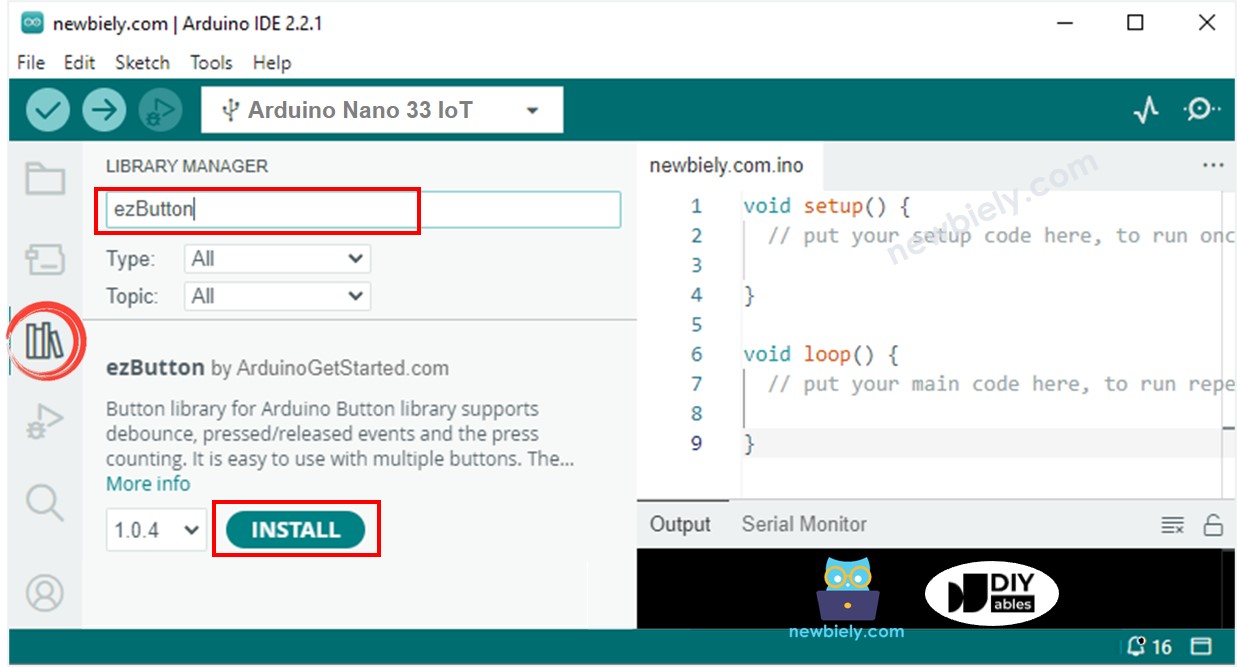
Each key on the 1x4 keypad works like a regular button, so we can use the digitalRead() function to check if a key is pressed. Like other buttons, it has a problem called bouncing, where one press might count as several presses. To fix this, we need to debounce each key. Debouncing all four keys at once without stopping other parts of the code can be hard. Fortunately, the ezBbutton library makes it much easier.
Detailed Instructions
If you are new to the Arduino Nano 33 IoT, be sure to check out our Getting Started with Arduino Nano 33 IoT tutorial. Then, follow these steps:
- Connect the components to the Arduino Nano 33 IoT board as depicted in the diagram.
- Use a USB cable to connect the Arduino Nano 33 IoT board to your computer.
- Launch the Arduino IDE on your computer.
- Select the Arduino Nano 33 IoT board and choose its corresponding COM port.
To begin using Arduino Nano 33 IoT, follow these steps:
- If you're new to the Arduino Nano 33 IoT, check out the basic guide on setting up the Arduino Nano 33 IoT in the Arduino IDE.
- Connect the Arduino Nano 33 IoT to the 1x4 keypad.
- Plug the Arduino Nano 33 IoT board into your computer with a USB cable.
- Open the Arduino IDE on your computer.
- Select the Arduino Nano 33 IoT board and the correct COM port.
- Click the Libraries icon on the left side of the Arduino IDE.
- Search for ezButton and find the button library from Arduino Nano 33 IoTGetStarted.com.
- Click the Install button to add the ezButton library.
- Copy the code and open it in the Arduino IDE
- Click the Upload button in the Arduino IDE to send the code to your Arduino Nano 33 IoT
- Open the Serial Monitor
- Press each key on the 1x4 keypad one by one
- Look at the results in the Serial Monitor